# Akto Agentic AI Security

Welcome to Akto Agentic AI Security!

Secure your AI agents, MCP servers, and agentic applications with complete visibility, automated scanning, and real-time protection. Get started in minutes by choosing what you need.

<table data-card-size="large" data-view="cards"><thead><tr><th></th><th></th><th data-hidden data-card-target data-type="content-ref"></th></tr></thead><tbody><tr><td><strong>Akto Atlas : Agentic AI Security For Employee Endpoints</strong></td><td>Browser extensions, secure web networks, AI endpoint shield, and agentic shield</td><td><a href="/pages/WFusT0tNpWX5VAT3cUEh">/pages/WFusT0tNpWX5VAT3cUEh</a></td></tr><tr><td><strong>Akto Argus: Agentic AI Security For Homegrown AI</strong></td><td>Browser extensions, secure web networks, AI endpoint shield, and agentic shield</td><td><a href="/pages/FVjtSz2WygwVQWQKAiZW">/pages/FVjtSz2WygwVQWQKAiZW</a></td></tr></tbody></table>

***

## [Agentic Red Teaming](/akto-argus-agentic-ai-security-for-homegrown-ai/agentic-red-teaming)

Probe your AI agents and MCP servers with 4000+ specialized security probes. Identify vulnerabilities like prompt injections, tool abuse, and privilege escalation before attackers do.

**Import your components to start Red Teaming**

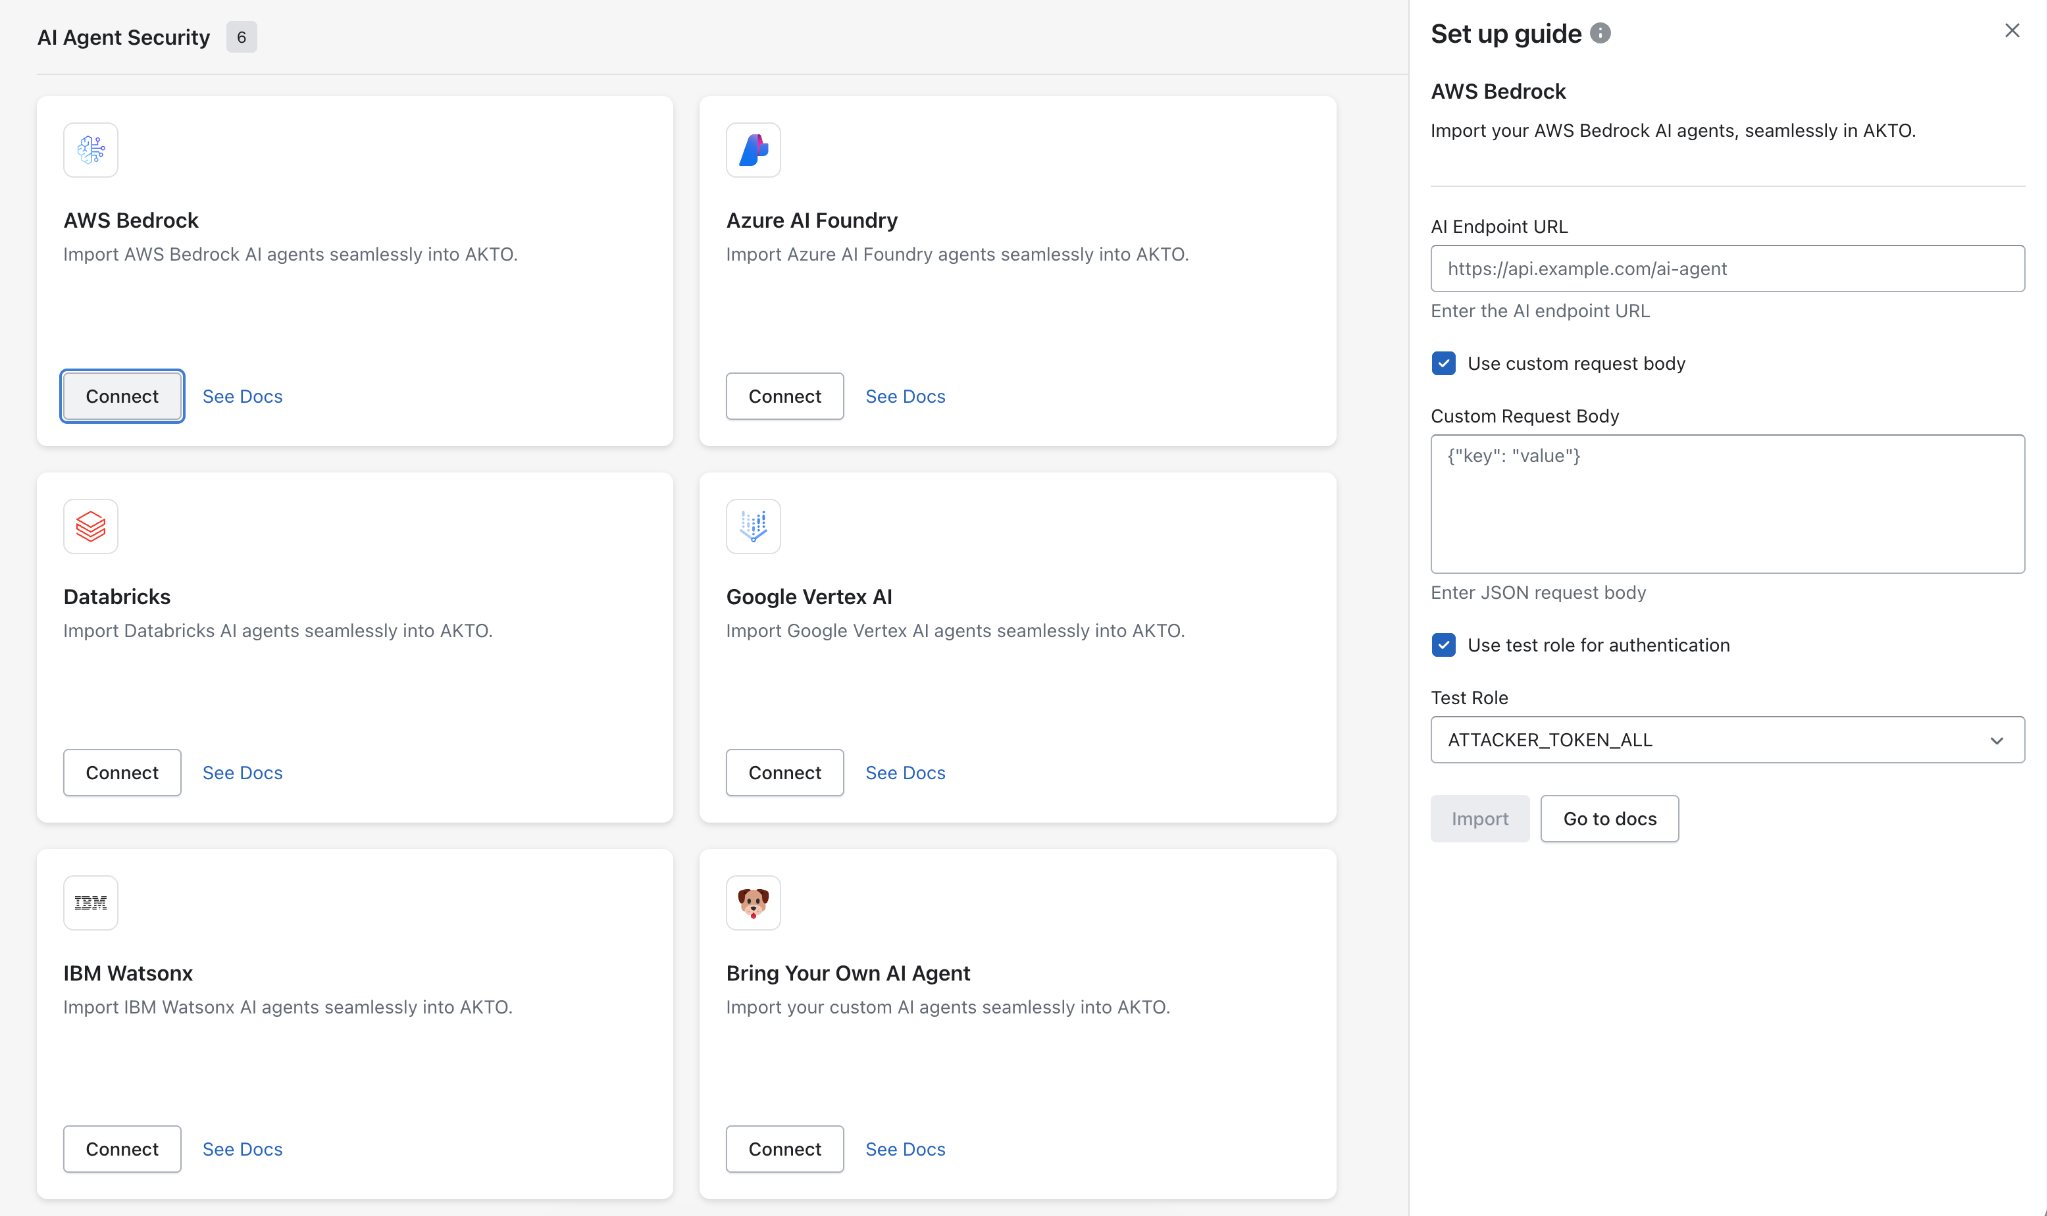
<table data-view="cards"><thead><tr><th></th><th></th><th data-hidden data-card-target data-type="content-ref"></th></tr></thead><tbody><tr><td><strong>AI Agents</strong></td><td>AWS Bedrock, Azure AI, Databricks, Vertex AI, Watsonx, or custom agents</td><td><a href="/pages/shtnxqZCHCkLdLp2WfBM">/pages/shtnxqZCHCkLdLp2WfBM</a></td></tr><tr><td><strong>MCP Servers</strong></td><td>Model Context Protocol tools, resources, and prompts</td><td><a href="/pages/pq8OAMwrXCK9rZk7Emyc">/pages/pq8OAMwrXCK9rZk7Emyc</a></td></tr><tr><td><strong>AI Models</strong></td><td>Large language models and custom AI implementations</td><td><a href="/pages/R4Lc1Ij4xZ1nCV4Kq0ne">/pages/R4Lc1Ij4xZ1nCV4Kq0ne</a></td></tr></tbody></table>

***

## [Agentic Guardrails](/agentic-guardrails/overview)

Deploy real-time protection for your production agents. Block threats as they occur, enforce schema conformance, and prevent exploits before they impact your systems.

**Set up protection gateways**

<table data-view="cards"><thead><tr><th></th><th></th><th data-hidden data-card-target data-type="content-ref"></th></tr></thead><tbody><tr><td><strong>MCP Gateway</strong></td><td>Real-time protection for MCP servers</td><td><a href="/pages/FfXHyOszqiPTq0cxn1lb">/pages/FfXHyOszqiPTq0cxn1lb</a></td></tr><tr><td><strong>Agent Gateway</strong></td><td>Real-time protection for AI agents</td><td><a href="/pages/Gyuw9r7AFCyIrKKg41qU">/pages/Gyuw9r7AFCyIrKKg41qU</a></td></tr></tbody></table>

## Resources

<table data-view="cards"><thead><tr><th></th><th></th><th data-hidden data-card-target data-type="content-ref"></th></tr></thead><tbody><tr><td><strong>Hybrid SaaS Deployment</strong></td><td>Deploy Akto in your cloud</td><td><a href="/pages/L0jKb7Fe8CHxoTV8ThbS">/pages/L0jKb7Fe8CHxoTV8ThbS</a></td></tr></tbody></table>

{% hint style="success" %}
**Akto Support**

Contact our support team at **<support@akto.io>** or use in-app Intercom to reach out for help and guidance.
{% endhint %}


# AI Security

With the rise of large language models (LLMs), securing the Agentic components behind LLMs and chatbots is critical. Akto protects these Agentic components through four key pillars, with deep coverage of OWASP Top 10 LLM vulnerabilities.

***

### **1. LLM API Discovery**

The first step in securing your Agentic components is knowing what you have. Akto continuously scans your environments to discover all active and shadow Agentic components, including those interacting with LLMs. It maps Agentic components, classifies sensitive data, and maintains an up-to-date inventory. This visibility is essential to managing risk in dynamic AI environments where Agentic components frequently evolve.

**Key Capabilities:**

* Automated detection of Agentic components, including internal, third-party, and LLM endpoints
* Classification of data and identification of PII, secrets, and LLM-specific payloads
* Real-time inventory and change tracking

***

### **2. LLM Security Probing**

Akto enables proactive security by running automated probes to uncover vulnerabilities in APIs behind LLMs and chatbots. With over 1000 probe templates modeled on OWASP’s Top 10 for LLM applications, Akto detects issues like prompt injection, system prompt leakage, vector embedding weaknesses, and data poisoning.

**Key Capabilities:**

* 4000+ probe templates based on real-world LLM attack scenarios
* Prebuilt and custom scan suites for LLM-specific APIs
* Integration with CI/CD pipelines for shift-left scanning

***

### **3. LLM Guardrail Protection**

With Agentic components behind LLMs facing unique threats such as misinformation, unbounded consumption, and improper output handling, Akto provides real-time protection against these and more. It monitors for anomalies specific to AI workloads, blocks malicious traffic, and flags abuses like repeated prompt probing or excessive Agentic component usage.

**Key Capabilities:**

* Detection and prevention of LLM-specific threats
* Behavioral modeling to detect anomalous user interactions with AI endpoints

***

### **4. LLM Security Posture**

Agentic Security Posture serves as a unified overview of all the above pillars—Discovery, scanning, and Guardrail Protection. It helps security teams understand the overall security health of LLM-integrated APIs. Akto provides visibility into risks, trends, severities and coverage gaps, and enforces security policies aligned with OWASP GenAI Security standards.

**Key Capabilities:**

* Posture assessments aligned with OWASP GenAI Security Project
* Aggregated tracking of risk scores, findings, and compliance gaps
* Actionable insights and prioritized recommendations based on all three layers

***

### Get Support for your Akto setup

There are multiple ways to request support from Akto. We are 24X7 available on the following:

1. In-app `intercom` support. Message us with your query on intercom in Akto dashboard and someone will reply.
2. Join our [discord channel](https://www.akto.io/community) for community support.
3. Contact `help@akto.io` for email support.


# MCP Security

## MCP Security

The Akto MCP Security Module is designed for teams working with LLMs, agent frameworks, or AI-based orchestration systems. As MCPs become a new layer in modern application stacks, they also introduce new attack surfaces — often unmonitored and untested. Akto brings complete visibility and protection with zero friction.

Akto automatically identifies MCP servers, discovers associated Agentic components, runs targeted red teaming, and continuously monitors for misconfigurations, threats, and data leaks — all in real time.

{% embed url="<https://www.youtube.com/watch?t=1s&v=RLjKVXTSEr8>" %}

#### 🔧 Key Capabilities

1. **MCP Server Discovery**

Gain instant visibility into every MCP server running in your environment:

* Automatically detects MCP servers and the Agentic components they expose.
* Works across cloud, hybrid, and on-prem environments.

<figure><img src="https://2916937215-files.gitbook.io/~/files/v0/b/gitbook-x-prod.appspot.com/o/spaces%2FRc4KTKGprZI2sPWKoaLe%2Fuploads%2Fgit-blob-23d841a29953fac209cc51d91d4b049b8501916e%2Fimage.png?alt=media" alt=""><figcaption></figcaption></figure>

2. **Security Probing for MCPs**

Uncover critical vulnerabilities unique to MCP architectures using Akto's curated probe library:

* **Prompt Injection**
* **Tool Poisoning**
* **Excessive Permissions**
* **Unauthorized Endpoint Access**
* **Insecure Authentication**

Each probe simulates real-world attack paths and highlights risk with contextual severity scoring.

<figure><img src="https://2916937215-files.gitbook.io/~/files/v0/b/gitbook-x-prod.appspot.com/o/spaces%2FRc4KTKGprZI2sPWKoaLe%2Fuploads%2Fgit-blob-e3eb7d855cdbefa143f1eb3a26d1cad0c3c8e202%2Fimage.png?alt=media" alt=""><figcaption></figcaption></figure>

3. **Continuous Monitoring & Guardrails**

Stay ahead of evolving threats with intelligent real-time monitoring:

* Detects unusual tool activity, malicious actor behavior, and abnormal Agentic component patterns.
* Visualizes threats by actor, IP address, country, and reputation.
* Enables early detection of misuse and lateral movement.

<figure><img src="https://2916937215-files.gitbook.io/~/files/v0/b/gitbook-x-prod.appspot.com/o/spaces%2FRc4KTKGprZI2sPWKoaLe%2Fuploads%2Fgit-blob-849ea647da0e98d436d625e984b0b4519f6b090e%2Fimage.png?alt=media" alt=""><figcaption></figcaption></figure>

#### 🚀 Get Started with MCP Security

Akto's MCP Security Module is a **paid feature** designed for security-conscious teams working with LLMs, agent frameworks, and AI orchestration tools.

If you're ready to enable deep visibility, automated scanning, and continuous protection for your MCP stack — we're here to help.

👉 [**Request a personalized demo**](https://www.akto.io/mcp-security-demo) to see how it works in your environment.


# Akto MCP Server

#### **What is Model Context Protocol?**

The Model Context Protocol (MCP) is a standardized protocol that enables AI models to interact with external tools and services. In the context of Akto, the MCP server acts as a bridge between AI-powered tools (like Claude, Cursor, etc.) and Akto's Agentic AI Security platform, allowing these tools to access and analyze your agentic AI security data.

{% embed url="<https://www.youtube.com/watch?v=QXdGqadpos4>" %}

#### **Prerequisites**

* Docker installed and running
* Akto API Key

***

#### **Getting Started**

**Step 1: Generating an API Key**

For detailed information about generating and managing API keys, refer to the [Akto API Reference Documentation](https://docs.akto.io/~/changes/674/api-reference/api-reference).

<figure><img src="https://2916937215-files.gitbook.io/~/files/v0/b/gitbook-x-prod.appspot.com/o/spaces%2FRc4KTKGprZI2sPWKoaLe%2Fuploads%2Fgit-blob-945c84e09eb98fea399846ecaea951fc55cf4b2e%2Fimage.png?alt=media" alt=""><figcaption></figcaption></figure>

**Step 2: Configuring MCP Clients**

{% tabs fullWidth="false" %}
{% tab title="Cursor" %}

1. **Open Settings**
   * Launch Cursor
   * Go to Settings
   * Navigate to the MCP tab
2. **Add MCP Server**

   * Click "Add new global MCP server"
   * Paste the following configuration:

   ```json
   {
     "mcpServers": {
       "akto-mcp-server": {
         "command": "docker",
         "args": [
           "run",
           "--rm",
           "-i",
           "-e",
           "AKTO_API_KEY",
           "aktosecurity/akto-mcp-server:latest"
         ],
         "env": {
           "AKTO_API_KEY": "your_api_key"
         }
       }
     }
   }

   ```

   * Replace `your_api_key` with your actual API key
   * Click Save to activate
   * Check the status of the server by clicking on the "MCP" tab and looking for "akto-mcp-server" under Active Servers
     {% endtab %}

{% tab title="Claude Desktop" %}

1. **Locate Config File**
   * macOS: `~/Library/Application Support/Claude/claude_desktop_config.json`
   * Windows: `%APPDATA%\\Claude\\claude_desktop_config.json`
2. **Update Configuration**

   * Add the following configuration:

   ```json
   {
     "mcpServers": {
       "akto-mcp-server": {
         "command": "docker",
         "args": [
           "run",
           "--rm",
           "-i",
           "-e",
           "AKTO_API_KEY",
           "aktosecurity/akto-mcp-server:latest"
         ],
         "env": {
           "AKTO_API_KEY": "your_api_key"
         }
       }
     }
   }

   ```

   * Replace `your_api_key` with your actual API key
   * Save the file
   * Restart Claude Desktop
   * Open Claude's Settings > MCP tab to check server status and connection details
     {% endtab %}
     {% endtabs %}

Each tool is designed to work seamlessly with AI models to provide comprehensive access to your agentic AI security data and analysis capabilities.

***

#### **Feature Highlights**

The MCP server provides easy access to Akto's powerful agentic AI security features through AI tools. Here's what you can do:

1. **View Your Agentic Components**: Get a complete list of all your Agentic components and their details in one place
2. **Track Agentic Component Changes**: Monitor new Agentic components and changes in your Agentic component landscape
3. **Find Security Issues**: Automatically detect vulnerabilities and security risks in your Agentic components
4. **Analyze Sensitive Data**: Identify and track sensitive information in your Agentic component responses
5. **Monitor Agentic Component Health**: Keep track of Agentic component performance and security status
6. **Track Issues**: View and monitor the status of security issues
7. **Get Security Insights**: Receive AI-powered analysis and recommendations for your Agentic components
8. **View Risk Scores**: Access risk scores for your Agentic components to understand their security posture

Each of these capabilities is designed to work seamlessly with AI tools like Claude and Cursor, making agentic AI security management more intuitive and efficient.

***

#### Prompt Examples

1. List active agentic collections.
2. How many endpoints in `Collection_Name`? Show the one with the highest risk.
3. List top 5 high severity issues.
4. Get schema for API: `API_Path`
5. How many scan runs in the last 48 hours?
6. Summarize issues by status (open, ignored, fixed) and severity.
7. List sensitive parameters for `API_Path`

***

#### **Troubleshooting**

**Server Connection Issues**

* Verify API key is correct
* Check network connectivity
* Ensure Docker is running
* Verify Docker image pull was successful

**Client Configuration**

* Validate JSON configuration
* Check file permissions
* Verify environment variables
* Ensure Docker image name is correct (`aktosecurity/akto-mcp-server`)

***

#### Get Support for your Akto setup

There are multiple ways to request support from Akto. We are 24X7 available on the following:

1. In-app `intercom` support. Message us with your query on intercom in Akto dashboard and someone will reply.
2. Join our [discord channel](https://www.akto.io/community) for community support.
3. Contact `help@akto.io` for email support.


# What is AI Agent Security?

As organizations rapidly adopt AI agents and large language models (LLMs), securing these systems has become critical. AI agents present unique security challenges that traditional security tools cannot adequately address. Akto provides comprehensive protection for AI-powered applications through specialized security capabilities designed for the evolving threat landscape of 2025.

## The AI Security Challenge

AI agents and LLMs introduce novel attack vectors beyond traditional application vulnerabilities. These systems can autonomously execute actions, access external tools, maintain persistent memory, and make decisions that directly impact business operations. The OWASP Top 10 for LLM Applications 2025 identifies critical risks including prompt injection, supply chain vulnerabilities, data poisoning, excessive agency, and sensitive information disclosure.

Agentic AI systems expand the attack surface through:

* **Autonomous Decision-Making**: Agents can plan, refine, and adapt strategies, potentially evading guardrails
* **Tool Integration**: Direct access to APIs, databases, and external systems creates new exploitation paths
* **Persistent Memory**: Context retention across sessions introduces data leakage and manipulation risks
* **Dynamic Workflows**: Complex, multi-step operations increase the potential for cascading failures

***

## Akto's Four Pillars of AI Security

### **1. AI Agent & MCP Discovery**

Understanding your AI attack surface is the foundation of security. Akto automatically discovers and inventories all AI-related endpoints, agent workflows, and LLM integrations across your infrastructure.

**Key Capabilities:**

* Automated detection of AI agents, LLM endpoints, and vector databases
* Classification of prompt data, embeddings, and AI-specific payloads
* Mapping of agent tool calls, function invocations, and external integrations
* Real-time tracking of AI workflow changes and new agent deployments
* Identification of shadow AI implementations and unauthorized LLM usage

**What It Detects:**

* OpenAI, Anthropic, Google AI, and custom LLM agentic endpoints
* RAG (Retrieval-Augmented Generation) system components
* Agent orchestration platforms and tool registries
* Vector stores and embedding services
* Prompt management and template systems

***

### **2. AI Red Teaming**

Proactive vulnerability assessment specifically designed for AI systems. Akto performs comprehensive AI Red Teaming aligned with OWASP GenAI Security standards and real-world attack patterns.

**Key Capabilities:**

* 4000+ AI-specific probe templates covering OWASP Top 10 for LLMs
* Automated red-teaming with adversarial prompt generation
* Scanning for prompt injection, jailbreaking, and system prompt extraction
* Supply chain vulnerability scanning for models and dependencies
* Data poisoning and model manipulation detection
* Excessive agency and unauthorized tool usage validation
* CI/CD integration for continuous AI Red Teaming

**Advanced Scanning Scenarios:**

* **Prompt Injection Attacks**: Direct, indirect, and multi-turn injection attempts
* **Model Extraction**: Attempts to steal model weights or training data
* **Adversarial Inputs**: Crafted inputs designed to cause misclassification
* **Resource Exhaustion**: Scanning for unbounded token consumption
* **Cross-Plugin Request Forgery**: Exploiting agent tool interactions
* **Training Data Leakage**: Extracting memorized sensitive information

***

### **3. Runtime AI Protection**

Real-time guardrail detection and prevention specifically engineered for AI workloads. Akto monitors and protects against AI-specific attacks while maintaining system performance.

**Key Capabilities:**

* Instant blocking of prompt injection and jailbreak attempts
* Runtime validation of agent actions and tool calls
* Behavioral analysis to detect anomalous AI usage patterns
* Token consumption monitoring and rate limiting
* Output filtering for toxic, biased, or non-compliant content
* Protection against model inversion and extraction attacks
* Memory poisoning and context manipulation prevention

**Protection Mechanisms:**

* **Input Sanitization**: Removes malicious patterns before reaching models
* **Output Validation**: Ensures responses comply with security policies
* **Tool Call Authorization**: Validates agent permissions for external actions
* **Semantic Firewall**: Blocks requests based on intent, not just patterns
* **Hallucination Detection**: Identifies and flags potentially false information
* **PII Redaction**: Automatically removes sensitive data from outputs

***

### **4. AI Security Posture Management**

Comprehensive visibility and governance across your entire AI security landscape. Akto provides continuous assessment and policy enforcement aligned with industry standards.

**Key Capabilities:**

* Unified dashboard showing AI risk scores and security metrics
* Compliance monitoring for OWASP, NIST AI RMF, and EU AI Act
* Policy enforcement for data governance and model usage
* Security posture trending and predictive risk analysis
* Integration with SIEM, SOAR, and existing security tools
* Automated remediation workflows and playbooks

**Compliance & Standards:**

* **OWASP Top 10 for LLMs 2025**: Full coverage and continuous updates
* **MITRE ATLAS**: Adversarial threat modeling for AI systems
* **NIST AI Risk Management Framework**: Implementation guidance
* **ISO/IEC 23053 & 23894**: AI trustworthiness and risk management
* **EU AI Act**: Compliance tracking and documentation

**Security Metrics:**

* Agent authorization violations and excessive permission usage
* Prompt injection attempt frequency and success rates
* Data leakage incidents and sensitive information exposure
* Model performance degradation and poisoning indicators
* Supply chain vulnerability exposure and patch status

***

## Implementation Best Practices

### Defense in Depth

* Layer multiple security controls throughout the AI pipeline
* Implement fail-safe mechanisms for critical agent actions
* Maintain human-in-the-loop oversight for high-risk operations

### Zero Trust for AI

* Verify every agent action and tool invocation
* Implement least-privilege access for all AI components
* Continuously validate model inputs and outputs

### Continuous Monitoring

* Track all AI interactions with full context capture
* Monitor for drift in model behavior and outputs
* Maintain audit logs for compliance and forensics

### Incident Response

* Establish AI-specific incident response procedures
* Implement automated containment for detected guadrail activity
* Maintain rollback capabilities for compromised models

***

### Get Support for your Akto setup

There are multiple ways to request support from Akto. We are 24X7 available on the following:

1. In-app `intercom` support. Message us with your query on intercom in Akto dashboard and someone will reply.
2. Join our [discord channel](https://www.akto.io/community) for community support.
3. Contact `help@akto.io` for email support.


# Self-Hosted Deployment

## **Overview**

**Ask Akto** is an AI-powered conversational assistant integrated into Akto's security platform that enables users to have real-time conversations about Agentic vulnerabilities, scan results, and security insights.

## Key Capabilities

* **Interactive Vulnerability Analysis**: Ask questions about scan results and vulnerabilities in natural language
* **Agentic and agentic AI security Guidance**: Get AI-powered remediation suggestions and security best practices
* **Scan Result Analysis**: Deep-dive into why scans passed/failed with AI assistance
* **Dashboard Metrics Discussion**: Analyse Agentic collections, endpoints, and risk scores
* **Conversation History**: Track and search through past security discussions
* **Multi-Conversation Support**: Maintain separate conversation threads for different contexts

## Pre-requisites

* Docker and Docker Compose installed
* Anthropic API Key
* Akto Agentic AI Security Dashboard running (self-hosted instance)

## Deployment Setup

{% stepper %}
{% step %}
**Create the Deployment Directory**

Create a directory that stores the Docker Compose configuration and environment files.

```
mkdir -p ~/akto-agentic-testing
cd ~/akto-agentic-testing
```

The directory acts as the working location for the deployment.
{% endstep %}

{% step %}
**Create Docker Compose File**

Create a `docker-compose.yml` file with the following configuration:

```yaml
version: '3.8'

services:
  agent-testing:
    container_name: agent-testing
    image: public.ecr.aws/aktosecurity/akto-agentic-testing:latest
    ports:
      - "5500:5500"
    env_file:
      - ./docker-agentic-testing-dashboard.env
    restart: always

  mcp-server:
    container_name: mcp-server
    image: public.ecr.aws/aktosecurity/akto-agentic-testing:mcp_latest
    ports:
      - "4000:4000"
    env_file:
      - ./docker-mcp-server.env
    restart: always
```

The Docker Compose configuration defines two services:

* **agent-testing** – runs the AI-driven Agentic engine.
* **mcp-server** – provides the MCP interface used by the AI agent.
  {% endstep %}

{% step %}
**Create Environment Files**

Two environment files configure runtime behavior for the containers.

**Environment File for Agent Testing Service**

Create a file named: `docker-agentic-testing-dashboard.env`

```bash
# Anthropic API Configuration
ANTHROPIC_API_KEY=<YOUR_ANTHROPIC_API_KEY>

# Node Environment
NODE_ENV=production

# Agent Testing Service Port
PORT=5500

# Enable Agentic Mode
AGENTIC_MODE=true

# MCP Server Connection
MCP_SERVER_URL=http://<YOUR_MCP_SERVER_HOST>:<YOUR_MCP_SERVER_PORT>
```

**Environment variables**

<table><thead><tr><th width="197.41796875">Variable</th><th>Purpose</th></tr></thead><tbody><tr><td><code>ANTHROPIC_API_KEY</code></td><td>API key used for accessing Anthropic Claude models.</td></tr><tr><td><code>PORT</code></td><td>Port exposed by the agent-testing service. Default value: <code>5500</code>.</td></tr><tr><td><code>MCP_SERVER_URL</code></td><td>URL used by the agent-testing service to communicate with the MCP server.<br>Replace <code>&#x3C;YOUR_MCP_SERVER_HOST></code> and <code>&#x3C;YOUR_MCP_SERVER_PORT></code> with the MCP server host and port configured in the deployment environment.</td></tr></tbody></table>

**Environment File for MCP Server**

Create a file named: `docker-mcp-server.env`

```bash
# Dashboard Connection
AKTO_BASE_URL=http://<YOUR_AKTO_DASHBOARD_HOST>:<PORT>

# MCP Server Configuration
MCP_MODE=internal
MCP_API_KEY="abc"

# Debug Logging
DEBUG=true
```

**Environment variables**

<table><thead><tr><th width="160.5078125">Variable</th><th>Purpose</th></tr></thead><tbody><tr><td><code>AKTO_BASE_URL</code></td><td>Base URL of the Akto Agentic AI Security Dashboard.<br>Replace <code>&#x3C;YOUR_AKTO_DASHBOARD_HOST></code> and <code>&#x3C;PORT></code> with the hostname and port configured in the on-prem deployment.</td></tr><tr><td><code>MCP_MODE</code></td><td>Deployment mode of the MCP server. Value <code>internal</code> is used for on-prem environments.</td></tr><tr><td><code>MCP_API_KEY</code></td><td>Authentication key used for MCP server access.</td></tr></tbody></table>
{% endstep %}

{% step %}
**Start the Services**

```bash
# From the deployment directory
docker-compose up -d

# Verify services are running
docker-compose ps
```

Expected output:

```
NAME              STATUS        PORTS
agent-testing     Up ...        0.0.0.0:5500->5500/tcp
mcp-server        Up ...        0.0.0.0:4000->4000/tcp
```

{% endstep %}

{% step %}
**Verify Connectivity**

You can verify that both services started successfully by checking the health endpoints.

**Agent Testing Service**

```bash
curl http://<AGENT_TESTING_HOST>:<AGENT_TESTING_PORT>/health
```

**MCP Server**

```bash
curl http://<MCP_SERVER_HOST>:<MCP_SERVER_PORT>/health
```

{% endstep %}
{% endstepper %}

## Usage

Once deployed, **Ask Akto** can be accessed through the Akto's Security Dashboard:

1. Navigate to your Akto dashboard
2. Access the **Ask Akto** feature section
3. Start conversing with the agent.

## Support

If you need help with the deployment:

* **Discord Community**: Join our community at [discord.gg/Wpc6xVME4s](https://discord.gg/Wpc6xVME4s)
* **Email Support**: Contact us at <support@akto.io>

Our team is available 24/7 to assist you with setup, troubleshooting, and best practices.


# Run with GitHub Copilot

## Overview

You can run Ask Akto with GitHub Copilot as the underlying AI model using the **Bring Your Own Model** configuration. This lets you power your on-prem Ask Akto assistant with GitHub Copilot instead of Anthropic Claude.

{% hint style="info" %}
You can use this integration only with **on-premises deployments**.
{% endhint %}

## Before You Begin

Make sure you have:

* A running self-hosted Akto deployment
* Your GitHub Copilot access with a valid API key
* Admin access to your Akto dashboard
* The following variable added to your **Akto API Security Dashboard env file**, and the service restarted to apply it:

  ```bash
  AKTO_MCP_SERVER_URL=<your-mcp-server-url>
  ```

## Configuration

{% stepper %}
{% step %}
**Generate Your GitHub Copilot API Key**

You need a GitHub **fine-grained personal access token** to authenticate with GitHub Copilot. Here's how to generate one:

1. Go to [github.com](https://github.com) and click your **profile picture** → **Settings**
2. Scroll to the bottom of the left sidebar and click **Developer settings**
3. Go to **Personal access tokens** → **Fine-grained tokens**
4. Click **Generate new token**
5. Give your token a recognizable name (e.g., `akto-copilot`) and set an expiration that suits your policy
6. Under **Permissions** → **Account permissions**, add the following three permissions, all set to **Read-only**:
   * **Copilot Chat**
   * **Copilot Editor Context**
   * **Copilot Requests**
7. Click **Generate token** at the bottom
8. **Copy your token immediately** — GitHub will only show it once

You'll use this token as your API key in the next step.
{% endstep %}

{% step %}
**Configure GitHub Copilot as Your Model**

Add your token to Akto so it can call GitHub Copilot:

1. In your Akto dashboard, go to **Settings → Integrations → Agents**
2. Click **Add Model**
3. Select **GitHub Copilot** as the provider
4. Enter a **Name**, paste your token into the **API Key** field, and pick a supported **Model**
5. Click **Save**

{% hint style="warning" %}
Only models that your GitHub Copilot subscription has access to will work. While configuring, make sure to pick a model that's actually available to you — otherwise the integration will fail.
{% endhint %}

For more details on each field and the full list of supported models, see the [Agent Configuration](/integrations/agent-configuration) guide.
{% endstep %}

{% step %}
**Update Your Environment File**

Open your `docker-agentic-testing-dashboard.env` file and update it with the following values:

```bash
# Leave this empty — you're using GitHub Copilot as your model provider
ANTHROPIC_API_KEY=""

NODE_ENV=production
PORT=5500
AGENTIC_MODE=true

MCP_SERVER_URL=<YOUR_AKTO_MCP_SERVER_URL>

# Required when you're using GitHub Copilot
DASHBOARD_URL=<YOUR_AKTO_DASHBOARD_URL>
AKTO_API_KEY=<YOUR_AKTO_API_KEY>
```

**What you need to set (GitHub Copilot specific)**

| Variable            | What to set                                                                                                                     |
| ------------------- | ------------------------------------------------------------------------------------------------------------------------------- |
| `ANTHROPIC_API_KEY` | Leave it empty — you're using GitHub Copilot instead.                                                                           |
| `AGENTIC_MODE`      | Must be set to `true`.                                                                                                          |
| `MCP_SERVER_URL`    | Your Akto MCP server URL.                                                                                                       |
| `DASHBOARD_URL`     | Your Akto Agentic AI Security Dashboard's base URL.                                                                             |
| `AKTO_API_KEY`      | Your Akto API key for authenticating with the Akto dashboard. Generate it from Settings → Integrations → Automation → Akto API. |

{% hint style="warning" %}
Make sure you add **all** of the environment variables listed above — including the empty ones like `ANTHROPIC_API_KEY=""`. Missing any of them might cause the service to misbehave or fail to start.
{% endhint %}
{% endstep %}

{% step %}
**Restart Your Services**

Restart your services to apply the updated environment file:

```bash
docker compose down && docker compose up -d
```

To confirm everything is running, follow the [Verify Connectivity](/ask-akto/self-hosted-deployment#verify-connectivity) steps from the base deployment guide.
{% endstep %}
{% endstepper %}

## Support

If you need help with the deployment:

* **Discord Community**: Join our community at [discord.gg/Wpc6xVME4s](https://discord.gg/Wpc6xVME4s)
* **Email Support**: Contact us at <support@akto.io>

Our team is available 24/7 to assist you with setup, troubleshooting, and best practices.


# Access the Public Akto MCP Server

## Overview

Akto hosts a public **MCP (Model Context Protocol) server** that lets any MCP-compatible client (Claude, Cursor, etc.) connect directly to your Akto data, without deploying or self-hosting an MCP server yourself.

{% hint style="warning" %}
**Akto's MCP server is HTTP-only; `stdio` is not supported.** Configure it as an `http`-type server entry pointing at `https://mcp.akto.io/mcp`, as shown below.

It also supports only the request/response half of MCP's Streamable HTTP transport, not the streaming (`GET`/SSE) half. If your client requires that streaming handshake to connect, it won't work with this server yet; don't assume a connection failure is an auth issue.
{% endhint %}

## Prerequisites

* An Akto account with access to **Settings**
* An MCP-compatible client (Claude, Cursor, etc.)

## Configuration

{% stepper %}
{% step %}
**Generate Your Akto API Key**

1. In your Akto dashboard, go to **Settings → Integrations → Automation → Akto API Token**
2. Click **Generate** to create a new token
3. Copy the token; you'll use it as the `x-mcp-api-key` value in the next step
   {% endstep %}

{% step %}
**Configure the MCP Server**

Add the following configuration in your MCP client:

```json
"akto-mcp-server": {
  "type": "http",
  "url": "https://mcp.akto.io/mcp",
  "headers": {
    "x-mcp-api-key": "<YOUR_AKTO_API_KEY>",
    "x-context-source": "Agentic"
  }
}
```

Replace `<YOUR_AKTO_API_KEY>` with the token generated in the previous step.
{% endstep %}
{% endstepper %}

## The `x-context-source` Header

The `x-context-source` header tells the MCP server which Akto product's data to serve:

| Value      | Product                                                 |
| ---------- | ------------------------------------------------------- |
| `API`      | Akto API Security                                       |
| `Agentic`  | Akto Argus (Agentic AI Security)                        |
| `Endpoint` | Akto Atlas (Agentic AI Security for Employee Endpoints) |
| `DAST`     | Akto DAST                                               |

{% hint style="info" %}

* If `x-context-source` is **not provided**, the server defaults to **API** context.
* If `x-context-source` is set to anything other than the four values above, the request is rejected with an error.
  {% endhint %}

Most MCP clients apply a fixed `headers` block for the life of a server connection, so you can't switch `x-context-source` per question. If your work spans multiple contexts (e.g. both Agentic and Endpoint), add multiple named server entries pointing at the same URL and API key, each with a different `x-context-source`, and enable whichever matches what you're currently working on:

<details>

<summary>Example: configuring multiple context entries</summary>

The wrapper key below (`mcpServers`) may be named `servers` instead, depending on your client. Use whichever key your client's own MCP config expects.

```json
{
  "mcpServers": {
    "akto-mcp-server-argus": {
      "type": "http",
      "url": "https://mcp.akto.io/mcp",
      "headers": {
        "x-mcp-api-key": "<YOUR_AKTO_API_KEY>",
        "x-context-source": "Agentic"
      }
    },
    "akto-mcp-server-atlas": {
      "type": "http",
      "url": "https://mcp.akto.io/mcp",
      "headers": {
        "x-mcp-api-key": "<YOUR_AKTO_API_KEY>",
        "x-context-source": "Endpoint"
      }
    }
  }
}
```

</details>

## Troubleshooting

* **Check the server is reachable**: `GET https://mcp.akto.io/health` returns a liveness response and doesn't require any headers.
* **Connection fails immediately / handshake never completes**: your client may depend on the streaming (`GET`/SSE) half of Streamable HTTP, which this server doesn't implement yet. See the note above.
* **401 error**: `x-mcp-api-key` is missing or invalid. Double-check the token generated in Step 1.
* **400 error**: `x-context-source` is set to a value other than `API`, `Agentic`, `Endpoint`, or `DAST`. Fix the value, or omit the header to default to `API`.

## Support

If you need help with the setup:

* **Discord Community**: Join our community at [discord.gg/Wpc6xVME4s](https://discord.gg/Wpc6xVME4s)
* **Email Support**: Contact us at <support@akto.io>

Our team is available 24/7 to assist you with setup, troubleshooting, and best practices.


# Overview

Akto Atlas secures AI agents, MCPs, and GenAI tools used at the endpoints where development and experimentation actually happen. Atlas provides visibility and control over AI usage on developer laptops, browsers, IDEs, and local environments—outside the traditional cloud perimeter.

## The Problem You Face

AI agents and GenAI tools are increasingly used directly from endpoints, creating unmanaged risk beyond centralized cloud infrastructure:

* You lack visibility into which AI agents, MCPs, and GenAI tools employees use across devices.
* Most organizations operate without formal guardrails for endpoint AI usage.
* Only a small fraction maintain an accurate, up-to-date inventory of AI agents and MCP connections.

Endpoint-driven AI usage is now one of the fastest-growing sources of security and governance gaps.

## How Akto Atlas Helps

Akto Atlas for Endpoints secures and governs AI usage directly at the source. Atlas discovers AI activity across employee devices and enforces guardrails without disrupting developer workflows.

### Why Atlas Is Different

Traditional endpoint security tools were not designed to understand AI agents, MCPs, or prompt-driven workflows. Atlas is built to observe and control AI-specific behaviors across browsers, IDEs, and local development environments.

## Core Capabilities

### Discover AI Usage Across Every Employee and Device

* Discover AI agents, MCPs, and GenAI tools used across:
  * Browsers
  * IDEs such as Cursor and Claude
  * Local development environments
* Identify shadow AI usage and locally spun-up MCP servers.
* Maintain a live, continuously updated inventory of endpoint AI assets.

## Enforce Guardrails at the Endpoint

* Apply guardrails to:
  * Block sensitive data exposure
  * Prevent unsafe prompts or actions
  * Restrict risky MCP tool calls
* Enforce policies using browser-based controls and Endpoint Shield.

## Enterprise-Ready Deployment

* Deploy a lightweight browser extension for rapid coverage.
* Use Endpoint Shield for deeper enforcement and visibility.
* Support all major IDEs and AI tools.
* Preserve developer productivity with no workflow disruption.

## Next Step: Endpoint Discovery Agents

Start by deploying [**Endpoint Discovery Agents**](/akto-atlas-agentic-ai-security-for-employee-endpoints/endpoints-discovery-agents) to gain visibility into AI agents, MCPs, and GenAI tools used across employee devices. This inventory forms the foundation for enforcing endpoint guardrails and governance.

***


# AI Discovery Connectors

Get started immediately with endpoint-based discovery agents that require no infrastructure setup, perfect for development environments, quick starts, and user-level discovery of AI agents and MCP servers.

* [Browser Extensions](/akto-atlas-agentic-ai-security-for-employee-endpoints/endpoints-discovery-agents/browser-extensions) - Discover agents directly from Chrome, Firefox, or Safari as you browse web applications
* [AI Endpoint Shield](/akto-atlas-agentic-ai-security-for-employee-endpoints/endpoints-discovery-agents/ai-endpoint-shield) - Specialised endpoint protection and discovery for Model Context Protocol interactions
* [Cursor Hooks](/akto-atlas-agentic-ai-security-for-employee-endpoints/endpoints-discovery-agents/cursor-hooks) - Zero-installation security hooks for Cursor IDE (monitors chat + MCP tools)
* [Claude CLI Hooks](/akto-atlas-agentic-ai-security-for-employee-endpoints/endpoints-discovery-agents/claude-cli-hooks) - Zero-installation security hooks for Claude CLI (monitors prompts + responses)
* [Kiro CLI Hooks](/akto-atlas-agentic-ai-security-for-employee-endpoints/endpoints-discovery-agents/kiro-cli-hooks) - Zero-installation security hooks for Kiro CLI (monitors prompts + tool calls)
* [Codex CLI Hooks](/akto-atlas-agentic-ai-security-for-employee-endpoints/endpoints-discovery-agents/codex-cli-hooks) - Zero-installation security hooks for OpenAI Codex CLI (monitors prompts, responses + tool calls)
* [Gemini CLI Hooks](/akto-atlas-agentic-ai-security-for-employee-endpoints/endpoints-discovery-agents/gemini-cli-hooks) - Zero-installation security hooks for Gemini CLI (monitors prompts + responses)
* [Snowflake Cortex Code CLI Hooks](/akto-atlas-agentic-ai-security-for-employee-endpoints/endpoints-discovery-agents/snowflake-cortex-cli-hooks) - Security hooks for Snowflake Cortex Code CLI (prompts + tool use via native Cortex hooks)
* [Neovim Hooks](/akto-atlas-agentic-ai-security-for-employee-endpoints/endpoints-discovery-agents/neovim-hooks) - Lua plugin for Neovim AI plugins security (avante, copilot, codecompanion, windsurf + more)
* [OpenCode Hooks](/akto-atlas-agentic-ai-security-for-employee-endpoints/endpoints-discovery-agents/opencode-hooks) - Zero-installation security hooks for OpenCode (monitors chat + MCP tools)
* [Hermes Hooks](/akto-atlas-agentic-ai-security-for-employee-endpoints/endpoints-discovery-agents/hermes-hooks) - Zero-installation security hooks for Hermes (monitors chat + MCP tools)
* [Amp Hooks](/akto-atlas-agentic-ai-security-for-employee-endpoints/endpoints-discovery-agents/amp-hooks) - Zero-installation security hooks for Amp (monitors tool executions + MCP tools)
* [Deploy via SentinelOne](/akto-atlas-agentic-ai-security-for-employee-endpoints/endpoints-discovery-agents/deploy-via-sentinelone) - Connect SentinelOne to discover AI agents and deploy guardrails on managed endpoints
* [Deploy via CrowdStrike](/akto-atlas-agentic-ai-security-for-employee-endpoints/endpoints-discovery-agents/deploy-via-crowdstrike) - Connect CrowdStrike Falcon to discover AI agents and deploy guardrails on managed endpoints
* [Agentic Shield](/akto-atlas-agentic-ai-security-for-employee-endpoints/endpoints-discovery-agents/agentic-shield) - Application-level shield for real-time discovery and protection of AI agent interactions
* [Anthropic Connector](/akto-atlas-agentic-ai-security-for-employee-endpoints/endpoints-discovery-agents/anthropic-connector) - Pull compliance activity data from Claude.ai, Claude Console, and Claude API directly into Akto via the Anthropic Compliance API
* [Claude Inference Hooks](/akto-atlas-agentic-ai-security-for-employee-endpoints/endpoints-discovery-agents/claude-inference-hooks) - Use Akto Atlas as the AI security server behind Anthropic's Inference Hooks to allow or deny Claude prompts inline, before inference runs
* [OpenAI Connector](/akto-atlas-agentic-ai-security-for-employee-endpoints/endpoints-discovery-agents/openai-connector) - Pull audit log and org activity data from ChatGPT and OpenAI directly into Akto via the OpenAI Admin API


# Browser Extensions

Discover and probe your AI agents and MCP servers directly from your browser. Akto's browser extensions capture agent interactions in real-time as you use your AI applications, making it easy to discover and secure your agentic components without complex setup.

## How It Works

Browser extensions monitor your AI agent interactions as you browse and automatically send the traffic to Akto for discovery and analysis. This approach is perfect for:

* Probing AI applications during development
* Discovering shadow agents in your organization
* Quick security validation without infrastructure changes
* Capturing MCP server interactions from web applications

## Available Extensions

* [Chrome Extension](/akto-atlas-agentic-ai-security-for-employee-endpoints/endpoints-discovery-agents/browser-extensions/chrome) - For Google Chrome and Chromium-based browsers
* [Firefox Extension](/akto-atlas-agentic-ai-security-for-employee-endpoints/endpoints-discovery-agents/browser-extensions/firefox) - For Mozilla Firefox
* [Safari Extension](/akto-atlas-agentic-ai-security-for-employee-endpoints/endpoints-discovery-agents/browser-extensions/safari) - For Safari on macOS

## When to Use Browser Extensions

Browser extensions are ideal when you:

* Want to discover agents without deploying infrastructure
* Need to quickly probe a specific AI application
* Are evaluating Akto before full deployment
* Want to capture agent behavior during manual scanning


# Chrome

Discover AI agents and MCP servers directly from Google Chrome or any Chromium-based browser (Edge, Brave, Opera, etc.). The Akto Security extension captures agent interactions in real-time as you browse.

## What Extension Captures

The Chrome extension monitors:

* AI agent API calls and responses
* MCP server interactions
* Tool invocations and parameters
* Authentication tokens and headers
* Request/response payloads

All captured data is sent securely to your Akto instance for analysis.

{% hint style="info" %}
**Privacy & Security**

The extension only captures traffic when actively enabled and only sends data to your configured Akto instance. You have full control over what gets monitored.
{% endhint %}

## Enterprise Deployment Using Google Workspace

### Prerequisites

You can gather the following information before starting deployment:

* Google Workspace administrator access to `https://admin.google.com`
* Target Organisational Unit (OU) or user group for deployment
* Chrome extension ID provided by the Akto Support team
* Custom extension URL provided by the Akto Support team
* Update XML URL provided by the Akto Support team

{% hint style="info" %}
**Support Contact**

You can request the extension ID, custom extension URL, and update XML URL from the Akto Support team at [**support@akto.io**](mailto:support@akto.io).
{% endhint %}

### Installation Steps

{% stepper %}
{% step %}
**Navigating to Chrome Extension Management**

1. Sign in to `https://admin.google.com`.
2. Navigate to **Devices**.
3. Select **Chrome**.
4. Select **Apps & extensions**.
5. Open the **Users and browsers** tab.
6. Select the target Organisational Unit.

   <div data-with-frame="true"><figure><img src="/files/3G20BRYPlfiDU6Rgbcp9" alt="" width="563"><figcaption></figcaption></figure></div>

{% endstep %}

{% step %}
**Adding the Akto Chrome Extension by ID**

1. Select the yellow **+** button.
2. Choose **Add Chrome app or extension by ID**.

   <div data-with-frame="true"><figure><img src="/files/ijOxlC41lcRmWxYkEBk2" alt="" width="375"><figcaption></figcaption></figure></div>
3. Enter the Chrome extension ID provided by the Akto Support team.
4. Expand **From a custom URL**.
5. Enter the custom extension URL provided by the Akto Support team.

   <div data-with-frame="true"><figure><img src="/files/7LfcPhwolEasLvxDUuRT" alt="" width="375"><figcaption></figcaption></figure></div>
6. Select **Save**.
   {% endstep %}

{% step %}
**Configuring Force Installation**

1. Open the extension configuration panel.
2. Set **Installation policy** to **Force install**.

   <div data-with-frame="true"><figure><img src="/files/jMdAMGGTL2v4V0Ve9tbD" alt="" width="375"><figcaption></figcaption></figure></div>
3. Enter the **update XML URL** provided by the Akto Support team in the **Installation URL** space.

   <div data-with-frame="true"><figure><img src="/files/MDYerdDtjh0IRGSnQwjF" alt="" width="375"><figcaption></figcaption></figure></div>
4. Select **Save**.

Now, force installation enables automatic deployment to all managed Chrome users within the selected Organisational Unit.
{% endstep %}
{% endstepper %}

## Enterprise Deployment Using Microsoft Intune (Windows)

You can deploy and force-install the Akto Security Chrome extension to Intune-managed Windows devices using a Settings Catalog profile.

Akto provides two required values:

* Extension ID
* Update XML URL

Follow the full step-by-step guide here:

* [Intune Deployment (Windows)](/akto-atlas-agentic-ai-security-for-employee-endpoints/endpoints-discovery-agents/browser-extensions/chrome/intune-deployment)

## Enterprise Deployment Using NinjaOne (Windows)

You can deploy and force-install the Akto Security Chrome extension to NinjaOne-managed Windows devices using a PowerShell automation script and Chrome force-install policy.

Akto provides two required values:

* Extension ID
* Update XML URL

Follow the full step-by-step guide here:

* [NinjaOne Deployment (Windows)](/akto-atlas-agentic-ai-security-for-employee-endpoints/endpoints-discovery-agents/browser-extensions/chrome/ninjaone-deployment)

## Deployment using ZIP File

### Prerequisites

* Google Chrome browser (Version 88 or higher)
* The Akto Security extension ZIP file (required).
* The extension folder (extracted from the ZIP file)

{% hint style="warning" %}
Contact the Akto support team for the required extension ZIP file.
{% endhint %}

### Steps

{% stepper %}
{% step %}
**Get the Extension Files**

* Download the extension package you received
* If it's a ZIP file, extract it to a folder on your computer
* Remember where you saved this folder
  {% endstep %}

{% step %}
**Open Chrome Extensions**

Open Chrome and type this in the address bar:

{% code overflow="wrap" %}

```
chrome://extensions/
```

{% endcode %}

Press Enter.

**OR**

Click the three dots (⋮) in Chrome → **More tools** → **Extensions**
{% endstep %}

{% step %}
**Turn On Developer Mode**

* Look at the top-right corner of the Extensions page
* Find the **Developer mode** toggle switch
* Turn it **ON** (it will turn blue)
  {% endstep %}

{% step %}
**Load the Extension**

* Click the **Load unpacked** button (appears at the top after Step 3)
* A file browser will open
* Find and select the Akto Security extension folder
* Click **Select Folder**
  {% endstep %}

{% step %}
**Verify It's Installed**

You should now see **Akto Security** in your extensions list with:

* Akto icon
* Version number
* Toggle switch set to ON
  {% endstep %}

{% step %}
**Pin to Toolbar (Optional but Recommended)**

* Click the puzzle icon (🧩) in Chrome toolbar
* Find **Akto Security** in the list
* Click the pin icon (📌) next to it
* The Akto icon will appear in your toolbar
  {% endstep %}
  {% endstepper %}

## Extension Appearance After Successful Installation

Managed Chrome browsers install the Akto extension after policy synchronisation. The Chrome toolbar then displays the Akto extension icon once installation completes.

<div data-with-frame="true"><figure><img src="/files/76eqq6P70kpEObuRwLBJ" alt="" width="563"><figcaption></figcaption></figure></div>

## Support

For deployment assistance or troubleshooting, you can contact the Akto Support team at [**support@akto.io**](mailto:support@akto.io).

## What Next

Chrome extension installation completes enterprise deployment.

The next section explains how the Akto Chrome extension monitors browser activity and enforces guardrails during runtime.


# Intune Deployment (Windows)

Deploy the Akto Security Chrome extension to Windows devices managed by Microsoft Intune using a Settings Catalog profile.

## Overview

This method force-installs the extension for managed devices and keeps it controlled by policy.

Akto provides the required values:

* **Extension ID**
* **Update XML URL**

{% hint style="info" %}
Use the values exactly as shared by Akto Support. Do not modify the extension ID or update URL format.
{% endhint %}

## Prerequisites

* Microsoft Intune admin access
* Windows device group(s) already enrolled in Intune
* Google Chrome installed on target devices
* Akto-provided extension details:
  * Extension ID (example format: `xxxxxxxxxxxxxxxxxxxxxxxxxxxxxxxx`)
  * Update XML URL (example format: `https://.../update.xml`)

## Create Intune Configuration Profile

{% stepper %}
{% step %}
**Go to Windows Configuration in Intune**

1. Open the Microsoft Intune admin center.
2. Navigate to **Devices → Windows → Configuration**.
3. Click **Create**.
4. Set:
   * **Platform:** `Windows 10 and later`
   * **Profile type:** `Settings catalog`
5. Click **Create**.

<div data-with-frame="true"><figure><img src="/files/Z9ZatlpSrj5KGryOX7Na" alt="Create a settings catalog profile for Windows in Intune" width="563"><figcaption><p>Start a new Settings Catalog profile for Windows devices.</p></figcaption></figure></div>
{% endstep %}

{% step %}
**Configure Profile Basics**

1. Enter a profile name, for example: `akto-browser-extension`.
2. Add a description, for example: `Installs Akto browser extension`.
3. Confirm **Platform** is Windows.
4. Click **Next**.

<div data-with-frame="true"><figure><img src="/files/b8aqKSvQlK877rhgRBcF" alt="Profile basics page in Intune" width="563"><figcaption><p>Provide profile name and description.</p></figcaption></figure></div>
{% endstep %}

{% step %}
**Add Chrome Extension Settings**

1. On **Configuration settings**, click **Add settings**.
2. In **Settings picker**, search for `silent`.
3. Select **Google Chrome > Extensions**.
4. Choose:
   * **Extension/App IDs and update URLs to be silently installed (Device)**
5. Click **Select these settings**.

<div data-with-frame="true"><figure><img src="/files/6gUtcPIZXnRzURKIzU0V" alt="Select Chrome extension settings in Intune settings picker" width="563"><figcaption><p>Select the Chrome extension policy from Settings Catalog.</p></figcaption></figure></div>
{% endstep %}

{% step %}
**Set Akto Extension Policy Values**

1. Set **Configure the list of force-installed apps and extensions** to **Enabled**.
2. In **Extension/App IDs and update URLs to be silently installed (Device)**, click **Add**.
3. Enter this value in one line:

```
<AKTO_EXTENSION_ID>;<AKTO_UPDATE_XML_URL>
```

Example:

```
mjcadlphyjmonhffggcpinejpageieeh;https://akto-chrome-ext.s3.ap-south-1.amazonaws.com/akto-chrome-ext/update.xml
```

4. Click **Next**.

<div data-with-frame="true"><figure><img src="/files/HosR8ztGKKZjsWnHu1e3" alt="Configure extension id and update xml url in Intune profile" width="563"><figcaption><p>Add the Akto extension ID and update XML URL, then enable force-install.</p></figcaption></figure></div>
{% endstep %}

{% step %}
**Assign and Create the Profile**

1. Complete **Scope tags** as needed.
2. Assign the profile to target device groups.
3. On **Review + create**, verify:
   * Platform is Windows
   * Chrome extension force-install is enabled
   * Extension ID + Update XML URL are correct
4. Click **Create**.

<div data-with-frame="true"><figure><img src="/files/RZuaBqWAfXN5xjaxEnJn" alt="Review and create screen in Intune profile wizard" width="563"><figcaption><p>Review settings and create the deployment profile.</p></figcaption></figure></div>
{% endstep %}
{% endstepper %}

## Validate Deployment

1. Go to **Devices** in Intune and confirm policy assignment status.
2. On a target Windows laptop, open Chrome and check extension presence.
3. In Chrome, open `chrome://policy` and verify Chrome extension policies are applied.
4. Confirm activity is visible in Akto after users browse monitored domains.

## Troubleshooting

* **Extension not installed:** Verify the value format is exactly `<extension_id>;<update_xml_url>`.
* **Policy appears but no extension in Chrome:** Restart Chrome and sync device policies.
* **No Akto traffic visible:** Confirm Browser Extension scope is configured in Akto Settings and target domains match.

## Support

For extension ID/update URL issues or deployment help, contact [**support@akto.io**](mailto:support@akto.io).


# NinjaOne Deployment (Windows)

Deploy the Akto Chrome extension on NinjaOne-managed Windows endpoints by setting Chrome force-install policy values.

## Prerequisites

* NinjaOne admin access with script and policy permissions
* Windows device policy in NinjaOne
* Akto-provided values:
  * `<AKTO_CHROME_EXTENSION_ID>`
  * `<AKTO_CHROME_UPDATE_XML_URL>`

## Policy Value Format

Use this exact value:

```
<AKTO_CHROME_EXTENSION_ID>;<AKTO_CHROME_UPDATE_XML_URL>
```

Example:

```
mjcadlphyjmonhffggcpinejpageieeh;https://akto-chrome-ext.s3.ap-south-1.amazonaws.com/akto-chrome-ext/update.xml
```

## Deployment Steps

{% stepper %}
{% step %}

### Create Windows script for Chrome force-install

In NinjaOne Automation Library, create a PowerShell script (Run As: System) named:

`Akto Chrome Extension - Force Install`
{% endstep %}

{% step %}

### Use this script content

Download direct script file:

* [akto-chrome-ninjaone-force-install.ps1](https://github.com/akto-api-security/Documentation/blob/agentic_security/akto-atlas-agentic-ai-security-for-employee-endpoints/endpoints-discovery-agents/browser-extensions/chrome/scripts/akto-chrome-ninjaone-force-install.ps1)

<details>

<summary><strong>Show script</strong></summary>

```powershell
$ErrorActionPreference = "Stop"

$regPath = "HKLM:\SOFTWARE\Policies\Google\Chrome\ExtensionInstallForcelist"
$extensionValue = "<AKTO_CHROME_EXTENSION_ID>;<AKTO_CHROME_UPDATE_XML_URL>"

if (-not (Test-Path $regPath)) {
    New-Item -Path $regPath -Force | Out-Null
}

New-ItemProperty -Path $regPath -Name "1" -PropertyType String -Value $extensionValue -Force | Out-Null
Write-Host "[Akto] Chrome extension force-install policy set: $extensionValue"
```

</details>
{% endstep %}

{% step %}

### Attach script to Windows policy

1. Open target Windows policy
2. Add a **Scheduled Script** for `Akto Chrome Extension - Force Install`
3. Run once on pilot devices
4. Add to standard build policy for production devices
   {% endstep %}

{% step %}

### Validate on endpoint

1. Restart Chrome on a test endpoint
2. Open `chrome://policy` and confirm policy refresh
3. Open `chrome://extensions` and confirm Akto extension is installed and managed
   {% endstep %}
   {% endstepper %}

## Troubleshooting

### Extension does not appear

* Confirm value format is exactly `id;update_xml_url`
* Confirm policy key exists at `HKLM\SOFTWARE\Policies\Google\Chrome\ExtensionInstallForcelist`
* Restart Chrome and re-check `chrome://policy`

## Related Documentation

* [Intune Deployment (Windows)](/akto-atlas-agentic-ai-security-for-employee-endpoints/endpoints-discovery-agents/browser-extensions/chrome/intune-deployment)
* [Extension Usage Behaviour](/akto-atlas-agentic-ai-security-for-employee-endpoints/endpoints-discovery-agents/browser-extensions/chrome/extension-usage-behaviour)
* [NinjaOne Deployment (Windows Endpoint Shield)](/akto-atlas-agentic-ai-security-for-employee-endpoints/endpoints-discovery-agents/ai-endpoint-shield/ninjaone-windows-deployment)

## Support

For extension ID and update URL details, contact [**support@akto.io**](mailto:support@akto.io).


# Extension Usage Behaviour

## Overview

The Akto Chrome extension enforces guardrail policies inside managed browsers and provides centralized visibility in Akto Atlas.

When your users send requests to monitored domains, the extension evaluates each request in real time against guardrail policies defined in the Akto dashboard. Based on your enforcement configuration, the extension either allows the request to proceed or blocks it.

To understand runtime enforcement, you first define which domains and paths the extension should monitor.

## Configuring Browser Extension Scope

You define monitoring scope in the **Browser Extension** section of the Akto Settings.

<div data-with-frame="true"><figure><img src="/files/LsQkxmF15AVt4xHCHDse" alt="" width="563"><figcaption></figcaption></figure></div>

Each configuration specifies:

* **Host** - Domain you want to monitor
* **Paths** - API paths evaluated against guardrail policies
* **Wildcard support** - Example: `/api/*`
* **Active status** - Determines whether enforcement applies

The extension retrieves active configurations from the dashboard settings and evaluates only matching hosts and paths.

For guardrail policy configuration details, see: [Guardrail Policy](/agentic-guardrails/concepts/threat-policy)

{% hint style="info" %}
**Supported Browser LLMs**

The **Block personal accounts** guardrail is currently supported on the following browser LLMs: **chatgpt.com**, **gemini.google.com**, **claude.ai**, **copilot.microsoft.com**, and **grok.com**.
{% endhint %}

## Real-Time Guardrail Enforcement in the Browser

When a user sends a request to a configured domain, the extension validates the request against guardrail policy conditions before completion.

If a request does not meet guardrail criteria, the extension generates a guardrail event.

Enforcement behaviour depends on the **Bypass Guardrails** setting.

<div data-with-frame="true"><figure><img src="/files/6v0YkIdHgvbOxojGHBg1" alt="" width="375"><figcaption></figcaption></figure></div>

### Monitoring Mode (Bypass Guardrails Enabled)

* Policy violations are detected.
* Guardrail events are recorded.
* The request proceeds without interruption.

Monitoring mode gives you visibility without blocking user traffic.

{% hint style="warning" %}
**Important**

End users cannot modify the **Bypass Guardrails** setting. This behaviour is controlled by administrators through the extension configuration.
{% endhint %}

This mode is commonly used when organisations want to evaluate guardrail behaviour without interrupting user workflows.

For example, during early deployment or evaluation phases, administrators may enable monitoring mode to observe how policies behave before enforcing blocking.

### Blocking Mode (Bypass Guardrails Disabled)

* Policy violations are detected.
* The request is blocked before completion.
* A browser-level alert informs the user.
* The website returns a request failure response.

  <div data-with-frame="true"><figure><img src="/files/kerYmqtzLr1fHxG6ym2c" alt="" width="563"><figcaption><p>Browser request blocked after violating a configured guardrail policy.</p></figcaption></figure></div>

Blocking mode allows you to enforce guardrail policies directly at the endpoint.

Every flagged request, whether blocked or allowed, is recorded in Akto Atlas.

For guardrail behaviour and event lifecycle details, see: [Guardrail Activity](/agentic-guardrails/concepts/guardrail-activity)

{% hint style="info" %}
**Export Capability**

You can export guardrail events using the **Export to JSON** option in the browser extension.

<img src="/files/EsrJdQ12Wd8B7lxfuZWG" alt="" data-size="original">
{% endhint %}

## Endpoint Discovery in Akto Atlas

When a user sends the first request to a configured domain, Akto automatically discovers the interaction.

You can view the domain under:

* **Akto Atlas → Agentic Assets → \<Domain Name>**

Example:

**Akto Atlas → Agentic Assets → chatgpt.com**

<div data-with-frame="true"><figure><img src="/files/LA4v8HjhjG930NxefCET" alt="" width="563"><figcaption></figcaption></figure></div>

### User and Endpoint Identification

Akto groups discovered activity based on browser identity:

* Authenticated browser session → Activity mapped to username
* Incognito or unidentified session → Activity mapped to Endpoint ID

Each entry represents a distinct browser instance interacting with the monitored domain.

In the Agentic Assets view, you can see:

* Endpoint ID or Username
* Risk score
* Sensitive data indicators
* Last traffic timestamp
* Discovery time

For asset grouping and lifecycle behaviour, see: [Agentic Assets](/akto-atlas-agentic-ai-security-for-employee-endpoints/ai-agent-activity/agentic-assets)

## Guardrail Activity in Akto Atlas

All flagged activity appears under:

**Akto Atlas → Agentic Guardrails → Guardrail Activity**

<div data-with-frame="true"><figure><img src="/files/4ckY8TPOG4lCJg0i6e7s" alt="" width="563"><figcaption></figcaption></figure></div>

Guardrail events are logged regardless of whether a request is blocked or allowed.

### Event Visibility

For each guardrail event, you can view:

* Severity
* Endpoint or Username
* HTTP method
* API path
* Timestamp
* Policy trigger

Events are categorized as Active, Under Review, or Ignored.

### Attack Drilldown

Selecting a guardrail event opens a detailed investigation panel.

From the drilldown view, you can review:

* Full request payload
* Full response payload
* Policy validator details
* Triggered condition
* Timeline and session context

For detailed guardrail investigation workflows, see: [Guardrail Activity Detailed View](/agentic-guardrails/how-to/guardrail-activity-detailed-view)


# Firefox

Discover AI agents and MCP servers directly from Mozilla Firefox. The Akto Firefox extension captures agent interactions in real-time as you browse.

## Installation

1. Install the Akto extension from Firefox Add-ons
2. Configure your Akto dashboard connection
3. Start browsing your AI applications

The extension will automatically capture and send agent traffic to your Akto dashboard for discovery and security analysis.

## What Gets Captured

The Firefox extension monitors:

* AI agent API calls and responses
* MCP server interactions
* Tool invocations and parameters
* Authentication tokens and headers
* Request/response payloads

All captured data is sent securely to your Akto instance for analysis.

## Requirements

* Mozilla Firefox (latest version recommended)
* Active Akto account or self-hosted instance
* Network access to your Akto dashboard

## Privacy & Security

The extension only captures traffic when actively enabled and only sends data to your configured Akto instance. You have full control over what gets monitored.


# Safari

Discover AI agents and MCP servers directly from Safari on macOS. The Akto Safari extension captures agent interactions in real-time as you browse.

## What Extension Captures

The Safari extension monitors:

* AI agent API calls and responses
* MCP server interactions
* Tool invocations and parameters
* Authentication tokens and headers
* Request/response payloads

All captured data is sent securely to your Akto instance for analysis.

{% hint style="info" %}
**Privacy & Security**

The extension only captures traffic when actively enabled and only sends data to your configured Akto instance. You have full control over what gets monitored.
{% endhint %}

## Deployment using ZIP File

### Prerequisites

* Safari on macOS (Ventura 13 or higher recommended)
* The Akto Security extension ZIP file
* The extension app bundle (extracted from the ZIP file)

{% hint style="warning" %}
Contact the Akto support team for the required extension ZIP file.
{% endhint %}

### Steps

{% stepper %}
{% step %}
**Get the Extension Files**

* Download the extension package you received
* If it's a ZIP file, extract it to a folder on your computer
* Remember where you saved the `.app` bundle
  {% endstep %}

{% step %}
**Move the App to Applications**

* Move the extracted `.app` bundle to your `/Applications` folder
* Launch the app once so macOS registers it
  {% endstep %}

{% step %}
**Enable Safari Developer Mode**

Open Safari and enable developer features:

1. Click **Safari** in the menu bar → **Settings**
2. Open the **Advanced** tab
3. Check **"Show features for web developers"**

The **Develop** menu will now appear in the Safari menu bar.
{% endstep %}

{% step %}
**Allow Unsigned Extensions**

1. Click **Develop** in the menu bar
2. Select **Allow Unsigned Extensions**

{% hint style="warning" %}
This setting resets every time Safari is quit. You will need to re-enable it each time you restart Safari until the extension is distributed through the App Store.
{% endhint %}
{% endstep %}

{% step %}
**Enable the Akto Extension**

1. Click **Safari** → **Settings**
2. Open the **Extensions** tab
3. Find **Akto Security** in the list
4. Toggle the checkbox next to it to enable it
   {% endstep %}

{% step %}
**Verify It's Installed**

You should now see **Akto Security** in the Extensions list with:

* Akto icon
* Version number
* Toggle switch set to ON

The Akto icon will also appear in the Safari toolbar.
{% endstep %}
{% endstepper %}

## Support

For deployment assistance or troubleshooting, you can contact the Akto Support team at [**support@akto.io**](mailto:support@akto.io).


# AI Endpoint Shield

## Overview

AI Endpoint Shield provides **runtime security** and auto-discovery of local MCP servers configured on your machine. It acts as a protective layer between the MCP client (e.g., Cursor, VS Code, Claude) and the MCP servers, requiring no changes to your setup.

## What is Agentic Endpoint Shield?

Endpoint Shield continuously monitors employee devices to identify and track:

* **AI Agents**: All deployed agents across web, desktop, and endpoint devices
* **MCP Servers**: Model Context Protocol server instances running locally or remotely
* **Device Information**: Complete device inventory with hardware IDs, usernames, and locations
* **Agent Activity**: Real-time heartbeat monitoring and deployment status
* **MCP Connections**: Server URLs, connection health, and last seen timestamps

## Features

* Continuous safety checks on all requests and responses to the MCP servers
* Automatic blocking of unsafe interactions (via standard JSON-RPC errors)
* Works out-of-the-box with popular MCP clients (Cursor, VS Code, Claude)
* Zero changes required in your MCP server

## Installation

* The application is provided as an installble package (.app, .deb, .exe)
* Please reach out to Akto Support to get your installer.
* Please refer to the [Manaul Setup](#manual-setup) section if you wish to run the tool without an installer.

## Auto-Detection

Akto AI Endpoint Shield automatically detects MCP client configurations:

* **Cursor** → Reads `~/.cursor/mcp.json`
* **Visual Studio Code** → Reads `.vscode/mcp.json` inside your workspace
* **Claude Desktop** → Reads Claude’s MCP config JSON

For each detected MCP server config:

1. The JSON file is parsed.
2. Each server entry is automatically wrapped with **Akto AI Endpoint Shield**.
3. Your MCP clients transparently run through the shield without requiring manual reconfiguration.

{% hint style="warning" %}
You don’t need to manually edit your MCP config files — the wrapper handles this for you.
{% endhint %}

<details>

<summary>Example — Cursor <code>mcp.json</code></summary>

**Original file (before wrapping):**

```json
{
  "mcpServers": {
    "chrome-devtools-mcp": {
      "command": "npx",
      "args": [
        "-y"
        "chrome-devtools-mcp@latest"
      ]
    }
  }
}
```

**Automatically wrapped file (after Akto AI Endpoint Shield):**

```json
{
  "mcpServers": {
    "chrome-devtools-mcp": {
      "command": "mcp-endpoint-shield",
      "args": [
        "stdio",
        "--name",
        "chrome-devtools-mcp",
        "--exec",
        "npx",
        "-y",
        "chrome-devtools-mcp@latest"
      ]
    }
  }
}
```

Here how the wrap looks in the code:
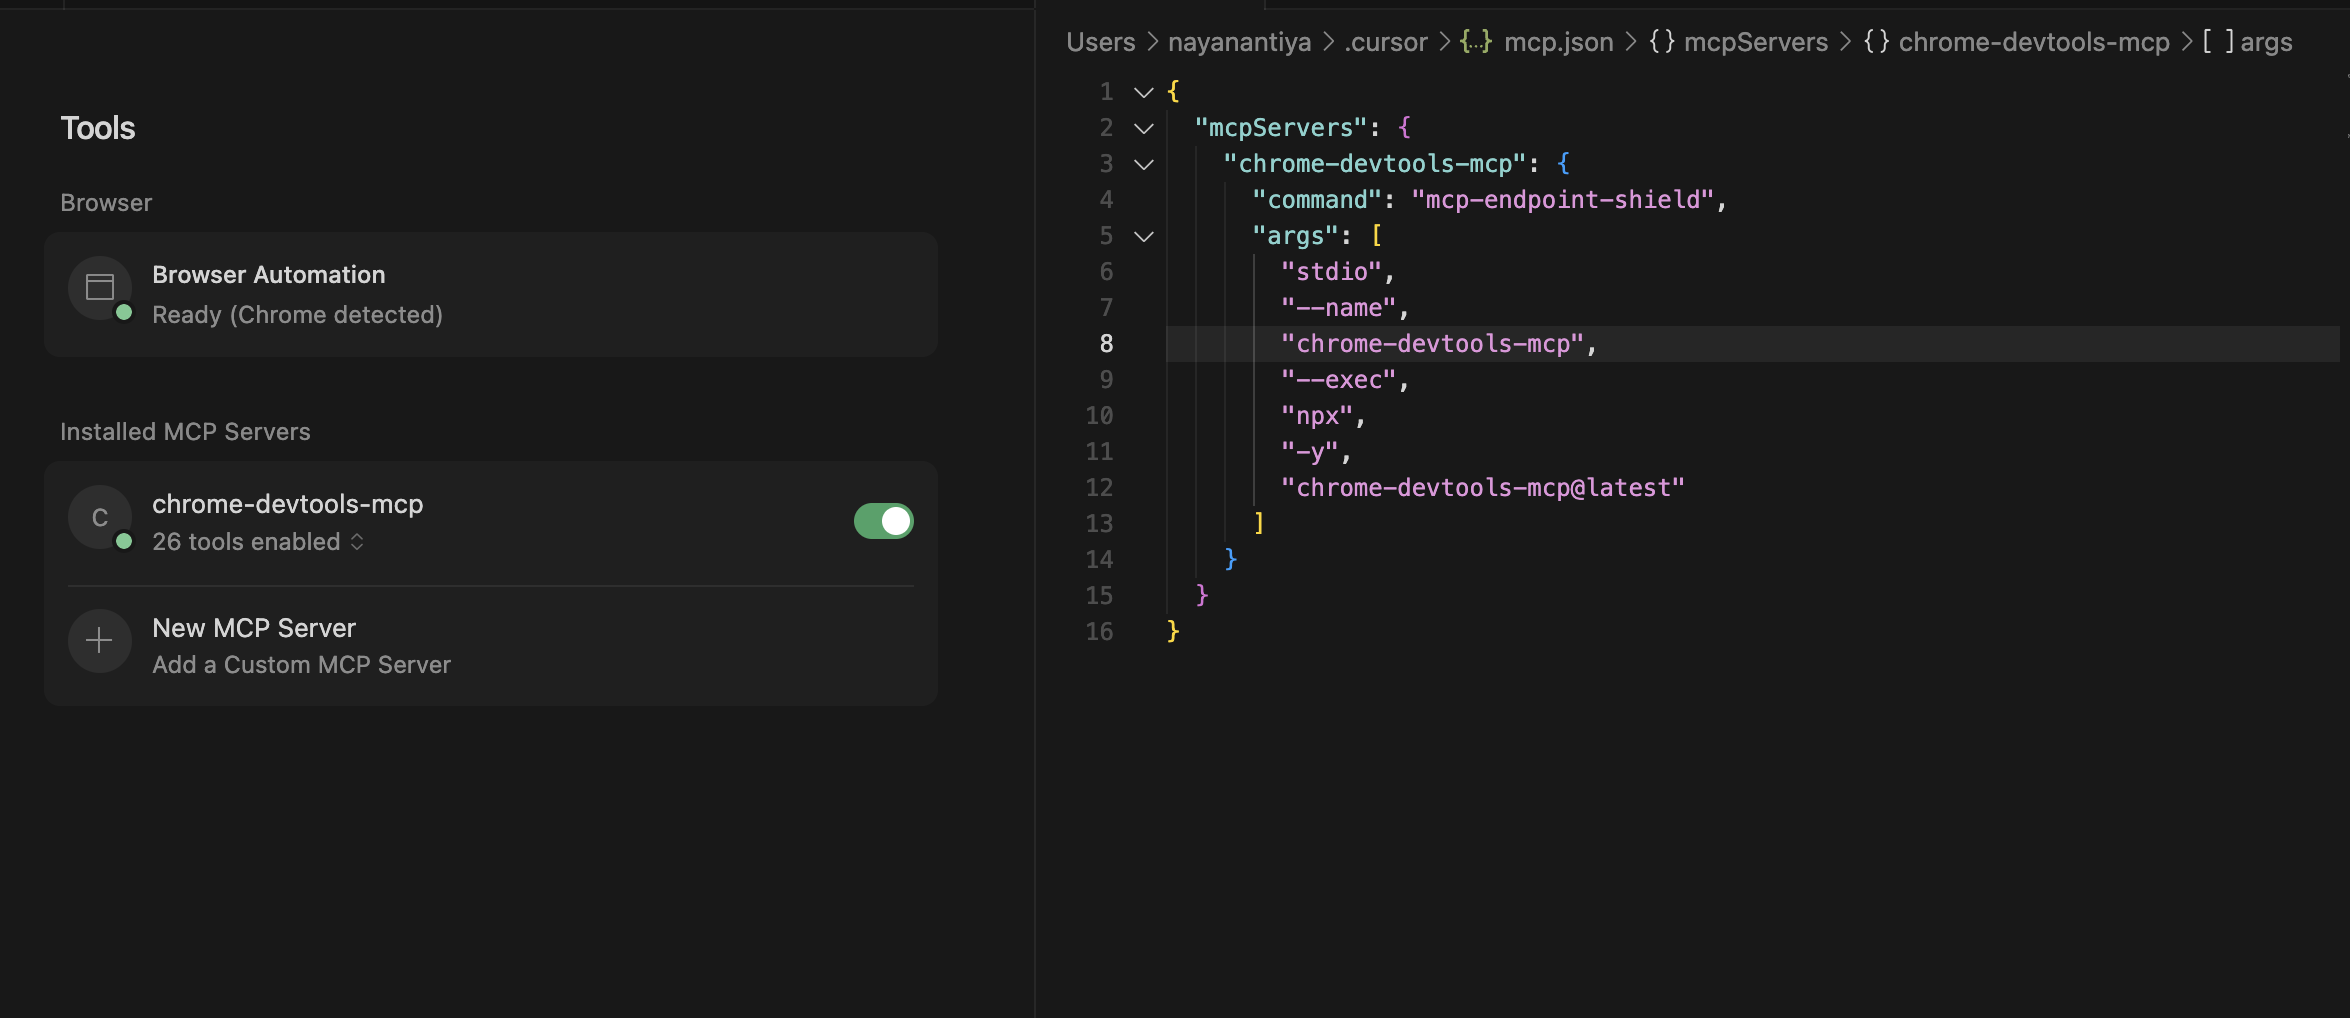
<figure><img src="https://2916937215-files.gitbook.io/~/files/v0/b/gitbook-x-prod.appspot.com/o/spaces%2FRc4KTKGprZI2sPWKoaLe%2Fuploads%2Fgit-blob-a71682de7c1df47b6a5ea827fc2bf83af6fde9ff%2Fmcp_endpoint_shield_example.png?alt=media" alt="" width="563"><figcaption></figcaption></figure>

**What changed:**

* `mcp-endpoint-shield` is now the entry command.
* Original server command (`npx -y chrome-devtools-mcp@latest`) is passed through `--exec`.

</details>

## Manual Setup

Follow these steps to manually set up and run AI Endpoint Shield to protect your MCP servers.

### Prerequisites

* You have the `mcp-endpoint-shield` binary available
* You have an Akto API token
* uninstall AI Endpoint Shield if installed previously using installers

{% stepper %}
{% step %}
**Set Your API Token**

Set the `AKTO_API_TOKEN` environment variable:

```bash
export AKTO_API_TOKEN="your-actual-token-here"
```

**Make it permanent** (optional):

* For **bash** users, add to `~/.bashrc`:

  ```bash
  echo 'export AKTO_API_TOKEN="your-actual-token-here"' >> ~/.bashrc
  source ~/.bashrc
  ```
* For **zsh** users, add to `~/.zshrc`:

  ```bash
  echo 'export AKTO_API_TOKEN="your-actual-token-here"' >> ~/.zshrc
  source ~/.zshrc
  ```

Verify it's set:

```bash
echo $AKTO_API_TOKEN
```

{% endstep %}

{% step %}
**Start the Agent**

The agent automatically discovers and protects your MCP servers.

```bash
./mcp-endpoint-shield agent
```

**Expected output:**

```
Starting akto agent...
Starting RunAgent...
Agent mode started. Press Ctrl+C to stop...
```

**Keep this terminal running.** The agent will:

* Find your MCP configuration files (Cursor, VS Code, Claude Desktop)
* Wrap your MCP servers with security
* Sync security policies from Akto backend
* Watch for changes and auto-update configs

{% hint style="info" %}
**Note:**

If you want the agent to run in the background, use:

<pre class="language-bash"><code class="lang-bash"><strong>nohup ./mcp-endpoint-shield agent > agent.log 2>&#x26;1 &#x26;
</strong></code></pre>

{% endhint %}
{% endstep %}

{% step %}
**Protecting Local MCP Servers (STDIO)**

**Option A: Let the Agent Wrap It (Recommended)**

If the agent is running (Step 2), it will **automatically** detect and wrap your config. Your MCP configuration will be automatically modified to route through the security shield.

<details>

<summary><strong>Example transformation</strong></summary>

Before:

```json
{
  "mcpServers": {
    "chrome-devtools": {
      "command": "npx",
      "args": ["-y", "chrome-devtools"]
    }
  }
}
```

After (automatic):

```json
{
  "mcpServers": {
    "chrome-devtools-endpoint-shield": {
      "command": "mcp-endpoint-shield",
      "args": [
        "stdio",
        "--name",
        "chrome-devtools",
        "--akto-api-token",
        "your-actual-token-here",
        "--exec",
        "npx",
        "-y",
        "chrome-devtools"
      ]
    }
  }
}
```

</details>

**Restart your MCP client** (Cursor/VS Code) to apply changes.

**Option B: Manual Wrapping (If Not Using Agent)**

If you're not running the agent, manually edit your MCP config file (e.g., `~/.cursor/mcp.json`):

**Key changes:**

1. Change `command` to the full path of `mcp-endpoint-shield`
2. Add `"stdio", "--name", "<server-name>", "--akto-api-token", "<your-token>", "--exec"` to the start of `args`
3. Place the original command (`npx`) and arguments (`-y`, `chrome-devtools`) after `--exec`

<details>

<summary><strong>Example transformation</strong></summary>

**Before:**

```json
{
  "mcpServers": {
    "chrome-devtools": {
      "command": "npx",
      "args": ["-y", "chrome-devtools"]
    }
  }
}
```

**After:**

```json
{
  "mcpServers": {
    "chrome-devtools": {
      "command": "/path/to/mcp-endpoint-shield",
      "args": [
        "stdio",
        "--name",
        "chrome-devtools",
        "--akto-api-token",
        "your-actual-token-here",
        "--exec",
        "npx",
        "-y",
        "chrome-devtools"
      ]
    }
  }
}
```

</details>

**Restart your MCP client** to apply changes.
{% endstep %}

{% step %}
**Protecting Remote MCP Servers (HTTP)**

For HTTP-based MCP servers, run the HTTP proxy in a **new terminal**:

```bash
export AKTO_API_TOKEN="your-actual-token-here"
./mcp-endpoint-shield http
```

**Expected output:**

```
Starting MCP HTTP Proxy on 127.0.0.1:57294
Project: default, Skip Threat: false
```

**Keep this terminal running.**

{% hint style="info" %}
**Note:** The proxy runs on port `57294` by default.
{% endhint %}

**Configure Your Remote MCP Server**

**Original config** (direct connection to remote server):

```json
{
  "mcpServers": {
    "remote-mcp": {
      "url": "https://remote-mcp-server.example.com/mcp",
      "headers": {
        "Authorization": "Basic <token>"
      }
    }
  }
}
```

**Protected config** (route through proxy):

```json
{
  "mcpServers": {
    "remote-mcp": {
      "url": "http://localhost:57294/mcp/streamable",
      "headers": {
        "Authorization": "Basic <token>",
        "mcp-server-base-url": "https://remote-mcp-server.example.com/mcp"
      }
    }
  }
}
```

**Key changes:**

1. Change `url` to `http://localhost:57294/mcp/streamable`
2. Keep your existing `Authorization` header (or any other headers)
3. Add new header `mcp-server-base-url` with the original remote server URL

The proxy will:

* Receive requests at `http://localhost:57294/mcp/streamable`
* Read the `mcp-server-base-url` header to know where to forward
* Apply security policies
* Forward to your actual remote MCP server
* Return the response back to your client

**Restart your MCP client** to apply changes.
{% endstep %}

{% step %}
**Verify Everything is Working**

* **Check Agent Status**

  Look at the agent terminal - you should see:

  ```
  Agent mode started. Press Ctrl+C to stop...
  ```

  No errors means it's working!
* **Check HTTP Proxy Status**

  Look at the proxy terminal:

  ```
  Starting MCP HTTP Proxy on 127.0.0.1:57294
  ```
* **Probe Your MCP Server**

  Open your MCP client (Cursor, VS Code, Claude Desktop) and try using your wrapped MCP server. It should work normally, but now with security protection.Step 4:
  {% endstep %}
  {% endstepper %}

## Quick Command Reference

**Terminal 1 - Agent:**

```bash
export AKTO_API_TOKEN="your-token"
./mcp-endpoint-shield agent
```

**Terminal 2 - HTTP Proxy:**

```bash
export AKTO_API_TOKEN="your-token"
./mcp-endpoint-shield http
```

**Get Help:**

```bash
./mcp-endpoint-shield help
```

This protects:

* **STDIO servers** (like `npx -y chrome-devtools`) via agent
* **HTTP servers** (remote MCP servers) via proxy

## Common Flags

* `--name <project_name>` → Friendly label used in logs and insights
* `--akto-api-token <token>` → Your Akto API token
* `--exec <command> [args...]` → Command to start your MCP server
* `--env KEY=VALUE` (repeatable) → Pass additional environment variables to the MCP process

## Logging

Based on Log File Locations, choose from the following:

### Manual Run

When you manually run `mcp-endpoint-shield`, logs are written to:

```
~/.akto-mcp-endpoint-shield/logs/
```

**Example:**

```bash
# If you wrapped a server with --name chrome-devtools
tail -f ~/.akto-mcp-endpoint-shield/logs/chrome-devtools.log

# View all logs
ls -la ~/.akto-mcp-endpoint-shield/logs/
tail -f ~/.akto-mcp-endpoint-shield/logs/*.log
```

### MacOS System Service (LaunchDaemon)

When installed and running as a system service on macOS:

* **Agent logs**

  ```
  /var/log/akto-mcp-endpoint-shield/agent.log
  /var/log/akto-mcp-endpoint-shield/agent-error.log
  ```
* **HTTP Proxy logs**

  ```
  /var/log/akto-mcp-endpoint-shield/proxy-server.log
  /var/log/akto-mcp-endpoint-shield/proxy-error.log
  ```
* **View logs**

  ```bash
  sudo tail -f /var/log/akto-mcp-endpoint-shield/*.log
  ```

### Linux System Service (systemd)

When installed and running as a systemd service on Linux:

* **Agent logs**

  ```
  /var/log/akto-mcp-endpoint-shield/agent.log
  ```
* **HTTP Proxy logs**

  ```
  /var/log/akto-mcp-endpoint-shield/proxy-server.log
  ```
* **View logs**

  ```bash
  # Direct log files
  sudo tail -f /var/log/akto-mcp-endpoint-shield/*.log

  # Via systemd journalctl
  sudo journalctl -u mcp-endpoint-shield-agent -f
  sudo journalctl -u mcp-endpoint-shield -f
  ```

### Windows

When AI Endpoint Shield runs on Windows, agent logs are stored in the user’s local application data directory:

```powershell
%LOCALAPPDATA%\akto-mcp-endpoint-shield\logs\
```

You can use this command to verify agent startup, inspect runtime errors, and confirm connectivity from the Windows endpoint.

### STDIO Wrapped MCP servers (Manual and Installer)

Each wrapped STDIO MCP server gets its own log file named after the `--name` attribute:

```
~/.akto-mcp-endpoint-shield/logs/<name>.log
```

## Troubleshooting

**Issue:** `AKTO_API_TOKEN is not set`

* **Cause**: Environment variable not configured.
* **Fix**: Set the token with `export AKTO_API_TOKEN="your-token"` and verify with `echo $AKTO_API_TOKEN`.

**Issue:** `Port already in use` (HTTP Proxy)

* **Cause**: Port 57294 is already being used by another process.
* **Fix 1**: Find and kill the process with `lsof -i :57294` and `kill -9 PID`.
* **Fix 2**: Use a different port with `./mcp-endpoint-shield http --port 8080` and update your config.

**Issue:** MCP server not working after wrapping

* **Cause**: Multiple possible causes.
* **Fix**:
  * Restart your MCP client,
  * Verify binary path with `which mcp-endpoint-shield`,
  * Check logs at `~/.akto-mcp-endpoint-shield/logs/` or `/var/log/akto-mcp-endpoint-shield/` (if installed using installer)
  * Test original command works standalone.

**Issue:** `permission denied: ./mcp-endpoint-shield` ➡

* **Cause**: Binary doesn't have execute permissions. ➡
* **Fix**: Run `chmod +x ./mcp-endpoint-shield`.

**Issue:** `command not found: mcp-endpoint-shield` ➡

* **Cause**: Binary not in PATH or wrong path used. ➡
* **Fix**: Use full path (`./mcp-endpoint-shield` or `/usr/local/bin/mcp-endpoint-shield`) or add to PATH with `export PATH=$PATH:/path/to/binary/directory`.

{% hint style="success" %}
**Akto Security Scope**

* **Transparency**: Safe traffic is never altered.
* **Clarity**: Unsafe traffic always results in a clear JSON-RPC error.
* **Minimal footprint**: Designed to stay invisible unless an issue occurs.
  {% endhint %}

## Get Support for your Akto setup

There are multiple ways to request support from Akto. We are 24X7 available on the following:

1. In-app `intercom` support. Message us with your query on intercom in Akto dashboard and someone will reply.
2. Join our [discord channel](https://www.akto.io/community) for community support.
3. Contact `support@akto.io` for email support.
4. Contact us [here](https://www.akto.io/contact-us).


# MDM Deployment

## Overview

Akto AI Endpoint Shield provides **enterprise-grade Mobile Device Management (MDM) support** for seamless deployment and centralized management across your organization's devices.

### Why MDM Integration Matters

In enterprise environments, manually configuring security tools on hundreds or thousands of developer machines is impractical. MDM support enables:

* **Zero-touch deployment** across all managed devices
* **Centralized configuration** and policy management
* **Automated updates** and patch management
* **Compliance enforcement** and audit trails
* **Remote monitoring** of security posture

### Supported MDM Platforms

Akto AI Endpoint Shield integrates with leading MDM solutions:

* ✅ **Microsoft Intune** (Windows, macOS)
* ✅ **Jamf Pro** (macOS, iOS)
* ✅ **Workspace ONE** (VMware)
* ✅ **Kandji** (macOS)
* ✅ **Mosyle** (Apple devices)
* ✅ **ManageEngine** (Cross-platform)
* ✅ **IBM MaaS360**
* ✅ **Automox** (Windows Worklets — see [Automox Deployment](/akto-atlas-agentic-ai-security-for-employee-endpoints/endpoints-discovery-agents/ai-endpoint-shield/automox-deployment))
* ✅ **Any standard MDM** supporting package deployment

### Key MDM Capabilities

**1. Automated Deployment**

* **Silent installation** without user interaction
* **Pre-configured API tokens** pushed via MDM profiles
* **Automatic service startup** on device enrollment
* **Version control** and automated updates

**2. Centralized Configuration**

* **Configuration profiles** for standard settings
* **Environment variables** managed via MDM
* **Policy enforcement** (blocking vs. monitoring mode)
* **Custom server lists** and whitelist management

**3. Compliance & Monitoring**

* **Health check reporting** back to MDM console
* **Installation verification** via scripts
* **Log collection** for security audits
* **Compliance dashboards** in Akto platform

## Prerequisites

* Active Akto account with API token
* MDM platform with package deployment capability
* Administrator access to MDM console
* AI Endpoint Shield installer package (.pkg for macOS, .msi for Windows, .deb for Linux)

## Step 1: Prepare the Installation Package

### **For macOS (Jamf Pro, Intune, Kandji)**

{% stepper %}
{% step %}
**Download the installer**

* Contact Akto Support to get `akto-mcp-endpoint-shield.pkg`
* The `.pkg` file is **signed and notarized** by Apple for secure installation
* **Developer ID:** Akto, Inc.
* **Notarization:** Apple-verified for Gatekeeper compatibility
* Upload to your MDM file repository

**Why signing and notarization matters:**

* ✅ **Passes Gatekeeper checks** on macOS 10.15+ without manual overrides
* ✅ **No security warnings** during installation
* ✅ **Compatible with MDM silent installs** (no user interaction required)
* ✅ **Trusted by Apple** - package integrity verified
* ✅ **Meets enterprise security policies** for managed devices
  {% endstep %}

{% step %}
**Create a configuration profile:**

```xml
<?xml version="1.0" encoding="UTF-8"?>
<!DOCTYPE plist PUBLIC "-//Apple//DTD PLIST 1.0//EN" "http://www.apple.com/DTDs/PropertyList-1.0.dtd">
<plist version="1.0">
<dict>
    <key>PayloadContent</key>
    <array>
        <dict>
            <key>PayloadType</key>
            <string>com.apple.ManagedClient.preferences</string>
            <key>PayloadIdentifier</key>
            <string>com.akto.mcp-endpoint-shield.config</string>
            <key>PayloadDisplayName</key>
            <string>Akto AI Endpoint Shield Configuration</string>
            <key>PayloadEnabled</key>
            <true/>
            <key>PayloadUUID</key>
            <string>GENERATE-UUID-HERE</string>
            <key>PayloadVersion</key>
            <integer>1</integer>
            <key>PayloadContent</key>
            <dict>
                <key>AKTO_API_TOKEN</key>
                <string>YOUR-AKTO-API-TOKEN-HERE</string>
                <key>AKTO_PROJECT_NAME</key>
                <string>default</string>
                <key>AKTO_SKIP_THREAT</key>
                <string>false</string>
            </dict>
        </dict>
    </array>
</dict>
</plist>
```

{% endstep %}

{% step %}
**Upload to MDM:**

* Navigate to **Configuration Profiles** section
* Upload the `.plist` configuration
* Assign to target device groups
  {% endstep %}
  {% endstepper %}

### **For Windows (MDM)**

{% hint style="success" %}
**Recommended:** Fleet deployment on Windows uses a **ZIP installer + PowerShell script** (`install.ps1`) with automatic updates from Akto-hosted storage. Works with any MDM that can run scripts as SYSTEM. See [**Windows MDM Deployment**](/akto-atlas-agentic-ai-security-for-employee-endpoints/endpoints-discovery-agents/ai-endpoint-shield/windows-mdm-deployment).
{% endhint %}

Summary:

* Akto provides `install.ps1`, `MANIFEST_URL`, and optional direct ZIP URL
* Upload the script to your MDM (run as **SYSTEM**, 64-bit PowerShell)
* Script parameters: `MANIFEST_URL`, optional `INSTALLER_URL`, `AKTO_API_TOKEN`, `AKTO_API_BASE_URL`
* Schedule daily for auto-update; no per-tenant installer build required

{% hint style="info" %}
**Automox:** For Automox Worklets (alternative Windows path), see [Automox Deployment](/akto-atlas-agentic-ai-security-for-employee-endpoints/endpoints-discovery-agents/ai-endpoint-shield/automox-deployment).
{% endhint %}

### **For Linux (Fleet, Canonical Landscape)**

{% stepper %}
{% step %}
**Download the installer:**

```bash
# Contact Akto Support for .deb or .rpm package
wget https://akto-releases.example.com/mcp-endpoint-shield_latest_amd64.deb
```

{% endstep %}

{% step %}
**Create deployment script:**

```bash
#!/bin/bash
# deploy-mcp-shield.sh

# Set environment variables
echo 'export AKTO_API_TOKEN="YOUR-AKTO-API-TOKEN"' >> /etc/environment
echo 'export AKTO_PROJECT_NAME="default"' >> /etc/environment

# Install package
dpkg -i akto-mcp-endpoint-shield_latest_amd64.deb

# Enable and start service
systemctl enable mcp-endpoint-shield-agent
systemctl start mcp-endpoint-shield-agent
systemctl enable mcp-endpoint-shield

# Verify
systemctl is-active mcp-endpoint-shield-agent
```

{% endstep %}

{% step %}
**Deploy via MDM:**

* Use your MDM's script execution capability
* Schedule deployment to target device groups
* Set execution frequency (one-time for new devices)
  {% endstep %}
  {% endstepper %}

## Step 2: Configure Auto-Discovery Settings

The agent will automatically discover and protect MCP servers. However, you can customize behavior via MDM-managed configuration files.

#### **Create Custom Policy File**

**Location:** `/etc/akto-mcp-endpoint-shield/policy.json` (Linux/macOS) or `C:\ProgramData\Akto\mcp-endpoint-shield\policy.json` (Windows)

**Example policy:**

```json
{
  "autoDiscovery": {
    "enabled": true,
    "clients": ["cursor", "vscode", "claude"],
    "autoWrap": true
  },
  "security": {
    "blockUnsafe": true,
    "logLevel": "info",
    "auditMode": false
  },
  "allowlist": {
    "servers": [
      "filesystem",
      "postgres",
      "brave-search"
    ]
  },
  "notifications": {
    "webhook": "https://your-company.com/security-alerts",
    "emailAlerts": true
  }
}
```

#### **Deploy Policy via MDM**

**For Jamf:**

```bash
#!/bin/bash
# Deploy as a policy script
mkdir -p /etc/akto-mcp-endpoint-shield
cat > /etc/akto-mcp-endpoint-shield/policy.json << 'EOF'
{
  "autoDiscovery": {"enabled": true, "clients": ["cursor", "vscode", "claude"], "autoWrap": true},
  "security": {"blockUnsafe": true, "logLevel": "info"}
}
EOF
chmod 644 /etc/akto-mcp-endpoint-shield/policy.json
```

**For Intune:**

* Create a **Device Configuration Profile**
* Use **Custom Settings** for file deployment
* Upload `policy.json` to target path

## Step 3: Deploy to Target Devices

#### **Scope Configuration**

**Define device groups:**

* **Engineering\_Developers** → Full deployment with auto-wrap enabled
* **Security\_Team** → Deployment with audit mode enabled
* **Contractors** → Strict blocking mode with limited allowlist

**Example Jamf Smart Group:**

```
Criteria:
- Department is "Engineering"
- Operating System like "macOS 13%"
- Application Title has "Cursor" OR "Visual Studio Code"
```

#### **Deployment Schedule**

**Staged rollout recommended:**

1. **Pilot group** (10-20 users) → Week 1
2. **Early adopters** (100 users) → Week 2
3. **Full deployment** → Week 3+

**Installation Command Examples**

* **Jamf:**

  ```bash
  sudo installer -pkg /path/to/akto-mcp-endpoint-shield.pkg -target /
  ```
* **Intune:**

  ```powershell
  msiexec /i akto-mcp-endpoint-shield.msi /qn /norestart AKTO_API_TOKEN="YOUR-TOKEN"
  ```
* **Fleet:**

  ```bash
  dpkg -i akto-mcp-endpoint-shield.deb && systemctl enable --now mcp-endpoint-shield-agent
  ```

## Step 4: Verify Deployment Status

#### **Check Installation via MDM Console**

{% tabs %}
{% tab title="For Jamf Pro" %}

1. Navigate to **Computers** → **Inventory**
2. Search for application: `Akto AI Endpoint Shield`
3. View **Installation Status** and **Version**
   {% endtab %}

{% tab title="For Microsoft Intune:" %}

1. Go to **Apps** → **All apps** → `Akto AI Endpoint Shield`
2. Check **Device install status**
3. Review **Installation errors** if any
   {% endtab %}
   {% endtabs %}

**Automated Health Check Script**

Deploy this script via MDM to verify installation:

{% tabs %}
{% tab title="macOS/Linux" %}

```bash
#!/bin/bash
# health-check-mcp-shield.sh

# Check if binary exists
if [ ! -f "/usr/local/bin/mcp-endpoint-shield" ]; then
    echo "ERROR: Binary not found"
    exit 1
fi

# Check if agent is running
if ! pgrep -f "mcp-endpoint-shield agent" > /dev/null; then
    echo "ERROR: Agent not running"
    exit 1
fi

# Check configuration
if [ ! -f "$HOME/.akto-mcp-endpoint-shield/logs/agent.log" ]; then
    echo "WARNING: No agent logs found"
    exit 2
fi

# Check API token
if [ -z "$AKTO_API_TOKEN" ]; then
    echo "ERROR: API token not set"
    exit 1
fi

echo "SUCCESS: MCP Shield is properly configured"
exit 0
```

{% endtab %}

{% tab title="Windows" %}

```powershell
# health-check-mcp-shield.ps1
$ErrorActionPreference = "Stop"

# Check service
$service = Get-Service -Name "MCP-Endpoint-Shield" -ErrorAction SilentlyContinue
if ($service.Status -ne "Running") {
    Write-Output "ERROR: Service not running"
    exit 1
}

# Check API token
$token = [System.Environment]::GetEnvironmentVariable("AKTO_API_TOKEN", [System.EnvironmentVariableTarget]::Machine)
if ([string]::IsNullOrEmpty($token)) {
    Write-Output "ERROR: API token not configured"
    exit 1
}

Write-Output "SUCCESS: MCP Shield is properly configured"
exit 0
```

{% endtab %}
{% endtabs %}

#### **Schedule in MDM:**

* **Frequency:** Daily
* **Remediation:** Auto-restart service if failed
* **Alerting:** Notify security team on repeated failures

## Step 5: Monitor and Maintain

#### **Centralized Logging**

**Configure log forwarding to SIEM:**

**For Splunk:**

```conf
# /opt/splunkforwarder/etc/apps/akto-mcp/inputs.conf
[monitor:///var/log/akto-mcp-endpoint-shield/*.log]
disabled = false
index = security
sourcetype = akto:mcp:shield
```

**For Azure Sentinel:**

```json
{
  "type": "CustomLogs",
  "customLogName": "AktoMCPShield",
  "path": "/var/log/akto-mcp-endpoint-shield/*.log",
  "recordDelimiter": "\n",
  "parseTimestamp": true
}
```

#### **Update Management**

**Automatic updates via MDM:**

**Jamf Patch Management:**

1. Subscribe to Akto MCP Shield patch definition
2. Set auto-update policy: **Install updates within 7 days**
3. Test updates on pilot group first

**Intune Update Ring:**

```powershell
# update-mcp-shield.ps1
$latestVersion = "1.2.3"  # Fetched from Akto release API
$installedVersion = (Get-ItemProperty HKLM:\Software\Akto\MCPShield).Version

if ($installedVersion -lt $latestVersion) {
    Start-Process msiexec.exe -ArgumentList "/i akto-mcp-endpoint-shield-$latestVersion.msi /quiet /norestart" -Wait
}
```

#### **Compliance Reporting**

**Key metrics to track:**

* Installation success rate (target: >95%)
* Agent uptime (target: >99%)
* Policy violations detected per device
* Blocked threats count
* Configuration drift incidents

**View in Akto Dashboard:**

* Navigate to **MCP Shield** → **Enterprise Console**
* Filter by MDM deployment group
* Export compliance reports for audits

#### 🔍 Auto-Detection

Akto AI Endpoint Shield automatically detects MCP client configurations:

* **Cursor** → Reads `~/.cursor/mcp.json`
* **Visual Studio Code** → Reads `.vscode/mcp.json` inside your workspace
* **Claude Desktop** → Reads Claude’s MCP config JSON

For each detected MCP server config:

1. The JSON file is parsed.
2. Each server entry is automatically wrapped with **Akto AI Endpoint Shield**.
3. Your MCP clients transparently run through the shield without requiring manual reconfiguration.

👉 You don’t need to manually edit your MCP config files — the wrapper handles this for you.

<details>

<summary>📄 Example — Cursor mcp.json</summary>

**Original file (before wrapping):**

```json
{
  "mcpServers": {
    "chrome-devtools-mcp": {
      "command": "npx",
      "args": [
        "-y"
        "chrome-devtools-mcp@latest"
      ]
    }
  }
}
```

**Automatically wrapped file (after Akto AI Endpoint Shield):**

```json
{
  "mcpServers": {
    "chrome-devtools-mcp": {
      "command": "mcp-endpoint-shield",
      "args": [
        "stdio",
        "--name",
        "chrome-devtools-mcp",
        "--exec",
        "npx",
        "-y",
        "chrome-devtools-mcp@latest"
      ]
    }
  }
}
```

<figure><img src="https://2916937215-files.gitbook.io/~/files/v0/b/gitbook-x-prod.appspot.com/o/spaces%2FRc4KTKGprZI2sPWKoaLe%2Fuploads%2Fgit-blob-a71682de7c1df47b6a5ea827fc2bf83af6fde9ff%2Fmcp_endpoint_shield_example.png?alt=media" alt=""><figcaption></figcaption></figure>

**What changed:**

* `mcp-endpoint-shield` is now the entry command.
* Original server command (`npx -y chrome-devtools-mcp@latest`) is passed through `--exec`.

</details>

## 🔧 Manual Setup

Follow these steps to manually set up and run AI Endpoint Shield to protect your MCP servers.

### Prerequisites

* You have the `mcp-endpoint-shield` binary available
* You have an Akto API token
* uninstall AI Endpoint Shield if installed previously using installers

{% stepper %}
{% step %}
**Set Your API Token**

Set the `AKTO_API_TOKEN` environment variable:

```bash
export AKTO_API_TOKEN="your-actual-token-here"
```

**Make it permanent** (optional):

For **bash** users, add to `~/.bashrc`:

```bash
echo 'export AKTO_API_TOKEN="your-actual-token-here"' >> ~/.bashrc
source ~/.bashrc
```

For **zsh** users, add to `~/.zshrc`:

```bash
echo 'export AKTO_API_TOKEN="your-actual-token-here"' >> ~/.zshrc
source ~/.zshrc
```

Verify it's set:

```bash
echo $AKTO_API_TOKEN
```

{% endstep %}

{% step %}
**Start the Agent**

The agent automatically discovers and protects your MCP servers.

```bash
./mcp-endpoint-shield agent
```

**Expected output:**

```
Starting akto agent...
Starting RunAgent...
Agent mode started. Press Ctrl+C to stop...
```

**Keep this terminal running.** The agent will:

* Find your MCP configuration files (Cursor, VS Code, Claude Desktop)
* Wrap your MCP servers with security
* Sync security policies from Akto backend
* Watch for changes and auto-update configs

{% hint style="info" %}
**Note**

If you want the agent to run in the background, use:

```bash
nohup ./mcp-endpoint-shield agent > agent.log 2>&1 &
```

{% endhint %}
{% endstep %}

{% step %}
**Protecting Local MCP Servers (STDIO)**

{% tabs %}
{% tab title="Option A:  Agent Wrapping (Recommended)" %}
**Let the Agent Wrap It (Recommended)**

If the agent is running (Step 2), it will **automatically** detect and wrap your config. Your MCP configuration will be automatically modified to route through the security shield.

**Example transformation:**

Before:

```json
{
  "mcpServers": {
    "chrome-devtools": {
      "command": "npx",
      "args": ["-y", "chrome-devtools"]
    }
  }
}
```

After (automatic):

```json
{
  "mcpServers": {
    "chrome-devtools-endpoint-shield": {
      "command": "mcp-endpoint-shield",
      "args": [
        "stdio",
        "--name",
        "chrome-devtools",
        "--akto-api-token",
        "your-actual-token-here",
        "--exec",
        "npx",
        "-y",
        "chrome-devtools"
      ]
    }
  }
}
```

**Restart your MCP client** (Cursor/VS Code) to apply changes.
{% endtab %}

{% tab title="Option B: Manual Wrapping" %}
**Manual Wrapping (If Not Using Agent)**

If you're not running the agent, manually edit your MCP config file (e.g., `~/.cursor/mcp.json`):

**Before:**

```json
{
  "mcpServers": {
    "chrome-devtools": {
      "command": "npx",
      "args": ["-y", "chrome-devtools"]
    }
  }
}
```

**After:**

```json
{
  "mcpServers": {
    "chrome-devtools": {
      "command": "/path/to/mcp-endpoint-shield",
      "args": [
        "stdio",
        "--name",
        "chrome-devtools",
        "--akto-api-token",
        "your-actual-token-here",
        "--exec",
        "npx",
        "-y",
        "chrome-devtools"
      ]
    }
  }
}
```

**Key changes:**

1. Change `command` to the full path of `mcp-endpoint-shield`
2. Add `"stdio", "--name", "<server-name>", "--akto-api-token", "<your-token>", "--exec"` to the start of `args`
3. Place the original command (`npx`) and arguments (`-y`, `chrome-devtools`) after `--exec`

**Restart your MCP client** to apply changes.
{% endtab %}
{% endtabs %}
{% endstep %}

{% step %}
**Protecting Remote MCP Servers (HTTP)**

For HTTP-based MCP servers, run the HTTP proxy in a **new terminal**:

```bash
export AKTO_API_TOKEN="your-actual-token-here"
./mcp-endpoint-shield http
```

**Expected output:**

```
Starting MCP HTTP Proxy on 127.0.0.1:57294
Project: default, Skip Threat: false
```

**Keep this terminal running.**

{% hint style="info" %}
**Note:** The proxy runs on port `57294` by default.
{% endhint %}

**Configure Your Remote MCP Server**

**Original config** (direct connection to remote server):

```json
{
  "mcpServers": {
    "remote-mcp": {
      "url": "https://remote-mcp-server.example.com/mcp",
      "headers": {
        "Authorization": "Basic <token>"
      }
    }
  }
}
```

**Protected config** (route through proxy):

```json
{
  "mcpServers": {
    "remote-mcp": {
      "url": "http://localhost:57294/mcp/streamable",
      "headers": {
        "Authorization": "Basic <token>",
        "mcp-server-base-url": "https://remote-mcp-server.example.com/mcp"
      }
    }
  }
}
```

**Key changes:**

1. Change `url` to `http://localhost:57294/mcp/streamable`
2. Keep your existing `Authorization` header (or any other headers)
3. Add new header `mcp-server-base-url` with the original remote server URL

The proxy will:

* Receive requests at `http://localhost:57294/mcp/streamable`
* Read the `mcp-server-base-url` header to know where to forward
* Apply security policies
* Forward to your actual remote MCP server
* Return the response back to your client

**Restart your MCP client** to apply changes.
{% endstep %}

{% step %}
**Verify Everything is Working**

**Check Agent Status**

Look at the agent terminal - you should see:

```
Agent mode started. Press Ctrl+C to stop...
```

No errors means it's working!

**Check HTTP Proxy Status**

Look at the proxy terminal:

```
Starting MCP HTTP Proxy on 127.0.0.1:57294
```

**Probe Your MCP Server**

Open your MCP client (Cursor, VS Code, Claude Desktop) and try using your wrapped MCP server. It should work normally, but now with security protection.
{% endstep %}
{% endstepper %}

{% hint style="success" %}
**⚙️ Common Flags**

* `--name <project_name>` → Friendly label used in logs and insights
* `--akto-api-token <token>` → Your Akto API token
* `--exec <command> [args...]` → Command to start your MCP server
* `--env KEY=VALUE` (repeatable) → Pass additional environment variables to the MCP process
  {% endhint %}

## Quick Command Reference

* **Terminal 1 - Agent:**

  ```bash
  export AKTO_API_TOKEN="your-token"
  ./mcp-endpoint-shield agent
  ```
* **Terminal 2 - HTTP Proxy:**

  ```bash
  export AKTO_API_TOKEN="your-token"
  ./mcp-endpoint-shield http
  ```
* **Get Help:**

  ```bash
  ./mcp-endpoint-shield help
  ```

This protects:

* **STDIO servers** (like `npx -y chrome-devtools`) via agent
* **HTTP servers** (remote MCP servers) via proxy

{% hint style="info" %}
**🔐 Enterprise Best Practices for MDM Deployments**

**1. Token Management**

* **Use dedicated service accounts** for API tokens
* **Rotate tokens every 90 days** via automated scripts
* **Store tokens in MDM secrets vault** (e.g., Azure Key Vault, AWS Secrets Manager)
* **Never hardcode tokens** in configuration files

**2. Network Considerations**

* **Allow outbound HTTPS** to `*.akto.io` on port 443
* **Whitelist proxy settings** if using corporate proxy
* **Configure firewall rules** for HTTP proxy (port 57294)
* **Use VPN** for remote workers

**3. User Communication**

* **Pre-deployment announcement** explaining the security enhancement
* **Documentation** with FAQs and support contact
* **Training sessions** for power users
* **Feedback channel** for reporting issues

**4. Rollback Strategy**

* **Keep previous version** available in MDM repository
* **Test rollback procedure** on pilot devices
* **Document rollback steps** for IT helpdesk
* **Monitor for issues** during first 48 hours post-deployment

**5. Compliance & Auditing**

* **Enable comprehensive logging** (audit mode initially)
* **Integrate with SIEM** for security monitoring
* **Schedule regular compliance reviews** (monthly)
* **Document security incidents** and response actions
  {% endhint %}

## 🧩 Troubleshooting

**Issue:** `AKTO_API_TOKEN is not set` ➡ Cause: Environment variable not configured. ➡ Fix: Set the token with `export AKTO_API_TOKEN="your-token"` and verify with `echo $AKTO_API_TOKEN`.

**Issue:** `Port already in use` (HTTP Proxy) ➡ Cause: Port 57294 is already being used by another process. ➡ Fix 1: Find and kill the process with `lsof -i :57294` and `kill -9 PID`. ➡ Fix 2: Use a different port with `./mcp-endpoint-shield http --port 8080` and update your config.

**Issue:** MCP server not working after wrapping ➡ Cause: Multiple possible causes. ➡ Fix:

1. Restart your MCP client,
2. Verify binary path with `which mcp-endpoint-shield`,
3. Check logs at `~/.akto-mcp-endpoint-shield/logs/` or `/var/log/akto-mcp-endpoint-shield/` (if installed using installer)
4. Test original command works standalone.

**Issue:** `permission denied: ./mcp-endpoint-shield` ➡ Cause: Binary doesn't have execute permissions. ➡ Fix: Run `chmod +x ./mcp-endpoint-shield`.

**Issue:** `command not found: mcp-endpoint-shield` ➡ Cause: Binary not in PATH or wrong path used. ➡ Fix: Use full path (`./mcp-endpoint-shield` or `/usr/local/bin/mcp-endpoint-shield`) or add to PATH with `export PATH=$PATH:/path/to/binary/directory`.

{% hint style="success" %}
**🔒 Guarantees**

* ✅ **Transparency**: Safe traffic is never altered.
* ✅ **Clarity**: Unsafe traffic always results in a clear JSON-RPC error.
* ✅ **Minimal footprint**: Designed to stay invisible unless an issue occurs.
  {% endhint %}

## Get Support

There are multiple ways to request support from Akto. We are 24X7 available on the following:

1. In-app `intercom` support. Message us with your query on intercom in Akto dashboard and someone will reply.
2. Join our [discord channel](https://www.akto.io/community) for community support.
3. Contact `support@akto.io` for email support.
4. Contact us [here](https://www.akto.io/contact-us).


# Automox Deployment

Deploy Akto Endpoint Shield on Windows endpoints using an Automox Worklet policy with a customer-specific Inno Setup installer.

Deploy **Akto Endpoint Shield** to Windows laptops via an Automox **Worklet** policy. The policy checks each device and silently installs or repairs the shield when needed — no user action required.

{% hint style="info" %}
Akto ships an **Inno Setup `.exe`** (not MSI). Use a Worklet with a file payload. Start from **Automate → Worklet Catalog → EXE Software Installation (System Wide-All Users)** or create a custom Windows Worklet.
{% endhint %}

### Important: Automox runs as SYSTEM

The installer writes `config.env` to the **SYSTEM** profile. The agent reads it from the **logged-in user's** profile. The remediation script copies config to every user profile and restarts agent tasks — this is required for the agent to authenticate.

## Prerequisites

* Automox account with Worklet policy permissions
* Windows 10/11 (64-bit) devices enrolled in Automox
* Customer-specific installer from Akto (token embedded at build time)
* Network access to `https://*.akto.io` and `https://ultron.akto.io`

Email **<support@akto.io>** with your Akto account ID, API token, and target version to request the installer.

## Deployment Steps

{% stepper %}
{% step %}

#### Get the installer

Akto provides `akto-endpoint-shield-setup-<version>.exe` (or a customer-named build). Note the **exact file name** — you will use it in the remediation script.
{% endstep %}

{% step %}

#### Create the Worklet policy

1. **Automate → Worklet Catalog → EXE Software Installation (System Wide-All Users)** → **Create Policy**\
   Or: **Automate → Policies → Create Policy → Worklet → Windows**
2. **Info tab:** Set policy name, OS = Windows, target device group(s). Pilot a small group first.

<div data-with-frame="true"><figure><img src="/files/RJZAdboJr2onbAEY1E8d" alt="Automox policy info" width="563"><figcaption><p>Policy Info — name, OS, and device groups</p></figcaption></figure></div>

3. **Payload:** Upload your `.exe` installer.
4. **Schedule:** Run once for pilot, then recurring for production. Enable *run on next check-in* for offline devices. Do **not** restart devices after worklet completion.
   {% endstep %}

{% step %}

#### Evaluation code

Paste into **Evaluation Code** only. Exit `0` = compliant, exit `1` = run remediation.

{% hint style="danger" %}
Paste **only** the PowerShell lines — not markdown fences. Evaluation and remediation are separate fields and separate processes.
{% endhint %}

```powershell
# Akto Endpoint Shield - Evaluation
# Exit 0 = compliant, Exit 1 = needs remediation

$pf64 = ${env:ProgramW6432}
if (-not $pf64) { $pf64 = "C:\Program Files" }

$binCandidates = @(
  (Join-Path $pf64 "Akto Endpoint Shield\akto-endpoint-shield.exe")
  (Join-Path $pf64 "MCP Endpoint Shield\akto-endpoint-shield.exe")
)
$binPath = $binCandidates | Where-Object { Test-Path -LiteralPath $_ } | Select-Object -First 1

$arp = Get-ItemProperty "HKLM:\SOFTWARE\Microsoft\Windows\CurrentVersion\Uninstall\*" -ErrorAction SilentlyContinue |
  Where-Object { $_.DisplayName -like "*Endpoint*Shield*" -or $_.DisplayName -like "*Akto*Endpoint*" }

$agentTask = Get-ScheduledTask -TaskName "MCPEndpointShieldAgent" -ErrorAction SilentlyContinue

$userHasToken = $false
$agentHealthy = $true
Get-CimInstance Win32_UserProfile -ErrorAction SilentlyContinue | ForEach-Object {
  if ($_.Special -or -not $_.LocalPath) { return }
  if ($_.SID -notmatch '^S-1-5-21-') { return }
  $userCfg = Join-Path $_.LocalPath ".akto-endpoint-shield\config\config.env"
  if ((Test-Path -LiteralPath $userCfg) -and (Select-String -LiteralPath $userCfg -Pattern '^AKTO_API_TOKEN=' -Quiet)) {
    $userHasToken = $true
    $agentLog = Join-Path $_.LocalPath "AppData\Local\akto-endpoint-shield\logs\agent.log"
    if (-not (Test-Path -LiteralPath $agentLog)) {
      $agentHealthy = $false
      return
    }
    $startupLine = Select-String -LiteralPath $agentLog -Pattern "startup env" -ErrorAction SilentlyContinue |
      Select-Object -Last 1
    if (-not $startupLine) {
      $agentHealthy = $false
      return
    }
    if ($startupLine.Line -match 'AKTO_API_TOKEN.*\(not set\)') {
      $agentHealthy = $false
      return
    }
    $cfgTime = (Get-Item -LiteralPath $userCfg).LastWriteTime
    $logTime = (Get-Item -LiteralPath $agentLog).LastWriteTime
    if ($cfgTime -gt $logTime) {
      $agentHealthy = $false
    }
  }
}

if ($binPath -and $arp -and $agentTask -and $userHasToken -and $agentHealthy) {
  Write-Output "Compliant: $binPath"
  exit 0
}

Write-Output "Non-compliant. binary=$([bool]$binPath) task=$([bool]$agentTask) userToken=$userHasToken agentHealthy=$agentHealthy"
exit 1
```

<div data-with-frame="true"><figure><img src="/files/84QR1LuG52ctC7dIdFyd" alt="Automox evaluation code" width="563"><figcaption><p>Payload and Evaluation Code</p></figcaption></figure></div>
{% endstep %}

{% step %}

#### Remediation code

Paste into **Remediation Code** only. Set `$fileName` to match your uploaded installer exactly.

```powershell
# Akto Endpoint Shield - Remediation (install + config propagation)

$fileName  = "akto-endpoint-shield-setup-1.1.5.exe"
$arguments = "/VERYSILENT /SUPPRESSMSGBOXES /NORESTART /SP- /LOG=C:\Windows\Temp\akto-endpoint-shield-install.log"

$pf64 = ${env:ProgramW6432}
if (-not $pf64) { $pf64 = "C:\Program Files" }

$bin1 = Join-Path $pf64 "Akto Endpoint Shield\akto-endpoint-shield.exe"
$bin2 = Join-Path $pf64 "MCP Endpoint Shield\akto-endpoint-shield.exe"

$systemCfgCandidates = @(
  (Join-Path ${env:WINDIR} "Sysnative\config\systemprofile\.akto-endpoint-shield\config\config.env")
  (Join-Path $env:SystemRoot "System32\config\systemprofile\.akto-endpoint-shield\config\config.env")
)
$systemCfg = $null
foreach ($candidate in $systemCfgCandidates) {
  if (Test-Path -LiteralPath $candidate) { $systemCfg = $candidate; break }
}
if (-not $systemCfg) { $systemCfg = $systemCfgCandidates[0] }

$binPath = $null
if (Test-Path -LiteralPath $bin1) { $binPath = $bin1 }
elseif (Test-Path -LiteralPath $bin2) { $binPath = $bin2 }

if (-not $binPath) {
  $sPath = Split-Path $script:MyInvocation.MyCommand.Path -Parent
  $fPath = Join-Path $sPath $fileName
  if (-not (Test-Path -LiteralPath $fPath)) {
    Write-Error "Installer not found: $fPath"
    exit 1
  }
  Write-Output "Running: $fPath $arguments"
  $p = Start-Process -FilePath $fPath -ArgumentList $arguments -Wait -PassThru
  if ($null -eq $p -or $p.ExitCode -ne 0) {
    Write-Error "Installer failed. ExitCode=$($p.ExitCode)"
    exit 1
  }
  $deadline = (Get-Date).AddMinutes(5)
  do {
    if (Test-Path -LiteralPath $bin1) { $binPath = $bin1; break }
    if (Test-Path -LiteralPath $bin2) { $binPath = $bin2; break }
    Start-Sleep -Seconds 15
  } while ((Get-Date) -lt $deadline)
  if (-not $binPath) {
    Write-Error "Binary missing after install. Checked: $bin1 ; $bin2"
    if (Test-Path "C:\Windows\Temp\akto-endpoint-shield-install.log") {
      Get-Content "C:\Windows\Temp\akto-endpoint-shield-install.log" -Tail 30
    }
    exit 1
  }
  Write-Output "Installed: $binPath"
  foreach ($candidate in $systemCfgCandidates) {
    if (Test-Path -LiteralPath $candidate) { $systemCfg = $candidate; break }
  }
}
else {
  Write-Output "Binary present: $binPath - running config sync"
  if (-not (Test-Path -LiteralPath $systemCfg)) {
    $sPath = Split-Path $script:MyInvocation.MyCommand.Path -Parent
    $fPath = Join-Path $sPath $fileName
    if (Test-Path -LiteralPath $fPath) {
      Write-Output "SYSTEM config missing - re-running installer"
      $p = Start-Process -FilePath $fPath -ArgumentList $arguments -Wait -PassThru
      if ($null -eq $p -or $p.ExitCode -ne 0) {
        Write-Error "Installer failed. ExitCode=$($p.ExitCode)"
        exit 1
      }
      Start-Sleep -Seconds 30
      foreach ($candidate in $systemCfgCandidates) {
        if (Test-Path -LiteralPath $candidate) { $systemCfg = $candidate; break }
      }
    }
  }
}

if (-not (Test-Path -LiteralPath $systemCfg)) {
  Write-Error "SYSTEM config missing. Checked: $($systemCfgCandidates -join ' ; ')"
  exit 1
}

Write-Output "Using SYSTEM config: $systemCfg"

$configContent = Get-Content -LiteralPath $systemCfg -Raw
$configContent = $configContent.TrimEnd()

Get-CimInstance Win32_UserProfile -ErrorAction SilentlyContinue | ForEach-Object {
  if ($_.Special -or -not $_.LocalPath) { return }
  if ($_.SID -notmatch '^S-1-5-21-') { return }
  if (-not (Test-Path -LiteralPath $_.LocalPath)) { return }

  $userCfg = Join-Path $_.LocalPath ".akto-endpoint-shield\config\config.env"
  $cfgDir = Split-Path -Parent $userCfg
  if (-not (Test-Path -LiteralPath $cfgDir)) {
    New-Item -ItemType Directory -Path $cfgDir -Force | Out-Null
  }

  $out = $configContent
  if (Test-Path -LiteralPath $userCfg) {
    $agentId = Get-Content -LiteralPath $userCfg -ErrorAction SilentlyContinue |
      Where-Object { $_ -match '^AGENT_ID=' } | Select-Object -First 1
    if ($agentId -and ($out -notlike "*AGENT_ID=*")) {
      $out = $out + [Environment]::NewLine + $agentId
    }
  }

  Set-Content -LiteralPath $userCfg -Value $out -Encoding UTF8
  Write-Output "Synced config: $userCfg"
}

$taskNames = @("MCPEndpointShieldAgent", "MCPEndpointShieldHTTP", "MCPEndpointShieldDetector")
foreach ($taskName in $taskNames) {
  $task = Get-ScheduledTask -TaskName $taskName -ErrorAction SilentlyContinue
  if (-not $task) {
    Write-Output "Task not found (skipped): $taskName"
    continue
  }
  try {
    Stop-ScheduledTask -TaskName $taskName -ErrorAction SilentlyContinue
    Start-Sleep -Seconds 3
    Start-ScheduledTask -TaskName $taskName -ErrorAction Stop
    Write-Output "Restarted: $taskName"
  }
  catch {
    & schtasks.exe /End /TN $taskName 2>$null | Out-Null
    Start-Sleep -Seconds 3
    & schtasks.exe /Run /TN $taskName 2>$null | Out-Null
    Write-Output "Restarted via schtasks: $taskName"
  }
}

Write-Output "Success: $binPath (config propagated; tasks restarted)"
exit 0
```

{% hint style="warning" %}
Update `$fileName` to your uploaded installer (e.g. `Akto-Endpoint-Shield-Comscore-1.1.5.exe`). Do not use `-Verb RunAs` — the worklet already runs as SYSTEM.
{% endhint %}
{% endstep %}

{% step %}

#### Save and run

**Save Policy**, then **Run Policy** on a pilot device.

In **Activity Log**, confirm:

* `Installed:` or `Binary present:`
* `Synced config:`
* `Restarted: MCPEndpointShieldAgent`
* Final line: `Compliant: ...` on the next evaluation run
  {% endstep %}
  {% endstepper %}

## Verify (optional)

On a device, confirm tasks are running and the agent has a token:

```powershell
Get-ScheduledTask -TaskName "MCPEndpointShield*" | Format-Table TaskName, State
Select-String -Path "$env:USERPROFILE\.akto-endpoint-shield\config\config.env" -Pattern "^AKTO_API_TOKEN="
Select-String -Path "$env:LOCALAPPDATA\akto-endpoint-shield\logs\agent.log" -Pattern "startup env" | Select-Object -Last 1
```

The startup log line should show the token is set (not `(not set)`).

## Hooks and system proxy

Hook installers and system proxy are **off by default**. Enable them in the **Akto dashboard** or via flags in `config.env`.

## Troubleshooting

| Issue                                                         | Fix                                                                                                                      |
| ------------------------------------------------------------- | ------------------------------------------------------------------------------------------------------------------------ |
| `Unexpected token '}'` or `Get-AktoBinaryPath` not recognized | Paste only the flat scripts above — no markdown fences, no `function` blocks, separate Evaluation and Remediation fields |
| `SYSTEM config missing`                                       | Use the remediation script above (uses `Sysnative` path for 32-bit Automox)                                              |
| `COMMAND TIMED OUT`                                           | Increase worklet timeout; check `C:\Windows\Temp\akto-endpoint-shield-install.log`                                       |
| `401 Unauthorized` in agent logs                              | Re-run policy. Evaluation reports `userToken=False` or `agentHealthy=False`; remediation syncs config and restarts tasks |
| Token present but API returns 401                             | JWT expired — request a new installer from Akto                                                                          |
| New user after deploy                                         | Recurring schedule picks them up on next run (`userToken=False`)                                                         |

## Uninstall

```powershell
$pf64 = ${env:ProgramW6432}
foreach ($dir in @("Akto Endpoint Shield", "MCP Endpoint Shield")) {
  $unins = Join-Path $pf64 "$dir\unins000.exe"
  if (Test-Path -LiteralPath $unins) { & $unins /VERYSILENT /SUPPRESSMSGBOXES /NORESTART; break }
}
```

## Related documentation

* [MDM Deployment](/akto-atlas-agentic-ai-security-for-employee-endpoints/endpoints-discovery-agents/ai-endpoint-shield/mdm-deployment)
* [README](/akto-atlas-agentic-ai-security-for-employee-endpoints/endpoints-discovery-agents/ai-endpoint-shield)

## Get Support

* **<support@akto.io>**
* In-app Intercom on the Akto dashboard


# Jamf MDM Deployment

### Overview

AI Endpoint Shield can be deployed enterprise-wide via **Jamf Pro** for seamless, automated installation across your organization's macOS devices.

#### Why Use MDM Deployment?

MDM deployment provides significant advantages over manual installation:

* **Zero-touch deployment** - Automatic installation at user login
* **Centralized management** - Configure and monitor from a single console
* **Consistent configuration** - Ensure all devices have the same security posture
* **Automated updates** - Devices automatically pull the latest version on each login
* **Compliance tracking** - Monitor deployment status and coverage

#### Supported Platforms

* ✅ **Jamf Pro** - Enterprise MDM solution

***

### Architecture

| Aspect            | Detail                                                        |
| ----------------- | ------------------------------------------------------------- |
| Script execution  | Root (Jamf default) — auto-detects console user               |
| Installation type | Per-user (`~/.akto-endpoint-shield/`)                         |
| Services          | LaunchAgents (run as user, not system-wide)                   |
| Auto-update       | Manifest (`latest.json`) — devices update at next login       |
| Reinstall         | `FORCE_REINSTALL=true` Jamf parameter                         |
| Token storage     | `~/.akto-endpoint-shield/config/config.env` (permissions 600) |

***

### Prerequisites

Before deploying via Jamf, ensure you have the following:

#### 1. AKTO\_API\_TOKEN

* Obtain from the Akto platform
* Will be deployed securely via Jamf encrypted parameters

#### 2. AKTO\_API\_BASE\_URL

* Your Akto data ingestion URL (e.g. `https://<account_id>-guardrails.akto.io`)

#### 3. MANIFEST\_URL

* Provided by Akto during onboarding
* Enables auto-update: devices check this URL on each login to determine if a newer version is available

#### 4. Jamf Pro Access

Permissions to create/edit:

* Scripts
* Policies
* Smart Groups (optional)
* Extension Attributes (optional)

***

### Deployment Script

This deployment uses a **single script** (`install.sh`). The script:

1. Fetches the latest version manifest (`latest.json`) from the URL you provide
2. Compares installed version vs manifest — skips if already up to date
3. Downloads the signed/notarized `.pkg` and installs it
4. Writes `config.env` (token, feature flags) to the user's home directory
5. The pkg's embedded `postinstall` handles file placement, LaunchAgent setup, and hook installation

**No manual package upload to Jamf is required.**

#### install.sh

* **Purpose**: Install or update Akto Endpoint Shield
* **Run as**: Root (auto-detects logged-in user)
* **Parameter 4**: `AKTO_API_TOKEN` (encrypted)
* **Parameter 5**: `AKTO_API_BASE_URL`
* **Parameter 6**: `MANIFEST_URL` (provided by Akto — enables auto-update)
* **Parameter 7**: `PKG_URL` (direct pkg URL — fallback if MANIFEST\_URL not set)

#### uninstall.sh

* **Purpose**: Removes Akto Endpoint Shield from user's system
* **Run as**: Root (auto-detects logged-in user)
* **Cleanup**: Includes removal of MCP server configurations

***

### Phase 1: Upload Scripts to Jamf Pro

Navigate to **Settings** → **Computer Management** → **Scripts** → **+ New**

**Script 1: install.sh**

* **Display Name**: Akto Endpoint Shield - Install
* **Category**: Security
* **Execution**: Root (default — do not change)
* **Parameter Labels**:
  * Parameter 4: `AKTO_API_TOKEN`
  * Parameter 5: `AKTO_API_BASE_URL`
  * Parameter 6: `MANIFEST_URL` (provided by Akto — enables auto-update)
  * Parameter 7: `PKG_URL` (direct pkg URL — fallback if MANIFEST\_URL not used)

Paste the contents of `install.sh` (provided by Akto) as the script body.

**Script 2: uninstall.sh**

* **Display Name**: Akto Endpoint Shield - Uninstall
* **Category**: Security
* No parameters needed

Paste the contents of `uninstall.sh` (provided by Akto) as the script body.

#### Extension Attribute (Optional but Recommended)

Navigate to **Settings** → **Computer Management** → **Extension Attributes** → **+ New**

* **Display Name**: Akto Endpoint Shield Version
* **Description**: Reports installed version of Akto Endpoint Shield
* **Data Type**: String
* **Inventory Display**: General
* **Input Type**: Script

**Script**:

```bash
#!/bin/bash
USER=$(stat -f%Su /dev/console 2>/dev/null)
if [ -z "$USER" ] || [ "$USER" = "root" ] || [ "$USER" = "_mbsetupuser" ]; then
    echo "<result>Not Installed (no user logged in)</result>"
elif [ -x "/usr/local/bin/akto-endpoint-shield" ]; then
    VERSION=$(sudo -u "$USER" /usr/local/bin/akto-endpoint-shield --version 2>/dev/null | awk '{print $NF}' || echo "unknown")
    echo "<result>$VERSION</result>"
else
    echo "<result>Not Installed</result>"
fi
```

#### Smart Group (Optional)

Navigate to **Computers** → **Smart Computer Groups** → **+ New**

* **Name**: Akto Endpoint Shield Not Installed
* **Criteria**:
  * Extension Attribute "Akto Endpoint Shield Version" is "Not Installed"
  * Operating System Version greater than or equal to 10.13.x

***

### Phase 2: Create Jamf Policy

Navigate to **Computers** → **Policies** → **+ New**

#### General Settings

* **Display Name**: Install Akto Endpoint Shield
* **Enabled**: Yes
* **Triggers**:
  * ✅ **Login** (user login trigger)
  * ✅ Recurring Check-in (optional, for catch-up)
* **Execution Frequency**: **Once per user per computer**

  > For auto-updates: change frequency to **Ongoing** — the script skips reinstall if already at the latest version (based on the manifest), so running on every login is safe.
* **Category**: Security

#### No Package Required

The script downloads and installs the pkg automatically. Do **not** add a package to this policy.

#### Scripts

Add **Akto Endpoint Shield - Install** with **Priority: Before**

**Parameter Values:**

| Parameter | Label                | Value                                         |
| --------- | -------------------- | --------------------------------------------- |
| $4        | AKTO\_API\_TOKEN     | `<your-token>` (use Jamf encrypted parameter) |
| $5        | AKTO\_API\_BASE\_URL | `https://<account_id>-guardrails.akto.io`     |
| $6        | MANIFEST\_URL        | Provided by Akto — enables auto-update        |
| $7        | PKG\_URL             | (leave empty — manifest provides the URL)     |

> Configuration (which MCP clients to protect, hook settings) is managed via the Akto dashboard after install — no Jamf policy changes needed.

#### Scope

Choose one of the following scoping options:

**Option A: Target Specific Group**

* **Targets**: Smart Group "Akto Endpoint Shield Not Installed"

**Option B: All Computers (install + auto-update)**

* **Targets**: All Computers
* **Frequency**: Ongoing

**Option C: Specific Departments/Locations**

* **Targets**:
  * Department: Engineering, Security, etc.
  * Location: Office A, Remote Workers, etc.

#### User Interaction (Optional)

* **Start Message**: Leave empty for silent installation
* **Complete Message**: "Akto Endpoint Shield has been installed to protect your MCP servers."
* Or leave both empty for completely silent deployment

#### Maintenance

* **Update Inventory**: Yes (recommended)

***

### Phase 3: Create Uninstall Policy (Optional)

Navigate to **Computers** → **Policies** → **+ New**

#### General Settings

* **Display Name**: Uninstall Akto Endpoint Shield
* **Enabled**: Yes
* **Triggers**:
  * ✅ **Self Service** (user-initiated only for safety)
* **Execution Frequency**: Ongoing
* **Category**: Security

#### Scripts

* Select: **Akto Endpoint Shield - Uninstall**
* Priority: Before

#### Scope

* **Targets**: All Computers (available to all, but Self Service only)

#### Self Service

* **Make the policy available in Self Service**: Yes
* **Display Name**: Uninstall Akto Endpoint Shield
* **Description**: "Remove Akto Endpoint Shield from your computer. This will restore your MCP server configurations to their original state."
* **Icon**: Upload Akto icon if available
* **Category**: Security

***

### Updating Akto Endpoint Shield

Updates are handled automatically. When Akto releases a new version, the `MANIFEST_URL` you configured in your Jamf policy will point to the updated package. Devices check this URL on each login and update if a newer version is available — no changes to your Jamf policy are needed.

**To force an immediate reinstall**: Set Jamf parameter `$7 PKG_URL` to the pkg URL provided by Akto (bypasses the manifest version check) and run the policy manually.

***

### Testing

#### Test Plan

1. **Create Test Group**
   * Create a Smart Group: "Akto Shield Test Group"
   * Add 2-3 test computers to the group
2. **Scope Policy to Test Group**
   * Edit your installation policy
   * Change scope to target only "Akto Shield Test Group"
3. **Test on First Machine**
   * Log in as test user
   * Policy should trigger automatically at login
   * Verify installation:

     ```bash
     /usr/local/bin/akto-endpoint-shield --version
     launchctl list | grep akto-endpoint-shield
     cat ~/.akto-endpoint-shield/config/config.env
     tail -50 ~/.akto-endpoint-shield/logs/install.log
     ```
4. **Verify Functionality**
   * Services running: `launchctl list | grep akto-endpoint-shield`
   * Config: `ls -la ~/.akto-endpoint-shield/config/config.env` (check permissions are 600)
   * Live logs: `tail -f ~/.akto-endpoint-shield/logs/*.log`
5. **Test on Multiple Architectures**
   * Test on Intel Mac
   * Test on Apple Silicon Mac
   * Verify universal binary works on both
6. **Test Uninstallation**
   * Run uninstall from Self Service
   * Verify complete removal
   * Check MCP configs are unwrapped

#### Verification Checklist

* [ ] Scripts upload successfully to Jamf
* [ ] Policy triggers at login
* [ ] Token deployed with correct permissions (600)
* [ ] Binary installed and executable at `/usr/local/bin/akto-endpoint-shield`
* [ ] Services start automatically
* [ ] Agent discovers MCP configurations
* [ ] HTTP proxy responds (check logs)
* [ ] Works on Intel Macs
* [ ] Works on Apple Silicon Macs
* [ ] Extension Attribute reports version correctly
* [ ] Uninstall removes all components
* [ ] Uninstall restores MCP configs

***

### Rollout Strategy

#### Phase 1: Pilot (Week 1)

* Deploy to 5-10 test users
* Monitor for issues
* Gather feedback
* Verify no conflicts with existing tools

#### Phase 2: Department Rollout (Week 2-3)

* Deploy to engineering/security teams first
* Monitor service health
* Address any issues
* Expand to other departments incrementally

#### Phase 3: Organization-Wide (Week 4+)

* Scope policy to all computers with **Ongoing** frequency
* Monitor deployment metrics
* Provide user support/documentation
* Track compliance via Extension Attribute

***

### Troubleshooting

| Error                                                | Cause                              | Fix                                                                                   |
| ---------------------------------------------------- | ---------------------------------- | ------------------------------------------------------------------------------------- |
| `No console user logged in`                          | Script ran before login            | Ensure trigger is **Login**                                                           |
| `Neither PKG_URL, PKG_PATH, nor MANIFEST_URL is set` | All three sources empty            | Set `$6 MANIFEST_URL` in Jamf policy parameters                                       |
| Services show `-` (not running)                      | Token missing or invalid           | Check `~/.akto-endpoint-shield/logs/install.log`                                      |
| `Already at latest version — nothing to do`          | Manifest version matches installed | Expected — set `FORCE_REINSTALL=true` to override                                     |
| LaunchAgent won't load (quarantine)                  | Gatekeeper blocked plist           | `xattr -dr com.apple.quarantine ~/Library/LaunchAgents/io.akto.akto-endpoint-shield*` |
| User not in scope                                    | User not in scoped group           | Verify user is in scoped group or change scope to All Computers                       |
| Policy frequency wrong                               | Policy set to "Once per computer"  | Change frequency to "Once per user per computer"                                      |

***

### Security Considerations

#### Token Storage

* **Location**: `~/.akto-endpoint-shield/config/config.env`
* **Permissions**: 600 (readable only by owner)
* **Encryption**: Token passed via Jamf encrypted parameter (parameter 4)
* **Access Control**: Limit Jamf policy editing to security team

#### Best Practices

**1. Rotate Tokens Regularly**

* Update token in Jamf policy
* Install script updates `config.env` on next run
* Consider 90-day rotation schedule

**2. Monitor Deployments**

* Use Extension Attribute to track deployment status
* Create Smart Group for failed installations
* Review Jamf logs regularly

**3. Least Privilege**

* Binaries run as user, not system
* No system-level daemons
* All user data confined to `~/.akto-endpoint-shield/`

**4. Audit Trail**

* Jamf logs all script executions
* Akto Endpoint Shield logs all activity in `~/.akto-endpoint-shield/logs/`
* Token deployment is timestamped

***

### File Locations

| Path                                                              | Purpose                                 |
| ----------------------------------------------------------------- | --------------------------------------- |
| `/usr/local/bin/akto-endpoint-shield`                             | Main binary                             |
| `~/.akto-endpoint-shield/bin/akto_endpoint_shield.sh`             | Wrapper script                          |
| `~/Library/LaunchAgents/io.akto.akto-endpoint-shield.plist`       | HTTP proxy service                      |
| `~/Library/LaunchAgents/io.akto.akto-endpoint-shield-agent.plist` | Agent service                           |
| `~/.akto-endpoint-shield/config/config.env`                       | Token + feature flags (permissions 600) |
| `~/.akto-endpoint-shield/logs/install.log`                        | Install log (readable without sudo)     |
| `~/.akto-endpoint-shield/logs/agent.log`                          | Agent runtime log                       |
| `~/.akto-endpoint-shield/logs/proxy-server.log`                   | HTTP proxy runtime log                  |

***

### Useful Commands

#### Check Installation Status

```bash
# Check version
/usr/local/bin/akto-endpoint-shield --version

# One-shot status check
echo "=== Version ===" && /usr/local/bin/akto-endpoint-shield --version && \
echo "=== Services ===" && launchctl list | grep akto-endpoint-shield && \
echo "=== Config ===" && ls -la ~/.akto-endpoint-shield/config/config.env && \
echo "=== Claude hooks ===" && jq '.hooks | keys' ~/.claude/settings.json 2>/dev/null || echo "not configured"
```

#### Check Services

```bash
# Check services (both must have a PID, not -)
launchctl list | grep akto-endpoint-shield

# View install log
tail -50 ~/.akto-endpoint-shield/logs/install.log

# View live logs
tail -f ~/.akto-endpoint-shield/logs/*.log
```

#### Check Configuration

```bash
# Check token and feature flags
cat ~/.akto-endpoint-shield/config/config.env
```

#### Jamf Commands

```bash
# Manually trigger Jamf policy
sudo jamf policy -id <policy_id>

# Force policy check-in
sudo jamf policy

# View Jamf logs
tail -f /var/log/jamf.log
```

***

### Jamf Policy Parameters Reference

| Parameter | Value                | Description                                                              |
| --------- | -------------------- | ------------------------------------------------------------------------ |
| $4        | AKTO\_API\_TOKEN     | Token for Akto Endpoint Shield (use Jamf encrypted parameter)            |
| $5        | AKTO\_API\_BASE\_URL | Akto data ingestion URL (e.g. `https://<account_id>-guardrails.akto.io`) |
| $6        | MANIFEST\_URL        | Provided by Akto — enables auto-update                                   |
| $7        | PKG\_URL             | Direct pkg URL — fallback if MANIFEST\_URL not set                       |

### Support

* **Jamf Issues**: IT Helpdesk
* **Akto Endpoint Shield Issues**: Security Team
* **Token Issues**: Security Team
* **Akto Platform**: <support@akto.io>

### Related Documentation

* [AI Endpoint Shield Overview](/akto-atlas-agentic-ai-security-for-employee-endpoints/endpoints-discovery-agents/ai-endpoint-shield) - General installation and manual setup
* [Cursor Hooks](/akto-atlas-agentic-ai-security-for-employee-endpoints/endpoints-discovery-agents/cursor-hooks) - Alternative: Zero-installation hooks for Cursor IDE
* [Claude CLI Hooks](/akto-atlas-agentic-ai-security-for-employee-endpoints/endpoints-discovery-agents/claude-cli-hooks) - Alternative: Zero-installation hooks for Claude CLI
* [Gemini CLI Hooks](/akto-atlas-agentic-ai-security-for-employee-endpoints/endpoints-discovery-agents/gemini-cli-hooks) - Alternative: Zero-installation hooks for Gemini CLI
* [MCP Security](/readme/mcp-security) - Security concepts and best practices

***

## Deprecated: Legacy Deployment (deploy\_token.sh + .pkg)

{% hint style="warning" %}
This approach is deprecated. It only supports one-time installation and requires manual package uploads to Jamf for every update. Use the [new approach](#deployment-script) above for auto-update support.
{% endhint %}

The legacy approach used three separate scripts and required uploading a `.pkg` file to Jamf for each release.

### Legacy Architecture

* **Installation Type**: User-level (installs to `~/.local/bin/`)
* **Services**: LaunchAgents (runs as user, not system-wide)
* **Token Management**: External configuration file (`~/.config/mcp-endpoint-shield/config.env`)
* **Binary**: Universal (Intel + Apple Silicon support)
* **Deployment**: Automated at login via Jamf policy
* **Security**: True user-level operation - no root privileges required

### Legacy Scripts

#### deploy\_token.sh

* **Purpose**: Deploys AKTO\_API\_TOKEN to user's config directory
* **Run as**: Logged-in user (NOT root)
* **Jamf Parameter 4**: AKTO\_API\_TOKEN (encrypted)
* **Jamf Parameter 5**: AKTO\_API\_BASE\_URL

#### install\_from\_staging.sh

* **Purpose**: Installs AI Endpoint Shield in user context
* **Run as**: Logged-in user (NOT root)
* **Auto-detects**: Package from Jamf cache

#### uninstall.sh

* **Purpose**: Removes AI Endpoint Shield from user's system

### Legacy Upload Steps

1. Upload `mcp-endpoint-shield-Jamf-Installer.pkg` via **Settings** → **Computer Management** → **Packages**
2. Upload `deploy_token.sh` as "AI Endpoint Shield - Deploy Token" with parameters:
   * Parameter 4: `AKTO_API_TOKEN`
   * Parameter 5: `AKTO_API_BASE_URL`
3. Upload `install_from_staging.sh` as "AI Endpoint Shield - Install User Package"
4. Create policy with:
   * **Script 1**: Deploy Token (Priority: Before) — with token parameters
   * **Script 2**: Install User Package (Priority: After)
   * **Package**: AI Endpoint Shield pkg
   * **Frequency**: Once per user per computer

### Legacy File Locations

| Path                                                             | Purpose             |
| ---------------------------------------------------------------- | ------------------- |
| `~/.local/bin/mcp-endpoint-shield`                               | Main binary         |
| `~/.local/bin/mcp_endpoint_shield.sh`                            | Wrapper script      |
| `~/Library/LaunchAgents/io.akto.mcp-endpoint-shield.plist`       | HTTP service        |
| `~/Library/LaunchAgents/io.akto.mcp-endpoint-shield-agent.plist` | Agent service       |
| `~/.config/mcp-endpoint-shield/config.env`                       | Token configuration |
| `~/.local/share/mcp-endpoint-shield/logs/`                       | Application logs    |
| `~/.mcp-endpoint-shield/mcp_audit_info.db`                       | Audit database      |


# Windows MDM Deployment

### Overview

AI Endpoint Shield can be deployed enterprise-wide on **Windows** through any **MDM or endpoint management platform** that can run PowerShell scripts as **SYSTEM** (for example Microsoft Intune, Workspace ONE, ManageEngine, Kandji for Windows, or custom RMM tools).

Akto provides the installer in two forms:

* **Account-specific installer** — your **API token and guardrails base URL are already embedded**, so at deploy time you supply only the **manifest URL** (and optionally a direct installer URL).
* **Universal installer** — one build shared across all clients; you pass the **token and base URL as parameters** at deploy time.

Either way, a single **`install.ps1`** script downloads the versioned ZIP from Akto-hosted storage, installs or upgrades the agent, and keeps devices current via a version manifest.

#### Why use MDM deployment?

* **Zero-touch deployment** — no manual installs on each laptop
* **Flexible credentials** — an **account-specific installer** ships with your token + guardrails URL embedded (nothing sensitive in your MDM), or a **universal installer** takes them as parameters
* **Automatic updates** — devices check a version manifest on each script run
* **MDM-agnostic** — same script and parameters across vendors
* **No per-customer builds required** — the universal installer works for every tenant; the account-specific installer simply pre-fills credentials

{% hint style="info" %}
For **macOS**, use [Jamf MDM Deployment](/akto-atlas-agentic-ai-security-for-employee-endpoints/endpoints-discovery-agents/ai-endpoint-shield/jamf-mdm-deployment). For Automox Worklets on Windows, see [Automox Deployment](/akto-atlas-agentic-ai-security-for-employee-endpoints/endpoints-discovery-agents/ai-endpoint-shield/automox-deployment).
{% endhint %}

***

### Architecture

| Aspect            | Detail                                                                                                                                                            |
| ----------------- | ----------------------------------------------------------------------------------------------------------------------------------------------------------------- |
| Script execution  | **SYSTEM** / LocalSystem (not the logged-on user)                                                                                                                 |
| PowerShell        | **64-bit** (`powershell.exe`, not 32-bit WOW64)                                                                                                                   |
| Installer payload | Versioned ZIP per release (hosted by Akto) — account-specific (credentials embedded) or universal                                                                 |
| Credentials       | `AKTO_API_TOKEN` + `AKTO_API_BASE_URL` — **embedded** in an account-specific installer, or passed via MDM script parameters/env vars with the universal installer |
| Auto-update       | `latest.json` manifest URL (provided by Akto)                                                                                                                     |
| Install location  | `C:\Program Files\Akto Endpoint Shield\`                                                                                                                          |
| Services          | Scheduled tasks `MCPEndpointShieldHTTP`, `MCPEndpointShieldAgent`, `MCPEndpointShieldDetector`, `MCPEndpointShieldSystemProxy`                                    |
| Config            | Per-user and SYSTEM `config.env` under `.akto-endpoint-shield\config\`                                                                                            |

This path uses **ZIP + `install.ps1`**, not an MSI installer.

***

### Prerequisites

#### 1. Akto installer package

* Provided by Akto and contains `install.ps1` plus the versioned ZIP payload
* **Account-specific installer:** your `AKTO_API_TOKEN` and `AKTO_API_BASE_URL` are already embedded — nothing else to supply
* **Universal installer:** shared across all clients — you must pass the token and base URL (below) at deploy time

#### 2. MANIFEST\_URL

* Provided by Akto during onboarding
* HTTPS URL to `latest.json` for auto-update

#### 3. INSTALLER\_URL (optional)

* Direct HTTPS URL to the ZIP — fallback if the manifest cannot be fetched

#### 4. AKTO\_API\_TOKEN + AKTO\_API\_BASE\_URL (universal installer only)

* Only required with the **universal** installer — with an account-specific installer these are already embedded
* `AKTO_API_TOKEN` — from the Akto platform (Atlas / guardrails onboarding); store as a **secret** in your MDM where supported
* `AKTO_API_BASE_URL` — guardrails URL, e.g. `https://<account_id>-guardrails.akto.io`

#### 5. MDM capabilities

Your platform must support:

* Running a **PowerShell script** on Windows 10/11
* Execution as **SYSTEM** (elevated machine context)
* **64-bit** PowerShell
* Recurring execution (daily recommended) for updates
* Passing **script arguments** or environment variables to the script

#### 6. Network

Managed devices need HTTPS access to:

* `MANIFEST_URL` and the ZIP host (often `*.amazonaws.com`)
* `https://<account_id>-guardrails.akto.io`
* `https://ultron.akto.io` (default data ingestion endpoint)

***

### Scripts

Akto provides:

| Script                             | Purpose                                                                                         |
| ---------------------------------- | ----------------------------------------------------------------------------------------------- |
| `install.ps1`                      | One-time install, credential provisioning, and configuration                                    |
| `Detect-AktoEndpointShield.ps1`    | Checks installed version + task health; makes no changes (Intune Remediations detection script) |
| `Remediate-AktoEndpointShield.ps1` | Repairs/updates in place, only when detection reports an issue                                  |
| `uninstall_windows.ps1`            | Remove agent, tasks, and config (separate MDM assignment)                                       |

#### install.ps1 parameters

Positional arguments (space-separated when your MDM supports a single parameter string):

| Position | Name                | Required | Description                                                                                  |
| -------- | ------------------- | -------- | -------------------------------------------------------------------------------------------- |
| `$1`     | `MANIFEST_URL`      | Yes\*    | HTTPS URL to `latest.json`                                                                   |
| `$2`     | `INSTALLER_URL`     | No       | Direct ZIP URL if manifest fetch fails                                                       |
| `$3`     | `AKTO_API_TOKEN`    | Cond.    | Required with the **universal** installer; already embedded in an account-specific installer |
| `$4`     | `AKTO_API_BASE_URL` | Cond.    | Required with the **universal** installer; already embedded in an account-specific installer |

\* Required unless only `INSTALLER_URL` / `INSTALLER_PATH` is used.

**Example — account-specific installer** (credentials embedded, pass only the manifest URL):

```powershell
.\install.ps1 "https://<manifest-url>/latest.json"
```

**Example — universal installer** (pass token + base URL; note the empty `""` placeholder for the unused installer URL so arguments don't shift):

```powershell
.\install.ps1 "https://<manifest-url>/latest.json" "" "<TOKEN>" "https://<account_id>-guardrails.akto.io"
```

**Example — universal installer with ZIP fallback** (single space-delimited string):

```
https://<akto-host>/atlas-installers/windows-installer/latest.json  https://<akto-host>/atlas-installers/windows-installer/<version>/akto-endpoint-shield-<version>.zip  <TOKEN>  https://<account_id>-guardrails.akto.io
```

Environment variables (`MANIFEST_URL`, `AKTO_API_TOKEN`, `AKTO_API_BASE_URL`, `FORCE_REINSTALL`, etc.) are also supported if your MDM sets them instead of positional args. With an account-specific installer, `AKTO_API_TOKEN` / `AKTO_API_BASE_URL` are already embedded and can be omitted.

`Detect-AktoEndpointShield.ps1` and `Remediate-AktoEndpointShield.ps1` take **no parameters** — they read everything they need from the device after the one-time `install.ps1` provisioning step. That's what lets them run on Intune Remediations, which has no parameters field.

***

### Deploy via your MDM

{% tabs %}
{% tab title="Microsoft Intune" %}
Intune deployment has **two parts**: a one-time install via a **Win32 app**, and recurring auto-update via **Remediations**.

Intune **Platform scripts** (Devices → Scripts and remediations → Platform scripts) re-run on every device check-in rather than installing once (and have no field for the token the universal installer needs) — so provisioning goes through a **Win32 app** instead, which supports a free-text install command and installs only once (governed by a detection rule).

**Step 1 — One-time install (Win32 app)**

1. **Package it.** Run the [Win32 Content Prep Tool](https://github.com/microsoft/Microsoft-Win32-Content-Prep-Tool) against a folder containing `install.ps1`, producing an `.intunewin` file.
2. **Apps** → **Windows** → **Add** → **Windows app (Win32)**, and upload the `.intunewin` file.
3. **Program:**
   * Install command — **account-specific installer** (credentials embedded, manifest URL only):

     ```
     powershell.exe -NoProfile -ExecutionPolicy Bypass -File install.ps1 "https://<manifest-url>/latest.json"
     ```

     With the **universal installer**, append the token and base URL (empty `""` for the unused installer URL so arguments don't shift):

     ```
     powershell.exe -NoProfile -ExecutionPolicy Bypass -File install.ps1 "https://<manifest-url>/latest.json" "" "<TOKEN>" "https://<account_id>-guardrails.akto.io"
     ```
   * Uninstall command:

     ```
     powershell.exe -NoProfile -ExecutionPolicy Bypass -File uninstall_windows.ps1
     ```
   * Install behavior: **System**
4. **Detection rules** — use a custom detection script (this is what makes the install genuinely one-time, so it isn't re-run on every check-in):

   ```powershell
   $cfg = "$env:SystemRoot\System32\config\systemprofile\.akto-endpoint-shield\config\config.env"
   if ((Test-Path $cfg) -and (Select-String -Path $cfg -Pattern '^AKTO_API_TOKEN=\S+' -Quiet)) {
       Write-Host "Installed"; exit 0
   }
   exit 1
   ```
5. **Assignments** — assign **Required** to your target device group(s).

If detection ever reports "not installed" (for example after a bad uninstall), Intune automatically retries the install command within about 24 hours.

**Step 2 — Recurring auto-update (Remediations)**

1. **Devices** → **Scripts and remediations** → **Create script package**.
2. **Basics** — name it, e.g. "Akto Endpoint Shield – Update & Self-heal".
3. **Settings** — upload `Detect-AktoEndpointShield.ps1` as the detection script and `Remediate-AktoEndpointShield.ps1` as the remediation script.
   * Run using logged-on credentials: **No**
   * Enforce script signature check: **No**
   * Run script in 64-bit PowerShell: **Yes**
4. **Assignments** — target the same device group(s) as the Win32 app.
5. **Schedule** — **Daily** (or every 4–6 hours). Both scripts are read-only until an issue is found, and the repair step is safe to re-run, so a tighter schedule is fine; Daily meets a "picks up a new release within a day" SLA.
   {% endtab %}

{% tab title="Other MDM / RMM" %}

1. Create a **PowerShell** remediation or custom script policy
2. Run as **SYSTEM** / **LocalSystem** with **highest** privileges
3. Use **64-bit** PowerShell
4. Pass the manifest URL (account-specific installer), or the manifest URL plus token and base URL (universal installer) — or set equivalent environment variables
5. Schedule at least **daily** on enrolled Windows devices
6. Use your MDM's script success/failure reporting for validation

Running `install.ps1` on a daily schedule handles updates on its own — it skips the download when the installed version already matches the manifest. If your MDM has a "detect, then remediate" primitive, you can instead run `Detect-AktoEndpointShield.ps1` on a schedule and run `Remediate-AktoEndpointShield.ps1` only when detection exits non-zero, mirroring the Intune Remediations flow.
{% endtab %}
{% endtabs %}

{% hint style="warning" %}
With an **account-specific installer** you pass only the manifest URL, so there are no credentials to map. With the **universal installer**, if your MDM passes a single space-delimited string, confirm in a pilot that the token maps to argument 3 and the base URL to argument 4 — and pass an empty `""` for the unused installer URL (argument 2) so nothing shifts. Akto onboarding can provide a parameter string tested for your platform.
{% endhint %}

***

### Schedule and scope

| Phase      | Scope                  | Frequency     |
| ---------- | ---------------------- | ------------- |
| Pilot      | 5–10 devices           | Daily, 1 week |
| Rollout    | Engineering / security | Daily         |
| Production | All Windows endpoints  | Daily         |

The script **skips downloading** the ZIP when the installed version already matches the manifest. Daily runs are safe and pick up new Akto releases automatically.

**Force full redeploy:** set `FORCE_REINSTALL=true` (environment variable) on the script assignment.

***

### What happens on the device

1. Fetches `latest.json` from `MANIFEST_URL`
2. Compares manifest `version` with `akto-endpoint-shield.exe --version`
3. If needed, downloads ZIP, stops tasks, deploys to `C:\Program Files\Akto Endpoint Shield\`
4. Writes `config.env` for interactive users and SYSTEM — from the credentials embedded in the installer, or from the token + base URL you passed
5. Registers and starts scheduled tasks

MCP client and hook settings are controlled from the **Akto dashboard** after install.

***

### Updates and rollback

* **Updates:** Akto updates `latest.json`; devices upgrade on the next script run — no MDM policy change required
* **Rollback:** Akto points `latest.json` to an older versioned ZIP path
* **Emergency:** Pass a specific ZIP URL as argument 2 (`INSTALLER_URL`)

***

### Verification

On a pilot device (Administrator PowerShell):

```powershell
& "${env:ProgramW6432}\Akto Endpoint Shield\akto-endpoint-shield.exe" --version
Get-Content "$env:USERPROFILE\.akto-endpoint-shield\config\config.env" | Select-String "AKTO_API"
Get-ScheduledTask -TaskName "MCPEndpointShield*" | Format-Table TaskName, State -AutoSize
Get-Content "$env:USERPROFILE\.akto-endpoint-shield\logs\install.log" -Tail 40 -ErrorAction SilentlyContinue
Get-Process akto-endpoint-shield -ErrorAction SilentlyContinue
```

Also confirm success in your **MDM script reporting** and that the device appears under **Akto → Endpoint Shield**.

#### Checklist

* [ ] MDM reports script success on pilot devices
* [ ] Binary and version under Program Files
* [ ] `config.env` has correct token and guardrails URL
* [ ] Scheduled tasks `MCPEndpointShield*` exist
* [ ] Endpoint visible in Akto with recent activity

***

### Troubleshooting

| Symptom                                    | Likely cause                                            | What to do                                                                                                                               |
| ------------------------------------------ | ------------------------------------------------------- | ---------------------------------------------------------------------------------------------------------------------------------------- |
| Script fails immediately                   | Not running as SYSTEM or 32-bit PowerShell              | Use 64-bit PowerShell as SYSTEM                                                                                                          |
| Wrong config / token (universal installer) | Arguments shifted in MDM                                | Fix parameter string; test locally with explicit `""` for arg 2. Or use an account-specific installer, which needs no credentials passed |
| Win32 app keeps reinstalling every \~24h   | Detection rule never matches (e.g. path typo)           | Verify the detection script against a working device                                                                                     |
| Device never gets the latest version       | Remediation not assigned, or scheduled too infrequently | Confirm assignment + schedule in Intune; policy delivery can take up to 8 hours to reach a device after first assignment                 |
| No upgrade                                 | Manifest version mismatch                               | Contact Akto to align manifest and published ZIP                                                                                         |
| No processes running                       | Tasks failed or binary exited                           | Check `%ProgramData%\akto-endpoint-shield\logs\*-wrapper.log`                                                                            |
| Download errors                            | Firewall / proxy                                        | Allow HTTPS to manifest and ZIP URLs                                                                                                     |

See [Whitelist Paths](/akto-atlas-agentic-ai-security-for-employee-endpoints/endpoints-discovery-agents/ai-endpoint-shield/whitelist-paths) for EDR exclusions (e.g. SentinelOne).

***

### File locations

| Path                                                                                           | Purpose                              |
| ---------------------------------------------------------------------------------------------- | ------------------------------------ |
| `C:\Program Files\Akto Endpoint Shield\akto-endpoint-shield.exe`                               | Main binary                          |
| `C:\Program Files\Akto Endpoint Shield\start-akto-mode.ps1`                                    | Task wrapper                         |
| `%SystemRoot%\System32\config\systemprofile\.akto-endpoint-shield\config\config.env`           | Credentials + feature flags (SYSTEM) |
| `%USERPROFILE%\.akto-endpoint-shield\config\config.env`                                        | Per-user configuration               |
| `%ProgramData%\akto-endpoint-shield\logs\install.log`                                          | Install log                          |
| `%ProgramData%\akto-endpoint-shield\logs\remediation-detect.log` / `remediation-remediate.log` | Auto-update check / repair logs      |
| `%ProgramData%\akto-endpoint-shield\logs\`                                                     | Wrapper logs                         |

***

### Get support

1. In-app **Intercom** on the Akto dashboard
2. [Discord community](https://www.akto.io/community)
3. **<support@akto.io>**
4. [Contact Akto](https://www.akto.io/contact-us)

For `MANIFEST_URL` and release artifacts, contact your Akto account team.


# NinjaOne Deployment (Windows)

## Overview

Deploy **Akto Endpoint Shield** to Windows endpoints from NinjaOne using a script directly stored in NinjaOne Automation Library (**Option A**).

{% hint style="info" %}
Replace placeholder values before rollout:

* `<AKTO_WINDOWS_INSTALLER_EXE_URL>`
  {% endhint %}

## Prerequisites

* NinjaOne admin access with script and policy permissions
* Windows device policy in NinjaOne
* Akto-hosted Windows installer URL (`.exe`)
* Pilot device group for staged rollout

## Deployment Steps

{% stepper %}
{% step %}

### Create the Windows automation script

In NinjaOne:

1. Go to **Administration → Library → Automation**
2. Click **Add** and choose **Script**
3. Configure:
   * **Language:** PowerShell
   * **OS:** Windows
   * **Run As:** System
4. Save as: `Akto Endpoint Shield - Windows Install`
   {% endstep %}

{% step %}

### Use this script content

Download direct script file:

* [akto-endpoint-shield-ninjaone-windows.ps1](https://github.com/akto-api-security/Documentation/blob/agentic_security/akto-atlas-agentic-ai-security-for-employee-endpoints/endpoints-discovery-agents/ai-endpoint-shield/scripts/ninjaone/akto-endpoint-shield-ninjaone-windows.ps1)

<details>

<summary><strong>Show script</strong></summary>

```powershell
$ErrorActionPreference = "Stop"

$installerUrl = "<AKTO_WINDOWS_INSTALLER_EXE_URL>"
$installerPath = Join-Path $env:TEMP "akto-endpoint-shield-setup.exe"
$installerArgs = "/VERYSILENT /SUPPRESSMSGBOXES /NORESTART /SP-"

Write-Host "[Akto] Downloading installer..."
Invoke-WebRequest -Uri $installerUrl -OutFile $installerPath -UseBasicParsing

Write-Host "[Akto] Running installer..."
$p = Start-Process -FilePath $installerPath -ArgumentList $installerArgs -Wait -PassThru

if ($null -eq $p -or $p.ExitCode -ne 0) {
    throw "Akto installer failed. Exit code: $($p.ExitCode)"
}

Write-Host "[Akto] Installation finished successfully."
```

</details>

{% hint style="warning" %}
Keep **Run As = System** so scheduled tasks and Program Files installation succeed.
{% endhint %}
{% endstep %}

{% step %}

### Attach to policy and schedule

1. Open target **Windows policy**
2. Add a **Scheduled Script**
3. Select `Akto Endpoint Shield - Windows Install`
4. Schedule:
   * Pilot: run once immediately
   * Production: run daily (safe for idempotent installs/upgrades)
5. Save policy
   {% endstep %}

{% step %}

### Validate on endpoint

Run on a test endpoint:

```powershell
Test-Path "C:\Program Files\Akto Endpoint Shield\akto-endpoint-shield.exe"
Get-ScheduledTask | Where-Object { $_.TaskName -like "*Akto Endpoint Shield*" } | Select-Object TaskName,State
```

Expected:

* Binary exists in `C:\Program Files\Akto Endpoint Shield\`
* Scheduled tasks exist for HTTP, Agent, and Detector
  {% endstep %}
  {% endstepper %}

## Troubleshooting

### Script fails in NinjaOne

* Confirm script runs as **System**
* Confirm endpoint can download `<AKTO_WINDOWS_INSTALLER_EXE_URL>`
* Check NinjaOne script output and local PowerShell logs

### Install succeeds but services not visible

* Re-run validation command for scheduled tasks
* Verify endpoint restart/startup task execution

## Related Documentation

* [Windows MDM Deployment](/akto-atlas-agentic-ai-security-for-employee-endpoints/endpoints-discovery-agents/ai-endpoint-shield/windows-mdm-deployment)
* [NinjaOne Deployment (macOS)](/akto-atlas-agentic-ai-security-for-employee-endpoints/endpoints-discovery-agents/ai-endpoint-shield/ninjaone-macos-deployment)
* [Chrome NinjaOne Deployment](/akto-atlas-agentic-ai-security-for-employee-endpoints/endpoints-discovery-agents/browser-extensions/chrome/ninjaone-deployment)

## Support

1. In-app Intercom in Akto dashboard
2. [Discord community](https://www.akto.io/community)
3. `support@akto.io`
4. [Contact Akto](https://www.akto.io/contact-us)


# NinjaOne Deployment (macOS)

## Overview

Deploy **Akto Endpoint Shield** to macOS endpoints from NinjaOne using a script directly stored in NinjaOne Automation Library (**Option A**).

{% hint style="info" %}
Replace placeholder values before rollout:

* `<AKTO_MACOS_PKG_URL>`
  {% endhint %}

## Prerequisites

* NinjaOne admin access with script and policy permissions
* macOS device policy in NinjaOne
* Akto-hosted macOS package URL (`.pkg`)
* Pilot device group for staged rollout

## Deployment Steps

{% stepper %}
{% step %}

### Create the macOS automation script

In NinjaOne:

1. Go to **Administration → Library → Automation**
2. Click **Add** and choose **Script**
3. Configure:
   * **Language:** ShellScript
   * **OS:** macOS
   * **Run As:** System
4. Save as: `Akto Endpoint Shield - macOS Install`
   {% endstep %}

{% step %}

### Use this script content

Download direct script file:

* [akto-endpoint-shield-ninjaone-macos.sh](https://github.com/akto-api-security/Documentation/blob/agentic_security/akto-atlas-agentic-ai-security-for-employee-endpoints/endpoints-discovery-agents/ai-endpoint-shield/scripts/ninjaone/akto-endpoint-shield-ninjaone-macos.sh)

<details>

<summary><strong>Show script</strong></summary>

```bash
#!/bin/bash
set -euo pipefail

PKG_URL="<AKTO_MACOS_PKG_URL>"
PKG_PATH="/tmp/akto-endpoint-shield.pkg"

echo "[Akto] Downloading package..."
curl -fsSL "$PKG_URL" -o "$PKG_PATH"

echo "[Akto] Installing package..."
installer -pkg "$PKG_PATH" -target /

echo "[Akto] Installation script finished."
```

</details>

{% hint style="info" %}
If you use customer-specific signed packages, keep one package URL per tenant/version.
{% endhint %}
{% endstep %}

{% step %}

### Attach to policy and schedule

1. Open target **macOS policy**
2. Add a **Scheduled Script**
3. Select `Akto Endpoint Shield - macOS Install`
4. Schedule:
   * Pilot: immediate run
   * Production: daily
5. Save policy
   {% endstep %}

{% step %}

### Validate on endpoint

Run on a test Mac:

```bash
ls -l /usr/local/bin/akto-endpoint-shield
launchctl list | grep -i akto-endpoint-shield || true
```

Expected:

* `/usr/local/bin/akto-endpoint-shield` exists
* Akto launch services appear for logged-in users
  {% endstep %}
  {% endstepper %}

## Troubleshooting

### Script exits early

* Confirm script runs as **System**
* Verify download from `<AKTO_MACOS_PKG_URL>` succeeds
* Confirm the package is signed and valid for managed installs

### Binary missing after run

* Re-run script on pilot endpoint
* Check NinjaOne script output logs for install-stage failure

## Related Documentation

* [Jamf MDM Deployment](/akto-atlas-agentic-ai-security-for-employee-endpoints/endpoints-discovery-agents/ai-endpoint-shield/jamf-mdm-deployment)
* [NinjaOne Deployment (Windows)](/akto-atlas-agentic-ai-security-for-employee-endpoints/endpoints-discovery-agents/ai-endpoint-shield/ninjaone-windows-deployment)

## Support

1. In-app Intercom in Akto dashboard
2. [Discord community](https://www.akto.io/community)
3. `support@akto.io`
4. [Contact Akto](https://www.akto.io/contact-us)


# Whitelist Paths

If an endpoint management tool is deployed in your organization, add the Akto AI Endpoint Shield binary paths as exclusions to prevent the tool from blocking or quarantining the process.

> Only the binary paths need to be excluded. Unlike broader EDR whitelisting, exclusions scoped to the executable paths are sufficient for normal operation.

***

## Paths to Exclude

These paths apply to all endpoint management tools (Microsoft Defender, SentinelOne, CrowdStrike, and others).

**macOS**

| Path                                               | Description                    |
| -------------------------------------------------- | ------------------------------ |
| `/usr/local/bin/akto-endpoint-shield`              | Main binary (MDM/Jamf install) |
| `~/.akto-endpoint-shield/bin/akto-endpoint-shield` | User-level binary              |

**Windows**

| Path                                                             | Description |
| ---------------------------------------------------------------- | ----------- |
| `C:\Program Files\Akto Endpoint Shield\akto-endpoint-shield.exe` | Main binary |

***

## Configure for MS Defender Endpoint

The following steps are specific to **Microsoft Defender for Endpoint**. For other tools, refer to your vendor's documentation for adding process or path exclusions.

### macOS

#### Directly on the Mac

Run these commands on each machine (no MDM required):

{% stepper %}
{% step %}
Add the process and path exclusions:

```bash
sudo mdatp exclusion process add --name akto-endpoint-shield
mdatp exclusion path add --path /usr/local/bin/akto-endpoint-shield
mdatp exclusion folder add --path ~/.akto-endpoint-shield/bin/
```

{% endstep %}

{% step %}
Verify the exclusions were applied:

```bash
mdatp exclusion list
```

{% endstep %}
{% endstepper %}

***

#### Via Jamf Pro

Deploy a custom Microsoft Defender configuration profile with the preference domain `com.microsoft.wdav`.

{% stepper %}
{% step %}
In Jamf Pro, navigate to **Computers** → **Configuration Profiles** → **+ New**.
{% endstep %}

{% step %}
Add a payload: **Application & Custom Settings**.
{% endstep %}

{% step %}
Set **Preference Domain**: `com.microsoft.wdav`.
{% endstep %}

{% step %}
Upload or paste the following JSON:

```json
{
  "antivirusEngine": {
    "exclusions": [
      { "type": "path", "path": "/usr/local/bin/akto-endpoint-shield" },
      { "type": "folder", "path": "/Users/" }
    ]
  }
}
```

> Microsoft Defender on macOS does not expand `~` in exclusion paths. Using `/Users/` as a folder exclusion covers `~/.akto-endpoint-shield/` for all users on the machine.
> {% endstep %}

{% step %}
Set **Scope** to target the relevant computers or groups.
{% endstep %}

{% step %}
Save and deploy.
{% endstep %}
{% endstepper %}

***

#### Via Microsoft Intune

{% stepper %}
{% step %}
Go to **Endpoint Security** → **Antivirus** → **Create Policy**.
{% endstep %}

{% step %}
Select **Platform: macOS** and **Profile: Microsoft Defender Antivirus**.
{% endstep %}

{% step %}
Under **Antivirus engine** → **Exclusions**, add the two paths above.
{% endstep %}

{% step %}
Assign the policy to the relevant device group and save.
{% endstep %}
{% endstepper %}

***

### Windows

#### Directly on the Windows Machine

Run the following commands in an **elevated PowerShell** session:

{% stepper %}
{% step %}
Add the process and path exclusions:

```powershell
Add-MpPreference -ExclusionProcess "akto-endpoint-shield.exe"
Add-MpPreference -ExclusionPath "C:\Program Files\Akto Endpoint Shield\"
```

{% endstep %}

{% step %}
Verify the exclusions were applied:

```powershell
Get-MpPreference | Select-Object -ExpandProperty ExclusionProcess
Get-MpPreference | Select-Object -ExpandProperty ExclusionPath
```

{% endstep %}
{% endstepper %}

***

#### Via Microsoft Intune

{% stepper %}
{% step %}
Go to **Endpoint Security** → **Antivirus** → **Create Policy**.
{% endstep %}

{% step %}
Select **Platform: Windows 10, Windows 11, and Windows Server** and **Profile: Microsoft Defender Antivirus**.
{% endstep %}

{% step %}
Under **Microsoft Defender Antivirus Exclusions**, add:

* **Process exclusions**: `akto-endpoint-shield.exe`
* **Path exclusions**: `C:\Program Files\Akto Endpoint Shield\`
  {% endstep %}

{% step %}
Assign the policy to the relevant device group and save.
{% endstep %}
{% endstepper %}

***

## Configure for CrowdStrike Falcon

These steps apply to **Windows** machines managed by CrowdStrike Falcon. Forward this section to your IT / CrowdStrike administrator.

### Windows

#### Get the binary hash

Before your CrowdStrike admin adds the exclusions, run the following on the affected machine and share the output hash with them.

{% stepper %}
{% step %}
Open **PowerShell** and run:

```powershell
Get-FileHash "C:\Program Files\Akto Endpoint Shield\akto-endpoint-shield.exe" -Algorithm SHA256 |
    Select-Object Hash, Path
```

{% endstep %}

{% step %}
Send the printed hash value to your CrowdStrike administrator along with the steps below.
{% endstep %}
{% endstepper %}

***

#### Falcon console exclusions

Add the following exclusions in the **Falcon console**, scoped to the policy or device group that covers the affected machines.

{% stepper %}
{% step %}
**ML exclusion — path**

Go to **Configuration → ML Exclusions → Add Exclusion** and fill in:

| Field         | Value                                                            |
| ------------- | ---------------------------------------------------------------- |
| Value         | `C:\Program Files\Akto Endpoint Shield\akto-endpoint-shield.exe` |
| Type          | Windows                                                          |
| Groups        | *(select the device group)*                                      |
| {% endstep %} |                                                                  |

{% step %}
**ML exclusion — hash**

Go to **Configuration → ML Exclusions → Add Exclusion** and fill in:

| Field         | Value                               |
| ------------- | ----------------------------------- |
| Value         | *(SHA256 hash from the step above)* |
| Type          | SHA256                              |
| Groups        | *(select the device group)*         |
| {% endstep %} |                                     |

{% step %}
**Prevention policy exclusion**

Go to **Configuration → Prevention Policies →&#x20;*****(policy name)*****&#x20;→ Exclusions** and add `akto-endpoint-shield.exe` as a process exclusion.

This prevents behavioral detections from blocking the Akto process when it runs under the SYSTEM account at boot.
{% endstep %}

{% step %}
**Sensor visibility exclusion** *(optional)*

If Akto activity is generating excessive alerts in the Falcon dashboard, go to **Configuration → Sensor Visibility Exclusions → Add** and fill in:

| Field            | Value                                    |
| ---------------- | ---------------------------------------- |
| Path             | `C:\Program Files\Akto Endpoint Shield\` |
| {% endstep %}    |                                          |
| {% endstepper %} |                                          |

***

## Get Support for your Akto setup

There are multiple ways to request support from Akto. We are available on the following:

1. In-app `intercom` support. Message us with your query on intercom in Akto dashboard and someone will reply.
2. Join our [discord channel](https://www.akto.io/community) for community support.
3. Contact <support@akto.io> for email support.


# Mosyle MDM Deployment

Deploy AI Endpoint Shield across your organization using a single script via Mosyle MDM.

## Overview

AI Endpoint Shield can be deployed enterprise-wide via **Mosyle MDM** (Mobile Device Management) for seamless, automated installation across your organization's macOS devices.

## Why Use MDM Deployment?

MDM deployment provides significant advantages over manual installation:

* **Zero-touch deployment** - Automatic installation at user login
* **Centralized management** - Configure and monitor from a single Mosyle console
* **Consistent configuration** - Ensure all devices have the same security posture
* **Automated updates** - Push new versions across the organization
* **Compliance tracking** - Monitor deployment status and coverage

## Key Features of Mosyle Deployment

* **One script** handles everything: downloads the installer, deploys the token, installs to each user's home directory, and starts services automatically
* **Runs at user sign-in:** installs once per user, retries automatically if it fails
* **No PKG upload to Mosyle required:** the script downloads the installer directly from a URL provided by Akto.
* **Minimal configuration:** only 3 values to configure in the script

## Prerequisites

Before deploying AI Endpoint Shield via Mosyle, ensure you have the following:

### 1. Akto Credentials

* **AKTO\_API\_TOKEN:** obtain from your Akto platform dashboard
* **AKTO\_API\_BASE\_URL:** your Akto instance URL (e.g. `https://<account_id>-guardrails.akto.io`)

### 2. Installer URL

* **PKG download URL:** request this from Akto (<support@akto.io>); Akto will provide a direct download URL for the installer
* ⚠️ **Important**: Keep this URL confidential as it's tied to your organization

### 3. Mosyle Admin Access

Permissions to create/edit and manage:

* Custom Commands
* Device Group assignments
* Execution results and logs

### 4. Device Enrolment

* Target Macs must be enrolled and appear in your Mosyle dashboard
* Devices must have internet connectivity to download the installer
* Users must be able to log in to devices for installation to trigger

## Deployment Process

{% stepper %}
{% step %}
**Prepare the Installation Script**

**1. Obtain credentials from Akto**

Contact Akto support team to request following information:

* Installation Script: `install.sh` file.
* Direct download URL for the installer (`PKG_URL`)
* Confirmation of your `AKTO_API_TOKEN`
* Your `AKTO_API_BASE_URL`

**2. Configure the installation script**

Open `install.sh` and fill in the CONFIG section at the top:

```bash
PKG_URL=""              # installer URL provided by Akto
AKTO_API_TOKEN=""       # your Akto API token
AKTO_API_BASE_URL=""    # your Akto base URL (e.g. https://<account_id>-guardrails.akto.io)
```

All other values (hook flags, wrap flags) can be left at their defaults or adjusted as needed.

{% hint style="warning" %}
**Security Note**

Do not commit `install.sh` with a real token to version control. Keep the filled-in copy local or in a secrets manager.
{% endhint %}
{% endstep %}

{% step %}
**Upload to Mosyle**

**1. Create Custom Command profile**

1. Log into your **Mosyle Business** console
2. Navigate to **Management** → **Custom Commands**
3. Click **Add new profile**
4. Name it: `Akto Endpoint Shield - Install`
5. Choose **Category**: Security (or create custom category)

**2. Upload the script**

1. Click the **Code** tab
2. Select code format: **Shell Script (bash)**
3. Paste the **entire contents** of your configured `install.sh` file
4. Review the pasted content for accuracy (verify CONFIG section is filled)
5. Click **Save**

<div data-with-frame="true"><figure><img src="/files/gIVMUbpgqaiDWR36oMr3" alt="" width="563"><figcaption></figcaption></figure></div>

**3. Configure execution settings**

Click the **Execution Settings** tab and configure:

<table><thead><tr><th width="234.02734375">Option</th><th>Configuration</th></tr></thead><tbody><tr><td><strong>Execute command</strong></td><td>Select: <strong>Immediately when saving the profile, upon assignment, or based on schedule or events</strong></td></tr><tr><td><strong>Execution trigger</strong></td><td>Tick Every user sign-in✅</td></tr><tr><td><strong>Schedule</strong></td><td>Only once (Event Required)✅</td></tr></tbody></table>

<div data-with-frame="true"><figure><img src="/files/i72iVL9MNgAxJVJKdjub" alt="" width="563"><figcaption></figcaption></figure></div>

{% hint style="info" %}
**Why this configuration?**

This combination runs the script on each user sign-in until it succeeds, then stops. If the download fails or no user is logged in, it retries automatically at the next sign-in.

The "**only once**" setting prevents repeated executions for the same user on the same device.
{% endhint %}

Leave all other options unchecked. Click **Save** to create the profile.
{% endstep %}

{% step %}
**Deploy to Devices**

**1. Add Profile Assignment Based on Your Preferences**

* Click **+ Add Assignment**, choose users or devices, then select and confirm your assignment.

  <div data-with-frame="true"><figure><img src="/files/camVERdvHacuP4Q3XZeG" alt="" width="563"><figcaption></figcaption></figure></div>
* Save the Custom Commands.

The script will run the next time each assigned user signs in.

**2. Monitor deployment**

Go to **Management** → **Custom Commands**, select your profile, and click **View Results** to see execution status:

* **Success**: Installation completed
* **Pending**: Awaiting user sign-in
* **Failed**: See troubleshooting section

<figure><img src="/files/j4X0Lpuoj6lcdAuzPmq8" alt="" width="563"><figcaption></figcaption></figure>
{% endstep %}

{% step %}
**Verify Installation**

**Verify on target device**

On a target Mac after the user has signed in, open Terminal and run:

```bash
# Check 1: Binary installed
ls -la ~/.akto-mcp-endpoint-shield/bin/mcp-endpoint-shield

# Check 2: Token configured
cat ~/.akto-mcp-endpoint-shield/config/config.env

# Check 3: Services running
launchctl list | grep mcp-endpoint-shield

# Check 4: View installation log
tail -30 /var/log/akto-mcp-endpoint-shield-install.log
```

<details>

<summary><strong>Verification checklist</strong></summary>

* [ ] Binary exists at `~/.akto-mcp-endpoint-shield/bin/mcp-endpoint-shield`
* [ ] Config file exists at `~/.akto-mcp-endpoint-shield/config/config.env`
* [ ] Config file has correct permissions (`chmod 600`)
* [ ] Token is present in config file
* [ ] Both LaunchAgents are loaded (`launchctl list`)
* [ ] Installation log shows no errors
* [ ] Mosyle shows "Success" status for this device

</details>
{% endstep %}
{% endstepper %}

## Updating Akto Endpoint Shield

1. Request the updated installer URL from Akto (<support@akto.io>)
2. Update `PKG_URL` in the script with the new URL
3. Edit the script in Mosyle and save — Mosyle will re-run it on next sign-in

{% hint style="danger" %}
**Force Upgrade:**

The script skips reinstallation if the binary is already present. To force an upgrade, run the uninstall script first (see below), then the install script will run again on next sign-in.
{% endhint %}

### Uninstall Script

To remove Akto Endpoint Shield from devices:

1. In Mosyle → **Custom Commands** → **Add new profile**
2. Paste the contents of `uninstall.sh`
3. Name it: `Akto Endpoint Shield - Uninstall`
4. Execution Settings:
   * Event: ✅ **Every user sign-in** (or trigger manually)
   * Schedule: ✅ **Only once (Event Required)**
5. Assign to the target devices

## Troubleshooting

### Issue: Script shows "Failed" in Mosyle View Results

**Symptoms**: Custom Command status shows "Failed" or "Error"

**Diagnostic command:**

```bash
tail -50 /var/log/akto-mcp-endpoint-shield-install.log
```

**Common causes and solutions:**

<table><thead><tr><th width="229.3984375">Issue</th><th>Check</th><th>Solution</th></tr></thead><tbody><tr><td><code>PKG_URL</code> is empty or unreachable</td><td>Look for URL errors in install log</td><td>Verify the URL provided by Akto is correctly pasted in CONFIG; test: <code>curl -I $PKG_URL</code></td></tr><tr><td><code>AKTO_API_TOKEN</code> is empty</td><td>Search install log for "TOKEN"</td><td>Check the CONFIG section of the script has the token value</td></tr><tr><td><code>AKTO_API_BASE_URL</code> is empty</td><td>Search install log for "BASE_URL"</td><td>Check the CONFIG section of the script has the base URL value</td></tr><tr><td>No user logged in</td><td>Check timestamp when script ran</td><td>Will retry automatically on next sign-in; no action needed</td></tr></tbody></table>

### Issue: Services Not Running After Installation

**Symptoms**: `launchctl list` shows no Akto Endpoint Shield services

**Solution - Manually load services:**

```bash
# Load both services
launchctl bootstrap gui/$(id -u) ~/Library/LaunchAgents/io.akto.mcp-endpoint-shield.plist
launchctl bootstrap gui/$(id -u) ~/Library/LaunchAgents/io.akto.mcp-endpoint-shield-agent.plist

# Verify they're running
launchctl list | grep mcp-endpoint-shield
```

### Issue: Token Needs Updating After Installation

**Symptoms**: Services running but not authenticated; logs show "AKTO\_API\_TOKEN not configured"

**Solution:**

Edit the script in Mosyle with the new token. Then on the device:

```bash
# Manually redeploy config
cat > ~/.akto-mcp-endpoint-shield/config/config.env <<EOF
AKTO_API_TOKEN=new-token-here
EOF
chmod 600 ~/.akto-mcp-endpoint-shield/config/config.env

# Restart services
launchctl bootout gui/$(id -u)/io.akto.mcp-endpoint-shield
launchctl bootout gui/$(id -u)/io.akto.mcp-endpoint-shield-agent
launchctl bootstrap gui/$(id -u) ~/Library/LaunchAgents/io.akto.mcp-endpoint-shield.plist
launchctl bootstrap gui/$(id -u) ~/Library/LaunchAgents/io.akto.mcp-endpoint-shield-agent.plist
```

## Support

* **For Akto platform issues**: <support@akto.io>
* **For Mosyle issues**: your IT administrator


# MacOS Installation

## Overview

This document is designed for MacOS Installation and end-user reference. It explains the installation flow of **AI Endpoint Shield** on macOS and the permissions users may be prompted to approve.

## Steps Guide

{% stepper %}
{% step %}
**Gatekeeper Security Warning on First Launch**

When the user double-clicks the **AI Endpoint Shield Installer**, macOS may display a warning stating that the application could not be verified and was blocked to protect the system.

<figure><img src="/files/BwwnzI97ueOnTWpKZ98C" alt="" width="375"><figcaption></figcaption></figure>

This is expected behaviour for applications distributed outside the Mac App Store.

**User Action (Required):**

1. Open **System Settings**
2. Navigate to **Privacy & Security**
3. Scroll to the **Security** section
4. Click **Open Anyway** for **mcp-endpoint-shield**
   {% endstep %}

{% step %}
**Allowing the Application in Privacy & Security**

This screen confirms that the user has explicitly approved the installer. Once approved, macOS will allow the installer to run normally.

<figure><img src="/files/IFgJzBr9Lv6vbltS0cdh" alt="" width="563"><figcaption></figcaption></figure>

No administrator privileges are required at this stage.
{% endstep %}

{% step %}
**Installer Wizard – Introduction Screen**

After approval, the installer wizard launches.

<figure><img src="/files/ABSqfYDM5tJlsLtsT3yu" alt="" width="563"><figcaption></figcaption></figure>

The introduction screen explains:

* What AI Endpoint Shield does
* The installation location (user directory)
* That no root or administrator permissions are required

Click **Continue** to proceed.
{% endstep %}

{% step %}
**Installation Type Confirmation**

<figure><img src="/files/UCSL33OwVRcTj9af8b5h" alt="" width="563"><figcaption></figcaption></figure>

Click **Install** to begin installation.

This screen confirms:

* Disk space required
* Installation scope (current user only)
* Target disk (e.g., Macintosh HD)
  {% endstep %}

{% step %}
**Background Item Registration**

After installation, macOS displays a notification indicating that **mcp\_endpoint\_shield.sh** has been added as a background item.

<figure><img src="/files/dqwVa6GK3sqB6p8uVKki" alt="" width="512"><figcaption></figcaption></figure>

This means:

* AI Endpoint Shield runs automatically in the background
* It starts on user login
* It can be managed via **Login Items & Extensions**

This is required for continuous endpoint monitoring.
{% endstep %}

{% step %}
**Folder Access Permissions (Optional)**

After installation, AI Endpoint Shield may request permission to access specific folders in the user’s home directory:

* Desktop
* Documents
* Downloads

<div><figure><img src="/files/ZYzzUKeeKyCFtoogKcBO" alt="" width="369"><figcaption></figcaption></figure> <figure><img src="/files/T6wOS8BGWSEca3vUeSxy" alt="" width="375"><figcaption></figcaption></figure> <figure><img src="/files/NYp2JbCjc0FuqdQmOcuY" alt="" width="351"><figcaption></figcaption></figure></div>

These permissions are used to:

* Scan MCP-related files
* Validate configurations
* Monitor relevant artifacts within the user environment

**User Choice:**

* **Allow** – Enables folder-level scanning
* **Don’t Allow** – Skips access to that folder

{% hint style="info" %}
These permissions are optional. The application will continue to function even if access is denied, but scanning coverage may be limited.
{% endhint %}
{% endstep %}
{% endstepper %}


# Windows Installation

## Overview

This page covers post-installation **validation and troubleshooting** of **AI Endpoint Shield** on Windows — checking the version, processes and scheduled tasks, where config lives, the logs the agent writes, verifying IDE hooks, and common fixes. Use it if Akto was installed but is not sending data, or stopped working after a reboot.

{% hint style="info" %}
**Everything below is read-only unless a section says otherwise** — safe to run at any time without disrupting a working install.

**How to open PowerShell as Administrator:** press `Win`, type `powershell`, right-click **Windows PowerShell**, and choose **Run as administrator**. Most checks below need this.
{% endhint %}

## 30-second health check

Paste this into an elevated PowerShell window:

```powershell
$d = "C:\Program Files\Akto Endpoint Shield"

Write-Host "`n--- Version ---"
& "$d\akto-endpoint-shield.exe" --version 2>&1

Write-Host "`n--- Scheduled tasks ---"
Get-ScheduledTask -TaskName "MCPEndpointShield*" | ForEach-Object {
    $i = $_ | Get-ScheduledTaskInfo
    [PSCustomObject]@{ Task = $_.TaskName; State = $_.State; LastResult = "0x{0:X8}" -f $i.LastTaskResult }
} | Format-Table -AutoSize

Write-Host "--- Running processes ---"
Get-Process akto-endpoint-shield -ErrorAction SilentlyContinue | Format-Table Name, Id, StartTime -AutoSize

Write-Host "--- Config status ---"
$cfgDir = "$env:SystemRoot\System32\config\systemprofile\.akto-endpoint-shield\config"
& "$d\akto-endpoint-shield.exe" check-config --path $cfgDir
```

A healthy result looks like:

* A version string (e.g. `akto-endpoint-shield version v1.1.134`), not an error
* `MCPEndpointShieldHTTP`, `MCPEndpointShieldAgent`, `MCPEndpointShieldDetector` all show `Running` or `Ready` with `LastResult` `0x00000000` (`MCPEndpointShieldSystemProxy` may show `Ready`/stopped — it's an optional feature, see [System-wide proxy](#system-wide-proxy-optional))
* At least one `akto-endpoint-shield` process listed
* Config status prints `provisioned`

If any of these don't match, keep reading — the matching section explains what to check, and [Common issues and fixes](#common-issues-and-fixes) has a quick symptom → fix table.

## Checking the installed version

```powershell
& "C:\Program Files\Akto Endpoint Shield\akto-endpoint-shield.exe" --version
```

This prints immediately, before anything else the agent does, so it works even if config or the network is broken. If it errors instead of printing a version, the binary itself is missing, blocked, or corrupted — see [Install location and files](#install-location-and-files).

## Install location and files

Default install folder:

```
C:\Program Files\Akto Endpoint Shield\
```

Quick presence + integrity check:

```powershell
$d = "C:\Program Files\Akto Endpoint Shield"
Test-Path "$d\akto-endpoint-shield.exe"
Get-Item "$d\akto-endpoint-shield.exe" | Select-Object Length, LastWriteTime
Get-AuthenticodeSignature "$d\akto-endpoint-shield.exe" | Select-Object Status
Get-Item "$d\akto-endpoint-shield.exe" -Stream Zone.Identifier -ErrorAction SilentlyContinue
```

* `Test-Path` returning `False` means Akto isn't installed (or was installed to a different location) — re-run the installer.
* If the last command (`Zone.Identifier`) returns a result instead of an error, the file is flagged by Windows as downloaded from the internet ("Mark of the Web"), which can cause SmartScreen/UAC to block it. Fix:

  ```powershell
  Unblock-File -LiteralPath "C:\Program Files\Akto Endpoint Shield\akto-endpoint-shield.exe"
  ```

If you previously had an older **MCP Endpoint Shield** install (the product's old name) at `C:\Program Files\MCP Endpoint Shield`, that's expected to be gone after an update — the installer removes it automatically.

## Scheduled tasks

Akto runs as four scheduled tasks (all named `MCPEndpointShield*`, registered to run as `SYSTEM` at startup):

| Task                           | What it does                                                                                                                                                       |
| ------------------------------ | ------------------------------------------------------------------------------------------------------------------------------------------------------------------ |
| `MCPEndpointShieldHTTP`        | Local HTTP service the agent uses internally                                                                                                                       |
| `MCPEndpointShieldAgent`       | Main background agent — heartbeats to the dashboard, applies config/policy changes, keeps IDE hooks up to date                                                     |
| `MCPEndpointShieldDetector`    | Detects which AI tools/IDEs are installed on the machine                                                                                                           |
| `MCPEndpointShieldSystemProxy` | Optional system-wide HTTPS inspection proxy — only relevant if your organization has this feature turned on (see [System-wide proxy](#system-wide-proxy-optional)) |

Check status and last result:

```powershell
Get-ScheduledTask -TaskName "MCPEndpointShield*" | ForEach-Object {
    $i = $_ | Get-ScheduledTaskInfo
    [PSCustomObject]@{
        Task        = $_.TaskName
        State       = $_.State
        LastRunTime = $i.LastRunTime
        LastResult  = "0x{0:X8}" -f $i.LastTaskResult
    }
} | Format-Table -AutoSize
```

`State` should be `Running` or `Ready` — never `Disabled`. Common `LastResult` codes:

| LastResult   | Meaning                                                                                                                                                                                                                                                                     |
| ------------ | --------------------------------------------------------------------------------------------------------------------------------------------------------------------------------------------------------------------------------------------------------------------------- |
| `0x00000000` | Success                                                                                                                                                                                                                                                                     |
| `0x00000002` | File not found — binary or launcher script is missing, reinstall                                                                                                                                                                                                            |
| `0x00000005` | Access denied — check with your security team if an EDR/antivirus tool is blocking it                                                                                                                                                                                       |
| `0x00041301` | Task is currently running (normal, transient)                                                                                                                                                                                                                               |
| `0x00041303` | Task has not run yet (normal right after install)                                                                                                                                                                                                                           |
| `0xC000013A` | Process was terminated externally — usually antivirus/EDR killing it, see [Whitelist Paths](/akto-atlas-agentic-ai-security-for-employee-endpoints/endpoints-discovery-agents/ai-endpoint-shield/whitelist-paths#configure-for-crowdstrike-falcon) if CrowdStrike is in use |
| `0x80070001` | PowerShell execution policy (a Group Policy restriction) is blocking the script at startup — contact your IT admin                                                                                                                                                          |

If a task shows `Ready` but never seems to have run, or you just changed something and want to restart everything immediately:

```powershell
Get-ScheduledTask -TaskName "MCPEndpointShield*" | Stop-ScheduledTask -ErrorAction SilentlyContinue
Start-Sleep -Seconds 2
Start-ScheduledTask -TaskName "MCPEndpointShieldHTTP"
Start-ScheduledTask -TaskName "MCPEndpointShieldAgent"
Start-ScheduledTask -TaskName "MCPEndpointShieldDetector"
```

**After a reboot**, all three core tasks (`HTTP`, `Agent`, `Detector`) should show a `LastRunTime` at or after your last boot time:

```powershell
(Get-CimInstance Win32_OperatingSystem).LastBootUpTime
Get-ScheduledTask -TaskName "MCPEndpointShield*" | Get-ScheduledTaskInfo | Select-Object TaskName, LastRunTime
```

If a task's `LastRunTime` is older than the boot time, it didn't auto-start — see [Common issues and fixes](#common-issues-and-fixes).

## Running processes

```powershell
Get-Process akto-endpoint-shield -ErrorAction SilentlyContinue | Format-Table Name, Id, StartTime, CPU -AutoSize
```

You should normally see 2–3 `akto-endpoint-shield.exe` processes (one per running task above). If nothing appears:

* Start the tasks manually (command in [Scheduled tasks](#scheduled-tasks)) and re-check after a few seconds.
* If a process appears and then disappears within a few seconds every time, something is killing it immediately after launch — most commonly an antivirus/EDR tool. See [Whitelist Paths](/akto-atlas-agentic-ai-security-for-employee-endpoints/endpoints-discovery-agents/ai-endpoint-shield/whitelist-paths).

To see the exact error a task would hit (useful when a task starts and immediately exits), run the agent directly in the foreground:

```powershell
cd "C:\Program Files\Akto Endpoint Shield"
.\akto-endpoint-shield.exe agent
```

Leave the window open, read the first few lines of output, then press `Ctrl+C` to stop it. Common messages:

| Message                                       | Meaning / fix                                                                                                                                              |
| --------------------------------------------- | ---------------------------------------------------------------------------------------------------------------------------------------------------------- |
| `AKTO_API_TOKEN is not set`                   | Config is missing or unreadable — see [Config values and location](#config-values-and-location)                                                            |
| `AKTO_API_BASE_URL is not set`                | Same as above                                                                                                                                              |
| `bind: Only one usage of each socket address` | Another Akto process is already using that port — stop existing processes first (`Stop-Process -Name akto-endpoint-shield -Force`), then restart the tasks |
| `failed to install mitmproxy`                 | No internet access during install — check network and re-run the installer                                                                                 |

## Config values and location

Akto stores its configuration (your account token, dashboard URL, and feature on/off switches) **encrypted on disk**, using Windows' own built-in machine-level encryption (DPAPI) — the file is not human-readable, and only processes on that same machine can decrypt it.

**File locations** (the same encrypted file is kept in more than one place so both your user session and the background SYSTEM tasks can each read their own copy):

| Where                                | Path                                                                                   |
| ------------------------------------ | -------------------------------------------------------------------------------------- |
| Your user profile                    | `%USERPROFILE%\.akto-endpoint-shield\config\config.env.enc`                            |
| SYSTEM (used by the scheduled tasks) | `C:\Windows\System32\config\systemprofile\.akto-endpoint-shield\config\config.env.enc` |

On a device that hasn't been updated in a while you may instead see a plain `config.env` file next to it — same idea, older format, still supported.

**Check whether config is present and valid** (does not print any secret values):

```powershell
$d = "C:\Program Files\Akto Endpoint Shield"
& "$d\akto-endpoint-shield.exe" check-config --path "$env:SystemRoot\System32\config\systemprofile\.akto-endpoint-shield\config"
```

| Output                            | Meaning                                                                                                                                                                                      |
| --------------------------------- | -------------------------------------------------------------------------------------------------------------------------------------------------------------------------------------------- |
| `provisioned` (exit code `0`)     | Healthy — token and settings are present and readable                                                                                                                                        |
| `not-provisioned` (exit code `2`) | Device was never given credentials — re-run the installer with your Akto token                                                                                                               |
| `undecryptable` (exit code `3`)   | Config file exists but can't be decrypted (e.g. after restoring from a different machine's backup/image) — this device needs to be reinstalled/reprovisioned, it cannot be repaired in place |

**Reading a specific (non-secret) value**, e.g. to confirm which dashboard URL or device ID this machine is registered under:

```powershell
& "C:\Program Files\Akto Endpoint Shield\akto-endpoint-shield.exe" get-config --path "$env:SystemRoot\System32\config\systemprofile\.akto-endpoint-shield\config" AKTO_API_BASE_URL AGENT_ID
```

{% hint style="danger" %}
**Do not run `get-config ... AKTO_API_TOKEN`** and paste the output anywhere (screenshots, tickets, chat) — that value is your account's secret credential. If Akto support needs to confirm the token, they can verify it against your account without you ever displaying it.
{% endhint %}

**Config keys you may be asked about:**

| Key                                            | What it is                                                                               |
| ---------------------------------------------- | ---------------------------------------------------------------------------------------- |
| `AKTO_API_TOKEN`                               | Your organization's Akto account credential (secret — never share)                       |
| `AKTO_API_BASE_URL`                            | Your Akto dashboard's URL for this account                                               |
| `AGENT_ID`                                     | This device's unique identifier, shown on the Akto dashboard                             |
| `ENABLE_PROMPT_HOOKS_*` / `ENABLE_MCP_HOOKS_*` | Per-IDE switches for whether guardrail hooks are installed for that tool (on by default) |
| `ENABLE_SYSTEM_PROXY`                          | Whether the optional system-wide HTTPS proxy is turned on (off by default)               |

**Cross-checking this device's identity against the dashboard:**

```powershell
$machineGuid = (Get-ItemProperty 'HKLM:\SOFTWARE\Microsoft\Cryptography' -Name MachineGuid).MachineGuid
$guidPrefix = ($machineGuid -replace '-', '').ToLower().Substring(0, 8)
$hostNorm = ($env:COMPUTERNAME -replace '[^a-zA-Z0-9]', '-')
"$hostNorm-$guidPrefix"
```

This should match the device label shown for this machine in the Akto dashboard.

## Logs

All logs below are plain text and safe to open in Notepad.

| Log                               | Location                                                                                                                                                          | What's in it                                                                                             |
| --------------------------------- | ----------------------------------------------------------------------------------------------------------------------------------------------------------------- | -------------------------------------------------------------------------------------------------------- |
| Install log                       | `%USERPROFILE%\.akto-endpoint-shield\logs\install.log` (also briefly at `C:\ProgramData\akto-endpoint-shield\logs\install.log` before a user profile is detected) | Full step-by-step output of the last install/update run, including every IDE hook installer's own output |
| Agent (background service)        | `C:\ProgramData\akto-endpoint-shield\logs\agent-wrapper.log`                                                                                                      | Startup/exit history for the `MCPEndpointShieldAgent` task                                               |
| HTTP service                      | `C:\ProgramData\akto-endpoint-shield\logs\http-wrapper.log`                                                                                                       | Startup/exit history for the `MCPEndpointShieldHTTP` task                                                |
| Detector                          | `C:\ProgramData\akto-endpoint-shield\logs\detect-wrapper.log`                                                                                                     | Startup/exit history for the `MCPEndpointShieldDetector` task                                            |
| System proxy                      | `C:\ProgramData\akto-endpoint-shield\logs\system-proxy.log` (or `%LOCALAPPDATA%\akto-endpoint-shield\logs\system-proxy.log` once a user is logged in)             | Only present if the optional proxy feature is enabled                                                    |
| Auto-update / self-heal detection | `C:\ProgramData\akto-endpoint-shield\logs\remediation-detect.log`                                                                                                 | Result of each scheduled health check (runs automatically every few hours)                               |
| Auto-update / self-heal action    | `C:\ProgramData\akto-endpoint-shield\logs\remediation-remediate.log`                                                                                              | What happened the last time a health check found and fixed an issue (e.g. installed a new version)       |

View the most recent activity in any of them:

```powershell
Get-Content "C:\ProgramData\akto-endpoint-shield\logs\agent-wrapper.log" -Tail 40
```

**Hook installation logs** — there's no separate file per IDE; each IDE's hook installer writes its output into `install.log` above, prefixed with its script name. To see just the hook-related lines from the last install/update:

```powershell
Get-Content "$env:USERPROFILE\.akto-endpoint-shield\logs\install.log" | Select-String "hook", "Hook"
```

**Hook execution (prompt block/allow) logs** — when a hook actually blocks or allows something in your IDE in real time, that decision is recorded on the **Akto dashboard**, not in a local file on this machine.

{% hint style="info" %}
These logs never contain your API token — safe to share with Akto support without redacting anything.
{% endhint %}

## Verifying IDE hooks

Akto installs guardrail "hooks" into each supported IDE/CLI so it can inspect prompts and tool calls. Run the check for whichever tools you use:

| Tool               | Check                                                                                                                                                |
| ------------------ | ---------------------------------------------------------------------------------------------------------------------------------------------------- |
| Claude Code        | `Get-Content "$env:USERPROFILE\.claude\settings.json" \| Select-String "akto"`                                                                       |
| Cursor             | `(Get-Content "$env:USERPROFILE\.cursor\hooks.json" \| ConvertFrom-Json).hooks.beforeSubmitPrompt`                                                   |
| GitHub Copilot CLI | `Test-Path "$env:USERPROFILE\.github\hooks\hooks.json"`                                                                                              |
| VS Code Copilot    | `Test-Path "$env:USERPROFILE\.copilot\hooks\akto-hooks.json"`                                                                                        |
| Codex CLI          | `Get-Content "$env:USERPROFILE\.codex\config.toml" \| Select-String "codex_hooks"`                                                                   |
| Gemini CLI         | `Test-Path "$env:USERPROFILE\.gemini\settings.json"`                                                                                                 |
| OpenCode           | Look for `akto-guardrails-plugin.js` under `%APPDATA%\OpenCode\plugin`, `%USERPROFILE%\.config\opencode\plugin`, or `%LOCALAPPDATA%\opencode\plugin` |

A result (a JSON block, `True`, or a matching line) means the hook is installed. No result / `False` means that tool's hooks weren't installed — because the tool wasn't detected on the machine, its feature switch (`ENABLE_PROMPT_HOOKS_*`, see [Config values and location](#config-values-and-location)) is off for your account, or the install needs to be re-run for that tool.

**If hooks worked before and stopped working** (e.g. after editing IDE settings yourself), the background agent (`MCPEndpointShieldAgent` task) automatically re-checks and restores them — no action needed, wait for its next check-in cycle (typically a few minutes), or restart the task to force it immediately:

```powershell
Restart-ScheduledTask -TaskName "MCPEndpointShieldAgent" -ErrorAction SilentlyContinue
```

## System-wide proxy (optional)

Some accounts have an optional feature enabled where Akto routes AI-tool traffic through a local HTTPS-inspecting proxy. This only applies if your organization has turned it on. Check whether it's active:

```powershell
Get-ScheduledTask -TaskName "MCPEndpointShieldSystemProxy" | Select-Object State
Test-Path "C:\ProgramData\akto-endpoint-shield\venv\Scripts\mitmdump.exe"
Get-ChildItem Cert:\LocalMachine\Root | Where-Object { $_.Subject -like "*mitmproxy*" }
```

If the task is `Ready` (not running) and no certificate is listed, the feature is simply not enabled for your account — this is normal and not an error.

If it **is** enabled but the certificate isn't trusted (browser/tool warnings about an untrusted certificate), re-import it:

```powershell
Import-Certificate -FilePath "C:\ProgramData\akto-endpoint-shield\mitmproxy-conf\mitmproxy-ca-cert.pem" `
    -CertStoreLocation Cert:\LocalMachine\Root
```

## Common issues and fixes

| Symptom                                        | Likely cause                                                                                   | Fix                                                                                                                                                                                                                                                                           |
| ---------------------------------------------- | ---------------------------------------------------------------------------------------------- | ----------------------------------------------------------------------------------------------------------------------------------------------------------------------------------------------------------------------------------------------------------------------------- |
| Device not appearing on the dashboard          | Not provisioned, or token mismatch between your user profile and SYSTEM                        | Run the config check in [Config values and location](#config-values-and-location) for both profile locations; re-run installer if `not-provisioned`                                                                                                                           |
| Tasks show `Running`/`Ready` but no processes  | Antivirus/EDR terminating the process immediately                                              | Use the foreground-run test in [Running processes](#running-processes); see [Whitelist Paths](/akto-atlas-agentic-ai-security-for-employee-endpoints/endpoints-discovery-agents/ai-endpoint-shield/whitelist-paths#configure-for-crowdstrike-falcon) if CrowdStrike is in use |
| Everything worked, then stopped after a reboot | Task didn't auto-start, or config mismatch (SYSTEM profile missing token the user profile has) | Run the reboot check in [Scheduled tasks](#scheduled-tasks); copy config from user profile to SYSTEM profile (see below)                                                                                                                                                      |
| A specific IDE's hooks aren't showing up       | That tool wasn't detected, its feature flag is off, or hooks need reinstalling                 | [Verifying IDE hooks](#verifying-ide-hooks)                                                                                                                                                                                                                                   |
| `check-config` reports `undecryptable`         | Device was cloned/restored from another machine's disk image                                   | Reinstall — this can't be repaired in place                                                                                                                                                                                                                                   |
| Binary blocked by Windows / SmartScreen        | File flagged as downloaded ("Mark of the Web")                                                 | `Unblock-File` command in [Install location and files](#install-location-and-files)                                                                                                                                                                                           |
| Port conflict error                            | Another Akto instance is stuck                                                                 | `Stop-Process -Name akto-endpoint-shield -Force`, then restart the tasks                                                                                                                                                                                                      |
| No tasks listed at all                         | Installer did not complete                                                                     | Re-run the installer as Administrator                                                                                                                                                                                                                                         |

**Copying config from your user profile to the SYSTEM profile** (fixes the common "works when I run it manually, not after reboot" case):

```powershell
$src  = "$env:USERPROFILE\.akto-endpoint-shield\config"
$dest = "C:\Windows\System32\config\systemprofile\.akto-endpoint-shield\config"
New-Item -ItemType Directory -Force -Path $dest | Out-Null
foreach ($name in @('config.env.enc', 'config.env')) {
    if (Test-Path (Join-Path $src $name)) { Copy-Item (Join-Path $src $name) (Join-Path $dest $name) -Force; break }
}
```

## Full automated diagnostic

For a single comprehensive report covering everything above plus antivirus/EDR conflicts, PowerShell execution-policy restrictions, and event log history:

1. Get `diagnose_windows.ps1` and `diagnose_windows.bat` (included in the Akto installer package, or ask Akto support for them).
2. Put both files in the same folder (e.g. your Desktop).
3. Right-click `diagnose_windows.bat` → **Run as administrator**.
4. A report file named like `akto-diag-20260722-143000.txt` is saved to your Desktop, along with a PASS/WARN/FAIL summary and copy-paste "quick fix" hints printed at the end.

This script only reads information from your machine — it does not change any settings — and does not print your API token.

## Reinstall / uninstall (last resort)

If nothing above resolves the issue:

1. Open **Settings → Apps → Installed apps** (or **Add or remove programs**), find **Akto Endpoint Shield**, and **Uninstall**.
2. Restart the machine.
3. Re-run the installer package provided by your IT team / Akto.
4. Wait 2–3 minutes, then check the dashboard for the device to reappear.

If the problem persists after reinstall, run the diagnostic script above and send the report to Akto support along with what you observed.

## Get Support for your Akto setup

When contacting Akto support, include the diagnostic report (`akto-diag-*.txt`), the installed version, and what you observed and when it started. **Never** include the raw `AKTO_API_TOKEN` value in a ticket, chat, or screenshot.

There are multiple ways to request support from Akto:

1. In-app `intercom` support. Message us with your query on intercom in the Akto dashboard and someone will reply.
2. Join our [discord channel](https://www.akto.io/community) for community support.
3. Contact <support@akto.io> for email support.


# Akto System Proxy

## Overview

Akto System Proxy is a network-level endpoint discovery method that monitors outbound traffic from AI applications running on employee devices — including **Claude Desktop**, **GitHub Copilot**, **ChatGPT desktop app**, and any other AI-related software. It captures API calls made by these apps and surfaces them in the Akto dashboard for visibility, analysis, and guardrails enforcement.

The proxy is installed automatically alongside [AI Endpoint Shield](/akto-atlas-agentic-ai-security-for-employee-endpoints/endpoints-discovery-agents/ai-endpoint-shield) — no separate installation step is required.

## Guardrails for Desktop AI Apps

Akto System Proxy intercepts and enforces guardrails on **standalone desktop AI applications** — apps that don't expose hooks or extensions:

| App                  | What gets intercepted                                    |
| -------------------- | -------------------------------------------------------- |
| **Claude Desktop**   | All API calls to Anthropic endpoints                     |
| **GitHub Copilot**   | Requests to GitHub Copilot AI services                   |
| **ChatGPT Desktop**  | API traffic to OpenAI endpoints                          |
| **Any other AI app** | Any app whose traffic matches your configured AI domains |

Because the proxy operates at the network level, it works transparently across all these apps without any per-app configuration or code changes.

## How It Works

The Akto System Proxy runs as a local service on the employee's device. All outbound network traffic is evaluated against your configured Proxy Patterns and domain lists:

```mermaid
sequenceDiagram
    autonumber
    participant App as AI App (Claude Desktop / Copilot / ChatGPT)
    participant Proxy as Akto System Proxy
    participant AI as AI Service (e.g. OpenAI)
    participant Akto as Akto Dashboard

    App->>Proxy: Outbound request
    Note over Proxy: Evaluate domain against patterns

    alt AI Domain
        Proxy->>Akto: Report request + apply guardrails
        alt Allowed
            Proxy->>AI: Forward request
            AI-->>Proxy: Response
            Proxy-->>App: Return response
        else Blocked by guardrail
            Proxy-->>App: Block request
            Proxy-->>Akto: Report security event
        end
    else Chatty Domain
        Proxy->>AI: Bypass — forward directly
        AI-->>App: Response (not captured)
    end
```

This gives your security team full visibility into which AI services are being accessed, what data is being sent, and the ability to enforce policies — without requiring any changes to the AI applications themselves.

## Prerequisites

* **AI Endpoint Shield** installed on the device (the system proxy is bundled with it)
* Access to **Settings → Proxy Patterns** in the Akto dashboard

## Configuration

All proxy configuration lives in **Settings → Proxy Patterns**.

### Proxy Patterns

Proxy patterns control which outbound traffic is routed through the Akto proxy for interception, and which is allowed to pass through directly.

{% stepper %}
{% step %}
**Open Proxy Patterns**

Go to **Settings → Proxy Patterns** in the Akto dashboard.
{% endstep %}

{% step %}
**Add a pattern**

Click **Add pattern** (top right). The **Add Proxy Pattern** dialog opens.
{% endstep %}

{% step %}
**Set Proxy Mode**

| Proxy Mode    | Behaviour                                                                      |
| ------------- | ------------------------------------------------------------------------------ |
| **True**      | Traffic matching this pattern is intercepted and routed through the Akto proxy |
| **False**     | Traffic matching this pattern bypasses the proxy (not captured)                |
| {% endstep %} |                                                                                |

{% step %}
**Enter the Pattern**

Type a URL or domain pattern in the **Pattern** field.

```
e.g. .internal.example.com.
```

Patterns follow standard proxy URL-matching syntax. Use leading dots to match all subdomains (e.g., `.openai.com` matches `api.openai.com`).
{% endstep %}

{% step %}
**Click Add**

The pattern is saved and takes effect immediately on devices running the Endpoint Shield.
{% endstep %}
{% endstepper %}

### Domains

The **Domains** section lets you classify domains so the proxy knows what to intercept and what to ignore.

| Domain Type        | Description                                                                                    | Proxy behaviour                                                                                   |
| ------------------ | ---------------------------------------------------------------------------------------------- | ------------------------------------------------------------------------------------------------- |
| **Chatty Domains** | High-traffic domains that are not AI-related (e.g., telemetry, CDN, package registries)        | **Bypassed** — traffic is not captured, reducing noise                                            |
| **AI Domains**     | AI service domains whose traffic should be monitored (e.g., `openai.com`, `api.anthropic.com`) | **Intercepted and guardrailed** — traffic is captured and enforced against your security policies |

To add a domain, type it in the respective input field (e.g., `openai.com`) and click **Add**.

## Get Support

There are multiple ways to request support from Akto. We are 24X7 available on the following:

1. In-app `intercom` support. Message us with your query on intercom in Akto dashboard and someone will reply.
2. Join our [discord channel](https://www.akto.io/community) for community support.
3. Contact `help@akto.io` for email support.
4. Contact us [here](https://www.akto.io/contact-us).


# OpenClaw (Clawdbot) Visibility

## Overview

Akto Atlas provides visibility into **employee usage of OpenClaw (Clawdbot)** by observing agent activity at the endpoint level.\
Visibility is enabled through the **AI Endpoint Shield**, which operates locally on enterprise-managed devices.

{% hint style="success" %}
Akto Atlas does not require direct integration with Clawdbot services, APIs, or SaaS infrastructure.
{% endhint %}

## Observation Model

Akto Atlas observes OpenClaw interactions through request and response guardrail validation.

<figure><img src="/files/5pRKB1IsT3rc1BiHzFMU" alt="" width="563"><figcaption></figcaption></figure>

Requests originating from OpenClaw channels such as AI models, chat applications, productivity tools, and automation platforms first pass through **Akto Endpoint Shield** for input guardrail validation before reaching **OpenClaw (Clawdbot)**.

Responses generated by OpenClaw pass through **Akto Endpoint Shield** again for response guardrail validation. Metadata from both validation stages is sent to the **Akto Dashboard** for monitoring and visibility.

## Attributes Detected by Akto Atlas

After Clawdbot successfully connects to AI Endpoint Shield, Akto Atlas can identify:

* Presence of Clawdbot on enterprise-managed endpoints
* Endpoints where Clawdbot is actively used
* Enterprise users associated with each endpoint
* First observed connection timestamp
* Most recent observed connection timestamp
* Frequency of observed usage sessions

## Visibility Mechanisms

Akto Atlas provides visibility into OpenClaw activity through gateway-based request monitoring and event-based hook integrations.

### Through AI Agent Gateway

Akto Atlas can observe OpenClaw model requests when OpenClaw routes LLM traffic through the **Akto AI Agent Gateway**.

The AI Agent Gateway operates as a middleware layer between OpenClaw and the configured model provider. OpenClaw sends model requests to the gateway endpoint instead of directly calling the LLM provider.

The request flow becomes:

```mermaid
flowchart LR

User[User]
Channel[Slack / Telegram]
OpenClaw[OpenClaw]
Gateway[Akto AI Agent Gateway]
Model[Model Provider]

User --> Channel
Channel --> OpenClaw
OpenClaw --> Gateway
Gateway --> Model
Model --> Gateway
Gateway --> OpenClaw
OpenClaw --> Channel
Channel --> User
```

The gateway records request metadata, applies guardrails, and forwards the request to the configured model provider. **Akto Atlas** receives the recorded metadata and associates the activity with the OpenClaw agent and the enterprise user.

Enterprise teams must configure OpenClaw to route model traffic through the gateway endpoint. Following are the configuration steps:

{% stepper %}
{% step %}
**Set Up the AI Agent Gateway**

Deploy the Akto AI Agent Gateway in the environment where OpenClaw sends model requests. The gateway acts as the intermediary between OpenClaw and the actual model provider.

Deployment instructions and architecture details are available in the following documentation: [AI Agent Gateway](/agentic-guardrails/overview/akto-agent-proxy)

After completing the gateway deployment, note the gateway endpoint URL. OpenClaw uses the gateway endpoint as the model provider base URL.
{% endstep %}

{% step %}
**Update the `openclaw.json` Configuration File**

OpenClaw uses the `openclaw.json` configuration file to define model providers. Add a provider entry that routes model requests to the Akto AI Agent Gateway.

Example configuration:

```json
"models": {
  "providers": {
    "secure-local": {
      "api": "openai-completions",
      "apiKey": "${OPENAI_API_KEY}; X-Original-Provider: openai/gpt-4o-mini",
      "baseUrl": "<AKTO_AI_AGENT_PROXY_URL>/v1",
      "models": [
        {
          "id": "gpt-4o-mini",
          "name": "gpt-4o-mini"
        }
      ]
    }
  }
}
```

* The `baseUrl` parameter must reference the AI Agent Gateway endpoint instead of the direct model provider endpoint. `AKTO_AI_AGENT_PROXY_URL` follows the format `https://<account_id>-guardrails.akto.io`; contact the Akto support team to get the URL for your account.
* The `X-Original-Provider` header allows the gateway to forward the request to the correct model provider after applying guardrails.
  {% endstep %}

{% step %}
**Register the Provider in the Authentication Profile**

OpenClaw requires an authentication profile entry for every configured provider. The authentication profile allows OpenClaw to activate the configured model provider.

Create or update the file `auth.profile.json` with the following configuration:

```json
{
  "version": 1,
  "profiles": {
    "secure-local:dummy": {
      "provider": "secure-local",
      "type": "token"
    }
  },
  "lastGood": {
    "secure-local": "secure-local:dummy"
  }
}
```

The authentication profile registers the gateway-backed provider so OpenClaw can route model requests through the AI Agent Gateway.
{% endstep %}
{% endstepper %}

After completing the configuration steps, OpenClaw sends model requests through the gateway. Akto Atlas observes the requests and records model interaction metadata.

### Through Hooks

Akto Atlas can observe OpenClaw interaction events through message lifecycle hooks when the OpenClaw platform exposes **message send and message receive hooks**.

Hook-based visibility depends on OpenClaw providing those hooks. Akto Atlas can subscribe to hook endpoints only after OpenClaw exposes the hook interface.

When OpenClaw triggers the message send or message receive hook, interaction metadata can be sent to Akto Atlas to record OpenClaw activity associated with enterprise users.

### Through MS Defender for Endpoint

In addition to **Gateway-based** and **Hook-based** visibility, OpenClaw also supports discovery via **Microsoft Defender for Endpoint**.

This method enables endpoint-level visibility by integrating Defender with Akto Atlas.

#### Steps

{% stepper %}
{% step %}
Navigate to **Akto Atlas** dashboard and go to **Connectors.**
{% endstep %}

{% step %}
Select Microsoft Defender for Endpoint
{% endstep %}

{% step %}
Fill in the required fields:

* Tenant ID → Your Azure AD tenant ID
* Client ID → App registration client ID
* Client Secret → App secret for authentication
* Data Ingestion Service URL → Defender API ingestion endpoint
* Polling Interval → Frequency (in seconds) to fetch data

<div data-with-frame="true"><figure><img src="/files/IgVcgrefY6cAUSKhZEkJ" alt="" width="375"><figcaption></figcaption></figure></div>
{% endstep %}

{% step %}
Click Save.
{% endstep %}
{% endstepper %}

#### How it Works

* Akto connects to Defender using the configured credentials
* Defender provides endpoint-level telemetry
* This enables:
  * Detection of AI tools
  * Visibility into OpenClaw activity
  * Integration with guardrail enforcement workflows

## Enable Guardrail via MS Defender for Endpoint

To enable OpenClaw guardrails on endpoints using Microsoft Defender:

{% stepper %}
{% step %}
Follow the steps from:\
[**Deploy via Microsoft Defender** ](/akto-atlas-agentic-ai-security-for-employee-endpoints/endpoints-discovery-agents/deploy-via-microsoft-defender#steps-to-deploy)**→ up to Step 3**
{% endstep %}

{% step %}
For OpenClaw:

* Request the appropriate script from the **Akto support team**
  * macOS / Linux → `.sh` script
  * Windows → `.ps1` script
    {% endstep %}

{% step %}
After completing the setup run the script via Live Response:

1. Navigate to:
   * **Microsoft Defender → Assets → Devices**
2. Select the target device
3. Click **Initiate live response session**
4. Once connected, run the script:

{% code overflow="wrap" %}

```shell
run update_openclaw_wsl_clean.ps1 -parameters "AKTO_PROXY_URL=https:your-guardrails-url.akto.io OPENAI_API_KEY=sk-xxxxx ORIGINAL_PROVIDER=<your provider eg: openai> /<model eg: gpt-4o-mini> MODEL_API=openai-completions MODEL_ID=<your model eg: gpt-40-mini> "
```

{% endcode %}

`AKTO_PROXY_URL` follows the format `https://<account_id>-guardrails.akto.io`; contact the Akto support team to get the URL for your account.

Wait for the script to complete execution.
{% endstep %}
{% endstepper %}

<details>

<summary>🐧 WSL (Additional Setup)</summary>

If you are using WSL, complete the following before running the script

{% hint style="info" %}
Live Response and updates must be executed on the **Windows host** (not inside WSL)
{% endhint %}

**1. Update Script Variables**

* Open the script in a text editor
* Update required environment variables (API key, model, etc.)

{% hint style="info" %}
The script runs on the Windows host and connects to WSL using this path.
{% endhint %}

**2. Verify or Install `jq`**

Check if installed:

```bash
which jq
jq --version
```

If not installed:

```bash
sudo apt update && sudo apt install jq -y
```

**3. Run The Script**

Run the script from the Live Response session:

```bash
run script.ps1
```

</details>

## Observability Location in Akto Atlas

### Assets Inventory

Clawdbot appears in the **Agentic** **Assets** inventory within Akto Atlas.

For each Clawdbot asset, Akto Atlas displays:

* Asset name: <kbd>Clawdbot</kbd>
* Detection source: <kbd>AI Agent</kbd>
* Associated endpoints
* Risk Score
* First seen timestamp
* Last seen timestamp

<div data-with-frame="true"><figure><img src="/files/neIyqtKDT8ezIikwkWIx" alt="" width="540"><figcaption></figcaption></figure></div>

## Supported Operating Systems

Akto Atlas supports OpenClaw visibility on enterprise-managed endpoints running:

* macOS
* Windows
* Linux

When AI Endpoint Shield runs on any of these operating systems, Akto Atlas can observe OpenClaw connections to the local MCP endpoint and register usage metadata.

## Data Scope and Enforcement Boundaries

Akto Atlas enforces strict boundaries on observed data:

* Data collection begins only after AI Endpoint Shield installation
* Visibility is limited to endpoints where AI Endpoint Shield is active
* Only usage metadata is collected
* No inspection of prompts, internal logic, or generated outputs
* No modification, blocking, or interference with Clawdbot execution

## Get Support for your Akto setup

There are multiple ways to request support from Akto. We are 24X7 available on the following:

1. In-app `intercom` support. Message us with your query on intercom in Akto dashboard and someone will reply.
2. Join our [discord channel](https://www.akto.io/community) for community support.
3. Contact `support@akto.io` for email support.


# Cursor Hooks

Akto Guardrails for Cursor provides comprehensive security monitoring and validation for both **chat interactions** and **MCP tool executions**. It intercepts all agent operations, validates against security policies, blocks risky behavior, and reports events to your Akto dashboard.

## Key Features

* ✅ **Zero Installation** - No standalone apps or packages to install
* ✅ **Comprehensive Coverage** - Monitors both chat prompts/responses and MCP requests/responses
* ✅ **Transparent Integration** - Uses Cursor's native hook mechanism
* ✅ **Real-time Protection** - Intercepts every interaction before execution
* ✅ **Centralized Monitoring** - All events reported to Akto dashboard
* ✅ **Flexible Deployment** - Supports both Argus and Atlas modes

## How It Works

Cursor's hook system executes custom scripts at four critical points:

```mermaid
sequenceDiagram
    autonumber
    participant User
    participant ChatHook as beforeSubmitPrompt Hook
    participant Agent as AI Agent
    participant ChatResponseHook as afterAgentResponse Hook
    participant MCPBeforeHook as beforeMCPExecution Hook
    participant MCP as MCP Server
    participant MCPAfterHook as afterMCPExecution Hook
    participant Akto as Akto Dashboard

    User->>ChatHook: User submits chat prompt
    Note over ChatHook: Validate guardrail policies
    alt Safe Prompt
        ChatHook->>Agent: Forward to AI
        ChatHook-->>Akto: Report event
    else Malicious
        ChatHook-->>User: Block
        ChatHook-->>Akto: Report security event
    end

    Agent->>ChatResponseHook: Agent response
    Note over ChatResponseHook: Validate response
    ChatResponseHook-->>Akto: Report event
    ChatResponseHook->>User: Response

    Agent->>MCPBeforeHook: MCP tool request
    Note over MCPBeforeHook: Validate tool parameters
    MCPBeforeHook->>MCP: Execute if safe
    MCPBeforeHook-->>Akto: Report event

    MCP->>MCPAfterHook: Tool response
    Note over MCPAfterHook: Validate response
    MCPAfterHook-->>Akto: Report event
    MCPAfterHook->>Agent: Response
```

**4 Hook Points:**

1. `beforeSubmitPrompt` - Validates chat prompts before sending to AI
2. `afterAgentResponse` - Validates AI responses before displaying
3. `beforeMCPExecution` - Validates MCP tool requests before execution
4. `afterMCPExecution` - Validates MCP tool responses

## File Structure

```
~/.cursor/
├── hooks/
│   └── akto/
│       ├── akto-validate-chat-prompt-wrapper.sh       # Chat prompt wrapper
│       ├── akto-validate-chat-prompt.py               # Chat prompt validation
│       ├── akto-validate-chat-response-wrapper.sh     # Chat response wrapper
│       ├── akto-validate-chat-response.py             # Chat response validation
│       ├── akto-validate-mcp-request-wrapper.sh       # MCP request wrapper
│       ├── akto-validate-mcp-request.py               # MCP request validation
│       ├── akto-validate-mcp-response-wrapper.sh      # MCP response wrapper
│       ├── akto-validate-mcp-response.py              # MCP response validation
│       ├── akto_ingestion_utility.py                  # Shared validation/ingestion logic
│       └── akto_machine_id.py                         # Device ID utility
├── akto/
│   ├── chat-logs/
│   │   ├── akto-validate-chat-prompt.log
│   │   └── akto-validate-chat-response.log
│   └── mcp-logs/
│       ├── akto-validate-request.log
│       └── akto-validate-response.log
└── hooks.json                                          # Hook configuration
```

**Key Files:**

* **Wrapper scripts (`.sh`)**: Set environment variables, invoke Python scripts
  * ⚠️ **Contains `AKTO_DATA_INGESTION_URL` placeholder** - Must be replaced with your Akto instance URL
* **Python scripts (`.py`)**: Core validation logic and Akto API communication
* **`akto_ingestion_utility.py`**: Shared validation/ingestion logic imported by the hook scripts — lives in a different GitHub directory (`shared/`, not `cursor-hooks/`), so it needs its own download step
* **`akto_machine_id.py`**: Generates unique device identifiers for Atlas mode
* **`hooks.json`**: Links hooks to wrapper scripts

## Setup Guide

### Prerequisites

* Cursor IDE (version 0.40+ with hooks support)
* Akto instance URL
* macOS, Linux, or Windows with bash/zsh

### Installation Steps

{% stepper %}
{% step %}
**Create Directories**

```bash
mkdir -p ~/.cursor/hooks/akto
mkdir -p ~/.cursor/akto/chat-logs
mkdir -p ~/.cursor/akto/mcp-logs
```

{% endstep %}

{% step %}
**Download Hook Scripts**

```bash
# Base URLs for downloading hooks
HOOKS_BASE="https://raw.githubusercontent.com/akto-api-security/akto/master/apps/mcp-endpoint-shield/cursor-hooks"
SHARED_BASE="https://raw.githubusercontent.com/akto-api-security/akto/master/apps/mcp-endpoint-shield/shared"

# Download chat validation hooks
curl -o ~/.cursor/hooks/akto/akto-validate-chat-prompt-wrapper.sh \
  "${HOOKS_BASE}/akto-validate-chat-prompt-wrapper.sh"
curl -o ~/.cursor/hooks/akto/akto-validate-chat-prompt.py \
  "${HOOKS_BASE}/akto-validate-chat-prompt.py"
curl -o ~/.cursor/hooks/akto/akto-validate-chat-response-wrapper.sh \
  "${HOOKS_BASE}/akto-validate-chat-response-wrapper.sh"
curl -o ~/.cursor/hooks/akto/akto-validate-chat-response.py \
  "${HOOKS_BASE}/akto-validate-chat-response.py"

# Download MCP validation hooks
curl -o ~/.cursor/hooks/akto/akto-validate-mcp-request-wrapper.sh \
  "${HOOKS_BASE}/akto-validate-mcp-request-wrapper.sh"
curl -o ~/.cursor/hooks/akto/akto-validate-mcp-request.py \
  "${HOOKS_BASE}/akto-validate-mcp-request.py"
curl -o ~/.cursor/hooks/akto/akto-validate-mcp-response-wrapper.sh \
  "${HOOKS_BASE}/akto-validate-mcp-response-wrapper.sh"
curl -o ~/.cursor/hooks/akto/akto-validate-mcp-response.py \
  "${HOOKS_BASE}/akto-validate-mcp-response.py"

# Download utility
curl -o ~/.cursor/hooks/akto/akto_machine_id.py \
  "${HOOKS_BASE}/akto_machine_id.py"

# Download shared ingestion utility (note: SHARED_BASE, not HOOKS_BASE)
curl -o ~/.cursor/hooks/akto/akto_ingestion_utility.py \
  "${SHARED_BASE}/akto_ingestion_utility.py"

# Make executable
chmod +x ~/.cursor/hooks/akto/*.sh
```

{% hint style="info" %}
`akto_ingestion_utility.py` must land in the same directory as the hook scripts — they import it as a plain top-level module, resolved from the script's own directory. Skipping this download makes the hooks fail with `ModuleNotFoundError: No module named 'akto_ingestion_utility'`.
{% endhint %}
{% endstep %}

{% step %}
**Configure Akto Ingestion URL and API Token** ⚠️ **CRITICAL STEP**

{% hint style="warning" %}
All wrapper scripts contain the placeholders `{{AKTO_DATA_INGESTION_URL}}`, `{{AKTO_API_TOKEN}}` and `{{DEVICE_ID (optional)}}` that **must be replaced** — the URL with your actual Akto instance URL, and the token with your Akto API token (obtain it from **Akto Atlas → Connectors → Setup Guardrail** card). If your deployment does not require auth, set the token to an empty string so the placeholder is removed (an unsubstituted `{{AKTO_API_TOKEN}}` would be sent as an invalid `Authorization` header).
{% endhint %}

{% hint style="info" %}
`DEVICE_ID` becomes the first label of the reported hostname (`<DEVICE_ID>.ai-agent.cursor`), and the dashboard displays that label verbatim as the device name. Substitute a real device label rather than deleting the line — with `DEVICE_ID` empty the hooks fall back to the lowercased computer name, which won't match how the same machine is named by the enterprise installer.
{% endhint %}

**Automated replacement:**

```bash
# Set your Akto ingestion URL and API token
AKTO_URL="https://your-akto-instance.com"
AKTO_API_TOKEN="your-akto-api-token"   # leave empty ("") if your deployment doesn't require auth

# Build the device label: <computer-name>-<first 8 chars of machine id>
# Works on macOS (scutil/ioreg) and Linux (hostname//etc/machine-id).
# Non-alphanumerics become '-' so the label cannot contain a dot: the dashboard
# splits the reported host on '.', and a dotted label would be truncated.
DEVICE_NAME=$(scutil --get ComputerName 2>/dev/null | tr -d '\n')
if [ -z "$DEVICE_NAME" ]; then DEVICE_NAME=$(hostname 2>/dev/null | tr -d '\n'); fi
if [ -z "$DEVICE_NAME" ]; then DEVICE_NAME=$(uname -n 2>/dev/null | tr -d '\n'); fi
DEVICE_NAME=$(printf '%s' "${DEVICE_NAME%.local}" | sed 's/[^a-zA-Z0-9]/-/g')

MACHINE_ID=$(ioreg -rd1 -c IOPlatformExpertDevice 2>/dev/null | awk -F'"' '/IOPlatformUUID/{print $4}')
if [ -z "$MACHINE_ID" ] && [ -r /etc/machine-id ]; then MACHINE_ID=$(tr -d '\n' < /etc/machine-id); fi
MACHINE_ID=$(printf '%s' "$MACHINE_ID" | tr -cd 'a-fA-F0-9' | tr '[:upper:]' '[:lower:]')

DEVICE_ID="${DEVICE_NAME:-unknown-device}"
if [ -n "$MACHINE_ID" ]; then DEVICE_ID="${DEVICE_ID}-$(printf '%s' "$MACHINE_ID" | cut -c1-8)"; fi
echo "Device label: $DEVICE_ID"

# Update all wrapper scripts
sed -i.bak "s|{{AKTO_DATA_INGESTION_URL}}|${AKTO_URL}|g" ~/.cursor/hooks/akto/*-wrapper.sh
sed -i.bak "s|{{AKTO_API_TOKEN}}|${AKTO_API_TOKEN}|g" ~/.cursor/hooks/akto/*-wrapper.sh
sed -i.bak "s|{{DEVICE_ID (optional)}}|${DEVICE_ID}|g" ~/.cursor/hooks/akto/*-wrapper.sh

# Verify replacement — no {{...}} should remain
grep -E "AKTO_DATA_INGESTION_URL|AKTO_API_TOKEN|DEVICE_ID" ~/.cursor/hooks/akto/*-wrapper.sh
grep -l "{{" ~/.cursor/hooks/akto/*-wrapper.sh && echo "⚠️  placeholders still present" || echo "✅ all placeholders substituted"
```

**Manual replacement (alternative):**

Edit each wrapper script and replace:

```bash
AKTO_DATA_INGESTION_URL="{{AKTO_DATA_INGESTION_URL}}"
AKTO_API_TOKEN="{{AKTO_API_TOKEN}}"
DEVICE_ID="{{DEVICE_ID (optional)}}"
```

With:

```bash
AKTO_DATA_INGESTION_URL="https://your-akto-instance.com"
AKTO_API_TOKEN="your-akto-api-token"
DEVICE_ID="My-MacBook-Pro-f0929fe8"
```

Files to update:

* `akto-validate-chat-prompt-wrapper.sh`
* `akto-validate-chat-response-wrapper.sh`
* `akto-validate-mcp-request-wrapper.sh`
* `akto-validate-mcp-response-wrapper.sh`
  {% endstep %}

{% step %}
**Configure Hooks**

Create Cursor hooks configuration:

```bash
cat > ~/.cursor/hooks.json << 'EOF'
{
  "version": 1,
  "hooks": {
    "beforeSubmitPrompt": [
      {
        "command": "bash ~/.cursor/hooks/akto/akto-validate-chat-prompt-wrapper.sh",
        "timeout": 10
      }
    ],
    "afterAgentResponse": [
      {
        "command": "bash ~/.cursor/hooks/akto/akto-validate-chat-response-wrapper.sh",
        "timeout": 10
      }
    ],
    "beforeMCPExecution": [
      {
        "command": "bash ~/.cursor/hooks/akto/akto-validate-mcp-request-wrapper.sh",
        "timeout": 10
      }
    ],
    "afterMCPExecution": [
      {
        "command": "bash ~/.cursor/hooks/akto/akto-validate-mcp-response-wrapper.sh",
        "timeout": 10
      }
    ]
  }
}
EOF
```

{% endstep %}

{% step %}
**Configure Hook Behavior (Optional)**

Edit wrapper scripts to customize:

```bash
# In each *-wrapper.sh file:

MODE="atlas"                    # "argus" or "atlas"
AKTO_SYNC_MODE="true"          # "true" (blocking) or "false" (observe only)
AKTO_TIMEOUT="5"               # Timeout in seconds
AKTO_CONNECTOR="claude_code_cli"
```

**Mode Options:**

* **Argus**: Standard validation and reporting
* **Atlas**: Includes device-specific metadata

**Sync Mode:**

* **true**: Blocks threats
* **false**: Reports but allows execution
  {% endstep %}

{% step %}
**Restart Cursor**

```bash
# Close all Cursor windows and reopen
# Or use Cmd+Q (macOS) / Alt+F4 (Windows/Linux)
```

{% endstep %}

{% step %}
**Verify Installation**

Check logs to confirm hooks are working:

```bash
# View chat logs
tail -f ~/.cursor/akto/chat-logs/akto-validate-chat-prompt.log
tail -f ~/.cursor/akto/chat-logs/akto-validate-chat-response.log

# View MCP logs
tail -f ~/.cursor/akto/mcp-logs/akto-validate-request.log
tail -f ~/.cursor/akto/mcp-logs/akto-validate-response.log
```

Test by typing a message in Cursor's chat or using an MCP tool. You should see log entries indicating validation occurred.
{% endstep %}
{% endstepper %}

## Configuration Reference

### Wrapper Script Variables

```bash
MODE="atlas"                                            # "argus" or "atlas"
AKTO_DATA_INGESTION_URL="{{AKTO_DATA_INGESTION_URL}}"  # ⚠️ MUST REPLACE
AKTO_API_TOKEN="{{AKTO_API_TOKEN}}"                    # Akto API token (Authorization header)
AKTO_SYNC_MODE="true"                                  # "true" or "false"
AKTO_TIMEOUT="5"                                       # Timeout in seconds
AKTO_CONNECTOR="claude_code_cli"                       # Connector identifier
```

### Environment Variables (Optional)

Override defaults via environment variables:

```bash
export MODE="atlas"
export AKTO_DATA_INGESTION_URL="https://your-akto-instance.com"
export AKTO_API_TOKEN="your-akto-api-token"
export AKTO_SYNC_MODE="true"
export AKTO_TIMEOUT="5"
```

## Troubleshooting

### `ModuleNotFoundError: No module named 'akto_ingestion_utility'`

The shared ingestion utility was not downloaded, or landed outside `~/.cursor/hooks/akto/`. It lives in the `shared/` directory on GitHub, **not** under `HOOKS_BASE`, so it needs its own `curl`.

```bash
# Confirm the file is missing
ls -l ~/.cursor/hooks/akto/akto_ingestion_utility.py

# Fetch it into the same directory as the hook scripts
SHARED_BASE="https://raw.githubusercontent.com/akto-api-security/akto/master/apps/mcp-endpoint-shield/shared"
curl -o ~/.cursor/hooks/akto/akto_ingestion_utility.py \
  "${SHARED_BASE}/akto_ingestion_utility.py"

# Verify the import resolves
python3 -c "import sys; sys.path.insert(0, '$HOME/.cursor/hooks/akto'); import akto_ingestion_utility; print('OK')"
```

If the file is present and the import still fails, check that `PYTHONSAFEPATH` is unset — it suppresses the script-directory entry on `sys.path` that this import relies on.

```bash
env | grep -i pythonsafepath   # must return nothing
```

### Hooks Not Executing

```bash
# Check hooks.json exists and is valid
cat ~/.cursor/hooks.json | python3 -m json.tool

# Verify scripts are executable
ls -la ~/.cursor/hooks/akto/
chmod +x ~/.cursor/hooks/akto/*.sh

# Restart Cursor completely
killall Cursor && open -a Cursor
```

### Ingestion URL Not Configured

```bash
# Check if placeholder still exists
grep "{{AKTO_DATA_INGESTION_URL}}" ~/.cursor/hooks/akto/*-wrapper.sh

# Replace with actual URL
AKTO_URL="https://your-akto-instance.com"
sed -i.bak "s|{{AKTO_DATA_INGESTION_URL}}|${AKTO_URL}|g" ~/.cursor/hooks/akto/*-wrapper.sh
```

### Device Shows Up With the Wrong Name

The device name in the dashboard is the first label of the reported hostname, which is whatever `DEVICE_ID` the wrapper exports. Check what is actually set:

```bash
grep DEVICE_ID ~/.cursor/hooks/akto/*-wrapper.sh
```

An unsubstituted `{{DEVICE_ID (optional)}}` is reported verbatim; an empty or missing value falls back to the lowercased computer name (or the raw machine UUID where that cannot be resolved). Substitute a real label:

```bash
DEVICE_NAME=$(scutil --get ComputerName 2>/dev/null | tr -d '\n')
if [ -z "$DEVICE_NAME" ]; then DEVICE_NAME=$(hostname 2>/dev/null | tr -d '\n'); fi
if [ -z "$DEVICE_NAME" ]; then DEVICE_NAME=$(uname -n 2>/dev/null | tr -d '\n'); fi
DEVICE_NAME=$(printf '%s' "${DEVICE_NAME%.local}" | sed 's/[^a-zA-Z0-9]/-/g')
MACHINE_ID=$(ioreg -rd1 -c IOPlatformExpertDevice 2>/dev/null | awk -F'"' '/IOPlatformUUID/{print $4}')
if [ -z "$MACHINE_ID" ] && [ -r /etc/machine-id ]; then MACHINE_ID=$(tr -d '\n' < /etc/machine-id); fi
MACHINE_ID=$(printf '%s' "$MACHINE_ID" | tr -cd 'a-fA-F0-9' | tr '[:upper:]' '[:lower:]')
DEVICE_ID="${DEVICE_NAME:-unknown-device}"
if [ -n "$MACHINE_ID" ]; then DEVICE_ID="${DEVICE_ID}-$(printf '%s' "$MACHINE_ID" | cut -c1-8)"; fi
sed -i.bak "s|{{DEVICE_ID (optional)}}|${DEVICE_ID}|g" ~/.cursor/hooks/akto/*-wrapper.sh
```

### Check Logs for Errors

```bash
# View chat logs
cat ~/.cursor/akto/chat-logs/akto-validate-chat-prompt.log
cat ~/.cursor/akto/chat-logs/akto-validate-chat-response.log

# View MCP logs
cat ~/.cursor/akto/mcp-logs/akto-validate-request.log
cat ~/.cursor/akto/mcp-logs/akto-validate-response.log
```

### Events Not in Dashboard

```bash
# Test API connectivity
curl -X POST "${AKTO_DATA_INGESTION_URL}/api/v1/events" \
  -H "Content-Type: application/json" \
  -d '{"test": "event"}'

# Verify URL in wrapper scripts
grep "AKTO_DATA_INGESTION_URL" ~/.cursor/hooks/akto/*-wrapper.sh
```

## Uninstallation

To completely remove Akto hooks from Cursor:

### Complete Removal

```bash
# 1. Remove hook configuration
rm ~/.cursor/hooks.json

# 2. Remove Akto hook scripts
rm -rf ~/.cursor/hooks/akto/

# 3. Remove Akto logs (optional - keeps historical data if skipped)
rm -rf ~/.cursor/akto/

# 4. Restart Cursor
killall Cursor && open -a Cursor
```

### Selective Removal (Keep Logs)

If you want to preserve logs for audit purposes:

```bash
# Remove only hooks and configuration
rm ~/.cursor/hooks.json
rm -rf ~/.cursor/hooks/akto/

# Restart Cursor
killall Cursor && open -a Cursor
```

### Backup Before Removal

```bash
# Backup configuration and logs before removal
mkdir -p ~/akto-backup
cp ~/.cursor/hooks.json ~/akto-backup/cursor-hooks.json.bak
cp -r ~/.cursor/akto/ ~/akto-backup/cursor-akto-logs/

# Then proceed with removal steps above
```

### Verify Removal

```bash
# Check that hooks are removed
test -f ~/.cursor/hooks.json && echo "⚠️  hooks.json still exists" || echo "✅ hooks.json removed"
test -d ~/.cursor/hooks/akto && echo "⚠️  Hook scripts still exist" || echo "✅ Hook scripts removed"

# Check if logs are removed (if you chose to remove them)
test -d ~/.cursor/akto && echo "ℹ️  Logs still present" || echo "✅ Logs removed"
```

### Restore Cursor to Default

After uninstallation, Cursor will operate without Akto security monitoring. No restart or additional configuration is needed beyond removing the files.

## Enterprise Deployment

### Automated Deployment Script

```bash
#!/bin/bash
# deploy-cursor-hooks.sh

set -e
AKTO_URL="${1:-https://your-akto-instance.com}"
AKTO_API_TOKEN="${2:-}"   # optional: pass your Akto API token as the 2nd argument

echo "🔧 Installing Akto Guardrails for Cursor..."

# Create directories
mkdir -p ~/.cursor/hooks/akto ~/.cursor/akto/chat-logs ~/.cursor/akto/mcp-logs

# Download hooks
HOOKS_BASE="https://raw.githubusercontent.com/akto-api-security/akto/master/apps/mcp-endpoint-shield/cursor-hooks"
SHARED_BASE="https://raw.githubusercontent.com/akto-api-security/akto/master/apps/mcp-endpoint-shield/shared"
curl -s "${HOOKS_BASE}/akto-validate-chat-prompt-wrapper.sh" -o ~/.cursor/hooks/akto/akto-validate-chat-prompt-wrapper.sh
curl -s "${HOOKS_BASE}/akto-validate-chat-prompt.py" -o ~/.cursor/hooks/akto/akto-validate-chat-prompt.py
curl -s "${HOOKS_BASE}/akto-validate-chat-response-wrapper.sh" -o ~/.cursor/hooks/akto/akto-validate-chat-response-wrapper.sh
curl -s "${HOOKS_BASE}/akto-validate-chat-response.py" -o ~/.cursor/hooks/akto/akto-validate-chat-response.py
curl -s "${HOOKS_BASE}/akto-validate-mcp-request-wrapper.sh" -o ~/.cursor/hooks/akto/akto-validate-mcp-request-wrapper.sh
curl -s "${HOOKS_BASE}/akto-validate-mcp-request.py" -o ~/.cursor/hooks/akto/akto-validate-mcp-request.py
curl -s "${HOOKS_BASE}/akto-validate-mcp-response-wrapper.sh" -o ~/.cursor/hooks/akto/akto-validate-mcp-response-wrapper.sh
curl -s "${HOOKS_BASE}/akto-validate-mcp-response.py" -o ~/.cursor/hooks/akto/akto-validate-mcp-response.py
curl -s "${HOOKS_BASE}/akto_machine_id.py" -o ~/.cursor/hooks/akto/akto_machine_id.py
curl -s "${SHARED_BASE}/akto_ingestion_utility.py" -o ~/.cursor/hooks/akto/akto_ingestion_utility.py

# Make executable
chmod +x ~/.cursor/hooks/akto/*.sh

# Build the device label: <computer-name>-<first 8 chars of machine id>
DEVICE_NAME=$(scutil --get ComputerName 2>/dev/null | tr -d '\n')
if [ -z "$DEVICE_NAME" ]; then DEVICE_NAME=$(hostname 2>/dev/null | tr -d '\n'); fi
if [ -z "$DEVICE_NAME" ]; then DEVICE_NAME=$(uname -n 2>/dev/null | tr -d '\n'); fi
DEVICE_NAME=$(printf '%s' "${DEVICE_NAME%.local}" | sed 's/[^a-zA-Z0-9]/-/g')
MACHINE_ID=$(ioreg -rd1 -c IOPlatformExpertDevice 2>/dev/null | awk -F'"' '/IOPlatformUUID/{print $4}')
if [ -z "$MACHINE_ID" ] && [ -r /etc/machine-id ]; then MACHINE_ID=$(tr -d '\n' < /etc/machine-id); fi
MACHINE_ID=$(printf '%s' "$MACHINE_ID" | tr -cd 'a-fA-F0-9' | tr '[:upper:]' '[:lower:]')
DEVICE_ID="${DEVICE_NAME:-unknown-device}"
if [ -n "$MACHINE_ID" ]; then DEVICE_ID="${DEVICE_ID}-$(printf '%s' "$MACHINE_ID" | cut -c1-8)"; fi

# Configure URL, token and device label
sed -i.bak "s|{{AKTO_DATA_INGESTION_URL}}|${AKTO_URL}|g" ~/.cursor/hooks/akto/*-wrapper.sh
sed -i.bak "s|{{AKTO_API_TOKEN}}|${AKTO_API_TOKEN}|g" ~/.cursor/hooks/akto/*-wrapper.sh
sed -i.bak "s|{{DEVICE_ID (optional)}}|${DEVICE_ID}|g" ~/.cursor/hooks/akto/*-wrapper.sh

# Create hooks.json
cat > ~/.cursor/hooks.json << 'EOFHOOKS'
{
  "version": 1,
  "hooks": {
    "beforeSubmitPrompt": [{"command": "bash ~/.cursor/hooks/akto/akto-validate-chat-prompt-wrapper.sh", "timeout": 10}],
    "afterAgentResponse": [{"command": "bash ~/.cursor/hooks/akto/akto-validate-chat-response-wrapper.sh", "timeout": 10}],
    "beforeMCPExecution": [{"command": "bash ~/.cursor/hooks/akto/akto-validate-mcp-request-wrapper.sh", "timeout": 10}],
    "afterMCPExecution": [{"command": "bash ~/.cursor/hooks/akto/akto-validate-mcp-response-wrapper.sh", "timeout": 10}]
  }
}
EOFHOOKS

echo "✅ Installation complete! Restart Cursor."
echo "📍 Akto instance: ${AKTO_URL}"
```

**Deploy to developers:**

```bash
curl -fsSL https://your-org.com/deploy-cursor-hooks.sh | bash -s https://your-akto-instance.com
```

## Quick Setup Summary

```bash
# 1. Create directories
mkdir -p ~/.cursor/hooks/akto ~/.cursor/akto/chat-logs ~/.cursor/akto/mcp-logs

# 2. Download all hook scripts from GitHub (see step 2 above)

# 3. ⚠️ Configure Akto URL, API token and device label (ALL REQUIRED)
AKTO_URL="https://your-akto-instance.com"
AKTO_API_TOKEN="your-akto-api-token"   # leave empty ("") if your deployment doesn't require auth
DEVICE_NAME=$(scutil --get ComputerName 2>/dev/null | tr -d '\n')
if [ -z "$DEVICE_NAME" ]; then DEVICE_NAME=$(hostname 2>/dev/null | tr -d '\n'); fi
if [ -z "$DEVICE_NAME" ]; then DEVICE_NAME=$(uname -n 2>/dev/null | tr -d '\n'); fi
DEVICE_NAME=$(printf '%s' "${DEVICE_NAME%.local}" | sed 's/[^a-zA-Z0-9]/-/g')
MACHINE_ID=$(ioreg -rd1 -c IOPlatformExpertDevice 2>/dev/null | awk -F'"' '/IOPlatformUUID/{print $4}')
if [ -z "$MACHINE_ID" ] && [ -r /etc/machine-id ]; then MACHINE_ID=$(tr -d '\n' < /etc/machine-id); fi
MACHINE_ID=$(printf '%s' "$MACHINE_ID" | tr -cd 'a-fA-F0-9' | tr '[:upper:]' '[:lower:]')
DEVICE_ID="${DEVICE_NAME:-unknown-device}"
if [ -n "$MACHINE_ID" ]; then DEVICE_ID="${DEVICE_ID}-$(printf '%s' "$MACHINE_ID" | cut -c1-8)"; fi
sed -i.bak "s|{{AKTO_DATA_INGESTION_URL}}|${AKTO_URL}|g" ~/.cursor/hooks/akto/*-wrapper.sh
sed -i.bak "s|{{AKTO_API_TOKEN}}|${AKTO_API_TOKEN}|g" ~/.cursor/hooks/akto/*-wrapper.sh
sed -i.bak "s|{{DEVICE_ID (optional)}}|${DEVICE_ID}|g" ~/.cursor/hooks/akto/*-wrapper.sh

# 4. Make executable
chmod +x ~/.cursor/hooks/akto/*.sh

# 5. Create hooks.json (see step 4 above)

# 6. Restart Cursor
```

## Resources

* **GitHub**: <https://github.com/akto-api-security/akto>
* **Support**: <support@akto.io>
* **Community**: <https://www.akto.io/community>


# Claude CLI Hooks

Akto Guardrails for Claude CLI provides security validation for AI interactions. It intercepts prompts before sending to Claude, MCP tool calls before they execute, and responses after generation — validating each against security policies, blocking risky behavior, and reporting events to your Akto dashboard.

## Key Features

* ✅ **Zero Installation** - No standalone apps to install
* ✅ **Transparent Integration** - Uses Claude CLI's native hook mechanism
* ✅ **Real-time Protection** - Validates every prompt, MCP tool call and response
* ✅ **MCP Coverage** - Tool calls are reported as JSON-RPC `tools/call`, so MCP servers and tools show up in your inventory
* ✅ **Centralized Monitoring** - All events reported to Akto dashboard
* ✅ **Flexible Deployment** - Supports Argus and Atlas modes
* ✅ **Configurable Behavior** - Blocking or observation modes

## How It Works

Claude CLI's hook system executes custom scripts at four critical points — two around the conversation, and two around every tool call the agent makes:

```mermaid
sequenceDiagram
    autonumber
    participant User
    participant PromptHook as UserPromptSubmit Hook
    participant Claude as Claude AI
    participant PreTool as PreToolUse Hook
    participant MCP as MCP Server / Tool
    participant PostTool as PostToolUse Hook
    participant ResponseHook as Stop Hook
    participant Akto as Akto Dashboard

    User->>PromptHook: User submits prompt
    Note over PromptHook: Validate guardrail policies
    alt Safe Prompt
        PromptHook->>Claude: Forward to API
        PromptHook-->>Akto: Report event
    else Malicious
        PromptHook-->>User: Block
        PromptHook-->>Akto: Report security event
    end

    Claude->>PreTool: Tool call (mcp__server__tool)
    Note over PreTool: Validate tool input
    alt Safe Tool Call
        PreTool->>MCP: Execute tool
        PreTool-->>Akto: Report event
    else Malicious
        PreTool-->>Claude: permissionDecision "deny"
        PreTool-->>Akto: Report security event
    end

    MCP->>PostTool: Tool result
    Note over PostTool: Capture result
    PostTool-->>Akto: Report event
    PostTool->>Claude: Result

    Claude->>ResponseHook: Claude response
    Note over ResponseHook: Validate response
    ResponseHook-->>Akto: Report event
    ResponseHook->>User: Response
```

**4 Hook Points:**

1. `UserPromptSubmit` — Validates prompts before sending to Claude API
2. `PreToolUse` — Validates MCP tool input before execution. The only hook that can block a tool call: it returns `permissionDecision: "deny"` with a reason
3. `PostToolUse` — Captures MCP tool results for observability and response guardrails
4. `Stop` — Validates responses when Claude finishes generating

{% hint style="info" %}
**How MCP tool calls are recognised.** Claude Code names MCP tools `mcp__<server>__<tool>`. The `PreToolUse` hook parses that shape, and for a match reports the call to Akto as a JSON-RPC `tools/call` on the `/mcp` path — so it lands in your MCP inventory with the server and tool broken out. Tool calls that are **not** MCP (`Bash`, `Read`, `Edit`, …) still pass through the same hook; they are mirrored to `/tool/<tool-name>` instead. Ingestion of non-MCP tool calls is off by default — set `AKTO_INGEST_NON_MCP_TOOLS=true` to enable it.
{% endhint %}

## File Structure

```
~/.claude/
├── hooks/
│   ├── akto-validate-prompt-wrapper.sh       # Prompt validation wrapper
│   ├── akto-validate-prompt.py                # Prompt validation logic
│   ├── akto-validate-response-wrapper.sh      # Response validation wrapper
│   ├── akto-validate-response.py              # Response validation logic
│   ├── akto-validate-mcp-request-wrapper.sh   # MCP tool input wrapper
│   ├── akto-validate-mcp-request.py           # MCP tool input validation
│   ├── akto-validate-mcp-response-wrapper.sh  # MCP tool result wrapper
│   ├── akto-validate-mcp-response.py          # MCP tool result capture
│   ├── akto_ingestion_utility.py              # Shared validation/ingestion logic
│   ├── akto_heartbeat.py                      # Device heartbeat publisher
│   └── akto_machine_id.py                     # Device ID utility
├── akto/
│   └── logs/
│       ├── validate-prompt.log
│       ├── validate-response.log
│       ├── validate-mcp-request.log
│       └── validate-mcp-response.log
└── settings.json                              # Hook configuration
```

**Key Files:**

* **Wrapper scripts (`.sh`)**: Set environment variables, invoke Python scripts
  * ⚠️ **Contains `AKTO_DATA_INGESTION_URL` placeholder** - Must be replaced with your Akto instance URL
* **Python scripts (`.py`)**: Core validation logic and Akto API communication
* **`akto-validate-mcp-request.py`**: Validates every tool call before it runs. Reports MCP calls (`mcp__<server>__<tool>`) as JSON-RPC `tools/call` on `/mcp`; can deny the call
* **`akto-validate-mcp-response.py`**: Captures the tool result as a JSON-RPC result. Observational — it cannot block
* **`akto_ingestion_utility.py`**, **`akto_machine_id.py`**, **`akto_heartbeat.py`**: shared modules imported by the hook scripts. All three live in the `shared/` GitHub directory, **not** `claude-cli-hooks/`, so they are fetched from `SHARED_BASE` — miss any one and the hooks fail at import with `ModuleNotFoundError`
* **`akto_heartbeat.py`**: Registers this device with Akto every 30s. Required — without a heartbeat record, mini-runtime cannot resolve the device to a user and **drops every hook event before indexing**, so the endpoint never appears under LLM observability / traces even though ingestion succeeds
* **`akto_machine_id.py`**: Generates unique device identifiers for Atlas mode
* **`settings.json`**: Links hooks to wrapper scripts

## Setup Guide

### Prerequisites

* Claude CLI installed ([Installation Guide](https://code.claude.com/docs/en/setup))
* Akto instance URL
* Python 3.7+ (standard library only — the hooks need no third-party packages)
* macOS, Linux, or Windows with bash/zsh

### Installation Steps

{% stepper %}
{% step %}
**Create Directories**

```bash
mkdir -p ~/.claude/hooks
mkdir -p ~/.claude/akto/logs
```

{% endstep %}

{% step %}
**Download Hook Scripts**

```bash
# Base URLs for downloading hooks
HOOKS_BASE="https://raw.githubusercontent.com/akto-api-security/akto/master/apps/mcp-endpoint-shield/claude-cli-hooks"
SHARED_BASE="https://raw.githubusercontent.com/akto-api-security/akto/master/apps/mcp-endpoint-shield/shared"

# Download prompt validation hooks
curl -o ~/.claude/hooks/akto-validate-prompt-wrapper.sh \
  "${HOOKS_BASE}/akto-validate-prompt-wrapper.sh"
curl -o ~/.claude/hooks/akto-validate-prompt.py \
  "${HOOKS_BASE}/akto-validate-prompt.py"

# Download response validation hooks
curl -o ~/.claude/hooks/akto-validate-response-wrapper.sh \
  "${HOOKS_BASE}/akto-validate-response-wrapper.sh"
curl -o ~/.claude/hooks/akto-validate-response.py \
  "${HOOKS_BASE}/akto-validate-response.py"

# Download MCP tool hooks (PreToolUse / PostToolUse)
curl -o ~/.claude/hooks/akto-validate-mcp-request-wrapper.sh \
  "${HOOKS_BASE}/akto-validate-mcp-request-wrapper.sh"
curl -o ~/.claude/hooks/akto-validate-mcp-request.py \
  "${HOOKS_BASE}/akto-validate-mcp-request.py"
curl -o ~/.claude/hooks/akto-validate-mcp-response-wrapper.sh \
  "${HOOKS_BASE}/akto-validate-mcp-response-wrapper.sh"
curl -o ~/.claude/hooks/akto-validate-mcp-response.py \
  "${HOOKS_BASE}/akto-validate-mcp-response.py"

# Download the shared modules (note: SHARED_BASE, not HOOKS_BASE — these live in
# a different GitHub directory). All three must land next to the hook scripts.
for f in akto_ingestion_utility.py akto_machine_id.py akto_heartbeat.py; do
  curl -o ~/.claude/hooks/"$f" "${SHARED_BASE}/${f}"
done

# Make executable
chmod +x ~/.claude/hooks/*.sh
```

{% hint style="info" %}
`akto_ingestion_utility.py` must land in the same directory as the hook scripts — they import it as a plain top-level module, resolved from the script's own directory. Skipping this download makes every hook fail with `ModuleNotFoundError: No module named 'akto_ingestion_utility'`.
{% endhint %}
{% endstep %}

{% step %}
**Configure Akto Ingestion URL, API Token and Device ID** ⚠️ **CRITICAL STEP**

{% hint style="warning" %}
All wrapper scripts contain the placeholders `{{AKTO_DATA_INGESTION_URL}}`, `{{AKTO_API_TOKEN}}` and `{{DEVICE_ID (optional)}}` that **must be replaced** — the URL with your actual Akto instance URL, the token with your Akto API token (obtain it from **Akto Atlas → Connectors → Setup Guardrail** card), and `{{DEVICE_ID (optional)}}` with this machine's device label, which the dashboard shows as the device name. If your deployment does not require auth, set the token to an empty string so the placeholder is removed (an unsubstituted `{{AKTO_API_TOKEN}}` would be sent as an invalid `Authorization` header).
{% endhint %}

**Automated replacement:**

```bash
# Set your Akto ingestion URL and API token
AKTO_URL="https://your-akto-instance.com"
AKTO_API_TOKEN="your-akto-api-token"   # leave empty ("") if your deployment doesn't require auth

# Build the device label: <computer-name>-<first 8 chars of machine id>
# Works on macOS (scutil/ioreg) and Linux (hostname//etc/machine-id).
# Non-alphanumerics become '-' so the label cannot contain a dot: the dashboard
# splits the reported host on '.', and a dotted label would be truncated.
DEVICE_NAME=$(scutil --get ComputerName 2>/dev/null | tr -d '\n')
if [ -z "$DEVICE_NAME" ]; then DEVICE_NAME=$(hostname 2>/dev/null | tr -d '\n'); fi
if [ -z "$DEVICE_NAME" ]; then DEVICE_NAME=$(uname -n 2>/dev/null | tr -d '\n'); fi
DEVICE_NAME=$(printf '%s' "${DEVICE_NAME%.local}" | sed 's/[^a-zA-Z0-9]/-/g')

MACHINE_ID=$(ioreg -rd1 -c IOPlatformExpertDevice 2>/dev/null | awk -F'"' '/IOPlatformUUID/{print $4}')
if [ -z "$MACHINE_ID" ] && [ -r /etc/machine-id ]; then MACHINE_ID=$(tr -d '\n' < /etc/machine-id); fi
MACHINE_ID=$(printf '%s' "$MACHINE_ID" | tr -cd 'a-fA-F0-9' | tr '[:upper:]' '[:lower:]')

DEVICE_ID="${DEVICE_NAME:-unknown-device}"
if [ -n "$MACHINE_ID" ]; then DEVICE_ID="${DEVICE_ID}-$(printf '%s' "$MACHINE_ID" | cut -c1-8)"; fi
echo "Device label: $DEVICE_ID"

# Update all wrapper scripts
sed -i.bak "s|{{AKTO_DATA_INGESTION_URL}}|${AKTO_URL}|g" ~/.claude/hooks/*-wrapper.sh
sed -i.bak "s|{{AKTO_API_TOKEN}}|${AKTO_API_TOKEN}|g" ~/.claude/hooks/*-wrapper.sh
sed -i.bak "s|{{DEVICE_ID (optional)}}|${DEVICE_ID}|g" ~/.claude/hooks/*-wrapper.sh

# Verify replacement — no {{...}} should remain
grep -E "AKTO_DATA_INGESTION_URL|AKTO_API_TOKEN|DEVICE_ID" ~/.claude/hooks/*-wrapper.sh
grep -l "{{" ~/.claude/hooks/*-wrapper.sh && echo "⚠️  placeholders still present" || echo "✅ all placeholders substituted"
```

**Manual replacement (alternative):**

Edit each wrapper script and replace:

```bash
AKTO_DATA_INGESTION_URL="{{AKTO_DATA_INGESTION_URL}}"
AKTO_API_TOKEN="{{AKTO_API_TOKEN}}"
DEVICE_ID="{{DEVICE_ID (optional)}}"
```

With:

```bash
AKTO_DATA_INGESTION_URL="https://your-akto-instance.com"
AKTO_API_TOKEN="your-akto-api-token"
DEVICE_ID="My-MacBook-Pro-f0929fe8"
```

Files to update:

* `akto-validate-prompt-wrapper.sh`
* `akto-validate-response-wrapper.sh`
* `akto-validate-mcp-request-wrapper.sh`
* `akto-validate-mcp-response-wrapper.sh`
  {% endstep %}

{% step %}
**Configure Hooks**

Create Claude CLI settings configuration:

```bash
cat > ~/.claude/settings.json << 'EOF'
{
  "hooks": {
    "UserPromptSubmit": [
      {
        "hooks": [
          {
            "type": "command",
            "command": "bash ~/.claude/hooks/akto-validate-prompt-wrapper.sh",
            "timeout": 10
          }
        ]
      }
    ],
    "PreToolUse": [
      {
        "hooks": [
          {
            "type": "command",
            "command": "bash ~/.claude/hooks/akto-validate-mcp-request-wrapper.sh",
            "timeout": 10
          }
        ]
      }
    ],
    "PostToolUse": [
      {
        "hooks": [
          {
            "type": "command",
            "command": "bash ~/.claude/hooks/akto-validate-mcp-response-wrapper.sh",
            "timeout": 10
          }
        ]
      }
    ],
    "Stop": [
      {
        "hooks": [
          {
            "type": "command",
            "command": "bash ~/.claude/hooks/akto-validate-response-wrapper.sh",
            "timeout": 10
          }
        ]
      }
    ]
  }
}
EOF
```

{% endstep %}

{% step %}
**Configure Hook Behavior (Optional)**

Edit wrapper scripts to customize:

```bash
# In each *-wrapper.sh file:

MODE="atlas"                    # "argus" or "atlas"
AKTO_SYNC_MODE="true"          # "true" (blocking) or "false" (observe only)
AKTO_TIMEOUT="5"               # Timeout in seconds
AKTO_CONNECTOR="claude_code_cli"
```

**Mode Options:**

* **Argus**: Standard validation and reporting
* **Atlas**: Includes device-specific metadata

**Sync Mode:**

* **true**: Blocks threats
* **false**: Reports but allows execution
  {% endstep %}

{% step %}
**Verify Installation**

Check logs to confirm hooks are working:

```bash
# View logs
tail -f ~/.claude/akto/logs/validate-prompt.log
tail -f ~/.claude/akto/logs/validate-response.log
```

Test by running a Claude command:

```bash
claude "What is 2+2?"
```

You should see log entries indicating validation occurred.
{% endstep %}
{% endstepper %}

## Configuration Reference

### Wrapper Script Variables

```bash
MODE="atlas"                                            # "argus" or "atlas"
AKTO_DATA_INGESTION_URL="{{AKTO_DATA_INGESTION_URL}}"  # ⚠️ MUST REPLACE
AKTO_API_TOKEN="{{AKTO_API_TOKEN}}"                    # Akto API token (Authorization header)
DEVICE_ID="{{DEVICE_ID (optional)}}"                   # ⚠️ MUST REPLACE — becomes the device name
AKTO_SYNC_MODE="true"                                  # "true" or "false"
AKTO_TIMEOUT="5"                                       # Timeout in seconds
AKTO_CONNECTOR="claude_code_cli"                       # Connector identifier
CLAUDE_API_URL="https://api.anthropic.com"             # Claude API endpoint
DATABASE_ABSTRACTOR_SERVICE_URL="https://cyborg.akto.io"  # Heartbeat target (on-prem: override)
```

### MCP Tool Hook Variables

Read by `akto-validate-mcp-request.py` / `akto-validate-mcp-response.py`. All optional — the defaults match what the enterprise installer configures.

```bash
MCP_INGEST_PATH="/mcp"                  # Path MCP tools/call events are mirrored to
AKTO_INGEST_NON_MCP_TOOLS="false"       # "true" also ingests built-in tools (Bash, Read, Edit, …)
NON_MCP_TOOL_PATH_PREFIX="/tool"        # Path prefix for non-MCP tools -> /tool/<tool-name>
NON_MCP_INGEST_PATH=""                  # Set to collapse all non-MCP tools onto one fixed path
```

{% hint style="warning" %}
**On-prem deployments must override `DATABASE_ABSTRACTOR_SERVICE_URL`.** The wrappers default to the SaaS cyborg endpoint. If your Akto runs on-prem, point it at your own abstractor before the heartbeat can register the device — and until it registers, LLM observability and traces stay empty.

```bash
export DATABASE_ABSTRACTOR_SERVICE_URL="https://cyborg.your-akto-instance.com"
sed -i.bak "s|^export DATABASE_ABSTRACTOR_SERVICE_URL=.*|export DATABASE_ABSTRACTOR_SERVICE_URL=\"${DATABASE_ABSTRACTOR_SERVICE_URL}\"|" \
  ~/.claude/hooks/*-wrapper.sh
```

{% endhint %}

**How `DEVICE_ID` is reported:** the hooks send `<DEVICE_ID>.ai-agent.claudecli` as the request host, and the dashboard uses the first label of that host as the device name. If `DEVICE_ID` is empty the hooks fall back to the lowercased computer name (or, where that cannot be resolved, the raw machine UUID — which is why a device sometimes shows up as a bare hex string).

```bash
export DEVICE_ID="My-MacBook-Pro-f0929fe8"   # <name>-<first 8 of machine id>
```

### Environment Variables (Optional)

Override defaults via environment variables or config file:

**Option 1: Environment variables**

```bash
export MODE="atlas"
export AKTO_DATA_INGESTION_URL="https://your-akto-instance.com"
export AKTO_API_TOKEN="your-akto-api-token"
export AKTO_SYNC_MODE="true"
export AKTO_TIMEOUT="5"
```

**Option 2: Config file**

```bash
# Create ~/.claude/akto/config
cat > ~/.claude/akto/config << 'EOF'
AKTO_DATA_INGESTION_URL=https://your-akto-instance.com
AKTO_API_TOKEN=your-akto-api-token
AKTO_TIMEOUT=5
CLAUDE_API_URL=https://api.anthropic.com
AKTO_SYNC_MODE=true
MODE=atlas
EOF

chmod 600 ~/.claude/akto/config
```

## Troubleshooting

### `ModuleNotFoundError: No module named 'akto_ingestion_utility'`

The shared ingestion utility was not downloaded, or landed outside `~/.claude/hooks/`. It lives in the `shared/` directory on GitHub, **not** under `HOOKS_BASE`, so it needs its own `curl`.

```bash
# Confirm the file is missing
ls -l ~/.claude/hooks/akto_ingestion_utility.py

# Fetch it into the same directory as the hook scripts
SHARED_BASE="https://raw.githubusercontent.com/akto-api-security/akto/master/apps/mcp-endpoint-shield/shared"
curl -o ~/.claude/hooks/akto_ingestion_utility.py \
  "${SHARED_BASE}/akto_ingestion_utility.py"

# Verify the import resolves
python3 -c "import sys; sys.path.insert(0, '$HOME/.claude/hooks'); import akto_ingestion_utility; print('OK')"
```

If the file is present and the import still fails, check that `PYTHONSAFEPATH` is unset — it suppresses the script-directory entry on `sys.path` that this import relies on.

```bash
env | grep -i pythonsafepath   # must return nothing
```

### MCP Tool Calls Not Appearing

`PreToolUse` fires for **every** tool call, but only names matching `mcp__<server>__<tool>` are reported as MCP `tools/call` on `/mcp`. Built-in tools (`Bash`, `Read`, `Edit`, …) take the non-MCP path and are **not** ingested unless you opt in.

```bash
# Are both MCP hooks registered?
python3 -c "import json;h=json.load(open('$HOME/.claude/settings.json'))['hooks'];print(sorted(h))"

# Did the hook run, and what did it classify the call as?
tail -20 ~/.claude/akto/logs/validate-mcp-request.log

# To also ingest built-in (non-MCP) tool calls
sed -i.bak '/^export CONTEXT_SOURCE=/a\
export AKTO_INGEST_NON_MCP_TOOLS="true"
' ~/.claude/hooks/akto-validate-mcp-*-wrapper.sh
```

If the log shows `Validating built-in / non-MCP tool request`, the call was not an MCP tool — that is expected for Claude's own tools.

### Endpoint Appears in Inventory but Traces / LLM Observability Are Empty

Ingestion and trace indexing are separate paths. mini-runtime resolves each hook event's device to a user via the heartbeat record (`moduleInfo.name` → `additionalData.username`); an event whose device has no heartbeat, and which carries no `user_email` header, is discarded before indexing. Claude Code's hook payloads never carry an email, so the heartbeat is the only thing that can satisfy this — the collection still shows up in inventory, which is why the endpoint looks connected.

```bash
# Was the heartbeat publisher installed?
ls -l ~/.claude/hooks/akto_heartbeat.py

# Has it sent recently? (unix timestamp of the last successful send)
cat ~/.claude/akto/logs/last_heartbeat

# Look for the send/skip line
grep -i heartbeat ~/.claude/akto/logs/*.log | tail -5
```

If the file is missing, re-run the download step. If it is present but never sends, confirm `DATABASE_ABSTRACTOR_SERVICE_URL` points at a reachable abstractor (see the hint above) and that `AKTO_AGENT_HEARTBEAT` is **not** set — that flag is for machines where the Akto agent already publishes the heartbeat, and it disables publishing from the hook.

```bash
grep -E "AKTO_AGENT_HEARTBEAT|DATABASE_ABSTRACTOR_SERVICE_URL" ~/.claude/hooks/*-wrapper.sh
```

### Hooks Not Executing

```bash
# Check settings.json exists and is valid
cat ~/.claude/settings.json | python3 -m json.tool

# Verify scripts are executable
ls -la ~/.claude/hooks/
chmod +x ~/.claude/hooks/*.sh

# Check Claude CLI version
claude --version
```

### Ingestion URL Not Configured

```bash
# Check if placeholder still exists
grep "{{AKTO_DATA_INGESTION_URL}}" ~/.claude/hooks/*-wrapper.sh

# Replace with actual URL
AKTO_URL="https://your-akto-instance.com"
sed -i.bak "s|{{AKTO_DATA_INGESTION_URL}}|${AKTO_URL}|g" ~/.claude/hooks/*-wrapper.sh
```

### Check Logs for Errors

```bash
# View logs
cat ~/.claude/akto/logs/validate-prompt.log
cat ~/.claude/akto/logs/validate-response.log

# Check for errors
grep -i error ~/.claude/akto/logs/*.log
```

### Events Not in Dashboard

```bash
# Test API connectivity
curl -X POST "${AKTO_DATA_INGESTION_URL}/api/v1/events" \
  -H "Content-Type: application/json" \
  -d '{"test": "event"}'

# Verify URL in wrapper scripts
grep "AKTO_DATA_INGESTION_URL" ~/.claude/hooks/*-wrapper.sh
```

## Uninstallation

To completely remove Akto hooks from Claude CLI:

### Complete Removal

```bash
# 1. Remove hook configuration
rm ~/.claude/settings.json

# 2. Remove Akto hook scripts
rm -rf ~/.claude/hooks/

# 3. Remove Akto logs (optional - keeps historical data if skipped)
rm -rf ~/.claude/akto/

# 4. No restart needed - Claude CLI reads settings on each invocation
```

### Selective Removal (Keep Logs)

If you want to preserve logs for audit purposes:

```bash
# Remove only hooks and configuration
rm ~/.claude/settings.json
rm -rf ~/.claude/hooks/

# Akto logs preserved in ~/.claude/akto/
```

### Backup Before Removal

```bash
# Backup configuration and logs before removal
mkdir -p ~/akto-backup
cp ~/.claude/settings.json ~/akto-backup/claude-settings.json.bak 2>/dev/null
cp -r ~/.claude/akto/ ~/akto-backup/claude-akto-logs/ 2>/dev/null

# Then proceed with removal steps above
```

### Verify Removal

```bash
# Check that hooks are removed
test -f ~/.claude/settings.json && echo "⚠️  settings.json still exists" || echo "✅ settings.json removed"
test -d ~/.claude/hooks && echo "⚠️  Hook scripts still exist" || echo "✅ Hook scripts removed"

# Check if logs are removed (if you chose to remove them)
test -d ~/.claude/akto && echo "ℹ️  Logs still present" || echo "✅ Logs removed"
```

### Restore Claude CLI to Default

After uninstallation, Claude CLI will operate without Akto security monitoring. No additional configuration is needed beyond removing the files. Test with:

```bash
claude "Test message"
```

## Enterprise Deployment

### Automated Deployment Script

```bash
#!/bin/bash
# deploy-claude-cli-hooks.sh

set -e
AKTO_URL="${1:-https://your-akto-instance.com}"
AKTO_API_TOKEN="${2:-}"   # optional: pass your Akto API token as the 2nd argument

echo "🔧 Installing Akto Guardrails for Claude CLI..."

# Create directories
mkdir -p ~/.claude/hooks ~/.claude/akto/logs

# Download hooks
HOOKS_BASE="https://raw.githubusercontent.com/akto-api-security/akto/feat/claude-hooks/apps/mcp-endpoint-shield/claude-cli-hooks"
SHARED_BASE="https://raw.githubusercontent.com/akto-api-security/akto/feat/claude-hooks/apps/mcp-endpoint-shield/shared"
curl -s "${HOOKS_BASE}/akto-validate-prompt-wrapper.sh" -o ~/.claude/hooks/akto-validate-prompt-wrapper.sh
curl -s "${HOOKS_BASE}/akto-validate-prompt.py" -o ~/.claude/hooks/akto-validate-prompt.py
curl -s "${HOOKS_BASE}/akto-validate-response-wrapper.sh" -o ~/.claude/hooks/akto-validate-response-wrapper.sh
curl -s "${HOOKS_BASE}/akto-validate-response.py" -o ~/.claude/hooks/akto-validate-response.py
curl -s "${HOOKS_BASE}/akto-validate-mcp-request-wrapper.sh" -o ~/.claude/hooks/akto-validate-mcp-request-wrapper.sh
curl -s "${HOOKS_BASE}/akto-validate-mcp-request.py" -o ~/.claude/hooks/akto-validate-mcp-request.py
curl -s "${HOOKS_BASE}/akto-validate-mcp-response-wrapper.sh" -o ~/.claude/hooks/akto-validate-mcp-response-wrapper.sh
curl -s "${HOOKS_BASE}/akto-validate-mcp-response.py" -o ~/.claude/hooks/akto-validate-mcp-response.py
for f in akto_ingestion_utility.py akto_machine_id.py akto_heartbeat.py; do
  curl -s "${SHARED_BASE}/${f}" -o ~/.claude/hooks/"$f"
done

# Make executable
chmod +x ~/.claude/hooks/*.sh

# Build the device label: <computer-name>-<first 8 chars of machine id>
DEVICE_NAME=$(scutil --get ComputerName 2>/dev/null | tr -d '\n')
if [ -z "$DEVICE_NAME" ]; then DEVICE_NAME=$(hostname 2>/dev/null | tr -d '\n'); fi
if [ -z "$DEVICE_NAME" ]; then DEVICE_NAME=$(uname -n 2>/dev/null | tr -d '\n'); fi
DEVICE_NAME=$(printf '%s' "${DEVICE_NAME%.local}" | sed 's/[^a-zA-Z0-9]/-/g')
MACHINE_ID=$(ioreg -rd1 -c IOPlatformExpertDevice 2>/dev/null | awk -F'"' '/IOPlatformUUID/{print $4}')
if [ -z "$MACHINE_ID" ] && [ -r /etc/machine-id ]; then MACHINE_ID=$(tr -d '\n' < /etc/machine-id); fi
MACHINE_ID=$(printf '%s' "$MACHINE_ID" | tr -cd 'a-fA-F0-9' | tr '[:upper:]' '[:lower:]')
DEVICE_ID="${DEVICE_NAME:-unknown-device}"
if [ -n "$MACHINE_ID" ]; then DEVICE_ID="${DEVICE_ID}-$(printf '%s' "$MACHINE_ID" | cut -c1-8)"; fi

# Configure URL, token and device label
sed -i.bak "s|{{AKTO_DATA_INGESTION_URL}}|${AKTO_URL}|g" ~/.claude/hooks/*-wrapper.sh
sed -i.bak "s|{{AKTO_API_TOKEN}}|${AKTO_API_TOKEN}|g" ~/.claude/hooks/*-wrapper.sh
sed -i.bak "s|{{DEVICE_ID (optional)}}|${DEVICE_ID}|g" ~/.claude/hooks/*-wrapper.sh

# Create config file
cat > ~/.claude/akto/config << EOFCONFIG
AKTO_DATA_INGESTION_URL=${AKTO_URL}
AKTO_API_TOKEN=${AKTO_API_TOKEN}
AKTO_TIMEOUT=5
CLAUDE_API_URL=https://api.anthropic.com
AKTO_SYNC_MODE=true
MODE=atlas
EOFCONFIG
chmod 600 ~/.claude/akto/config

# Create settings.json
cat > ~/.claude/settings.json << 'EOFSETTINGS'
{
  "hooks": {
    "UserPromptSubmit": [
      {
        "hooks": [
          {
            "type": "command",
            "command": "bash ~/.claude/hooks/akto-validate-prompt-wrapper.sh",
            "timeout": 10
          }
        ]
      }
    ],
    "PreToolUse": [
      {
        "hooks": [
          {
            "type": "command",
            "command": "bash ~/.claude/hooks/akto-validate-mcp-request-wrapper.sh",
            "timeout": 10
          }
        ]
      }
    ],
    "PostToolUse": [
      {
        "hooks": [
          {
            "type": "command",
            "command": "bash ~/.claude/hooks/akto-validate-mcp-response-wrapper.sh",
            "timeout": 10
          }
        ]
      }
    ],
    "Stop": [
      {
        "hooks": [
          {
            "type": "command",
            "command": "bash ~/.claude/hooks/akto-validate-response-wrapper.sh",
            "timeout": 10
          }
        ]
      }
    ]
  }
}
EOFSETTINGS

echo "✅ Installation complete!"
echo "📍 Akto instance: ${AKTO_URL}"
echo "🖥️  Device label:  ${DEVICE_ID}"
echo "Test with: claude 'What is 2+2?'"
```

**Deploy to developers:**

```bash
curl -fsSL https://your-org.com/deploy-claude-cli-hooks.sh | bash -s https://your-akto-instance.com
```

## Quick Setup Summary

```bash
# 1. Create directories
mkdir -p ~/.claude/hooks ~/.claude/akto/logs

# 2. Download all hook scripts from GitHub (see step 2 above)

# 3. ⚠️ Configure Akto URL, API token and device label (ALL REQUIRED)
AKTO_URL="https://your-akto-instance.com"
AKTO_API_TOKEN="your-akto-api-token"   # leave empty ("") if your deployment doesn't require auth
DEVICE_NAME=$(scutil --get ComputerName 2>/dev/null | tr -d '\n')
if [ -z "$DEVICE_NAME" ]; then DEVICE_NAME=$(hostname 2>/dev/null | tr -d '\n'); fi
if [ -z "$DEVICE_NAME" ]; then DEVICE_NAME=$(uname -n 2>/dev/null | tr -d '\n'); fi
DEVICE_NAME=$(printf '%s' "${DEVICE_NAME%.local}" | sed 's/[^a-zA-Z0-9]/-/g')
MACHINE_ID=$(ioreg -rd1 -c IOPlatformExpertDevice 2>/dev/null | awk -F'"' '/IOPlatformUUID/{print $4}')
if [ -z "$MACHINE_ID" ] && [ -r /etc/machine-id ]; then MACHINE_ID=$(tr -d '\n' < /etc/machine-id); fi
MACHINE_ID=$(printf '%s' "$MACHINE_ID" | tr -cd 'a-fA-F0-9' | tr '[:upper:]' '[:lower:]')
DEVICE_ID="${DEVICE_NAME:-unknown-device}"
if [ -n "$MACHINE_ID" ]; then DEVICE_ID="${DEVICE_ID}-$(printf '%s' "$MACHINE_ID" | cut -c1-8)"; fi
sed -i.bak "s|{{AKTO_DATA_INGESTION_URL}}|${AKTO_URL}|g" ~/.claude/hooks/*-wrapper.sh
sed -i.bak "s|{{AKTO_API_TOKEN}}|${AKTO_API_TOKEN}|g" ~/.claude/hooks/*-wrapper.sh
sed -i.bak "s|{{DEVICE_ID (optional)}}|${DEVICE_ID}|g" ~/.claude/hooks/*-wrapper.sh

# 4. Make executable
chmod +x ~/.claude/hooks/*.sh

# 5. Create settings.json (see step 4 above)

# 6. Test
claude "What is 2+2?"
```

## Resources

* **GitHub**: <https://github.com/akto-api-security/akto>
* **Support**: <support@akto.io>
* **Community**: <https://www.akto.io/community>


# Argus Mode with Custom Hostname

Akto Guardrails for Claude CLI (Argus mode) provides security validation and observability for AI interactions on **servers and shared environments**. It intercepts prompts, responses, and MCP tool calls, validates them against security policies, blocks risky behavior, and reports all events to your Akto dashboard under **Agentic AI**.

## Key Features

* ✅ **Zero Installation** - No standalone apps to install
* ✅ **Transparent Integration** - Uses Claude CLI's native hook mechanism
* ✅ **Real-time Protection** - Validates every prompt, response, and MCP tool call
* ✅ **Centralized Monitoring** - All events reported to Akto dashboard under Agentic AI
* ✅ **Custom Hostname** - Override the default `api.anthropic.com` host via `AKTO_HOST`
* ✅ **Configurable Behavior** - Blocking or observation-only modes

## How It Works

Claude CLI's hook system executes custom scripts at four critical points:

```mermaid
sequenceDiagram
    autonumber
    participant User
    participant PromptHook as UserPromptSubmit Hook
    participant Claude as Claude AI
    participant PreTool as PreToolUse Hook
    participant MCP as MCP Server
    participant PostTool as PostToolUse Hook
    participant ResponseHook as Stop Hook
    participant Akto as Akto Dashboard

    User->>PromptHook: User submits prompt
    Note over PromptHook: Validate guardrail policies
    alt Safe Prompt
        PromptHook->>Claude: Forward to API
        PromptHook-->>Akto: Report event
    else Malicious
        PromptHook-->>User: Block
        PromptHook-->>Akto: Report security event
    end

    Claude->>PreTool: Claude invokes MCP tool
    Note over PreTool: Validate tool input
    alt Safe Tool Call
        PreTool->>MCP: Forward to MCP server
        PreTool-->>Akto: Report event
    else Malicious
        PreTool-->>Claude: Block tool execution
        PreTool-->>Akto: Report security event
    end

    MCP->>PostTool: MCP tool result
    Note over PostTool: Validate tool response
    PostTool-->>Akto: Report event
    PostTool->>Claude: Return result

    Claude->>ResponseHook: Claude response
    Note over ResponseHook: Validate response
    ResponseHook-->>Akto: Report event
    ResponseHook->>User: Response
```

**4 Hook Points:**

1. `UserPromptSubmit` — Validates prompts before sending to Claude API
2. `PreToolUse` — Validates MCP tool input before execution
3. `PostToolUse` — Captures MCP tool results for observability and response guardrails
4. `Stop` — Validates responses when Claude finishes generating

## File Structure

```
~/.claude/
├── hooks/
│   ├── akto-validate-prompt-wrapper.sh           # Prompt validation wrapper
│   ├── akto-validate-prompt.py                    # Prompt validation logic
│   ├── akto-validate-response-wrapper.sh          # Response validation wrapper
│   ├── akto-validate-response.py                  # Response validation logic
│   ├── akto-validate-mcp-request-wrapper.sh       # MCP tool input wrapper
│   ├── akto-validate-mcp-request.py               # MCP tool input validation
│   ├── akto-validate-mcp-response-wrapper.sh      # MCP tool result wrapper
│   ├── akto-validate-mcp-response.py              # MCP tool result capture
│   ├── akto_ingestion_utility.py                   # Shared validation/ingestion logic
│   └── akto_helpers.py                            # get_device_ip() helper
├── akto/
│   └── logs/
│       ├── validate-prompt.log
│       ├── validate-response.log
│       ├── validate-mcp-request.log
│       └── validate-mcp-response.log
└── settings.json                                  # Hook configuration
```

**Key Files:**

* **Wrapper scripts (`.sh`)**: Set environment variables, invoke Python scripts
  * ⚠️ **Contains `{{AKTO_DATA_INGESTION_URL}}`, `{{AKTO_API_TOKEN}}`, `{{AKTO_HOST}}` placeholders** — must be replaced with your real values
* **Python scripts (`.py`)**: Core validation logic and Akto API communication
* **`akto_ingestion_utility.py`**: Shared validation/ingestion logic imported by every hook script — lives in a different GitHub directory (`shared/`, not `claude-cli-hooks-argus/`), so it needs its own download step
* **`akto_helpers.py`**: Provides `get_device_ip()` (LAN IP used in the `ip` payload field)
* **`settings.json`**: Links Claude CLI hook events to wrapper scripts

## Setup Guide

### Prerequisites

* Claude CLI installed ([Installation Guide](https://code.claude.com/docs/en/setup))
* Akto instance URL and token
* Python 3.7+
* macOS, Linux, or Windows with bash/zsh

### Installation Steps

{% stepper %}
{% step %}
**Create Directories**

```bash
mkdir -p ~/.claude/hooks
mkdir -p ~/.claude/akto/logs
```

{% endstep %}

{% step %}
**Download Hook Scripts**

```bash
# Base URLs for downloading argus hooks
HOOKS_BASE="https://raw.githubusercontent.com/akto-api-security/akto/master/apps/mcp-endpoint-shield/claude-cli-hooks-argus"
SHARED_BASE="https://raw.githubusercontent.com/akto-api-security/akto/master/apps/mcp-endpoint-shield/shared"

for f in akto-validate-prompt.py akto-validate-prompt-wrapper.sh \
         akto-validate-response.py akto-validate-response-wrapper.sh \
         akto-validate-mcp-request.py akto-validate-mcp-request-wrapper.sh \
         akto-validate-mcp-response.py akto-validate-mcp-response-wrapper.sh \
         akto_helpers.py; do
  curl -o ~/.claude/hooks/"$f" "${HOOKS_BASE}/${f}"
done

# Download shared ingestion utility (note: SHARED_BASE, not HOOKS_BASE)
curl -o ~/.claude/hooks/akto_ingestion_utility.py \
  "${SHARED_BASE}/akto_ingestion_utility.py"

# Make wrappers executable
chmod +x ~/.claude/hooks/*.sh
```

{% hint style="info" %}
`akto_ingestion_utility.py` must land in the same directory as the hook scripts — they import it as a plain top-level module, resolved from the script's own directory. Skipping this download makes every hook fail with `ModuleNotFoundError: No module named 'akto_ingestion_utility'`.
{% endhint %}
{% endstep %}

{% step %}
**Configure Akto Ingestion URL** ⚠️ **CRITICAL STEP**

{% hint style="warning" %}
All wrapper scripts contain the placeholder `{{AKTO_DATA_INGESTION_URL}}` that **must be replaced** with your actual Akto instance URL.
{% endhint %}

**Automated replacement:**

```bash
# Set your Akto ingestion URL
AKTO_URL="https://your-akto-instance.com"

# Replace URL placeholder across all wrapper scripts
sed -i.bak "s|{{AKTO_DATA_INGESTION_URL}}|${AKTO_URL}|g" ~/.claude/hooks/*-wrapper.sh

# Verify replacement
grep "AKTO_DATA_INGESTION_URL" ~/.claude/hooks/*-wrapper.sh
```

**Manual replacement (alternative):**

Edit each wrapper script and replace:

```bash
export AKTO_DATA_INGESTION_URL="{{AKTO_DATA_INGESTION_URL}}"
```

With:

```bash
export AKTO_DATA_INGESTION_URL="https://your-akto-instance.com"
```

Files to update:

* `akto-validate-prompt-wrapper.sh`
* `akto-validate-response-wrapper.sh`
* `akto-validate-mcp-request-wrapper.sh`
* `akto-validate-mcp-response-wrapper.sh`
  {% endstep %}

{% step %}
**Configure Hooks**

Create Claude CLI settings configuration:

```bash
cat > ~/.claude/settings.json << 'EOF'
{
  "hooks": {
    "UserPromptSubmit": [
      {
        "hooks": [
          {
            "type": "command",
            "command": "bash ~/.claude/hooks/akto-validate-prompt-wrapper.sh",
            "timeout": 10
          }
        ]
      }
    ],
    "Stop": [
      {
        "hooks": [
          {
            "type": "command",
            "command": "bash ~/.claude/hooks/akto-validate-response-wrapper.sh",
            "timeout": 10
          }
        ]
      }
    ],
    "PreToolUse": [
      {
        "hooks": [
          {
            "type": "command",
            "command": "bash ~/.claude/hooks/akto-validate-mcp-request-wrapper.sh",
            "timeout": 10
          }
        ]
      }
    ],
    "PostToolUse": [
      {
        "hooks": [
          {
            "type": "command",
            "command": "bash ~/.claude/hooks/akto-validate-mcp-response-wrapper.sh",
            "timeout": 10
          }
        ]
      }
    ]
  }
}
EOF
```

{% endstep %}

{% step %}
**Configure Token and Host**

```bash
AKTO_API_TOKEN_VALUE="your-akto-token"
AKTO_HOST_VALUE="api.anthropic.com"   # or your custom host, e.g. my-proxy.corp.example.com

sed -i.bak "s|{{AKTO_API_TOKEN}}|${AKTO_API_TOKEN_VALUE}|g" ~/.claude/hooks/*-wrapper.sh
sed -i.bak "s|{{AKTO_HOST}}|${AKTO_HOST_VALUE}|g"   ~/.claude/hooks/*-wrapper.sh

# Verify
grep -E "AKTO_API_TOKEN|AKTO_HOST" ~/.claude/hooks/*-wrapper.sh
```

`AKTO_HOST` becomes the `host` request header value in every mirrored payload.
{% endstep %}

{% step %}
**Configure Hook Behavior (Optional)**

Edit wrapper scripts to customize:

```bash
# In each *-wrapper.sh file:

export AKTO_SYNC_MODE="true"          # "true" (blocking) or "false" (observe only)
export AKTO_TIMEOUT="5"               # Timeout in seconds
export AKTO_CONNECTOR="claude_code_cli"
export CONTEXT_SOURCE="AGENTIC"       # contextSource + tags["source"] in payloads
```

**Sync Mode:**

* **true**: Validates and blocks threats in real time
* **false**: Reports events to Akto but allows all traffic through
  {% endstep %}

{% step %}
**Verify Installation**

Check logs to confirm hooks are working:

```bash
# Run a test prompt
claude "What is 2+2?"

# View prompt hook log
tail -20 ~/.claude/akto/logs/validate-prompt.log
```

A successful Argus mode entry looks like:

```
INFO - AKTO_HOST: https://api.anthropic.com, DEVICE_IP: 192.168.0.3
INFO - === Hook execution started - Sync: True ===
INFO - Processing prompt (length: 14 chars)
INFO - Validating prompt against guardrails
INFO - API CALL: POST https://your-akto-instance.com/api/http-proxy?guardrails=true&...
INFO - API RESPONSE: Status 200, Duration: 38ms, Size: 96 bytes
INFO - Prompt ALLOWED by guardrails
INFO - Prompt allowed
```

{% endstep %}
{% endstepper %}

## Complete Wrapper Script Example

A fully configured Argus mode wrapper script:

```bash
#!/bin/bash
export AKTO_DATA_INGESTION_URL="https://your-akto-instance.com"
export AKTO_API_TOKEN="your-akto-token"
export AKTO_HOST="my-proxy.corp.example.com"
export CONTEXT_SOURCE="AGENTIC"
export AKTO_SYNC_MODE="true"
export AKTO_TIMEOUT="5"
export AKTO_CONNECTOR="claude_code_cli"

export LOG_LEVEL="INFO"
export LOG_PAYLOADS="false"

exec python3 "$HOME/.claude/hooks/akto-validate-prompt.py" "$@"
```

## Configuration Reference

| Variable                  | Required | Default                     | Description                                              |
| ------------------------- | -------- | --------------------------- | -------------------------------------------------------- |
| `AKTO_DATA_INGESTION_URL` | Yes      | —                           | Your Akto instance URL                                   |
| `AKTO_API_TOKEN`          | Yes      | —                           | Authorization token for Akto API                         |
| `AKTO_HOST`               | No       | `https://api.anthropic.com` | `host` header value in mirrored requests                 |
| `CONTEXT_SOURCE`          | No       | `AGENTIC`                   | Payload `contextSource` field and `tags["source"]` value |
| `AKTO_SYNC_MODE`          | No       | `true`                      | `true` = blocking, `false` = observe only                |
| `AKTO_TIMEOUT`            | No       | `5`                         | Request timeout in seconds                               |
| `AKTO_CONNECTOR`          | No       | `claude_code_cli`           | Connector identifier in the dashboard                    |
| `LOG_DIR`                 | No       | `~/.claude/akto/logs`       | Directory for log files                                  |
| `LOG_LEVEL`               | No       | `INFO`                      | Logging verbosity: DEBUG, INFO, WARNING, ERROR           |
| `LOG_PAYLOADS`            | No       | `false`                     | Log full request/response payloads                       |

### Environment Variables (Optional)

Override wrapper script values via shell environment:

```bash
export AKTO_DATA_INGESTION_URL="https://your-akto-instance.com"
export AKTO_API_TOKEN="your-akto-token"
export AKTO_HOST="my-proxy.corp.example.com"
export CONTEXT_SOURCE="AGENTIC"
export AKTO_SYNC_MODE="true"
export AKTO_TIMEOUT="5"
```

## Troubleshooting

### `ModuleNotFoundError: No module named 'akto_ingestion_utility'`

The shared ingestion utility was not downloaded, or landed outside `~/.claude/hooks/`. It lives in the `shared/` directory on GitHub, **not** under `HOOKS_BASE`, so it needs its own `curl`.

```bash
# Confirm the file is missing
ls -l ~/.claude/hooks/akto_ingestion_utility.py

# Fetch it into the same directory as the hook scripts
SHARED_BASE="https://raw.githubusercontent.com/akto-api-security/akto/master/apps/mcp-endpoint-shield/shared"
curl -o ~/.claude/hooks/akto_ingestion_utility.py \
  "${SHARED_BASE}/akto_ingestion_utility.py"

# Verify the import resolves
python3 -c "import sys; sys.path.insert(0, '$HOME/.claude/hooks'); import akto_ingestion_utility; print('OK')"
```

If the file is present and the import still fails, check that `PYTHONSAFEPATH` is unset — it suppresses the script-directory entry on `sys.path` that this import relies on.

```bash
env | grep -i pythonsafepath   # must return nothing
```

### Hooks Not Executing

```bash
# Check settings.json exists and is valid
cat ~/.claude/settings.json | python3 -m json.tool

# Verify scripts are executable
ls -la ~/.claude/hooks/
chmod +x ~/.claude/hooks/*.sh

# Check Claude CLI version
claude --version
```

### Ingestion URL Not Configured

```bash
# Check if placeholder still exists
grep "{{AKTO_DATA_INGESTION_URL}}" ~/.claude/hooks/*-wrapper.sh

# Replace with actual URL
AKTO_URL="https://your-akto-instance.com"
sed -i.bak "s|{{AKTO_DATA_INGESTION_URL}}|${AKTO_URL}|g" ~/.claude/hooks/*-wrapper.sh
```

### Custom Hostname Not Appearing in Logs

```bash
grep "AKTO_HOST" ~/.claude/hooks/akto-validate-prompt-wrapper.sh
# Should show: export AKTO_HOST="my-proxy.corp.example.com"
```

### Events Not in Dashboard

```bash
# Test API connectivity
curl -s -o /dev/null -w "%{http_code}" \
  "${AKTO_DATA_INGESTION_URL}/api/http-proxy?akto_connector=claude_code_cli"

# Verify URL and token in wrapper scripts
grep -E "AKTO_DATA_INGESTION_URL|AKTO_API_TOKEN" ~/.claude/hooks/*-wrapper.sh
```

### Check Logs for Errors

```bash
# Tail all logs at once
tail -f ~/.claude/akto/logs/*.log

# Filter errors only
grep -i error ~/.claude/akto/logs/*.log
```

### Hooks Not Blocking Threats

Ensure `AKTO_SYNC_MODE` is `true`:

```bash
grep "AKTO_SYNC_MODE" ~/.claude/hooks/*-wrapper.sh
```

## Uninstallation

### Complete Removal

```bash
# 1. Remove hook configuration
rm ~/.claude/settings.json

# 2. Remove Akto hook scripts
rm -rf ~/.claude/hooks/

# 3. Remove Akto logs (optional — keeps historical data if skipped)
rm -rf ~/.claude/akto/

# No restart needed — Claude CLI reads settings on each invocation
```

### Selective Removal (Keep Logs)

```bash
# Remove only hooks and configuration
rm ~/.claude/settings.json
rm -rf ~/.claude/hooks/

# Akto logs preserved in ~/.claude/akto/
```

### Backup Before Removal

```bash
mkdir -p ~/akto-backup
cp ~/.claude/settings.json ~/akto-backup/claude-settings.json.bak 2>/dev/null
cp -r ~/.claude/akto/ ~/akto-backup/claude-akto-logs/ 2>/dev/null

# Then proceed with removal steps above
```

### Verify Removal

```bash
test -f ~/.claude/settings.json && echo "⚠️  settings.json still exists" || echo "✅ settings.json removed"
test -d ~/.claude/hooks && echo "⚠️  Hook scripts still exist" || echo "✅ Hook scripts removed"
test -d ~/.claude/akto && echo "ℹ️  Logs still present" || echo "✅ Logs removed"
```

## Enterprise Deployment

### Automated Deployment Script

```bash
#!/bin/bash
# deploy-claude-cli-hooks-argus.sh

set -e
AKTO_URL="${1:-https://your-akto-instance.com}"
AKTO_API_TOKEN_VALUE="${2:-}"
AKTO_HOST_VALUE="${3:-}"   # Optional: custom hostname

echo "🔧 Installing Akto Guardrails for Claude CLI (Argus mode)..."

# Create directories
mkdir -p ~/.claude/hooks ~/.claude/akto/logs

# Download argus hooks
HOOKS_BASE="https://raw.githubusercontent.com/akto-api-security/akto/master/apps/mcp-endpoint-shield/claude-cli-hooks-argus"
SHARED_BASE="https://raw.githubusercontent.com/akto-api-security/akto/master/apps/mcp-endpoint-shield/shared"
for file in \
  akto-validate-prompt-wrapper.sh akto-validate-prompt.py \
  akto-validate-response-wrapper.sh akto-validate-response.py \
  akto-validate-mcp-request-wrapper.sh akto-validate-mcp-request.py \
  akto-validate-mcp-response-wrapper.sh akto-validate-mcp-response.py \
  akto_helpers.py; do
  curl -s "${HOOKS_BASE}/${file}" -o ~/.claude/hooks/"${file}"
done
curl -s "${SHARED_BASE}/akto_ingestion_utility.py" -o ~/.claude/hooks/akto_ingestion_utility.py

# Make executable
chmod +x ~/.claude/hooks/*.sh

# Replace placeholders in all wrapper scripts
sed -i.bak "s|{{AKTO_DATA_INGESTION_URL}}|${AKTO_URL}|g" ~/.claude/hooks/*-wrapper.sh
[ -n "${AKTO_API_TOKEN_VALUE}" ] && sed -i.bak "s|{{AKTO_API_TOKEN}}|${AKTO_API_TOKEN_VALUE}|g" ~/.claude/hooks/*-wrapper.sh
sed -i.bak "s|{{AKTO_HOST}}|${AKTO_HOST_VALUE:-api.anthropic.com}|g" ~/.claude/hooks/*-wrapper.sh

# Create settings.json
cat > ~/.claude/settings.json << 'EOFSETTINGS'
{
  "hooks": {
    "UserPromptSubmit": [
      {
        "hooks": [
          {
            "type": "command",
            "command": "bash ~/.claude/hooks/akto-validate-prompt-wrapper.sh",
            "timeout": 10
          }
        ]
      }
    ],
    "Stop": [
      {
        "hooks": [
          {
            "type": "command",
            "command": "bash ~/.claude/hooks/akto-validate-response-wrapper.sh",
            "timeout": 10
          }
        ]
      }
    ],
    "PreToolUse": [
      {
        "hooks": [
          {
            "type": "command",
            "command": "bash ~/.claude/hooks/akto-validate-mcp-request-wrapper.sh",
            "timeout": 10
          }
        ]
      }
    ],
    "PostToolUse": [
      {
        "hooks": [
          {
            "type": "command",
            "command": "bash ~/.claude/hooks/akto-validate-mcp-response-wrapper.sh",
            "timeout": 10
          }
        ]
      }
    ]
  }
}
EOFSETTINGS

echo "✅ Installation complete!"
echo "📍 Akto instance: ${AKTO_URL}"
echo "🔒 Mode: argus"
echo "Test with: claude 'What is 2+2?'"
```

**Deploy to a server or shared environment:**

```bash
curl -fsSL https://your-org.com/deploy-claude-cli-hooks-argus.sh | \
  bash -s https://your-akto-instance.com your-akto-token my-proxy.corp.example.com
```

## Quick Setup Summary

```bash
# 1. Create directories
mkdir -p ~/.claude/hooks ~/.claude/akto/logs

# 2. Download all hook scripts (see Download Hook Scripts above)

# 3. ⚠️ Replace placeholders (REQUIRED)
AKTO_URL="https://your-akto-instance.com"
AKTO_API_TOKEN_VALUE="your-akto-token"
AKTO_HOST_VALUE="api.anthropic.com"   # or your custom host
sed -i.bak "s|{{AKTO_DATA_INGESTION_URL}}|${AKTO_URL}|g"     ~/.claude/hooks/*-wrapper.sh
sed -i.bak "s|{{AKTO_API_TOKEN}}|${AKTO_API_TOKEN_VALUE}|g"          ~/.claude/hooks/*-wrapper.sh
sed -i.bak "s|{{AKTO_HOST}}|${AKTO_HOST_VALUE}|g"            ~/.claude/hooks/*-wrapper.sh

# 4. Make scripts executable
chmod +x ~/.claude/hooks/*.sh

# 5. Create settings.json (see Configure Hooks above)

# 6. Test
claude "What is 2+2?"
tail -5 ~/.claude/akto/logs/validate-prompt.log
```

## Resources

* **GitHub**: <https://github.com/akto-api-security/akto>
* **Support**: <support@akto.io>
* **Community**: <https://www.akto.io/community>


# Kiro CLI Hooks

Akto Guardrails for Kiro CLI brings real-time security validation to AI interactions by hooking into Kiro CLI's native lifecycle hooks — validating prompts and tool calls before they execute, and reporting every event to your Akto dashboard.

## Key Features

* ✅ **Zero Installation** - No standalone apps to install
* ✅ **Transparent Integration** - Uses Kiro CLI's native hook mechanism
* ✅ **Real-time Protection** - Validates every prompt and tool call
* ✅ **Centralized Monitoring** - All events reported to Akto dashboard
* ✅ **Flexible Deployment** - Supports Argus and Atlas modes
* ✅ **Configurable Behavior** - Blocking or observation modes

## How It Works

Kiro CLI's hook system executes custom scripts at three points:

```mermaid
sequenceDiagram
    autonumber
    participant User
    participant PromptHook as userPromptSubmit Hook
    participant Kiro as Kiro Agent
    participant PreToolHook as preToolUse Hook
    participant Tool
    participant PostToolHook as postToolUse Hook
    participant Akto as Akto Dashboard

    User->>PromptHook: User submits prompt
    Note over PromptHook: Ingest prompt, warn if risky
    PromptHook-->>Akto: Report event
    PromptHook->>Kiro: Forward to model

    Kiro->>PreToolHook: Tool request
    Note over PreToolHook: Validate tool parameters
    alt Safe Tool Call
        PreToolHook->>Tool: Execute tool
        PreToolHook-->>Akto: Report event
    else Malicious
        PreToolHook-->>Kiro: Exit code 2 - reject tool
        PreToolHook-->>Akto: Report security event
    end

    Tool->>PostToolHook: Tool result
    Note over PostToolHook: Ingest tool input/output
    PostToolHook-->>Akto: Report event
    PostToolHook->>Kiro: Result
```

**3 Hook Points:**

1. `userPromptSubmit` - Ingests prompts before they're sent to the model. Cannot block — a non-zero exit only shows the user a warning, the prompt still proceeds.
2. `preToolUse` - Validates tool requests before execution. The only event that can block: exit code `2` rejects the tool call.
3. `postToolUse` - Ingests tool input/output after execution (observational only).

## File Structure

```
~/.kiro/
├── hooks/
│   └── akto/
│       ├── akto-validate-prompt-wrapper.sh    # userPromptSubmit wrapper
│       ├── akto-validate-pre-tool-wrapper.sh  # preToolUse wrapper
│       ├── akto-validate-post-tool-wrapper.sh # postToolUse wrapper
│       ├── akto-hooks.py                      # Event dispatcher
│       ├── akto_ingestion_utility.py          # Shared hook runner logic
│       └── akto_machine_id.py                 # Device ID utility
├── akto/
│   └── logs/
│       ├── validate-prompt.log
│       ├── validate-pre-tool.log
│       └── validate-post-tool.log
└── agents/
    └── <agent-name>.json                      # Agent config - hooks block goes here
```

**Key Files:**

* **Wrapper scripts (`.sh`)**: Set environment variables, invoke `akto-hooks.py`
  * ⚠️ **Contains `AKTO_DATA_INGESTION_URL` placeholder** - Must be replaced with your Akto instance URL
* **`akto-hooks.py`**: Single dispatch script — routes `preToolUse` to a blocking runner, `userPromptSubmit` to a warn-only runner, and everything else to an observability-only runner
* **`akto_ingestion_utility.py`**: Core validation/ingestion logic and Akto API communication
* **`akto_machine_id.py`**: Generates unique device identifiers for Atlas mode
* **Agent config (`hooks` block)**: Links hooks to wrapper scripts

## Setup Guide

### Prerequisites

* Kiro CLI installed ([Installation Guide](https://kiro.dev/docs/cli/quick-start/))
* Akto instance URL
* Python 3.7+
* macOS, Linux, or Windows with bash/zsh

### Installation Steps

{% stepper %}
{% step %}
**Create Directories**

```bash
mkdir -p ~/.kiro/hooks/akto
mkdir -p ~/.kiro/akto/logs
```

{% endstep %}

{% step %}
**Download Hook Scripts**

```bash
# Base URLs for downloading hooks
HOOKS_BASE="https://raw.githubusercontent.com/akto-api-security/akto/master/apps/mcp-endpoint-shield/kiro-cli-hooks"
SHARED_BASE="https://raw.githubusercontent.com/akto-api-security/akto/master/apps/mcp-endpoint-shield/shared"

# Download wrapper scripts and dispatcher
curl -o ~/.kiro/hooks/akto/akto-validate-prompt-wrapper.sh \
  "${HOOKS_BASE}/akto-validate-prompt-wrapper.sh"
curl -o ~/.kiro/hooks/akto/akto-validate-pre-tool-wrapper.sh \
  "${HOOKS_BASE}/akto-validate-pre-tool-wrapper.sh"
curl -o ~/.kiro/hooks/akto/akto-validate-post-tool-wrapper.sh \
  "${HOOKS_BASE}/akto-validate-post-tool-wrapper.sh"
curl -o ~/.kiro/hooks/akto/akto-hooks.py \
  "${HOOKS_BASE}/akto-hooks.py"
curl -o ~/.kiro/hooks/akto/akto_machine_id.py \
  "${HOOKS_BASE}/akto_machine_id.py"

# Download shared ingestion utility
curl -o ~/.kiro/hooks/akto/akto_ingestion_utility.py \
  "${SHARED_BASE}/akto_ingestion_utility.py"

# Make executable
chmod +x ~/.kiro/hooks/akto/*.sh
```

{% endstep %}

{% step %}
**Configure Akto Ingestion URL, API Token and Device ID** ⚠️ **CRITICAL STEP**

{% hint style="warning" %}
All wrapper scripts contain the placeholders `{{AKTO_DATA_INGESTION_URL}}`, `{{AKTO_API_TOKEN}}` and `{{DEVICE_ID}}` that **must be replaced** — the URL with your actual Akto instance URL, and the token with your Akto API token (obtain it from **Akto Atlas → Connectors → Setup Guardrail** card). If your deployment does not require auth, set the token to an empty string so the placeholder is removed (an unsubstituted `{{AKTO_API_TOKEN}}` would be sent as an invalid `Authorization` header).
{% endhint %}

{% hint style="danger" %}
`DEVICE_ID` becomes the first label of the reported hostname (`<DEVICE_ID>.ai-agent.kirocli`), and the dashboard displays that label verbatim as the device name. An unsubstituted `{{DEVICE_ID}}` is **not** treated as empty — leave it in and every machine in your org reports the literal string `{{DEVICE_ID}}`, collapsing them all into a single device.
{% endhint %}

**Automated replacement:**

```bash
# Set your Akto ingestion URL and API token
AKTO_URL="https://your-akto-instance.com"
AKTO_API_TOKEN="your-akto-api-token"   # leave empty ("") if your deployment doesn't require auth

# Build the device label: <computer-name>-<first 8 chars of machine id>
# Works on macOS (scutil/ioreg) and Linux (hostname//etc/machine-id).
# Non-alphanumerics become '-' so the label cannot contain a dot: the dashboard
# splits the reported host on '.', and a dotted label would be truncated.
DEVICE_NAME=$(scutil --get ComputerName 2>/dev/null | tr -d '\n')
if [ -z "$DEVICE_NAME" ]; then DEVICE_NAME=$(hostname 2>/dev/null | tr -d '\n'); fi
if [ -z "$DEVICE_NAME" ]; then DEVICE_NAME=$(uname -n 2>/dev/null | tr -d '\n'); fi
DEVICE_NAME=$(printf '%s' "${DEVICE_NAME%.local}" | sed 's/[^a-zA-Z0-9]/-/g')

MACHINE_ID=$(ioreg -rd1 -c IOPlatformExpertDevice 2>/dev/null | awk -F'"' '/IOPlatformUUID/{print $4}')
if [ -z "$MACHINE_ID" ] && [ -r /etc/machine-id ]; then MACHINE_ID=$(tr -d '\n' < /etc/machine-id); fi
MACHINE_ID=$(printf '%s' "$MACHINE_ID" | tr -cd 'a-fA-F0-9' | tr '[:upper:]' '[:lower:]')

DEVICE_ID="${DEVICE_NAME:-unknown-device}"
if [ -n "$MACHINE_ID" ]; then DEVICE_ID="${DEVICE_ID}-$(printf '%s' "$MACHINE_ID" | cut -c1-8)"; fi
echo "Device label: $DEVICE_ID"

# Update all wrapper scripts
sed -i.bak "s|{{AKTO_DATA_INGESTION_URL}}|${AKTO_URL}|g" ~/.kiro/hooks/akto/*-wrapper.sh
sed -i.bak "s|{{AKTO_API_TOKEN}}|${AKTO_API_TOKEN}|g" ~/.kiro/hooks/akto/*-wrapper.sh
sed -i.bak "s|{{DEVICE_ID}}|${DEVICE_ID}|g" ~/.kiro/hooks/akto/*-wrapper.sh

# Verify replacement — no {{...}} should remain
grep -E "AKTO_DATA_INGESTION_URL|AKTO_API_TOKEN|DEVICE_ID" ~/.kiro/hooks/akto/*-wrapper.sh
grep -l "{{" ~/.kiro/hooks/akto/*-wrapper.sh && echo "⚠️  placeholders still present" || echo "✅ all placeholders substituted"
```

**Manual replacement (alternative):**

Edit each wrapper script and replace:

```bash
AKTO_DATA_INGESTION_URL="{{AKTO_DATA_INGESTION_URL}}"
AKTO_API_TOKEN="{{AKTO_API_TOKEN}}"
DEVICE_ID="{{DEVICE_ID}}"
```

With:

```bash
AKTO_DATA_INGESTION_URL="https://your-akto-instance.com"
AKTO_API_TOKEN="your-akto-api-token"
DEVICE_ID="My-MacBook-Pro-f0929fe8"
```

Files to update:

* `akto-validate-prompt-wrapper.sh`
* `akto-validate-pre-tool-wrapper.sh`
* `akto-validate-post-tool-wrapper.sh`
  {% endstep %}

{% step %}
**Configure Hooks**

Merge the `hooks` block below into your `kiro-cli` agent config (`~/.kiro/agents/<agent-name>.json`, or edit via `kiro-cli agent edit`):

```json
{
  "hooks": {
    "userPromptSubmit": [
      {
        "command": "bash ~/.kiro/hooks/akto/akto-validate-prompt-wrapper.sh"
      }
    ],
    "preToolUse": [
      {
        "matcher": "*",
        "command": "bash ~/.kiro/hooks/akto/akto-validate-pre-tool-wrapper.sh"
      }
    ],
    "postToolUse": [
      {
        "matcher": "*",
        "command": "bash ~/.kiro/hooks/akto/akto-validate-post-tool-wrapper.sh"
      }
    ]
  }
}
```

{% endstep %}

{% step %}
**Configure Hook Behavior (Optional)**

Edit wrapper scripts to customize:

```bash
# In each *-wrapper.sh file:

MODE="atlas"                    # "argus" or "atlas"
AKTO_SYNC_MODE="true"          # "true" (blocking) or "false" (observe only)
AKTO_TIMEOUT="5"               # Timeout in seconds
AKTO_CONNECTOR="kiro_cli"
```

**Mode Options:**

* **Argus**: Standard validation and reporting
* **Atlas**: Includes device-specific metadata

**Sync Mode:**

* **true**: Blocks threats on `preToolUse` (exit code `2`)
* **false**: Reports but allows execution
  {% endstep %}

{% step %}
**Install Python Dependencies**

```bash
pip3 install requests

# Verify installation
python3 -c "import requests; print('Requests installed successfully')"
```

{% endstep %}

{% step %}
**Verify Installation**

Check logs to confirm hooks are working:

```bash
# View logs
tail -f ~/.kiro/akto/logs/validate-prompt.log
tail -f ~/.kiro/akto/logs/validate-pre-tool.log
tail -f ~/.kiro/akto/logs/validate-post-tool.log
```

Test by running a Kiro command:

```bash
kiro-cli chat "What is 2+2?"
```

You should see log entries indicating validation occurred.
{% endstep %}
{% endstepper %}

## Configuration Reference

### Wrapper Script Variables

```bash
MODE="atlas"                                            # "argus" or "atlas"
AKTO_DATA_INGESTION_URL="{{AKTO_DATA_INGESTION_URL}}"  # ⚠️ MUST REPLACE
AKTO_API_TOKEN="{{AKTO_API_TOKEN}}"                    # Akto API token (Authorization header)
DEVICE_ID="{{DEVICE_ID}}"                              # ⚠️ MUST REPLACE — becomes the device name
AKTO_SYNC_MODE="true"                                  # "true" or "false"
AKTO_TIMEOUT="5"                                       # Timeout in seconds
AKTO_CONNECTOR="kiro_cli"                              # Connector identifier
```

**How `DEVICE_ID` is reported:** the hooks send `<DEVICE_ID>.ai-agent.kirocli` as the request host, and the dashboard uses the first label of that host as the device name. If `DEVICE_ID` is empty the hooks fall back to the lowercased computer name (or, where that cannot be resolved, the raw machine UUID — which is why a device sometimes shows up as a bare hex string).

```bash
export DEVICE_ID="My-MacBook-Pro-f0929fe8"   # <name>-<first 8 of machine id>
```

### Environment Variables (Optional)

Override defaults via environment variables or config file:

**Option 1: Environment variables**

```bash
export MODE="atlas"
export AKTO_DATA_INGESTION_URL="https://your-akto-instance.com"
export AKTO_API_TOKEN="your-akto-api-token"
export AKTO_SYNC_MODE="true"
export AKTO_TIMEOUT="5"
```

**Option 2: Config file**

```bash
# Create ~/.kiro/akto/config
cat > ~/.kiro/akto/config << 'EOF'
AKTO_DATA_INGESTION_URL=https://your-akto-instance.com
AKTO_API_TOKEN=your-akto-api-token
AKTO_TIMEOUT=5
AKTO_SYNC_MODE=true
MODE=atlas
EOF

chmod 600 ~/.kiro/akto/config
```

## Troubleshooting

### Hooks Not Executing

```bash
# Check agent config contains a valid "hooks" block
cat ~/.kiro/agents/<agent-name>.json | python3 -m json.tool

# Verify scripts are executable
ls -la ~/.kiro/hooks/akto/
chmod +x ~/.kiro/hooks/akto/*.sh

# Check Kiro CLI version
kiro-cli --version
```

### Ingestion URL Not Configured

```bash
# Check if placeholder still exists
grep "{{AKTO_DATA_INGESTION_URL}}" ~/.kiro/hooks/akto/*-wrapper.sh

# Replace with actual URL
AKTO_URL="https://your-akto-instance.com"
sed -i.bak "s|{{AKTO_DATA_INGESTION_URL}}|${AKTO_URL}|g" ~/.kiro/hooks/akto/*-wrapper.sh
```

### Check Logs for Errors

```bash
# View logs
cat ~/.kiro/akto/logs/validate-prompt.log
cat ~/.kiro/akto/logs/validate-pre-tool.log
cat ~/.kiro/akto/logs/validate-post-tool.log

# Check for errors
grep -i error ~/.kiro/akto/logs/*.log
```

### Events Not in Dashboard

```bash
# Test API connectivity
curl -X POST "${AKTO_DATA_INGESTION_URL}/api/v1/events" \
  -H "Content-Type: application/json" \
  -d '{"test": "event"}'

# Verify URL in wrapper scripts
grep "AKTO_DATA_INGESTION_URL" ~/.kiro/hooks/akto/*-wrapper.sh
```

### Python Dependencies Missing

```bash
# Install required packages
pip3 install requests

# Verify installation
python3 -c "import requests; print(requests.__version__)"
```

## Uninstallation

To completely remove Akto hooks from Kiro CLI:

### Complete Removal

```bash
# 1. Remove the "hooks" block from your agent config
#    (edit ~/.kiro/agents/<agent-name>.json and delete the "hooks" key)

# 2. Remove Akto hook scripts
rm -rf ~/.kiro/hooks/akto/

# 3. Remove Akto logs (optional - keeps historical data if skipped)
rm -rf ~/.kiro/akto/

# 4. No restart needed - Kiro CLI reads agent config on each invocation
```

### Selective Removal (Keep Logs)

If you want to preserve logs for audit purposes:

```bash
# Remove only hooks and configuration
rm -rf ~/.kiro/hooks/akto/
# and remove the "hooks" block from your agent config

# Akto logs preserved in ~/.kiro/akto/
```

### Backup Before Removal

```bash
# Backup configuration and logs before removal
mkdir -p ~/akto-backup
cp ~/.kiro/agents/<agent-name>.json ~/akto-backup/kiro-agent.json.bak 2>/dev/null
cp -r ~/.kiro/akto/ ~/akto-backup/kiro-akto-logs/ 2>/dev/null

# Then proceed with removal steps above
```

### Verify Removal

```bash
# Check that hooks are removed
test -d ~/.kiro/hooks/akto && echo "⚠️  Hook scripts still exist" || echo "✅ Hook scripts removed"

# Check if logs are removed (if you chose to remove them)
test -d ~/.kiro/akto && echo "ℹ️  Logs still present" || echo "✅ Logs removed"
```

### Restore Kiro CLI to Default

After uninstallation, Kiro CLI will operate without Akto security monitoring. No additional configuration is needed beyond removing the files and the `hooks` block. Test with:

```bash
kiro-cli chat "Test message"
```

## Enterprise Deployment

### Automated Deployment Script

```bash
#!/bin/bash
# deploy-kiro-cli-hooks.sh

set -e
AKTO_URL="${1:-https://your-akto-instance.com}"
AKTO_API_TOKEN="${2:-}"   # optional: pass your Akto API token as the 2nd argument

echo "🔧 Installing Akto Guardrails for Kiro CLI..."

# Create directories
mkdir -p ~/.kiro/hooks/akto ~/.kiro/akto/logs

# Download hooks
HOOKS_BASE="https://raw.githubusercontent.com/akto-api-security/akto/master/apps/mcp-endpoint-shield/kiro-cli-hooks"
SHARED_BASE="https://raw.githubusercontent.com/akto-api-security/akto/master/apps/mcp-endpoint-shield/shared"
curl -s "${HOOKS_BASE}/akto-validate-prompt-wrapper.sh" -o ~/.kiro/hooks/akto/akto-validate-prompt-wrapper.sh
curl -s "${HOOKS_BASE}/akto-validate-pre-tool-wrapper.sh" -o ~/.kiro/hooks/akto/akto-validate-pre-tool-wrapper.sh
curl -s "${HOOKS_BASE}/akto-validate-post-tool-wrapper.sh" -o ~/.kiro/hooks/akto/akto-validate-post-tool-wrapper.sh
curl -s "${HOOKS_BASE}/akto-hooks.py" -o ~/.kiro/hooks/akto/akto-hooks.py
curl -s "${HOOKS_BASE}/akto_machine_id.py" -o ~/.kiro/hooks/akto/akto_machine_id.py
curl -s "${SHARED_BASE}/akto_ingestion_utility.py" -o ~/.kiro/hooks/akto/akto_ingestion_utility.py

# Make executable
chmod +x ~/.kiro/hooks/akto/*.sh

# Build the device label: <computer-name>-<first 8 chars of machine id>
DEVICE_NAME=$(scutil --get ComputerName 2>/dev/null | tr -d '\n')
if [ -z "$DEVICE_NAME" ]; then DEVICE_NAME=$(hostname 2>/dev/null | tr -d '\n'); fi
if [ -z "$DEVICE_NAME" ]; then DEVICE_NAME=$(uname -n 2>/dev/null | tr -d '\n'); fi
DEVICE_NAME=$(printf '%s' "${DEVICE_NAME%.local}" | sed 's/[^a-zA-Z0-9]/-/g')
MACHINE_ID=$(ioreg -rd1 -c IOPlatformExpertDevice 2>/dev/null | awk -F'"' '/IOPlatformUUID/{print $4}')
if [ -z "$MACHINE_ID" ] && [ -r /etc/machine-id ]; then MACHINE_ID=$(tr -d '\n' < /etc/machine-id); fi
MACHINE_ID=$(printf '%s' "$MACHINE_ID" | tr -cd 'a-fA-F0-9' | tr '[:upper:]' '[:lower:]')
DEVICE_ID="${DEVICE_NAME:-unknown-device}"
if [ -n "$MACHINE_ID" ]; then DEVICE_ID="${DEVICE_ID}-$(printf '%s' "$MACHINE_ID" | cut -c1-8)"; fi

# Configure URL, token and device label
sed -i.bak "s|{{AKTO_DATA_INGESTION_URL}}|${AKTO_URL}|g" ~/.kiro/hooks/akto/*-wrapper.sh
sed -i.bak "s|{{AKTO_API_TOKEN}}|${AKTO_API_TOKEN}|g" ~/.kiro/hooks/akto/*-wrapper.sh
sed -i.bak "s|{{DEVICE_ID}}|${DEVICE_ID}|g" ~/.kiro/hooks/akto/*-wrapper.sh

echo "✅ Installation complete!"
echo "📍 Akto instance: ${AKTO_URL}"
echo "🖥️  Device label:  ${DEVICE_ID}"
echo "⚠️  Merge the hooks block into ~/.kiro/agents/<agent-name>.json (see Configure Hooks step)"
echo "Test with: kiro-cli chat 'What is 2+2?'"
```

**Deploy to developers:**

```bash
curl -fsSL https://your-org.com/deploy-kiro-cli-hooks.sh | bash -s https://your-akto-instance.com
```

## Quick Setup Summary

```bash
# 1. Create directories
mkdir -p ~/.kiro/hooks/akto ~/.kiro/akto/logs

# 2. Download all hook scripts from GitHub (see step 2 above)

# 3. ⚠️ Configure Akto URL, API token and device label (ALL REQUIRED)
AKTO_URL="https://your-akto-instance.com"
AKTO_API_TOKEN="your-akto-api-token"   # leave empty ("") if your deployment doesn't require auth
DEVICE_NAME=$(scutil --get ComputerName 2>/dev/null | tr -d '\n')
if [ -z "$DEVICE_NAME" ]; then DEVICE_NAME=$(hostname 2>/dev/null | tr -d '\n'); fi
if [ -z "$DEVICE_NAME" ]; then DEVICE_NAME=$(uname -n 2>/dev/null | tr -d '\n'); fi
DEVICE_NAME=$(printf '%s' "${DEVICE_NAME%.local}" | sed 's/[^a-zA-Z0-9]/-/g')
MACHINE_ID=$(ioreg -rd1 -c IOPlatformExpertDevice 2>/dev/null | awk -F'"' '/IOPlatformUUID/{print $4}')
if [ -z "$MACHINE_ID" ] && [ -r /etc/machine-id ]; then MACHINE_ID=$(tr -d '\n' < /etc/machine-id); fi
MACHINE_ID=$(printf '%s' "$MACHINE_ID" | tr -cd 'a-fA-F0-9' | tr '[:upper:]' '[:lower:]')
DEVICE_ID="${DEVICE_NAME:-unknown-device}"
if [ -n "$MACHINE_ID" ]; then DEVICE_ID="${DEVICE_ID}-$(printf '%s' "$MACHINE_ID" | cut -c1-8)"; fi
sed -i.bak "s|{{AKTO_DATA_INGESTION_URL}}|${AKTO_URL}|g" ~/.kiro/hooks/akto/*-wrapper.sh
sed -i.bak "s|{{AKTO_API_TOKEN}}|${AKTO_API_TOKEN}|g" ~/.kiro/hooks/akto/*-wrapper.sh
sed -i.bak "s|{{DEVICE_ID}}|${DEVICE_ID}|g" ~/.kiro/hooks/akto/*-wrapper.sh

# 4. Make executable
chmod +x ~/.kiro/hooks/akto/*.sh

# 5. Merge the "hooks" block into your kiro-cli agent config (see step 4 above)

# 6. Install dependencies
pip3 install requests

# 7. Test
kiro-cli chat "What is 2+2?"
```

## Resources

* **GitHub**: <https://github.com/akto-api-security/akto>
* **Support**: <support@akto.io>
* **Community**: <https://www.akto.io/community>


# Copilot Hooks

Akto Guardrails for GitHub Copilot provides security validation for AI-assisted development across VS Code and the CLI. It intercepts prompts when submitted and tool executions before and after they run, validates against security policies, blocks risky behavior, and reports events to your Akto dashboard.

## Key Features

* ✅ **Zero Installation** - No standalone apps to install
* ✅ **Transparent Integration** - Uses GitHub Copilot's native hook mechanism in both VS Code and CLI
* ✅ **Real-time Tool Blocking** - Can block dangerous tool executions before they run
* ✅ **Centralized Monitoring** - All events reported to Akto dashboard
* ✅ **Agent Registration** - Automatically registers the device (ID + username) with Akto on first hook invocation
* ✅ **Flexible Deployment** - Supports Argus and Atlas modes
* ✅ **Configurable Behavior** - Blocking or observation modes
* ✅ **Cross-platform** - Full support for macOS, Linux, and Windows (including Azure Virtual Desktop)
* ⚠️ **Prompt Monitoring Only** - GitHub Copilot limitation prevents blocking prompts at submission

## How Hooks Works

GitHub Copilot's hook system executes custom scripts at three critical points in both VS Code and the CLI:

```mermaid
sequenceDiagram
    autonumber
    participant User
    participant PromptHook as userPromptSubmitted Hook
    participant Copilot as GitHub Copilot AI
    participant PreToolHook as preToolUse Hook
    participant PostToolHook as postToolUse Hook
    participant Akto as Akto Dashboard

    User->>PromptHook: User submits prompt
    Note over PromptHook: Validate guardrail policies (monitor only)
    PromptHook-->>Akto: Report event / flag security issue
    PromptHook->>Copilot: Forward to Copilot (cannot block)

    Copilot->>PreToolHook: Copilot requests tool execution
    Note over PreToolHook: Validate tool use against policies
    alt Safe Tool Use
        PreToolHook->>Copilot: Allow tool execution
        PreToolHook-->>Akto: Report event
    else Policy Violation
        PreToolHook-->>User: Block tool execution
        PreToolHook-->>Akto: Report security event
    end

    Copilot->>PostToolHook: Tool execution completes
    Note over PostToolHook: Ingest tool result for analytics
    PostToolHook-->>Akto: Report event
    PostToolHook->>User: Result returned
```

**3 Hook Points:**

1. `userPromptSubmitted` - Monitors prompts when submitted to Copilot (reporting only, cannot block)
2. `preToolUse` - Validates tool use before execution and **can block** dangerous operations
3. `postToolUse` - Ingests tool execution results for monitoring and audit

{% hint style="warning" %}
**GitHub Copilot Limitation**: The `userPromptSubmitted` hook **cannot block** prompt execution. Prompts flagged by guardrails will still reach the LLM. Only `preToolUse` can prevent operations from executing. For complete prompt blocking, consider using a network proxy.
{% endhint %}

## File Structure

```
<project-root>/
└── .github/
    └── hooks/
        ├── akto-validate-prompt-wrapper.sh       # Prompt monitoring wrapper (macOS/Linux)
        ├── akto-validate-prompt-wrapper.ps1      # Prompt monitoring wrapper (Windows)
        ├── akto-validate-prompt.py               # Prompt monitoring logic
        ├── akto-validate-pre-tool-wrapper.sh     # Pre-tool validation wrapper (macOS/Linux)
        ├── akto-validate-pre-tool-wrapper.ps1    # Pre-tool validation wrapper (Windows)
        ├── akto-validate-pre-tool.py             # Pre-tool validation and blocking logic
        ├── akto-validate-post-tool-wrapper.sh    # Post-tool ingestion wrapper (macOS/Linux)
        ├── akto-validate-post-tool-wrapper.ps1   # Post-tool ingestion wrapper (Windows)
        ├── akto-validate-post-tool.py            # Post-tool ingestion logic
        ├── akto_machine_id.py                    # Device ID utility (macOS/Linux/Windows)
        ├── akto_heartbeat.py                     # Agent registration heartbeat
        └── hooks.json                            # Hook configuration
```

**Key Files:**

* **Wrapper scripts (`.sh` / `.ps1`)**: Set environment variables, invoke Python scripts
  * ⚠️ **Contains `AKTO_DATA_INGESTION_URL` placeholder** - Must be set to your Akto instance URL
  * ⚠️ **Contains `AKTO_API_TOKEN` placeholder** - Must be set for agent registration
  * `.sh` used on macOS/Linux; `.ps1` used on Windows
* **Python scripts (`.py`)**: Core validation logic and Akto API communication
* **`akto_machine_id.py`**: Generates unique device identifiers — uses Windows registry (`MachineGuid`) on Windows, IOPlatformUUID on macOS, `/etc/machine-id` on Linux
* **`akto_heartbeat.py`**: Sends agent registration (device ID, username, OS) to Akto on each hook invocation, rate-limited to once per 30 seconds via a local timestamp cache
* **`hooks.json`**: Links hooks to wrapper scripts — uses `bash` key on macOS/Linux and `powershell` key on Windows

> **Note:** `hooks.json` is loaded from the project root's `.github/hooks/` directory.

## Setup Guide

### Prerequisites

* **GitHub Copilot CLI** installed and authenticated — run `copilot` (macOS/Linux) or `copilot.exe` (Windows) to verify
* **VS Code** with the GitHub Copilot extension (for VS Code hook support)
* Akto instance URL
* Python 3

**macOS / Linux:** bash or zsh

**Windows:** PowerShell 5.1+ (built-in on Windows 10/11, including Azure Virtual Desktop pooled sessions)

### Project-level Installation

Install hooks inside a specific repository at `<project-root>/.github/hooks/`. Copilot CLI auto-loads `hooks.json` from this location when you run `copilot` from the project root. These hooks only fire for Copilot CLI sessions launched from this repository.

{% hint style="info" %}
Use this approach when hooks should only apply inside one repository — e.g. committed alongside the codebase as a per-project security control. For machine-wide coverage that applies to every Copilot CLI session regardless of directory, see [Global (User-level) Installation](#global-user-level-installation) below.
{% endhint %}

{% stepper %}
{% step %}
**Create the Hooks Directory**

**macOS / Linux:**

```bash
mkdir -p .github/hooks
```

**Windows (PowerShell):**

```powershell
New-Item -ItemType Directory -Force -Path .github\hooks
```

{% endstep %}

{% step %}
**Download Hook Scripts**

**macOS / Linux:**

```bash
# Base URL for downloading hooks
HOOKS_BASE="https://raw.githubusercontent.com/akto-api-security/akto/master/apps/mcp-endpoint-shield/github-cli-hooks"

# Download prompt monitoring hooks
curl -o .github/hooks/akto-validate-prompt-wrapper.sh \
  "${HOOKS_BASE}/akto-validate-prompt-wrapper.sh"
curl -o .github/hooks/akto-validate-prompt.py \
  "${HOOKS_BASE}/akto-validate-prompt.py"

# Download pre-tool validation hooks
curl -o .github/hooks/akto-validate-pre-tool-wrapper.sh \
  "${HOOKS_BASE}/akto-validate-pre-tool-wrapper.sh"
curl -o .github/hooks/akto-validate-pre-tool.py \
  "${HOOKS_BASE}/akto-validate-pre-tool.py"

# Download post-tool ingestion hooks
curl -o .github/hooks/akto-validate-post-tool-wrapper.sh \
  "${HOOKS_BASE}/akto-validate-post-tool-wrapper.sh"
curl -o .github/hooks/akto-validate-post-tool.py \
  "${HOOKS_BASE}/akto-validate-post-tool.py"

# Download utilities
curl -o .github/hooks/akto_machine_id.py \
  "${HOOKS_BASE}/akto_machine_id.py"
curl -o .github/hooks/akto_heartbeat.py \
  "${HOOKS_BASE}/akto_heartbeat.py"

# Download hooks configuration
curl -o .github/hooks/hooks.json \
  "${HOOKS_BASE}/hooks.json"

# Make executable
chmod +x .github/hooks/*.py .github/hooks/*.sh
```

**Windows (PowerShell):**

```powershell
$HOOKS_BASE = "https://raw.githubusercontent.com/akto-api-security/akto/master/apps/mcp-endpoint-shield/github-cli-hooks"

$files = @(
  "akto-validate-prompt-wrapper.ps1", "akto-validate-prompt.py",
  "akto-validate-pre-tool-wrapper.ps1", "akto-validate-pre-tool.py",
  "akto-validate-post-tool-wrapper.ps1", "akto-validate-post-tool.py",
  "akto_machine_id.py", "akto_heartbeat.py", "hooks.json"
)

foreach ($file in $files) {
  Invoke-WebRequest -Uri "$HOOKS_BASE/$file" -OutFile ".github\hooks\$file"
}
```

{% endstep %}

{% step %}
**Configure URLs and API Token** ⚠️ **CRITICAL STEP**

{% hint style="warning" %}
All wrapper scripts contain two placeholders that **must be replaced** before hooks will work:

* `{{AKTO_DATA_INGESTION_URL}}` — your Akto instance URL (required for event ingestion)
* `{{AKTO_API_TOKEN}}` — your Akto API token (required for agent registration auth; obtain from **Akto Atlas → Connectors → Setup Guardrail** card)

`DATABASE_ABSTRACTOR_SERVICE_URL` is built into the hooks and defaults to `https://cyborg.akto.io` automatically — no action needed for SaaS users.
{% endhint %}

**macOS / Linux — automated replacement:**

```bash
# Set your values
AKTO_URL="https://your-akto-instance.com"
AKTO_API_TOKEN="your-akto-api-token"

# Update all wrapper scripts
sed -i.bak "s|{{AKTO_DATA_INGESTION_URL}}|${AKTO_URL}|g" .github/hooks/*-wrapper.sh
sed -i.bak "s|{{AKTO_API_TOKEN}}|${AKTO_API_TOKEN}|g" .github/hooks/*-wrapper.sh

# Verify replacements
grep -E "AKTO_DATA_INGESTION_URL|AKTO_API_TOKEN" .github/hooks/*-wrapper.sh
```

**Windows (PowerShell) — automated replacement:**

```powershell
$AKTO_URL = "https://your-akto-instance.com"
$AKTO_API_TOKEN = "your-akto-api-token"

Get-ChildItem ".github\hooks\*-wrapper.ps1" | ForEach-Object {
  (Get-Content $_.FullName) `
    -replace '{{AKTO_DATA_INGESTION_URL}}', $AKTO_URL `
    -replace '{{AKTO_API_TOKEN}}', $AKTO_API_TOKEN |
    Set-Content $_.FullName
}

# Verify replacements
Select-String "AKTO_DATA_INGESTION_URL|AKTO_API_TOKEN" .github\hooks\*-wrapper.ps1
```

**Manual replacement (alternative):**

Edit each wrapper script and replace the two placeholders with your actual values.

Files to update on macOS/Linux:

* `akto-validate-prompt-wrapper.sh`
* `akto-validate-pre-tool-wrapper.sh`
* `akto-validate-post-tool-wrapper.sh`

Files to update on Windows:

* `akto-validate-prompt-wrapper.ps1`
* `akto-validate-pre-tool-wrapper.ps1`
* `akto-validate-post-tool-wrapper.ps1`
  {% endstep %}

{% step %}
**Verify hooks.json Configuration**

The `hooks.json` file should already be configured after downloading. Verify it contains all three hooks:

```json
{
  "version": 1,
  "hooks": {
    "userPromptSubmitted": [
      {
        "type": "command",
        "bash": "bash ./.github/hooks/akto-validate-prompt-wrapper.sh",
        "powershell": "powershell -ExecutionPolicy Bypass -File .github/hooks/akto-validate-prompt-wrapper.ps1",
        "comment": "Validate prompts against Akto Guardrails (monitoring only - cannot block per GitHub limitation)",
        "timeoutSec": 30
      }
    ],
    "preToolUse": [
      {
        "type": "command",
        "bash": "bash ./.github/hooks/akto-validate-pre-tool-wrapper.sh",
        "powershell": "powershell -ExecutionPolicy Bypass -File .github/hooks/akto-validate-pre-tool-wrapper.ps1",
        "comment": "Validate and block tool execution based on Akto Guardrails policies",
        "timeoutSec": 30
      }
    ],
    "postToolUse": [
      {
        "type": "command",
        "bash": "bash ./.github/hooks/akto-validate-post-tool-wrapper.sh",
        "powershell": "powershell -ExecutionPolicy Bypass -File .github/hooks/akto-validate-post-tool-wrapper.ps1",
        "comment": "Ingest tool execution results to Akto for monitoring and analytics",
        "timeoutSec": 30
      }
    ]
  }
}
```

> **Windows note:** The `powershell` key is used automatically on Windows. The `.ps1` wrapper sets all required environment variables before invoking the Python script — equivalent to what the `.sh` wrappers do on macOS/Linux.

> **Note:** `timeoutSec` is in seconds (30 = 30 seconds). Hooks are loaded from `.github/hooks/hooks.json` in the directory you run copilot from.
> {% endstep %}

{% step %}
**Configure Hook Behavior (Optional)**

Edit wrapper scripts to customize:

**macOS / Linux** — in each `*-wrapper.sh`:

```bash
export MODE="atlas"                                   # "argus" or "atlas"
export AKTO_DATA_INGESTION_URL="..."                 # Your Akto instance URL
export AKTO_SYNC_MODE="true"                          # "true" (blocking) or "false" (observe only)
export AKTO_TIMEOUT="5"                               # Timeout in seconds
export AKTO_CONNECTOR="github_copilot_cli"
export CONTEXT_SOURCE="ENDPOINT"
export AKTO_API_TOKEN="..."                           # Akto API token (for agent registration)
```

**Windows** — in each `*-wrapper.ps1`:

```powershell
$env:MODE = "atlas"
$env:AKTO_DATA_INGESTION_URL = "..."                 # Your Akto instance URL
$env:AKTO_SYNC_MODE = "true"
$env:AKTO_TIMEOUT = "5"
$env:AKTO_CONNECTOR = "github_copilot_cli"
$env:CONTEXT_SOURCE = "ENDPOINT"
$env:AKTO_API_TOKEN = "..."                          # Akto API token (for agent registration)
```

**Mode Options:**

* **Argus**: Standard validation and reporting
* **Atlas**: Includes device-specific metadata

**Sync Mode:**

* **true**: Validates in real-time; `preToolUse` blocks dangerous tool executions
* **false**: Monitoring only; all tool executions pass through but are logged
  {% endstep %}

{% step %}
**Verify Installation**

**macOS / Linux:**

```bash
# Check hooks.json is valid JSON
python3 -m json.tool .github/hooks/hooks.json

# Verify scripts are executable
ls -la .github/hooks/

# Test a hook manually
echo '{"prompt":"test","cwd":"/test","timestamp":1704614400000}' | \
  python3 .github/hooks/akto-validate-prompt.py

# Run a Copilot command from the project root
copilot
```

**Windows (PowerShell):**

```powershell
# Check hooks.json is valid JSON
python -m json.tool .github\hooks\hooks.json

# List hook files
Get-ChildItem .github\hooks\

# Test a hook manually
'{"prompt":"test","cwd":"C:\\test","timestamp":1704614400000}' | python .github\hooks\akto-validate-prompt.py

# Run a Copilot command from the project root
copilot
```

Check logs to confirm hooks are working:

**macOS / Linux:**

```bash
# Default log location: ~/akto/.github/akto/copilot/logs/
tail -f ~/akto/.github/akto/copilot/logs/validate-prompt.log
tail -f ~/akto/.github/akto/copilot/logs/validate-pre-tool.log
tail -f ~/akto/.github/akto/copilot/logs/validate-post-tool.log
```

**Windows (PowerShell):**

```powershell
# Default log location: C:\Users\<username>\akto\.github\akto\copilot\logs\
Get-Content "$env:USERPROFILE\akto\.github\akto\copilot\logs\validate-prompt.log" -Wait -Tail 20
Get-Content "$env:USERPROFILE\akto\.github\akto\copilot\logs\validate-pre-tool.log" -Wait -Tail 20
Get-Content "$env:USERPROFILE\akto\.github\akto\copilot\logs\validate-post-tool.log" -Wait -Tail 20
```

{% endstep %}
{% endstepper %}

### Global (User-level) Installation

The project-level install above applies only inside the repo it lives in. To apply Akto Guardrails to **every Copilot CLI session on your machine — regardless of which directory you launch from** — install hooks once at the user level. Wrappers live at `~/.github/hooks/` and are registered directly in `~/.copilot/config.json` (no per-repo `hooks.json`).

{% hint style="info" %}
Use the **project-level** install when hooks should only apply inside one repository (e.g. committed as a per-project security control). Use the **user-level** install below when every Copilot CLI invocation on your machine should go through Akto Guardrails.
{% endhint %}

{% stepper %}
{% step %}
**Create the Global Hooks Directory**

**macOS / Linux:**

```bash
mkdir -p ~/.github/hooks
```

**Windows (PowerShell):**

```powershell
New-Item -ItemType Directory -Force -Path "$env:USERPROFILE\.github\hooks"
```

{% endstep %}

{% step %}
**Download Hook Scripts**

Download the eight hook files into the directory you just created. Do **not** download `hooks.json` — user-level hooks are defined directly in `~/.copilot/config.json` (step 4 below), not in a separate `hooks.json` file.

Files you will download (all from `https://raw.githubusercontent.com/akto-api-security/akto/master/apps/mcp-endpoint-shield/github-cli-hooks/`):

| # | macOS / Linux                        | Windows                               |
| - | ------------------------------------ | ------------------------------------- |
| 1 | `akto-validate-prompt-wrapper.sh`    | `akto-validate-prompt-wrapper.ps1`    |
| 2 | `akto-validate-prompt.py`            | `akto-validate-prompt.py`             |
| 3 | `akto-validate-pre-tool-wrapper.sh`  | `akto-validate-pre-tool-wrapper.ps1`  |
| 4 | `akto-validate-pre-tool.py`          | `akto-validate-pre-tool.py`           |
| 5 | `akto-validate-post-tool-wrapper.sh` | `akto-validate-post-tool-wrapper.ps1` |
| 6 | `akto-validate-post-tool.py`         | `akto-validate-post-tool.py`          |
| 7 | `akto_machine_id.py`                 | `akto_machine_id.py`                  |
| 8 | `akto_heartbeat.py`                  | `akto_heartbeat.py`                   |

**macOS / Linux — copy the entire block below, paste it into your terminal, press Enter:**

```bash
HOOKS_BASE="https://raw.githubusercontent.com/akto-api-security/akto/master/apps/mcp-endpoint-shield/github-cli-hooks"
HOOKS_DIR="$HOME/.github/hooks"

for f in \
  akto-validate-prompt-wrapper.sh akto-validate-prompt.py \
  akto-validate-pre-tool-wrapper.sh akto-validate-pre-tool.py \
  akto-validate-post-tool-wrapper.sh akto-validate-post-tool.py \
  akto_machine_id.py akto_heartbeat.py; do
  curl -o "$HOOKS_DIR/$f" "${HOOKS_BASE}/$f"
done

chmod +x "$HOOKS_DIR"/*.py "$HOOKS_DIR"/*.sh
```

Confirm all 8 files landed in the directory:

```bash
ls -l ~/.github/hooks
```

**Windows (PowerShell) — copy the entire block below, paste it into PowerShell, press Enter:**

```powershell
$HOOKS_BASE = "https://raw.githubusercontent.com/akto-api-security/akto/master/apps/mcp-endpoint-shield/github-cli-hooks"
$HOOKS_DIR  = "$env:USERPROFILE\.github\hooks"

$files = @(
  "akto-validate-prompt-wrapper.ps1", "akto-validate-prompt.py",
  "akto-validate-pre-tool-wrapper.ps1", "akto-validate-pre-tool.py",
  "akto-validate-post-tool-wrapper.ps1", "akto-validate-post-tool.py",
  "akto_machine_id.py", "akto_heartbeat.py"
)

foreach ($file in $files) {
  Invoke-WebRequest -Uri "$HOOKS_BASE/$file" -OutFile (Join-Path $HOOKS_DIR $file)
}

Get-ChildItem "$HOOKS_DIR\*" | Unblock-File
```

Confirm all 8 files landed in the directory:

```powershell
Get-ChildItem "$env:USERPROFILE\.github\hooks"
```

{% endstep %}

{% step %}
**Configure Wrappers** ⚠️ **CRITICAL STEP**

Each of the three wrapper scripts you downloaded has four things that need to be set before Copilot CLI can run them. The block below handles all four in one shot.

What the block does:

1. Replaces `{{AKTO_DATA_INGESTION_URL}}` inside the wrappers with your Akto instance URL.
2. Replaces `{{AKTO_API_TOKEN}}` inside the wrappers with your Akto API token.
3. Changes the relative `./.github/hooks/akto-validate-*.py` reference inside each wrapper to an **absolute path** (e.g. `/Users/you/.github/hooks/akto-validate-*.py`). User-level wrappers are invoked from whatever directory the user launched Copilot CLI from, so relative paths would not resolve.
4. Adds `export AKTO_CONNECTOR="github_copilot_cli"` (or `$env:AKTO_CONNECTOR` on Windows). Without this the connector defaults to `vscode` and CLI traffic is mis-attributed in the Akto dashboard.

**macOS / Linux — first, edit the two values at the top of the block** (`AKTO_URL` and `AKTO_API_TOKEN`) with your real Akto instance URL and API token. Then copy the entire block, paste it into your terminal, and press Enter:

```bash
AKTO_URL="https://your-akto-instance.com"      # <-- replace with your Akto instance URL
AKTO_API_TOKEN="your-akto-api-token"                # <-- replace with your Akto API token
HOOKS_DIR="$HOME/.github/hooks"

# 1 + 2. Credentials
sed -i.bak "s|{{AKTO_DATA_INGESTION_URL}}|${AKTO_URL}|g" "$HOOKS_DIR"/*-wrapper.sh
sed -i.bak "s|{{AKTO_API_TOKEN}}|${AKTO_API_TOKEN}|g" "$HOOKS_DIR"/*-wrapper.sh

# 3. Relative .py paths -> absolute
sed -i.bak "s|\./\.github/hooks/akto-validate-|${HOOKS_DIR}/akto-validate-|g" "$HOOKS_DIR"/*-wrapper.sh

# 4. Add AKTO_CONNECTOR after the existing CONTEXT_SOURCE line
sed -i.bak '/^export CONTEXT_SOURCE=/a\
export AKTO_CONNECTOR="github_copilot_cli"
' "$HOOKS_DIR"/*-wrapper.sh

# Clean up the .bak files sed left behind
rm -f "$HOOKS_DIR"/*.bak
```

Confirm no placeholders are left and the wrappers look correct:

```bash
# Should print "✓ all placeholders substituted" (no files listed)
grep -l '{{' "$HOOKS_DIR"/*-wrapper.sh || echo "✓ all placeholders substituted"

# Inspect one wrapper to eyeball the result
cat ~/.github/hooks/akto-validate-prompt-wrapper.sh
```

**Windows (PowerShell) — first, edit the two values at the top of the block** (`$AKTO_URL` and `$AKTO_API_TOKEN`) with your real Akto instance URL and API token. Then copy the entire block, paste it into PowerShell, and press Enter:

```powershell
$AKTO_URL   = "https://your-akto-instance.com"      # <-- replace with your Akto instance URL
$AKTO_API_TOKEN = "your-akto-api-token"                  # <-- replace with your Akto API token
$HOOKS_DIR  = "$env:USERPROFILE\.github\hooks"
$HOOKS_DIR_ESCAPED = $HOOKS_DIR -replace '\\', '\\'

Get-ChildItem "$HOOKS_DIR\*-wrapper.ps1" | ForEach-Object {
  $content = Get-Content $_.FullName -Raw
  $content = $content `
    -replace '{{AKTO_DATA_INGESTION_URL}}', $AKTO_URL `
    -replace '{{AKTO_API_TOKEN}}', $AKTO_API_TOKEN `
    -replace '\.github\\hooks\\akto-validate-', "$HOOKS_DIR_ESCAPED\akto-validate-"
  # Add AKTO_CONNECTOR right after CONTEXT_SOURCE
  $content = $content -replace '(\$env:CONTEXT_SOURCE\s*=.*)', "`$1`r`n`$env:AKTO_CONNECTOR = `"github_copilot_cli`""
  Set-Content $_.FullName $content
}
```

Confirm no placeholders are left:

```powershell
Select-String -Pattern '\{\{' -Path "$env:USERPROFILE\.github\hooks\*-wrapper.ps1"
# (no output = all placeholders substituted)
```

{% endstep %}

{% step %}
**Register Hooks in `~/.copilot/config.json`**

User-level hooks are declared directly in the Copilot CLI user config at `~/.copilot/config.json`. There is no separate `hooks.json` file at the user level, and the `hooks` object here has **no outer `version` wrapper** (that `version` wrapper is only for repository-level `.github/hooks/*.json`).

The block below backs up your existing `config.json` to `config.json.bak`, then merges in the three Akto hooks (preserving any other keys you already have such as `trusted_folders`, `loggedInUsers`, `banner`, etc).

{% hint style="info" %}
Requires `jq` on macOS/Linux (usually preinstalled; if not: `brew install jq` on macOS, `sudo apt install jq` on Ubuntu/Debian). Windows uses PowerShell's built-in `ConvertFrom-Json` / `ConvertTo-Json` — no extra install.
{% endhint %}

**macOS / Linux — copy the entire block below, paste it into your terminal, press Enter:**

```bash
HOOKS_DIR="$HOME/.github/hooks"

# Back up your current config.json before modifying it
cp ~/.copilot/config.json ~/.copilot/config.json.bak

# Build the hooks block with absolute paths
HOOKS_JSON=$(cat <<JSON
{
  "userPromptSubmitted": [
    {
      "type": "command",
      "bash": "$HOOKS_DIR/akto-validate-prompt-wrapper.sh",
      "comment": "Validate prompts against Akto Guardrails (monitoring only - cannot block per GitHub limitation)",
      "timeoutSec": 30
    }
  ],
  "preToolUse": [
    {
      "type": "command",
      "bash": "bash $HOOKS_DIR/akto-validate-pre-tool-wrapper.sh",
      "comment": "Validate and block tool execution based on Akto Guardrails policies",
      "timeoutSec": 30
    }
  ],
  "postToolUse": [
    {
      "type": "command",
      "bash": "bash $HOOKS_DIR/akto-validate-post-tool-wrapper.sh",
      "comment": "Ingest tool execution results to Akto for monitoring and analytics",
      "timeoutSec": 30
    }
  ]
}
JSON
)

# Merge the hooks block into the existing config (other top-level keys are preserved)
jq --argjson hooks "$HOOKS_JSON" '. + {hooks: $hooks}' ~/.copilot/config.json > ~/.copilot/config.json.tmp && \
  mv ~/.copilot/config.json.tmp ~/.copilot/config.json
```

Verify the `hooks` section was written correctly:

```bash
jq .hooks ~/.copilot/config.json
```

**Windows (PowerShell) — copy the entire block below, paste it into PowerShell, press Enter:**

```powershell
$HOOKS_DIR   = "$env:USERPROFILE\.github\hooks"
$CONFIG_PATH = "$env:USERPROFILE\.copilot\config.json"

# Back up your current config.json before modifying it
Copy-Item $CONFIG_PATH "$CONFIG_PATH.bak"

$config = Get-Content $CONFIG_PATH -Raw | ConvertFrom-Json
$hooksBlock = [ordered]@{
  userPromptSubmitted = @([ordered]@{
    type       = "command"
    powershell = "powershell -ExecutionPolicy Bypass -File `"$HOOKS_DIR\akto-validate-prompt-wrapper.ps1`""
    comment    = "Validate prompts against Akto Guardrails (monitoring only - cannot block per GitHub limitation)"
    timeoutSec = 30
  })
  preToolUse = @([ordered]@{
    type       = "command"
    powershell = "powershell -ExecutionPolicy Bypass -File `"$HOOKS_DIR\akto-validate-pre-tool-wrapper.ps1`""
    comment    = "Validate and block tool execution based on Akto Guardrails policies"
    timeoutSec = 30
  })
  postToolUse = @([ordered]@{
    type       = "command"
    powershell = "powershell -ExecutionPolicy Bypass -File `"$HOOKS_DIR\akto-validate-post-tool-wrapper.ps1`""
    comment    = "Ingest tool execution results to Akto for monitoring and analytics"
    timeoutSec = 30
  })
}
$config | Add-Member -NotePropertyName hooks -NotePropertyValue $hooksBlock -Force
$config | ConvertTo-Json -Depth 20 | Set-Content $CONFIG_PATH
```

Verify the `hooks` section was written correctly:

```powershell
Get-Content $env:USERPROFILE\.copilot\config.json | ConvertFrom-Json | Select-Object -ExpandProperty hooks | ConvertTo-Json -Depth 10
```

**Reference — what the resulting `hooks` section in `~/.copilot/config.json` should look like (macOS/Linux example):**

```json
{
  "hooks": {
    "userPromptSubmitted": [
      {
        "type": "command",
        "bash": "/Users/<you>/.github/hooks/akto-validate-prompt-wrapper.sh",
        "comment": "Validate prompts against Akto Guardrails (monitoring only - cannot block per GitHub limitation)",
        "timeoutSec": 30
      }
    ],
    "preToolUse": [
      {
        "type": "command",
        "bash": "bash /Users/<you>/.github/hooks/akto-validate-pre-tool-wrapper.sh",
        "comment": "Validate and block tool execution based on Akto Guardrails policies",
        "timeoutSec": 30
      }
    ],
    "postToolUse": [
      {
        "type": "command",
        "bash": "bash /Users/<you>/.github/hooks/akto-validate-post-tool-wrapper.sh",
        "comment": "Ingest tool execution results to Akto for monitoring and analytics",
        "timeoutSec": 30
      }
    ]
  }
}
```

{% endstep %}

{% step %}
**Verify Installation**

Three checks in order: validate the config file, run one hook manually end-to-end, then launch Copilot CLI from a directory that is **not** an Akto-hooked repo so you can confirm hooks fire globally.

**Check 1 — Validate the `hooks` block in `~/.copilot/config.json`.**

macOS / Linux:

```bash
jq .hooks ~/.copilot/config.json
```

Windows (PowerShell):

```powershell
Get-Content "$env:USERPROFILE\.copilot\config.json" | ConvertFrom-Json | Select-Object -ExpandProperty hooks | ConvertTo-Json -Depth 10
```

Expected: the three events (`userPromptSubmitted`, `preToolUse`, `postToolUse`) each pointing at your absolute wrapper paths.

**Check 2 — Run the pre-tool hook manually with a deliberately-flagged payload.** The hook should exit `0` and print a JSON `permissionDecision: "deny"` object to stdout.

macOS / Linux:

```bash
echo '{"tool_name":"demo","tool_input":{"message":"test@example.com"},"cwd":"/tmp","timestamp":1704614400000}' | \
  bash ~/.github/hooks/akto-validate-pre-tool-wrapper.sh
echo "exit=$?"
```

Expected output (roughly):

```
{"permissionDecision": "deny", "permissionDecisionReason": "Blocked by Akto Guardrails: ...", "hookSpecificOutput": { ... }}
exit=0
```

Windows (PowerShell):

```powershell
'{"tool_name":"demo","tool_input":{"message":"test@example.com"},"cwd":"/tmp","timestamp":1704614400000}' | `
  powershell -ExecutionPolicy Bypass -File "$env:USERPROFILE\.github\hooks\akto-validate-pre-tool-wrapper.ps1"
"exit=$LASTEXITCODE"
```

**Check 3 — Launch Copilot CLI from any directory** (e.g. `/tmp` on macOS/Linux, `$env:TEMP` on Windows) to prove hooks fire regardless of project. Submit a test prompt that includes an email address, or ask Copilot to run a shell command that would print one, and watch the logs fill up in real time.

Open a second terminal and tail the logs:

macOS / Linux:

```bash
tail -f ~/akto/.github/akto/copilot/logs/validate-prompt.log \
        ~/akto/.github/akto/copilot/logs/validate-pre-tool.log \
        ~/akto/.github/akto/copilot/logs/validate-post-tool.log
```

Windows (PowerShell):

```powershell
Get-Content "$env:USERPROFILE\akto\.github\akto\copilot\logs\validate-prompt.log" -Wait -Tail 20
```

Then in your first terminal:

macOS / Linux:

```bash
cd /tmp
copilot
```

Windows (PowerShell):

```powershell
Set-Location $env:TEMP
copilot
```

You should see `Connector: github_copilot_cli` and guardrail verdicts appearing in the log files for every prompt and tool call — confirming hooks are active globally and not scoped to a project.
{% endstep %}
{% endstepper %}

{% hint style="warning" %}
Paths in the `bash` / `powershell` fields of `~/.copilot/config.json` **must be absolute**. Copilot CLI runs these commands from whatever directory the user launched from, so relative paths (e.g. `./.github/hooks/...`) will silently fail to resolve.
{% endhint %}

## Configuration Reference

### Wrapper Script Variables

```bash
export MODE="atlas"                                           # "argus" or "atlas"
export AKTO_DATA_INGESTION_URL="{{AKTO_DATA_INGESTION_URL}}" # ⚠️ MUST REPLACE — Akto instance URL
export AKTO_SYNC_MODE="true"                                  # "true" or "false"
export AKTO_TIMEOUT="5"                                       # Timeout in seconds
export AKTO_CONNECTOR="github_copilot_cli"                    # Connector identifier
export CONTEXT_SOURCE="ENDPOINT"                              # Context source tag
export AKTO_API_TOKEN="{{AKTO_API_TOKEN}}"                    # ⚠️ MUST REPLACE — API token for auth
```

| Variable                          | Required | Default                            | Description                                        |
| --------------------------------- | -------- | ---------------------------------- | -------------------------------------------------- |
| `AKTO_DATA_INGESTION_URL`         | ✅ Yes    | —                                  | Your Akto instance URL for event ingestion         |
| `AKTO_API_TOKEN`                  | ✅ Yes    | —                                  | Akto API token used to authenticate heartbeat      |
| `MODE`                            | No       | `argus`                            | `argus` or `atlas`                                 |
| `AKTO_SYNC_MODE`                  | No       | `true`                             | `true` = blocking, `false` = observe only          |
| `AKTO_TIMEOUT`                    | No       | `5`                                | Request timeout in seconds                         |
| `DEVICE_ID`                       | No       | auto-detected                      | Override the machine ID                            |
| `LOG_DIR`                         | No       | `~/akto/.github/akto/copilot/logs` | Log directory                                      |
| `LOG_LEVEL`                       | No       | `INFO`                             | Log level (`DEBUG`, `INFO`, `WARNING`, `ERROR`)    |
| `DATABASE_ABSTRACTOR_SERVICE_URL` | No       | `https://cyborg.akto.io`           | Override cyborg URL — self-hosted deployments only |

### Environment Variables (Optional)

Override defaults via environment variables (e.g. in `~/.bashrc` or `~/.zshrc`):

```bash
export MODE="atlas"
export AKTO_DATA_INGESTION_URL="https://your-akto-instance.com"
export AKTO_API_TOKEN="your-api-token"
export AKTO_SYNC_MODE="true"
export AKTO_TIMEOUT="5"
```

## Agent Registration

Each hook automatically registers the device with Akto on first invocation (and refreshes every 30 seconds). This mirrors the heartbeat mechanism used by the `mcp-endpoint-shield` Go agent.

**What is registered:**

| Field                      | Value                                           |
| -------------------------- | ----------------------------------------------- |
| `moduleType`               | `GITHUB_COPILOT_CLI_HOOKS`                      |
| `name`                     | Machine ID (hardware-based, persistent)         |
| `additionalData.username`  | System username                                 |
| `additionalData.os`        | Operating system (`Windows`, `Darwin`, `Linux`) |
| `additionalData.connector` | `github_copilot_cli` or `vscode`                |

**How machine ID is resolved by platform:**

| Platform | Source                                                                      |
| -------- | --------------------------------------------------------------------------- |
| Windows  | `HKEY_LOCAL_MACHINE\SOFTWARE\Microsoft\Cryptography\MachineGuid` (registry) |
| macOS    | `IOPlatformUUID` via `ioreg`                                                |
| Linux    | `/etc/machine-id`                                                           |
| Fallback | MAC address via `uuid.getnode()`                                            |

**Rate limiting:** Registration is sent at most once every 30 seconds. The timestamp is cached in `<log_dir>/last_heartbeat`. The persistent agent ID is stored in `<log_dir>/agent_id` — this ID survives across hook invocations so the device appears as a single registered agent in the Akto dashboard.

## Troubleshooting

### Hooks Not Executing

```bash
# Check you're running from the project root
ls -la .github/hooks/hooks.json

# Verify scripts are executable
ls -la .github/hooks/
chmod +x .github/hooks/*.py .github/hooks/*.sh

# Check JSON syntax
python3 -m json.tool .github/hooks/hooks.json
```

### Ingestion URL Not Configured

**macOS / Linux:**

```bash
# Check current URL value in wrapper scripts
grep "AKTO_DATA_INGESTION_URL" .github/hooks/*-wrapper.sh

# Replace with actual URL
AKTO_URL="https://your-akto-instance.com"
sed -i.bak "s|{{AKTO_DATA_INGESTION_URL}}|${AKTO_URL}|g" .github/hooks/*-wrapper.sh
```

**Windows (PowerShell):**

```powershell
# Check current URL value
Select-String "AKTO_DATA_INGESTION_URL" .github\hooks\*-wrapper.ps1

# Replace with actual URL
$AKTO_URL = "https://your-akto-instance.com"
Get-ChildItem ".github\hooks\*-wrapper.ps1" | ForEach-Object {
  (Get-Content $_.FullName) -replace '{{AKTO_DATA_INGESTION_URL}}', $AKTO_URL |
    Set-Content $_.FullName
}
```

### Windows: Hooks Not Running

**Step 1 — Verify `.ps1` wrapper files were downloaded:**

```powershell
Get-ChildItem .github\hooks\*-wrapper.ps1
```

If missing, re-run the Windows download step above.

**Step 2 — Unblock downloaded files:**

Files downloaded via `Invoke-WebRequest` are marked as "from the internet" by Windows. Under `RemoteSigned` execution policy (default on Windows 10/11), these are blocked. Run:

```powershell
Get-ChildItem ".github\hooks\*" | Unblock-File
```

**Step 3 — Check execution policy:**

```powershell
Get-ExecutionPolicy
# If "Restricted", hooks cannot run at all.
# If "RemoteSigned", unblocking files (step 2) fixes it.
# "Bypass" or "Unrestricted" — execution policy is not the issue.
```

The `hooks.json` already includes `-ExecutionPolicy Bypass` in the `powershell` command, which overrides the policy per-invocation regardless of system settings.

### Check Logs for Errors

```bash
# View logs
cat .github/akto/copilot/logs/*.log

# Check for errors
grep -i error .github/akto/copilot/logs/*.log 2>/dev/null || true
```

### Events Not in Dashboard

```bash
# Test API connectivity
curl -X POST "${AKTO_DATA_INGESTION_URL}/api/http-proxy?akto_connector=github_copilot_cli" \
  -H "Content-Type: application/json" \
  -d '{"test": "event"}'

# Verify URL in wrapper scripts
grep "AKTO_DATA_INGESTION_URL" .github/hooks/*-wrapper.sh
```

### Hook Timing Out

Increase `timeoutSec` in `hooks.json` (value in seconds, e.g. `"timeoutSec": 60`). Ensure `AKTO_DATA_INGESTION_URL` is reachable from your machine.

### Permission Denied on Scripts

```bash
# Fix permissions
chmod +x .github/hooks/*.py .github/hooks/*.sh

# Verify Python 3 is available
python3 --version
```

## Uninstallation

### Complete Removal

```bash
# 1. Remove hook configuration and scripts
rm -rf .github/hooks/

# 2. Remove Akto logs (optional - keeps historical data if skipped)
rm -rf ~/akto-main/akto/.github/akto/

# 3. No restart needed - Copilot reads hooks.json on each invocation
```

### Selective Removal (Keep Logs)

```bash
# Remove only hooks and configuration
rm -rf .github/hooks/

# Logs preserved in ~/akto-main/akto/.github/akto/copilot/logs/
```

### Backup Before Removal

```bash
# Backup configuration and logs before removal
mkdir -p ~/akto-backup
cp -r .github/hooks/ ~/akto-backup/copilot-hooks/ 2>/dev/null
cp -r ~/akto-main/akto/.github/akto/ ~/akto-backup/copilot-akto-logs/ 2>/dev/null

# Then proceed with removal steps above
```

### Verify Removal

```bash
# Check that hooks are removed
test -f .github/hooks/hooks.json && echo "⚠️  hooks.json still exists" || echo "✅ hooks.json removed"
test -d .github/hooks && echo "⚠️  Hook scripts still exist" || echo "✅ Hook scripts removed"
```

## Enterprise Deployment

### Automated Deployment Script

**macOS / Linux:**

```bash
#!/bin/bash
# deploy-copilot-cli-hooks.sh

set -e
AKTO_URL="${1:-https://your-akto-instance.com}"
PROJECT_DIR="${2:-.}"

echo "Installing Akto Guardrails for GitHub Copilot..."

# Create directory
mkdir -p "${PROJECT_DIR}/.github/hooks"

# Download hooks
HOOKS_BASE="https://raw.githubusercontent.com/akto-api-security/akto/master/apps/mcp-endpoint-shield/github-cli-hooks"
for FILE in \
  akto-validate-prompt-wrapper.sh akto-validate-prompt.py \
  akto-validate-pre-tool-wrapper.sh akto-validate-pre-tool.py \
  akto-validate-post-tool-wrapper.sh akto-validate-post-tool.py \
  akto_machine_id.py akto_heartbeat.py hooks.json; do
  curl -s "${HOOKS_BASE}/${FILE}" -o "${PROJECT_DIR}/.github/hooks/${FILE}"
done

# Make executable
chmod +x "${PROJECT_DIR}/.github/hooks"/*.py "${PROJECT_DIR}/.github/hooks"/*.sh

# Configure placeholders
AKTO_API_TOKEN="${3:-}"
sed -i.bak "s|{{AKTO_DATA_INGESTION_URL}}|${AKTO_URL}|g" \
  "${PROJECT_DIR}/.github/hooks"/*-wrapper.sh
sed -i.bak "s|{{AKTO_API_TOKEN}}|${AKTO_API_TOKEN}|g" \
  "${PROJECT_DIR}/.github/hooks"/*-wrapper.sh

echo "Installation complete! Akto instance: ${AKTO_URL}"
echo "Test with: cd ${PROJECT_DIR} && gh copilot suggest 'list files'"
```

**Windows (PowerShell) — works on Azure Virtual Desktop pooled sessions:**

```powershell
# deploy-copilot-cli-hooks.ps1
param(
  [string]$AktoUrl = "https://your-akto-instance.com",
  [string]$ProjectDir = ".",
  [string]$AktoToken = ""
)

$HOOKS_BASE = "https://raw.githubusercontent.com/akto-api-security/akto/master/apps/mcp-endpoint-shield/github-cli-hooks"
$hooksDir = Join-Path $ProjectDir ".github\hooks"

New-Item -ItemType Directory -Force -Path $hooksDir | Out-Null

$files = @(
  "akto-validate-prompt-wrapper.ps1", "akto-validate-prompt.py",
  "akto-validate-pre-tool-wrapper.ps1", "akto-validate-pre-tool.py",
  "akto-validate-post-tool-wrapper.ps1", "akto-validate-post-tool.py",
  "akto_machine_id.py", "akto_heartbeat.py", "hooks.json"
)

foreach ($file in $files) {
  Invoke-WebRequest -Uri "$HOOKS_BASE/$file" -OutFile (Join-Path $hooksDir $file)
}

# Configure placeholders
Get-ChildItem (Join-Path $hooksDir "*-wrapper.ps1") | ForEach-Object {
  (Get-Content $_.FullName) `
    -replace '{{AKTO_DATA_INGESTION_URL}}', $AktoUrl `
    -replace '{{AKTO_API_TOKEN}}', $AktoToken |
    Set-Content $_.FullName
}

Write-Host "Installation complete! Akto instance: $AktoUrl"
Write-Host "Test with: cd $ProjectDir; gh copilot suggest 'list files'"
```

**Deploy to developers (Windows):**

```powershell
Invoke-WebRequest -Uri https://your-org.com/deploy-copilot-cli-hooks.ps1 -OutFile deploy.ps1
powershell -ExecutionPolicy Bypass -File deploy.ps1 -AktoUrl https://your-akto-instance.com -AktoToken your-akto-api-token -ProjectDir C:\path\to\project
```

## Quick Setup Summary

```bash
# 1. Create directory (from your project root)
mkdir -p .github/hooks

# 2. Download all hook scripts from GitHub (see step 2 above)

# 3. ⚠️ Configure placeholders (REQUIRED)
AKTO_URL="https://your-akto-instance.com"
AKTO_API_TOKEN="your-akto-api-token"
sed -i.bak "s|{{AKTO_DATA_INGESTION_URL}}|${AKTO_URL}|g" .github/hooks/*-wrapper.sh
sed -i.bak "s|{{AKTO_API_TOKEN}}|${AKTO_API_TOKEN}|g" .github/hooks/*-wrapper.sh

# 4. Make executable
chmod +x .github/hooks/*.py .github/hooks/*.sh

# 5. Verify hooks.json is present and valid
python3 -m json.tool .github/hooks/hooks.json

# 6. Test (run from project root)
copilot
```

## Resources

* **GitHub Copilot CLI**: <https://github.com/features/copilot/cli>
* **GitHub**: <https://github.com/akto-api-security/akto>
* **Support**: <support@akto.io>
* **Community**: <https://www.akto.io/community>


# Github Copilot Enterprise

## Overview

This page explains how you can integrate **GitHub Copilot Enterprise** with Akto Atlas to enable **agent discovery, centralized guardrails, and enterprise-wide policy enforcement**.

As an Akto user, you can secure Copilot Enterprise using two complementary integration layers:

1. **Endpoint-level control via Copilot Hooks**
2. **Model-level control via Akto Agent Gateway (custom model routing)**

Together, these provide visibility and enforcement both at the developer endpoint and before requests reach the AI model.

## **1.** Endpoint Enforcement (CLI Hooks)

You can secure Copilot usage using the **Copilot Hooks integration** (refer to the [Copilot Hooks](/akto-atlas-agentic-ai-security-for-employee-endpoints/endpoints-discovery-agents/copilot-cli-hooks) page for complete setup details).

This integration allows you to:

* Monitor prompt submissions
* Block unsafe tool executions before they run
* Send events to Akto Atlas for centralized visibility

This layer secures Copilot usage directly at employee endpoints.

## **2.** Model Routing (Agent Gateway)

To enforce guardrails before requests reach the AI provider, you can configure Copilot Enterprise to route model traffic through the **Akto Agent Gateway**.

Instead of allowing Copilot to directly access built-in models, you configure a **custom model endpoint** that points to Akto’s gateway.

Akto then:

1. Inspects and validates the request
2. Applies guardrails and policy enforcement
3. Forwards approved traffic to the configured backend model (Foundry or OpenAI-compatible)

This ensures centralized enforcement across all Copilot Enterprise users.

### **Prerequisites**

Before configuring GitHub:

* Ensure **Akto Agent Gateway is deployed and reachable**
* Ensure the gateway is connected to:
  * Azure Foundry **or**
  * An OpenAI-compatible backend
* Validate that the gateway endpoint is functioning correctly

{% hint style="warning" %}
**Important**

The Agent Gateway must already be connected to the target model backend before you configure it in GitHub. Misconfiguration will cause Copilot requests to fail.
{% endhint %}

### **Configuration Steps in GitHub**

After completing the prerequisites (including Akto Agent Gateway deployment), perform the following:

{% stepper %}
{% step %}
Go to **GitHub → Enterprise Settings**
{% endstep %}

{% step %}
Navigate to **AI Controls**
{% endstep %}

{% step %}
Open **Copilot**
{% endstep %}

{% step %}
Locate the **Configured Models** section

<div data-with-frame="true"><figure><img src="/files/KglJfD978cnUMqtkAw3g" alt="" width="563"><figcaption></figcaption></figure></div>
{% endstep %}

{% step %}
Disable all default or built-in models (if you want full gateway enforcement)
{% endstep %}

{% step %}
Select **Add Custom Model**

<div data-with-frame="true"><figure><img src="/files/ugQWVMycRseo6Q0gv4mF" alt="" width="563"><figcaption></figcaption></figure></div>
{% endstep %}

{% step %}
Choose the appropriate provider type:

* Foundry
* OpenAI-compatible
  {% endstep %}

{% step %}
Enter the **Akto Agent Gateway URL** as the model endpoint

* For OpenAI-compatible

  <div data-with-frame="true"><figure><img src="/files/j3X6hiiAsv3omEjMrdwL" alt="" width="563"><figcaption></figcaption></figure></div>
* For Microsoft Foundry

  <div data-with-frame="true"><figure><img src="/files/bGBJibqHlBleP0DNF2Tm" alt="" width="563"><figcaption></figcaption></figure></div>

{% endstep %}

{% step %}

1. Save and apply the configuration.
   {% endstep %}
   {% endstepper %}

All Copilot Enterprise model requests will now flow through Akto Agent Gateway before reaching the selected backend.

## **Operational Flow**

Once fully configured:

1. User interacts with Copilot
2. (Optional) Copilot Hooks capture endpoint events
3. Copilot sends model request
4. Request is routed to **Akto Agent Gateway**
5. Akto applies guardrails and validation
6. Approved requests are forwarded to the backend model
7. Responses return through the gateway to Copilot

This provides layered security across the Copilot lifecycle.

## **Best Practices**

* Use **both Copilot Hooks and Gateway routing** for complete coverage
* Disable direct access to built-in models to avoid bypass paths
* Validate gateway connectivity before enterprise rollout
* Test with a limited user group before full deployment
* Decide your enforcement posture (observe vs block) before enabling strict policies

## Get Support for your Akto setup

There are multiple ways to request support from Akto. We are 24X7 available on the following:

1. In-app `intercom` support. Message us with your query on intercom in Akto dashboard and someone will reply.
2. Join our [discord channel](https://www.akto.io/community) for community support.
3. Contact `support@akto.io` for email support.
4. Contact us [here](https://www.akto.io/contact-us).


# Gemini CLI Hooks

Akto Guardrails for Gemini CLI provides security validation for AI interactions. It intercepts prompts before sending to Gemini and responses after generation, validates against security policies, blocks risky behavior, and reports events to your Akto dashboard.

## Key Features

* ✅ **Zero Installation** - No standalone apps to install
* ✅ **Transparent Integration** - Uses Gemini CLI's native hook mechanism
* ✅ **Real-time Protection** - Validates every prompt and response
* ✅ **Centralized Monitoring** - All events reported to Akto dashboard
* ✅ **Flexible Deployment** - Supports Argus and Atlas modes (project or user-level)
* ✅ **Configurable Behavior** - Blocking or observation modes

## How It Works

Gemini CLI's hook system executes custom scripts at two critical points:

```mermaid
sequenceDiagram
    autonumber
    participant User
    participant PromptHook as BeforeModel Hook
    participant Gemini as Gemini AI
    participant ResponseHook as AfterModel Hook
    participant Akto as Akto Dashboard

    User->>PromptHook: User submits prompt
    Note over PromptHook: Validate guardrail policies
    alt Safe Prompt
        PromptHook->>Gemini: Forward to API
        PromptHook-->>Akto: Report event
    else Malicious
        PromptHook-->>User: Block
        PromptHook-->>Akto: Report security event
    end

    Gemini->>ResponseHook: Gemini response
    Note over ResponseHook: Ingest prompt/response
    ResponseHook-->>Akto: Report event
    ResponseHook->>User: Response
```

**2 Hook Points:**

1. `BeforeModel` - Validates prompts before sending to Gemini API
2. `AfterModel` - Ingests prompt/response when Gemini finishes (final chunk)

## File Structure

```
~/.gemini/
├── hooks/
│   ├── akto-validate-prompt-wrapper.sh       # Prompt validation wrapper
│   ├── akto-validate-prompt.py                # Prompt validation logic
│   ├── akto-validate-response-wrapper.sh      # Response ingestion wrapper
│   ├── akto-validate-response.py              # Response ingestion logic
│   └── akto_machine_id.py                     # Device ID utility
├── akto/
│   └── chat-logs/                             # Optional local logs
└── settings.json                              # Hook configuration
```

**Key Files:**

* **Wrapper scripts (`.sh`)**: Set environment variables, invoke Python scripts
  * ⚠️ **Contains `AKTO_DATA_INGESTION_URL` placeholder** - Must be replaced with your Akto instance URL
* **Python scripts (`.py`)**: Core validation logic and Akto API communication
* **`akto_machine_id.py`**: Generates unique device identifiers for Atlas mode
* **`settings.json`**: Links hooks to wrapper scripts

> **Note:** Gemini CLI also supports project-level setup (`.gemini/hooks/` and `.gemini/settings.json` in your project root). Config precedence: project → user → system.

## Setup Guide

### Prerequisites

* Gemini CLI installed and configured ([Gemini CLI](https://geminicli.com/))
* Akto instance URL
* Python 3
* macOS, Windows or Linux with bash/zsh

### Installation Steps

{% stepper %}
{% step %}
**Create Directories**

```bash
mkdir -p ~/.gemini/hooks
mkdir -p ~/.gemini/akto/chat-logs
```

{% endstep %}

{% step %}
**Download Hook Scripts**

```bash
# Base URL for downloading hooks
HOOKS_BASE="https://raw.githubusercontent.com/akto-api-security/akto/master/apps/mcp-endpoint-shield/gemini-cli-hooks"

# Download prompt validation hooks
curl -o ~/.gemini/hooks/akto-validate-prompt-wrapper.sh \
  "${HOOKS_BASE}/akto-validate-prompt-wrapper.sh"
curl -o ~/.gemini/hooks/akto-validate-prompt.py \
  "${HOOKS_BASE}/akto-validate-prompt.py"

# Download response ingestion hooks
curl -o ~/.gemini/hooks/akto-validate-response-wrapper.sh \
  "${HOOKS_BASE}/akto-validate-response-wrapper.sh"
curl -o ~/.gemini/hooks/akto-validate-response.py \
  "${HOOKS_BASE}/akto-validate-response.py"

# Download utility
curl -o ~/.gemini/hooks/akto_machine_id.py \
  "${HOOKS_BASE}/akto_machine_id.py"

# Make executable
chmod +x ~/.gemini/hooks/*.py ~/.gemini/hooks/*.sh
```

{% endstep %}

{% step %}
**Configure Akto Ingestion URL and API Token** ⚠️ **CRITICAL STEP**

{% hint style="warning" %}
All wrapper scripts contain the placeholders `{{AKTO_DATA_INGESTION_URL}}` and `{{AKTO_API_TOKEN}}` that **must be replaced** — the URL with your actual Akto instance URL, and the token with your Akto API token (obtain it from **Akto Atlas → Connectors → Setup Guardrail** card). If your deployment does not require auth, set the token to an empty string so the placeholder is removed (an unsubstituted `{{AKTO_API_TOKEN}}` would be sent as an invalid `Authorization` header).
{% endhint %}

**Automated replacement:**

```bash
# Set your Akto ingestion URL and API token
AKTO_URL="https://your-akto-instance.com"
AKTO_API_TOKEN="your-akto-api-token"   # leave empty ("") if your deployment doesn't require auth

# Update all wrapper scripts
sed -i.bak "s|{{AKTO_DATA_INGESTION_URL}}|${AKTO_URL}|g" ~/.gemini/hooks/*-wrapper.sh
sed -i.bak "s|{{AKTO_API_TOKEN}}|${AKTO_API_TOKEN}|g" ~/.gemini/hooks/*-wrapper.sh

# Verify replacement
grep -E "AKTO_DATA_INGESTION_URL|AKTO_API_TOKEN" ~/.gemini/hooks/*-wrapper.sh
```

**Manual replacement (alternative):**

Edit each wrapper script and replace:

```bash
AKTO_DATA_INGESTION_URL="{{AKTO_DATA_INGESTION_URL}}"
AKTO_API_TOKEN="{{AKTO_API_TOKEN}}"
```

With:

```bash
AKTO_DATA_INGESTION_URL="https://your-akto-instance.com"
AKTO_API_TOKEN="your-akto-api-token"
```

Files to update:

* `akto-validate-prompt-wrapper.sh`
* `akto-validate-response-wrapper.sh`
  {% endstep %}

{% step %}
**Configure Hooks**

Create Gemini CLI settings configuration (user-level):

```bash
cat > ~/.gemini/settings.json << 'EOF'
{
  "hooks": {
    "BeforeModel": [
      {
        "matcher": "*",
        "hooks": [
          {
            "name": "akto-validate-prompt",
            "type": "command",
            "command": "bash ~/.gemini/hooks/akto-validate-prompt-wrapper.sh",
            "timeout": 10000,
            "description": "Validates prompts against Akto Guardrails"
          }
        ]
      }
    ],
    "AfterModel": [
      {
        "matcher": "*",
        "hooks": [
          {
            "name": "akto-validate-response",
            "type": "command",
            "command": "bash ~/.gemini/hooks/akto-validate-response-wrapper.sh",
            "timeout": 10000,
            "description": "Sends prompt/response pairs to Akto for ingestion"
          }
        ]
      }
    ]
  }
}
EOF
```

> **Note:** Timeout is in milliseconds (10000 = 10 seconds). For project-level setup, use `.gemini/settings.json` and `$GEMINI_PROJECT_DIR/.gemini/hooks/` in the command paths.
> {% endstep %}

{% step %}
**Configure Hook Behavior (Optional)**

Edit wrapper scripts to customize:

```bash
# In each *-wrapper.sh file:

MODE="atlas"                    # "argus" or "atlas"
AKTO_SYNC_MODE="true"          # "true" (blocking) or "false" (observe only)
AKTO_TIMEOUT="5"               # Timeout in seconds
AKTO_CONNECTOR="gemini_cli"
GEMINI_API_URL="https://generativelanguage.googleapis.com"
```

**Mode Options:**

* **Argus**: Standard validation and reporting
* **Atlas**: Includes device-specific metadata

**Sync Mode:**

* **true**: Blocks threats
* **false**: Reports but allows execution
  {% endstep %}

{% step %}
**Verify Installation**

Check logs to confirm hooks are working:

```bash
# View logs (if LOG_DIR is set)
tail -f ~/.gemini/akto/chat-logs/*.log
```

Test by running a Gemini command:

```bash
gemini
```

You should see log entries or hook activity. In Gemini CLI, use `/hooks panel` to view hook execution status.
{% endstep %}
{% endstepper %}

## Configuration Reference

### Wrapper Script Variables

```bash
MODE="atlas"                                            # "argus" or "atlas"
AKTO_DATA_INGESTION_URL="{{AKTO_DATA_INGESTION_URL}}"  # ⚠️ MUST REPLACE
AKTO_API_TOKEN="{{AKTO_API_TOKEN}}"                    # Akto API token (Authorization header)
AKTO_SYNC_MODE="true"                                  # "true" or "false"
AKTO_TIMEOUT="5"                                       # Timeout in seconds
AKTO_CONNECTOR="gemini_cli"                            # Connector identifier
GEMINI_API_URL="https://generativelanguage.googleapis.com"
```

### Environment Variables (Optional)

Override defaults via environment variables (e.g. in `~/.bashrc` or `~/.zshrc`):

```bash
export MODE="atlas"
export AKTO_DATA_INGESTION_URL="https://your-akto-instance.com"
export AKTO_API_TOKEN="your-akto-api-token"
export AKTO_SYNC_MODE="true"
export AKTO_TIMEOUT="5"
```

## Managing Hooks (Gemini CLI)

| Command                 | Description                                  |
| ----------------------- | -------------------------------------------- |
| `/hooks panel`          | View hook execution status and recent output |
| `/hooks enable-all`     | Enable all hooks                             |
| `/hooks disable-all`    | Disable all hooks                            |
| `/hooks enable <name>`  | Enable a specific hook                       |
| `/hooks disable <name>` | Disable a specific hook                      |

## Troubleshooting

### Hooks Not Executing

```bash
# Check settings.json exists and is valid
cat ~/.gemini/settings.json | python3 -m json.tool

# Verify scripts are executable
ls -la ~/.gemini/hooks/
chmod +x ~/.gemini/hooks/*.py ~/.gemini/hooks/*.sh

# Check Gemini CLI and hook panel
gemini
# Then in CLI: /hooks panel
```

### Ingestion URL Not Configured

```bash
# Check if placeholder still exists
grep "{{AKTO_DATA_INGESTION_URL}}" ~/.gemini/hooks/*-wrapper.sh

# Replace with actual URL
AKTO_URL="https://your-akto-instance.com"
sed -i.bak "s|{{AKTO_DATA_INGESTION_URL}}|${AKTO_URL}|g" ~/.gemini/hooks/*-wrapper.sh
```

### Check Logs for Errors

```bash
# View logs (if LOG_DIR is set)
cat ~/.gemini/akto/chat-logs/*.log

# Check for errors
grep -i error ~/.gemini/akto/chat-logs/*.log 2>/dev/null || true
```

### Events Not in Dashboard

```bash
# Test API connectivity
curl -X POST "${AKTO_DATA_INGESTION_URL}/api/v1/events" \
  -H "Content-Type: application/json" \
  -d '{"test": "event"}'

# Verify URL in wrapper scripts
grep "AKTO_DATA_INGESTION_URL" ~/.gemini/hooks/*-wrapper.sh
```

### Hook Timing Out

Increase timeout in `~/.gemini/settings.json` (value in milliseconds, e.g. `"timeout": 120000`). Ensure `AKTO_DATA_INGESTION_URL` is reachable.

## Uninstallation

To completely remove Akto hooks from Gemini CLI:

### Complete Removal

```bash
# 1. Remove hook configuration
rm ~/.gemini/settings.json

# 2. Remove Akto hook scripts
rm -rf ~/.gemini/hooks/

# 3. Remove Akto logs (optional - keeps historical data if skipped)
rm -rf ~/.gemini/akto/

# 4. No restart needed - Gemini CLI reads settings on each invocation
```

### Selective Removal (Keep Logs)

If you want to preserve logs for audit purposes:

```bash
# Remove only hooks and configuration
rm ~/.gemini/settings.json
rm -rf ~/.gemini/hooks/

# Akto logs preserved in ~/.gemini/akto/
```

### Backup Before Removal

```bash
# Backup configuration and logs before removal
mkdir -p ~/akto-backup
cp ~/.gemini/settings.json ~/akto-backup/gemini-settings.json.bak 2>/dev/null
cp -r ~/.gemini/akto/ ~/akto-backup/gemini-akto-logs/ 2>/dev/null

# Then proceed with removal steps above
```

### Verify Removal

```bash
# Check that hooks are removed
test -f ~/.gemini/settings.json && echo "⚠️  settings.json still exists" || echo "✅ settings.json removed"
test -d ~/.gemini/hooks && echo "⚠️  Hook scripts still exist" || echo "✅ Hook scripts removed"

# Check if logs are removed (if you chose to remove them)
test -d ~/.gemini/akto && echo "ℹ️  Logs still present" || echo "✅ Logs removed"
```

### Restore Gemini CLI to Default

After uninstallation, Gemini CLI will operate without Akto security monitoring. No additional configuration is needed beyond removing the files. Test with:

```bash
gemini
```

## Enterprise Deployment

### Automated Deployment Script

```bash
#!/bin/bash
# deploy-gemini-cli-hooks.sh

set -e
AKTO_URL="${1:-https://your-akto-instance.com}"
AKTO_API_TOKEN="${2:-}"   # optional: pass your Akto API token as the 2nd argument

echo "🔧 Installing Akto Guardrails for Gemini CLI..."

# Create directories
mkdir -p ~/.gemini/hooks ~/.gemini/akto/chat-logs

# Download hooks
HOOKS_BASE="https://raw.githubusercontent.com/akto-api-security/akto/master/apps/mcp-endpoint-shield/gemini-cli-hooks"
curl -s "${HOOKS_BASE}/akto-validate-prompt-wrapper.sh" -o ~/.gemini/hooks/akto-validate-prompt-wrapper.sh
curl -s "${HOOKS_BASE}/akto-validate-prompt.py" -o ~/.gemini/hooks/akto-validate-prompt.py
curl -s "${HOOKS_BASE}/akto-validate-response-wrapper.sh" -o ~/.gemini/hooks/akto-validate-response-wrapper.sh
curl -s "${HOOKS_BASE}/akto-validate-response.py" -o ~/.gemini/hooks/akto-validate-response.py
curl -s "${HOOKS_BASE}/akto_machine_id.py" -o ~/.gemini/hooks/akto_machine_id.py

# Make executable
chmod +x ~/.gemini/hooks/*.py ~/.gemini/hooks/*.sh

# Configure URL and token
sed -i.bak "s|{{AKTO_DATA_INGESTION_URL}}|${AKTO_URL}|g" ~/.gemini/hooks/*-wrapper.sh
sed -i.bak "s|{{AKTO_API_TOKEN}}|${AKTO_API_TOKEN}|g" ~/.gemini/hooks/*-wrapper.sh

# Create settings.json
cat > ~/.gemini/settings.json << 'EOFSETTINGS'
{
  "hooks": {
    "BeforeModel": [
      {
        "matcher": "*",
        "hooks": [
          {
            "name": "akto-validate-prompt",
            "type": "command",
            "command": "bash ~/.gemini/hooks/akto-validate-prompt-wrapper.sh",
            "timeout": 10000,
            "description": "Validates prompts against Akto Guardrails"
          }
        ]
      }
    ],
    "AfterModel": [
      {
        "matcher": "*",
        "hooks": [
          {
            "name": "akto-validate-response",
            "type": "command",
            "command": "bash ~/.gemini/hooks/akto-validate-response-wrapper.sh",
            "timeout": 10000,
            "description": "Sends prompt/response pairs to Akto for ingestion"
          }
        ]
      }
    ]
  }
}
EOFSETTINGS

echo "✅ Installation complete!"
echo "📍 Akto instance: ${AKTO_URL}"
echo "Test with: gemini"
```

**Deploy to developers:**

```bash
curl -fsSL https://your-org.com/deploy-gemini-cli-hooks.sh | bash -s https://your-akto-instance.com
```

## Quick Setup Summary

```bash
# 1. Create directories
mkdir -p ~/.gemini/hooks ~/.gemini/akto/chat-logs

# 2. Download all hook scripts from GitHub (see step 2 above)

# 3. ⚠️ Configure Akto URL and API token (REQUIRED)
AKTO_URL="https://your-akto-instance.com"
AKTO_API_TOKEN="your-akto-api-token"   # leave empty ("") if your deployment doesn't require auth
sed -i.bak "s|{{AKTO_DATA_INGESTION_URL}}|${AKTO_URL}|g" ~/.gemini/hooks/*-wrapper.sh
sed -i.bak "s|{{AKTO_API_TOKEN}}|${AKTO_API_TOKEN}|g" ~/.gemini/hooks/*-wrapper.sh

# 4. Make executable
chmod +x ~/.gemini/hooks/*.py ~/.gemini/hooks/*.sh

# 5. Create settings.json (see step 4 above)

# 6. Test
gemini
```

## Resources

* **Gemini CLI**: <https://geminicli.com/>
* **GitHub**: <https://github.com/akto-api-security/akto>
* **Support**: <support@akto.io>
* **Community**: <https://www.akto.io/community>


# Snowflake Cortex Code CLI Hooks

Akto Guardrails for [Snowflake Cortex Code CLI](https://docs.snowflake.com/en/user-guide/cortex-code/extensibility) sends prompts and tool activity to Akto using the same `/api/http-proxy` ingestion path as Claude Code CLI, GitHub Copilot CLI, Cursor hooks, and Codex CLI. Hooks run locally on the employee machine, validate policy where Snowflake allows blocking, and record events in your Akto dashboard.

## Key Features

* ✅ **Native Cortex hooks** – Uses Snowflake’s documented hook events and JSON stdin/stdout contract
* ✅ **Atlas and Argus** – `MODE=atlas` uses a per-device synthetic host (`ai-agent.cortex`) for employee endpoint inventory
* ✅ **Guardrails + ingestion** – `UserPromptSubmit` and `PreToolUse` call Akto guardrails; `PostToolUse` ingests tool results
* ✅ **Blocking where supported** – `PreToolUse` can deny tool execution (exit code `2` per Snowflake); prompt hook is monitoring-only for that event (non-blocking in Cortex)
* ✅ **Centralized visibility** – Events appear alongside other Atlas discovery agents

## How It Works

Cortex Code CLI loads hook definitions from `~/.snowflake/cortex/hooks.json` or from project `.cortex/settings.json` / `.cortex/settings.local.json` (see [hook configuration](https://docs.snowflake.com/en/user-guide/cortex-code/extensibility#configuring-hooks)). Akto ships command hooks for three lifecycle points:

```mermaid
sequenceDiagram
    autonumber
    participant User
    participant Cortex as Cortex CLI
    participant PromptHook as User prompt hook
    participant PreHook as PreTool hook
    participant PostHook as PostTool hook
    participant Akto as Akto ingestion

    User->>Cortex: Submit prompt
    Cortex->>PromptHook: Hook JSON on stdin
    PromptHook->>Akto: Guardrails request
    PromptHook-->>Cortex: Stdout JSON exit 0
    Note over PromptHook: Monitoring only, cannot block prompt

    Cortex->>PreHook: Tool request JSON
    PreHook->>Akto: Guardrails request
    alt Allowed
        PreHook-->>Cortex: Allow exit 0
    else Denied
        PreHook-->>Cortex: Block exit 2
        PreHook->>Akto: Ingest blocked attempt
    end

    Cortex->>PostHook: Tool result JSON
    PostHook->>Akto: Ingest telemetry
    PostHook-->>Cortex: Exit 0
```

**Hook points (Akto package):**

1. **`UserPromptSubmit`** – Runs guardrails; on violation emits a `systemMessage`, ingests the event, always exits `0` (Snowflake does not treat this hook as blocking).
2. **`PreToolUse`** – Runs guardrails; on deny prints `{"decision":"block","reason":...}` and exits `2` to block the tool.
3. **`PostToolUse`** – Ingests tool input/output for inventory and analytics (observational).

For security practices (credentials, MCP, permissions), see [Security best practices for Cortex Code CLI](https://docs.snowflake.com/en/user-guide/cortex-code/security).

## File layout

Recommended install directory:

```
~/.snowflake/cortex/akto-hooks/
├── .env                                    # Your AKTO_DATA_INGESTION_URL and options (chmod 600)
├── cortex_common.py
├── akto_machine_id.py
├── akto-validate-prompt.py
├── akto-validate-prompt-wrapper.sh
├── akto-validate-pre-tool.py
├── akto-validate-pre-tool-wrapper.sh
├── akto-validate-post-tool.py
├── akto-validate-post-tool-wrapper.sh
└── hooks.json.example                      # Reference only; merge into global hooks.json
```

Logs default to `~/.snowflake/cortex/akto/logs` (or a temp-dir fallback if that path cannot be created).

**Sources in the Akto repo:** `apps/mcp-endpoint-shield/snowflake-cortex-cli-hooks/` ([browse on GitHub](https://github.com/akto-api-security/akto/tree/master/apps/mcp-endpoint-shield/snowflake-cortex-cli-hooks)).

## Setup guide

### Prerequisites

* Cortex Code CLI installed and working ([Cortex Code CLI](https://docs.snowflake.com/en/user-guide/cortex-code/extensibility))
* Akto data ingestion base URL (from your Akto deployment / Quick Start)
* Python 3 as `python3`
* macOS, Linux, or Windows (bash recommended for wrappers)

### Installation steps

{% stepper %}
{% step %}
**Create install directory**

```bash
mkdir -p ~/.snowflake/cortex/akto-hooks
cd ~/.snowflake/cortex/akto-hooks
```

{% endstep %}

{% step %}
**Download hook scripts**

```bash
HOOKS_BASE="https://raw.githubusercontent.com/akto-api-security/akto/feature/snowflake-cortex-atlas-integration/apps/mcp-endpoint-shield/snowflake-cortex-cli-hooks"

for f in \
  cortex_common.py \
  akto_machine_id.py \
  akto_heartbeat.py \
  akto-validate-prompt.py \
  akto-validate-prompt-wrapper.sh \
  akto-validate-pre-tool.py \
  akto-validate-pre-tool-wrapper.sh \
  akto-validate-post-tool.py \
  akto-validate-post-tool-wrapper.sh \
  hooks.json.example \
  .env.example \
  fixtures/sample-pretool.json
do
  mkdir -p "$(dirname "$f")"
  curl -fsSL -o "$f" "${HOOKS_BASE}/${f}"
done

chmod +x ./*.sh
```

{% endstep %}

{% step %}
**Configure URLs and API token (CRITICAL)**

The wrapper scripts ship with placeholders that must be replaced before hooks can authenticate to Akto (ingestion + cyborg heartbeat), unless you override everything via `.env` in the next step.

| Placeholder                           | Purpose                                                                                                                                        |
| ------------------------------------- | ---------------------------------------------------------------------------------------------------------------------------------------------- |
| `{{AKTO_DATA_INGESTION_URL}}`         | Akto data ingestion base URL (no trailing slash)                                                                                               |
| `{{AKTO_API_TOKEN}}`                  | API token sent as `Authorization` on ingestion `POST` and on cyborg heartbeat. Obtain from **Akto Atlas → Connectors → Setup Guardrail** card. |
| `{{DATABASE_ABSTRACTOR_SERVICE_URL}}` | Cyborg / database-abstractor base URL for heartbeat; for Akto SaaS replace with `https://cyborg.akto.io`                                       |

**macOS / Linux (`sed`):**

```bash
cd ~/.snowflake/cortex/akto-hooks

AKTO_URL="https://your-akto-ingestion.example.com"
AKTO_TOKEN="your-akto-api-token"
CYBORG_URL="https://cyborg.akto.io"

sed -i.bak "s|{{AKTO_DATA_INGESTION_URL}}|${AKTO_URL}|g" ./*-wrapper.sh
sed -i.bak "s|{{AKTO_API_TOKEN}}|${AKTO_TOKEN}|g" ./*-wrapper.sh
sed -i.bak "s|{{DATABASE_ABSTRACTOR_SERVICE_URL}}|${CYBORG_URL}|g" ./*-wrapper.sh

grep -E "AKTO_DATA_INGESTION_URL|AKTO_API_TOKEN|DATABASE_ABSTRACTOR" ./*-wrapper.sh
```

{% hint style="info" %}
If you use a `.env` file in the same directory, variables set there **override** these exports when the wrapper runs (the wrapper sources `.env` after the `export` lines).
{% endhint %}
{% endstep %}

{% step %}
**Configure Akto environment file**

{% hint style="warning" %}
Create `~/.snowflake/cortex/akto-hooks/.env` (do not commit it) if you prefer env-based config instead of `sed` on wrappers. Set `AKTO_DATA_INGESTION_URL` with **no** trailing slash, and `AKTO_API_TOKEN` as provided by your Akto deployment. You can start from the downloaded `.env.example`.
{% endhint %}

Minimal example:

```bash
cat > ~/.snowflake/cortex/akto-hooks/.env << 'EOF'
AKTO_DATA_INGESTION_URL=https://your-akto-ingestion.example.com
AKTO_API_TOKEN=your-akto-api-token
DATABASE_ABSTRACTOR_SERVICE_URL=https://cyborg.akto.io
MODE=atlas
AKTO_SYNC_MODE=true
AKTO_TIMEOUT=5
AKTO_CONNECTOR=cortex_code_cli
CONTEXT_SOURCE=ENDPOINT
LOG_DIR=~/.snowflake/cortex/akto/logs
LOG_LEVEL=INFO
EOF

chmod 600 ~/.snowflake/cortex/akto-hooks/.env
chmod 700 ~/.snowflake/cortex/akto-hooks
```

{% endstep %}

{% step %}
**Register hooks in Cortex**

Merge Akto commands into your Cortex hooks configuration.

* **Global:** `~/.snowflake/cortex/hooks.json`
* **Project:** `.cortex/settings.json` or `.cortex/settings.local.json`

Replace `INSTALL_DIR` below with the absolute path to `akto-hooks` (for example `/Users/you/.snowflake/cortex/akto-hooks`):

```json
{
  "hooks": {
    "UserPromptSubmit": [
      {
        "hooks": [
          {
            "type": "command",
            "command": "bash INSTALL_DIR/akto-validate-prompt-wrapper.sh",
            "timeout": 60
          }
        ]
      }
    ],
    "PreToolUse": [
      {
        "matcher": "*",
        "hooks": [
          {
            "type": "command",
            "command": "bash INSTALL_DIR/akto-validate-pre-tool-wrapper.sh",
            "timeout": 60
          }
        ]
      }
    ],
    "PostToolUse": [
      {
        "matcher": "*",
        "hooks": [
          {
            "type": "command",
            "command": "bash INSTALL_DIR/akto-validate-post-tool-wrapper.sh",
            "timeout": 60
          }
        ]
      }
    ]
  }
}
```

If a `hooks` key already exists, merge these three events with your existing entries so other hook scripts are preserved.
{% endstep %}

{% step %}
**Verify**

```bash
cd ~/.snowflake/cortex/akto-hooks
# Optional: pipe sample PreTool JSON (see repo fixtures/sample-pretool.json) through the pre-tool wrapper
tail -f ~/.snowflake/cortex/akto/logs/*.log
```

Run a short Cortex Code CLI session and confirm new lines in the Akto logs and dashboard inventory.
{% endstep %}
{% endstepper %}

## Configuration reference

### Environment variables (`.env` or shell)

| Variable                          | Description                                                                                                                                                   |
| --------------------------------- | ------------------------------------------------------------------------------------------------------------------------------------------------------------- |
| `AKTO_DATA_INGESTION_URL`         | **Required.** Akto ingestion base URL (no trailing `/`).                                                                                                      |
| `AKTO_API_TOKEN`                  | **Required for authenticated SaaS.** Sent as `Authorization` on ingestion and cyborg heartbeat (same as Copilot hooks). `AKTO_TOKEN` is accepted as an alias. |
| `DATABASE_ABSTRACTOR_SERVICE_URL` | Cyborg base URL for heartbeat; defaults to `https://cyborg.akto.io` when unset or still a `{{...}}` placeholder.                                              |
| `MODE`                            | `atlas` (employee endpoints) or `argus`.                                                                                                                      |
| `DEVICE_ID`                       | Optional Atlas device id; defaults to generated machine id.                                                                                                   |
| `AKTO_SYNC_MODE`                  | `true` to enforce guardrails on `PreToolUse`; `false` observes only where applicable.                                                                         |
| `AKTO_CONNECTOR`                  | Default `cortex_code_cli` (sent as `akto_connector` query param).                                                                                             |
| `CONTEXT_SOURCE`                  | Default `ENDPOINT`.                                                                                                                                           |
| `AKTO_TIMEOUT`                    | HTTP timeout seconds (default `5`).                                                                                                                           |
| `LOG_DIR`                         | Log directory; defaults under `~/.snowflake/cortex/akto/logs`.                                                                                                |
| `LOG_LEVEL`                       | `INFO`, `DEBUG`, etc.                                                                                                                                         |

Wrappers export `{{AKTO_DATA_INGESTION_URL}}`, `{{AKTO_API_TOKEN}}`, and `{{DATABASE_ABSTRACTOR_SERVICE_URL}}` (replace with `sed` or override via `.env`). They `source` `~/.snowflake/cortex/akto-hooks/.env` when present **after** those exports so `.env` wins.

### Synthetic traffic (Atlas)

In Atlas mode, hooks tag traffic with host pattern `https://{DEVICE_ID}.ai-agent.cortex` and metadata `ai-agent: cortexcli` so it aligns with other CLI discovery agents in Akto.

## Troubleshooting

| Issue                               | What to check                                                                                                                                 |
| ----------------------------------- | --------------------------------------------------------------------------------------------------------------------------------------------- |
| Hooks never run                     | JSON path in `command` must be absolute; merge did not overwrite unrelated keys incorrectly.                                                  |
| Python errors                       | `python3` on `PATH`; all `.py` files live in the same directory as wrappers (`cortex_common` import).                                         |
| No data in Akto                     | `AKTO_DATA_INGESTION_URL`, `AKTO_API_TOKEN`, network egress, and Akto account mapping for your org.                                           |
| `401` / auth errors on ingestion    | Set `AKTO_API_TOKEN` (or replace `{{AKTO_API_TOKEN}}` in wrappers). Include `Bearer` prefix in the token value if your deployment expects it. |
| Permission errors on `~/.snowflake` | Ensure home directory permissions; logs may fall back to the system temp directory.                                                           |

## Related

* [Claude CLI Hooks](/akto-atlas-agentic-ai-security-for-employee-endpoints/endpoints-discovery-agents/claude-cli-hooks)
* [Copilot Hooks](/akto-atlas-agentic-ai-security-for-employee-endpoints/endpoints-discovery-agents/copilot-cli-hooks)
* [Codex CLI Hooks](/akto-atlas-agentic-ai-security-for-employee-endpoints/endpoints-discovery-agents/codex-cli-hooks)
* [Gemini CLI Hooks](/akto-atlas-agentic-ai-security-for-employee-endpoints/endpoints-discovery-agents/gemini-cli-hooks)
* [Cursor Hooks](/akto-atlas-agentic-ai-security-for-employee-endpoints/endpoints-discovery-agents/cursor-hooks)


# OpenCode Hooks

Akto Guardrails for OpenCode provides security validation for AI coding agent interactions. It intercepts prompts and tool calls before execution, validates against security policies, blocks risky behavior, and reports all events to your Akto dashboard.

## Key Features

* ✅ **Built-in & MCP Tool Support** - Validates both OpenCode built-in tools (read, glob) and MCP server tools
* ✅ **Real-time Protection** - Validates every prompt and tool call before execution
* ✅ **JSON-RPC Compliance** - Full JSON-RPC 2.0 support for MCP protocol
* ✅ **Centralized Monitoring** - All events reported to Akto dashboard
* ✅ **Configurable Behavior** - Blocking or observation modes

## How It Works

OpenCode plugin hooks into three critical points in the AI coding agent lifecycle:

```mermaid
sequenceDiagram
    autonumber
    participant User
    participant PromptHook as Prompt Hook
    participant ToolHook as Tool Request Hook
    participant Akto as Akto Guardrails
    participant OpenCode as OpenCode Execution
    participant ResponseHook as Response Hook

    User->>PromptHook: User submits prompt
    Note over PromptHook: Validate prompt policy
    alt Safe Prompt
        PromptHook->>Akto: Report event (async)
        PromptHook->>OpenCode: Forward to AI
    else Blocked
        PromptHook-->>User: Block
        PromptHook->>Akto: Report security event
    end

    User->>ToolHook: Request tool execution
    Note over ToolHook: Detect MCP vs built-in
    alt Built-in Tool
        ToolHook->>Akto: Validate /v1/tools/execute
    else MCP Tool
        ToolHook->>Akto: Validate /mcp (JSON-RPC)
    end
    
    alt Allowed
        ToolHook->>OpenCode: Execute tool
        OpenCode->>ResponseHook: Tool completes
        ResponseHook->>Akto: Ingest response (async)
    else Blocked
        ToolHook-->>User: Block with reason
    end
```

**3 Hook Points:**

1. `experimental.chat.messages.transform` - Validates user prompts before sending to AI
2. `tool.execute.before` - Validates tool calls (MCP and built-in) before execution
3. `tool.execute.after` - Logs tool responses for audit trail

## File Structure

```
~/.opencode/
├── plugins/
│   ├── akto-guardrails-plugin.js         # Main plugin (hooks orchestrator)
│   ├── akto-validate-prompt.py           # Prompt validation logic
│   ├── akto-validate-tool-request.py     # Tool request validation
│   ├── akto-validate-tool-response.py    # Response logging
│   ├── akto-mcp-request.py               # MCP tool request handler (JSON-RPC)
│   ├── akto-mcp-response.py              # MCP tool response handler
│   ├── akto_machine_id.py                # Device ID utility
│   └── settings.json                     # Plugin metadata
├── akto/
│   └── logs/
│       ├── akto-guardrails.log           # Main plugin logs
│       ├── akto-validate-prompt.log      # Prompt validation logs
│       ├── akto-validate-tool-request.log # Tool validation logs
│       ├── akto-validate-tool-response.log # Response ingestion logs
│       ├── akto-mcp-request.log          # MCP request logs
│       └── akto-mcp-response.log         # MCP response logs
└── .bashrc/.zshrc (environment variable)
```

**Key Files:**

* **`akto-guardrails-plugin.js`**: Main plugin that registers hooks with OpenCode
* **`akto-validate-*.py`**: Python handlers for prompt/tool/response validation
* **`akto-mcp-request.py`**: MCP tool request handler — converts to JSON-RPC format and sends to `/mcp` endpoint
* **`akto-mcp-response.py`**: MCP tool response handler — logs responses for audit
* **`akto_machine_id.py`**: Generates unique device identifiers for Akto dashboard
* **`settings.json`**: Plugin metadata (name, version, hook descriptions) — OpenCode uses this for plugin discovery

## Setup Guide

### Prerequisites

* OpenCode installed on your system
* Python 3.6+ available
* Akto instance with guardrails API endpoint
* Network access to your Akto server
* macOS, Linux, or Windows with bash/zsh

### Installation Steps

{% stepper %}
{% step %}
**Obtain Plugin Files**

Clone the Akto repository or download the plugin files:

```bash
# Clone repository
git clone https://github.com/akto-api-security/akto.git
cd akto/apps/mcp-endpoint-shield/opencode
```

Alternatively, download individual files from GitHub:

```bash
OPENCODE_BASE="https://raw.githubusercontent.com/akto-api-security/akto/master/apps/mcp-endpoint-shield/opencode"

# Create directories
mkdir -p ~/.opencode/plugins

# Download all files
for file in akto-guardrails-plugin.js akto-validate-prompt.py akto-validate-tool-request.py akto-validate-tool-response.py akto-mcp-request.py akto-mcp-response.py akto_machine_id.py settings.json; do
  curl -o ~/.opencode/plugins/$file "${OPENCODE_BASE}/${file}"
done
```

{% endstep %}

{% step %}
**Copy Plugin to OpenCode**

Create the plugins directory and copy all files:

```bash
# Create plugins directory if it doesn't exist
mkdir -p ~/.opencode/plugins

# Copy all production files
cp akto-guardrails-plugin.js ~/.opencode/plugins/
cp akto-validate-prompt.py ~/.opencode/plugins/
cp akto-validate-tool-request.py ~/.opencode/plugins/
cp akto-validate-tool-response.py ~/.opencode/plugins/
cp akto-mcp-request.py ~/.opencode/plugins/
cp akto-mcp-response.py ~/.opencode/plugins/
cp akto_machine_id.py ~/.opencode/plugins/
cp settings.json ~/.opencode/plugins/

# Make Python scripts executable
chmod +x ~/.opencode/plugins/akto-*.py
```

**Verify installation:**

```bash
ls -la ~/.opencode/plugins/akto-*
# Should show 8 files + settings.json
```

{% endstep %}

{% step %}
**Configure Akto Server URL** ⚠️ **CRITICAL STEP**

Set your Akto instance URL as an environment variable:

```bash
# For bash
echo 'export AKTO_DATA_INGESTION_URL="https://your-akto-instance.com/guardrails"' >> ~/.bashrc
source ~/.bashrc

# For zsh
echo 'export AKTO_DATA_INGESTION_URL="https://your-akto-instance.com/guardrails"' >> ~/.zshrc
source ~/.zshrc
```

**Verify the URL is set:**

```bash
echo $AKTO_DATA_INGESTION_URL
# Should output: https://your-akto-instance.com/guardrails
```

{% hint style="warning" %}
This environment variable is **REQUIRED**. Without it, the plugin will run in fail-open mode (allows all execution but won't send data to Akto).
{% endhint %}
{% endstep %}

{% step %}
**(Optional) Configure MCP Servers**

If you use MCP servers with OpenCode, add them to `~/.config/opencode/opencode.json`:

```bash
# Create OpenCode config directory if needed
mkdir -p ~/.config/opencode

# Create/edit opencode.json
cat > ~/.config/opencode/opencode.json << 'EOF'
{
  "$schema": "https://opencode.ai/config.json",
  "mcp": {
    "git": {
      "type": "local",
      "command": ["npx", "-y", "@modelcontextprotocol/server-git"],
      "enabled": true
    },
    "memory": {
      "type": "local",
      "command": ["npx", "-y", "@modelcontextprotocol/server-memory"],
      "enabled": true
    }
  }
}
EOF
```

The plugin will automatically detect MCP tools (format: `server_tool`) and route them to the `/mcp` endpoint.
{% endstep %}

{% step %}
**Start OpenCode**

Kill any existing instance and start fresh:

```bash
# Kill existing instance
killall opencode 2>/dev/null || true
sleep 2

# Start OpenCode
opencode
```

**Verify plugin is loaded:**

```bash
tail -f ~/.config/opencode/akto/logs/akto-guardrails.log
# Should see: [PLUGIN_INIT] {"message":"Akto guardrails plugin initialized"}
```

{% endstep %}

{% step %}
**Verify Installation**

Check all components are working:

```bash
# 1. Plugin files copied
ls -la ~/.opencode/plugins/akto-*

# 2. Akto URL configured
echo $AKTO_DATA_INGESTION_URL

# 3. Log directory created
mkdir -p ~/.config/opencode/akto/logs
ls -la ~/.config/opencode/akto/logs/

# 4. Test with built-in tool (in OpenCode prompt)
read some_file.txt

# 5. Check logs for activity
tail -f ~/.config/opencode/akto/logs/akto-guardrails.log
# Should show: [TOOL_EXECUTE_BEFORE] {"tool":"read",...}
```

{% endstep %}
{% endstepper %}

## Configuration Reference

### Environment Variables

Set these to customize the plugin behavior. You can obtain the `AKTO_API_TOKEN` from **Akto Atlas → Connectors → Setup Guardrail** card.

```bash
# REQUIRED
export AKTO_DATA_INGESTION_URL="https://your-akto-instance.com/guardrails"

# OPTIONAL - Authentication
export AKTO_API_TOKEN=""                    # Bearer token sent as the Authorization header

# OPTIONAL - Logging
export LOG_LEVEL="INFO"                     # DEBUG, INFO, WARNING, ERROR
export LOG_PAYLOADS="false"                 # Set to "true" for verbose payload logging
export LOG_DIR="~/.config/opencode/akto/logs"

# OPTIONAL - Advanced
export AKTO_TIMEOUT="5"                     # Request timeout in seconds
export AKTO_SYNC_MODE="true"                # "true" (blocking) or "false" (async)
export MODE="atlas"                         # "argus" or "atlas"
export CONTEXT_SOURCE="ENDPOINT"            # Request classification
```

### OpenCode Plugin Settings

Edit `~/.opencode/plugins/settings.json` to customize (optional):

```json
{
  "name": "Akto Guardrails for OpenCode",
  "description": "Security guardrails plugin for OpenCode AI agent",
  "version": "1.0.0",
  "configuration": {
    "required": ["AKTO_DATA_INGESTION_URL"],
    "optional": ["AKTO_API_TOKEN", "AKTO_TIMEOUT", "LOG_LEVEL", "LOG_PAYLOADS", "MODE"]
  },
  "hooks": {
    "experimental.chat.messages.transform": {
      "description": "Validates user prompts before sending to AI",
      "blocking": true
    },
    "tool.execute.before": {
      "description": "Validates tool calls before execution",
      "blocking": true
    },
    "tool.execute.after": {
      "description": "Logs tool responses after execution",
      "blocking": false
    }
  }
}
```

## Monitoring & Logs

### View Real-time Activity

```bash
# Watch main plugin activity
tail -f ~/.config/opencode/akto/logs/akto-guardrails.log

# Watch prompt validation
tail -f ~/.config/opencode/akto/logs/akto-validate-prompt.log

# Watch tool validation
tail -f ~/.config/opencode/akto/logs/akto-validate-tool-request.log

# Watch MCP requests (if using MCP)
tail -f ~/.config/opencode/akto/logs/akto-mcp-request.log

# Watch MCP responses (if using MCP)
tail -f ~/.config/opencode/akto/logs/akto-mcp-response.log
```

### Log Format

Each log entry includes:

* **Timestamp**: When the event occurred
* **Hook**: Which hook point was triggered (PLUGIN\_INIT, TOOL\_EXECUTE\_BEFORE, MCP\_TOOL\_DETECTED, etc.)
* **Details**: JSON object with relevant context (tool name, args, API responses)

### Enable Debug Logging

For verbose logging with full payloads:

```bash
export LOG_LEVEL="DEBUG"
export LOG_PAYLOADS="true"

# Restart OpenCode
killall opencode
opencode
```

## Troubleshooting

### Plugin Not Loading

**Symptom:** No logs appear in `~/.config/opencode/akto/logs/`

**Solution:**

```bash
# Verify plugin files exist
ls -la ~/.opencode/plugins/akto-*

# Check Python is available
python3 --version

# Create log directory
mkdir -p ~/.config/opencode/akto/logs

# Restart OpenCode
killall opencode 2>/dev/null || true
sleep 2
opencode
```

### Akto Server Unreachable

**Symptom:** Logs show "API CALL FAILED"

**Solution:**

```bash
# Verify URL is correct
echo $AKTO_DATA_INGESTION_URL

# Test connectivity
curl -I https://your-akto-instance.com/guardrails

# Check if Akto is running
curl -v https://your-akto-instance.com/health
```

### MCP Tools Not Detected

**Symptom:** MCP tool doesn't appear as `server_tool` format

**Solution:**

```bash
# Check opencode.json is valid
python3 -m json.tool ~/.config/opencode/opencode.json

# Verify MCP server is configured
cat ~/.config/opencode/opencode.json | grep -A5 "mcp"

# Restart OpenCode to reload config
killall opencode 2>/dev/null || true
sleep 2
opencode
```

### Python Script Errors

**Symptom:** Errors in `akto-mcp-request.log`

**Solution:**

```bash
# Check Python version (need 3.6+)
python3 --version

# Check if Python script is executable
chmod +x ~/.opencode/plugins/akto-*.py

# Test Python script directly
python3 ~/.opencode/plugins/akto-mcp-request.py << 'EOF'
{"tool_name": "calculator_add", "tool_input": {"a": 5, "b": 3}}
EOF

# Enable debug logging
export LOG_LEVEL="DEBUG"
export LOG_PAYLOADS="true"
killall opencode 2>/dev/null || true
opencode
```

### No Events in Dashboard

**Symptom:** Plugin runs but events don't appear in Akto dashboard

**Solution:**

```bash
# Verify URL is set and correct
echo $AKTO_DATA_INGESTION_URL

# Check logs for API errors
grep "API CALL" ~/.config/opencode/akto/logs/akto-mcp-request.log

# Test API connectivity
curl -X POST "${AKTO_DATA_INGESTION_URL}/api/http-proxy?akto_connector=opencode" \
  -H "Content-Type: application/json" \
  -d '{"test": "payload"}'

# Check firewall/network
ping $(echo $AKTO_DATA_INGESTION_URL | sed 's|https://||; s|/.*||')
```

## Quick Setup Summary

```bash
# 1. Create directories
mkdir -p ~/.opencode/plugins
mkdir -p ~/.config/opencode/akto/logs

# 2. Copy plugin files (from cloned repo or download from GitHub)
cp akto-*.py akto-*.js settings.json ~/.opencode/plugins/

# 3. Make Python scripts executable
chmod +x ~/.opencode/plugins/akto-*.py

# 4. ⚠️ Set Akto URL (REQUIRED)
echo 'export AKTO_DATA_INGESTION_URL="https://your-akto-instance.com/guardrails"' >> ~/.zshrc
source ~/.zshrc

# 5. (Optional) Configure MCP servers in ~/.config/opencode/opencode.json

# 6. Restart OpenCode
killall opencode 2>/dev/null || true
opencode

# 7. Test with a tool
# In OpenCode: read some_file.txt

# 8. Verify logs
tail -f ~/.config/opencode/akto/logs/akto-guardrails.log
```

## Data Flow

### Built-in Tools (read, glob, etc.)

```
OpenCode User
  ↓ (tool.execute.before hook)
Plugin detects: tool="read" (non-MCP)
  ↓
Sends HTTP POST to: /v1/tools/execute
  ↓
Akto evaluates policy
  ↓
Allows/Blocks execution
```

### MCP Tools (calculator\_add, git\_status, etc.)

```
OpenCode User
  ↓ (tool.execute.before hook)
Plugin detects: tool="calculator_add" (MCP format)
  ↓
Spawns: python3 akto-mcp-request.py
  ↓
Python converts to JSON-RPC 2.0:
  {"jsonrpc": "2.0", "method": "tools/call", "params": {...}}
  ↓
Sends HTTP POST to: /mcp
  ↓
Akto evaluates policy
  ↓
Allows/Blocks execution
```

## Resources

* **GitHub**: <https://github.com/akto-api-security/akto>
* **Plugin Source**: <https://github.com/akto-api-security/akto/tree/master/apps/mcp-endpoint-shield/opencode>
* **Support**: <support@akto.io>
* **Community**: <https://www.akto.io/community>


# Hermes Hooks

Akto Guardrails for Hermes provides security validation for AI agent interactions. It intercepts prompts and tool calls before execution, validates against security policies, blocks risky behavior, and reports all events to your Akto dashboard.

## Key Features

* ✅ **MCP & Non-MCP Tool Support** - Validates both MCP server tools and non-MCP built-in tools
* ✅ **Real-time Protection** - Validates every prompt and tool call before execution
* ✅ **JSON-RPC Compliance** - Full JSON-RPC 2.0 support for MCP protocol
* ✅ **Device ID Tracking** - Multi-device management with unique device identifiers
* ✅ **Audit Trail** - Complete audit logging to Akto dashboard
* ✅ **Configurable Behavior** - Blocking or observation modes
* ✅ **Fail-Safe Design** - Graceful degradation if Akto server unavailable

## How It Works

Hermes plugin hooks into four critical points in the AI agent lifecycle:

```
User Input
    ↓
┌─────────────────────────────────────┐
│ pre_llm_call Hook                   │ ← Validate prompt, BLOCK if needed
│ (Runs BEFORE sending to Claude)     │
└────────────┬────────────────────────┘
             ↓ (if allowed)
        Claude LLM API
             ↓
┌─────────────────────────────────────┐
│ post_llm_call Hook                  │ ← Log response for audit
│ (Runs AFTER LLM responds)           │
└────────────┬────────────────────────┘
             ↓
       Tool Execution Request
             ↓
┌─────────────────────────────────────┐
│ pre_tool_call Hook                  │ ← Validate tool, BLOCK if needed
│ (Runs BEFORE tool execution)        │
└────────────┬────────────────────────┘
             ↓ (if allowed)
       Tool Execution
             ↓
┌──────────────────────────────────────┐
│ post_tool_call Hook                 │ ← Log result for audit
│ (Runs AFTER tool completes)         │
└──────────────────────────────────────┘
```

**4 Hook Points:**

1. `pre_llm_call` - Validates user prompts before sending to Claude LLM
2. `post_llm_call` - Logs Claude responses and audit trail
3. `pre_tool_call` - Validates tool calls (MCP and non-MCP) before execution
4. `post_tool_call` - Logs tool responses for audit trail

## File Structure

```
~/.hermes/plugins/akto-guardrails/
├── __init__.py                      # Hook handlers (4 hooks)
├── akto_client.py                   # Akto API client (validation + ingestion)
├── validators.py                    # Prompt & tool validation logic
├── config.py                        # Configuration management
├── logging_util.py                  # Logging setup
├── mcp_util.py                      # MCP tool detection
├── akto_machine_id.py               # Device ID utility
└── plugin.yaml                      # Plugin manifest
```

**Key Files:**

* **`__init__.py`**: Main plugin that registers 4 hooks with Hermes
* **`akto_client.py`**: Handles all API communication (validation + ingestion)
  * Validation calls: `/api/http-proxy?guardrails=true`
  * Ingestion calls: `/api/http-proxy?ingest_data=true`
* **`validators.py`**: Prompt and tool validation logic against Akto policies
* **`mcp_util.py`**: Detects MCP tools and converts to JSON-RPC 2.0 format
* **`akto_machine_id.py`**: Generates unique device identifiers for multi-device tracking
* **`plugin.yaml`**: Hermes plugin manifest — metadata for plugin discovery

## Setup Guide

### Prerequisites

* Hermes Agent installed and functional
* Python 3.6+ available
* Akto instance with guardrails API endpoint
* Network access to your Akto server
* Akto Data Ingestion URL (provided by your Akto admin)

### Installation Steps

#### Step 1: Obtain Plugin Files

Clone the Akto repository or download the plugin files:

```bash
# Clone repository
git clone https://github.com/akto-api-security/akto.git
cd akto/apps/mcp-endpoint-shield/hermes
```

Alternatively, download individual files from GitHub:

```bash
HERMES_BASE="https://raw.githubusercontent.com/akto-api-security/akto/master/apps/mcp-endpoint-shield/hermes"

# Create directories
mkdir -p ~/.hermes/plugins/akto-guardrails

# Download all files
for file in __init__.py akto_client.py validators.py config.py logging_util.py mcp_util.py akto_machine_id.py plugin.yaml; do
  curl -o ~/.hermes/plugins/akto-guardrails/$file "${HERMES_BASE}/${file}"
done
```

#### Step 2: Copy Plugin to Hermes

Create the plugins directory and copy all files:

```bash
# Create plugins directory if it doesn't exist
mkdir -p ~/.hermes/plugins/akto-guardrails

# Copy all production files
cp __init__.py ~/.hermes/plugins/akto-guardrails/
cp akto_client.py ~/.hermes/plugins/akto-guardrails/
cp validators.py ~/.hermes/plugins/akto-guardrails/
cp config.py ~/.hermes/plugins/akto-guardrails/
cp logging_util.py ~/.hermes/plugins/akto-guardrails/
cp mcp_util.py ~/.hermes/plugins/akto-guardrails/
cp akto_machine_id.py ~/.hermes/plugins/akto-guardrails/
cp plugin.yaml ~/.hermes/plugins/akto-guardrails/
```

**Verify installation:**

```bash
ls -la ~/.hermes/plugins/akto-guardrails/
# Should show 8 files
```

#### Step 3: Configure Akto Server URL ⚠️ **CRITICAL STEP**

Set your Akto instance URL as an environment variable:

```bash
# For bash
echo 'export AKTO_DATA_INGESTION_URL="https://your-akto-instance.com/guardrails"' >> ~/.bashrc
source ~/.bashrc

# For zsh
echo 'export AKTO_DATA_INGESTION_URL="https://your-akto-instance.com/guardrails"' >> ~/.zshrc
source ~/.zshrc
```

**Verify the URL is set:**

```bash
echo $AKTO_DATA_INGESTION_URL
# Should output: https://your-akto-instance.com/guardrails
```

{% hint style="warning" %}
This environment variable is **REQUIRED**. Without it, the plugin will run in fail-open mode (allows all execution but won't send data to Akto).
{% endhint %}

#### Step 4: Configure Hermes Plugin (Optional)

Edit or create `~/.hermes/config.yaml` for additional plugin configuration:

```yaml
# Plugin settings (optional)
plugins:
  akto-guardrails:
    enabled: true
    config:
      AKTO_SYNC_MODE: "true"      # Blocking enabled (default)
      LOG_LEVEL: "INFO"            # INFO, DEBUG, WARNING, ERROR
      LOG_PAYLOADS: "false"        # Set to "true" for verbose logging
      AKTO_TIMEOUT: "5"            # Timeout in seconds
```

**What each setting means:**

* `AKTO_SYNC_MODE: "true"` - Block risky prompts/tools (recommended)
* `AKTO_SYNC_MODE: "false"` - Logging only (no blocking)
* `LOG_LEVEL: "INFO"` - Log important events only
* `LOG_LEVEL: "DEBUG"` - Verbose logging with full payloads
* `AKTO_TIMEOUT: "5"` - Wait max 5 seconds for Akto response

#### Step 5: Configure MCP Servers (Optional)

If you use MCP servers with Hermes, add them to `~/.hermes/config.yaml`:

```yaml
mcp_servers:
  calculator:
    command: python3
    args:
      - /path/to/calculator_server.py
    env: {}
  
  git:
    command: python3
    args:
      - /path/to/git_server.py
    env: {}

agent:
  mcp_server_allowlist:
    - calculator
    - git
```

The plugin will automatically detect MCP tools (format: `server_tool`) and route them to the `/mcp` endpoint with JSON-RPC 2.0 format.

#### Step 6: Create Log Directory

```bash
mkdir -p ~/.config/hermes/akto/logs
chmod 755 ~/.config/hermes/akto/logs
```

Logs will be written to: `~/.config/hermes/akto/logs/hermes-guardrails.log`

#### Step 7: Start Hermes

Start or restart Hermes:

```bash
# Kill existing instance (if running)
pkill -f hermes 2>/dev/null || true
sleep 2

# Start Hermes
hermes
```

**Verify plugin is loaded:**

```bash
tail -f ~/.config/hermes/akto/logs/hermes-guardrails.log
# Should see plugin initialization messages
```

**Expected output:**

```
INFO - === Hermes Akto Guardrails Plugin Initializing ===
INFO - Mode: argus, Sync: True, Timeout: 5.0s
INFO - === Hermes Akto Guardrails Plugin Ready ===
INFO - Plugin hooks registered successfully!
```

#### Step 8: Verify Installation

Check all components are working:

```bash
# 1. Plugin files copied
ls -la ~/.hermes/plugins/akto-guardrails/

# 2. Akto URL configured
echo $AKTO_DATA_INGESTION_URL

# 3. Log directory created
ls -la ~/.config/hermes/akto/logs/

# 4. Test with a simple question
# In Hermes prompt: "What is 2+2?"

# 5. Check logs for activity
tail -20 ~/.config/hermes/akto/logs/hermes-guardrails.log
# Should show: [HOOK: pre_llm_call] ===== HOOK TRIGGERED =====
```

## Configuration Reference

### Environment Variables

Set these to customize the plugin behavior. You can obtain the `AKTO_API_TOKEN` from **Akto Atlas → Connectors → Setup Guardrail** card.

```bash
# REQUIRED
export AKTO_DATA_INGESTION_URL="https://your-akto-instance.com/guardrails"

# OPTIONAL - Authentication
export AKTO_API_TOKEN=""                    # API token sent as the Authorization header

# OPTIONAL - Behavior
export AKTO_SYNC_MODE="true"                # "true" (blocking) or "false" (logging only)
export AKTO_TIMEOUT="5"                     # Request timeout in seconds

# OPTIONAL - Logging
export LOG_LEVEL="INFO"                     # DEBUG, INFO, WARNING, ERROR
export LOG_PAYLOADS="false"                 # Set to "true" for verbose payload logging
export LOG_DIR="~/.config/hermes/akto/logs"

# OPTIONAL - Advanced
export MODE="argus"                         # "argus" (default) or "atlas"
export CONTEXT_SOURCE="ENDPOINT"            # Request classification
export AKTO_CONNECTOR="hermes"              # Connector name
```

### Hermes Plugin Settings

Edit `~/.hermes/config.yaml` to customize (optional):

```yaml
plugins:
  akto-guardrails:
    enabled: true
    config:
      AKTO_DATA_INGESTION_URL: "https://your-akto-instance.com/guardrails"
      AKTO_API_TOKEN: "your-akto-api-token"
      AKTO_SYNC_MODE: "true"
      AKTO_TIMEOUT: "5"
      LOG_LEVEL: "INFO"
      LOG_PAYLOADS: false
      MODE: "argus"
```

## Monitoring & Logs

### View Real-time Activity

```bash
# Watch all plugin activity
tail -f ~/.config/hermes/akto/logs/hermes-guardrails.log

# Filter for prompt validation
grep "pre_llm_call\|VALIDATE_PROMPT" ~/.config/hermes/akto/logs/hermes-guardrails.log

# Filter for tool validation
grep "pre_tool_call\|VALIDATE_TOOL" ~/.config/hermes/akto/logs/hermes-guardrails.log

# Filter for blocking events
grep "BLOCKED" ~/.config/hermes/akto/logs/hermes-guardrails.log

# Filter for API calls
grep "\[API\]" ~/.config/hermes/akto/logs/hermes-guardrails.log
```

### Log Format

Each log entry includes:

* **Timestamp**: When the event occurred
* **Component**: Which module generated the log (e.g., \[HOOK: pre\_llm\_call])
* **Details**: Relevant context (session ID, tool name, validation result)

### Enable Debug Logging

For verbose logging with full payloads:

```bash
export LOG_LEVEL="DEBUG"
export LOG_PAYLOADS="true"

# Restart Hermes
pkill -f hermes
sleep 2
hermes
```

## Troubleshooting

### Plugin Not Loading

**Symptom:** No logs appear in `~/.config/hermes/akto/logs/`

**Solution:**

```bash
# Verify plugin files exist
ls -la ~/.hermes/plugins/akto-guardrails/

# Check Python is available
python3 --version

# Create log directory
mkdir -p ~/.config/hermes/akto/logs

# Check plugin.yaml syntax
python3 -c "import yaml; yaml.safe_load(open('~/.hermes/plugins/akto-guardrails/plugin.yaml'))"

# Restart Hermes with verbose output
hermes 2>&1 | grep -i "plugin\|akto\|error"
```

### Akto Server Unreachable

**Symptom:** Logs show "API CALL FAILED"

**Solution:**

```bash
# Verify URL is correct
echo $AKTO_DATA_INGESTION_URL

# Test connectivity
curl -I https://your-akto-instance.com/guardrails

# Check if Akto is running
curl -v https://your-akto-instance.com/health

# Test from within Hermes logs
grep "API\]" ~/.config/hermes/akto/logs/hermes-guardrails.log
```

### MCP Tools Not Detected

**Symptom:** MCP tool doesn't appear as `server_tool` format

**Solution:**

```bash
# Check hermes config.yaml is valid
python3 -m yaml ~/.hermes/config.yaml

# Verify MCP server is configured
grep -A10 "mcp_servers:" ~/.hermes/config.yaml

# Verify server is in allowlist
grep -A5 "mcp_server_allowlist:" ~/.hermes/config.yaml

# Restart Hermes to reload config
pkill -f hermes
sleep 2
hermes
```

### Python Import Errors

**Symptom:** Errors in logs about missing modules

**Solution:**

```bash
# Check Python version (need 3.6+)
python3 --version

# Check all files are present
ls -la ~/.hermes/plugins/akto-guardrails/*.py

# Test imports directly
python3 -c "import sys; sys.path.insert(0, '~/.hermes/plugins/akto-guardrails'); from akto_client import AktoClient; print('OK')"

# Enable debug logging
export LOG_LEVEL="DEBUG"
pkill -f hermes
sleep 2
hermes
```

### No Events in Dashboard

**Symptom:** Plugin runs but events don't appear in Akto dashboard

**Solution:**

```bash
# Verify URL is set and correct
echo $AKTO_DATA_INGESTION_URL

# Check logs for validation/ingestion
grep "API\]" ~/.config/hermes/akto/logs/hermes-guardrails.log

# Check for successful responses
grep "Status 200" ~/.config/hermes/akto/logs/hermes-guardrails.log

# Test API connectivity directly
curl -X POST "$AKTO_DATA_INGESTION_URL/api/http-proxy?akto_connector=hermes" \
  -H "Content-Type: application/json" \
  -d '{"test": "payload"}'

# Check firewall/network
ping $(echo $AKTO_DATA_INGESTION_URL | sed 's|https://||; s|/.*||')
```

## Quick Setup Summary

```bash
# 1. Create directories
mkdir -p ~/.hermes/plugins/akto-guardrails
mkdir -p ~/.config/hermes/akto/logs

# 2. Copy plugin files (from cloned repo or download from GitHub)
cp __init__.py akto_client.py validators.py config.py logging_util.py mcp_util.py akto_machine_id.py plugin.yaml ~/.hermes/plugins/akto-guardrails/

# 3. ⚠️ Set Akto URL (REQUIRED)
echo 'export AKTO_DATA_INGESTION_URL="https://your-akto-instance.com/guardrails"' >> ~/.zshrc
source ~/.zshrc

# 4. (Optional) Configure plugin in ~/.hermes/config.yaml

# 5. (Optional) Configure MCP servers in ~/.hermes/config.yaml

# 6. Restart Hermes
pkill -f hermes 2>/dev/null || true
sleep 2
hermes

# 7. Test with a simple question
# In Hermes: "What is the capital of France?"

# 8. Verify logs
tail -f ~/.config/hermes/akto/logs/hermes-guardrails.log
```

## Data Flow

### Prompt Validation & Logging

```
Hermes User Question
  ↓ (pre_llm_call hook)
Plugin validates prompt policy
  ↓
Validation call: /api/http-proxy?guardrails=true
  ↓
Akto evaluates policy
  ↓
IF BLOCKED:
  Ingestion call: /api/http-proxy?ingest_data=true
  (audit trail of blocked prompt)
  ↓
  Return DENIED to hook
  ↓
  LLM sees security notice
ELSE:
  Return ALLOWED to hook
  ↓
  Claude processes normally
  ↓
  (post_llm_call hook)
  Ingestion call: /api/http-proxy?ingest_data=true
  (audit trail of response)
```

### Tool Execution - Non-MCP Tools (e.g., web\_search, terminal)

```
Hermes User wants tool
  ↓ (pre_tool_call hook)
Plugin detects: tool="web_search" (non-MCP)
  ↓
Validation call: /api/http-proxy?guardrails=true
  ↓
Akto evaluates policy
  ↓
IF BLOCKED:
  Ingestion call: /api/http-proxy?ingest_data=true
  (audit trail of blocked tool)
  ↓
  Return BLOCK action
  ↓
  Tool does NOT execute
ELSE:
  Return ALLOW action
  ↓
  Tool executes
  ↓
  (post_tool_call hook)
  Ingestion call: /api/http-proxy?ingest_data=true
  (audit trail of tool result)
```

### Tool Execution - MCP Tools (e.g., calculator\_add, git\_status)

```
Hermes User wants MCP tool
  ↓ (pre_tool_call hook)
Plugin detects: tool="calculator_add" (MCP format)
  ↓
Converts to JSON-RPC 2.0:
  {"jsonrpc": "2.0", "method": "tools/call", "params": {...}}
  ↓
Validation call: /api/http-proxy?guardrails=true
  (sent with path="/mcp" for MCP tools)
  ↓
Akto evaluates policy
  ↓
IF BLOCKED:
  Ingestion call: /api/http-proxy?ingest_data=true
  (audit trail of blocked MCP tool)
  ↓
  Return BLOCK action
  ↓
  Tool does NOT execute
ELSE:
  Return ALLOW action
  ↓
  Tool executes
  ↓
  (post_tool_call hook)
  Ingestion call: /api/http-proxy?ingest_data=true
  (audit trail of MCP tool result)
```

## Resources

* **GitHub**: <https://github.com/akto-api-security/akto>
* **Plugin Source**: <https://github.com/akto-api-security/akto/tree/master/apps/mcp-endpoint-shield/hermes>
* **Support**: <support@akto.io>
* **Community**: <https://www.akto.io/community>


# Codex CLI Hooks

Akto Guardrails for Codex provides comprehensive security monitoring and validation for both **chat interactions** and **tool executions** — and works with both **Codex CLI** and **Codex Desktop**. It intercepts prompts before sending to Codex, validates tool calls before execution, blocks risky behavior, and reports all events to your Akto dashboard.

## Key Features

* ✅ **Zero Installation** - No standalone apps to install
* ✅ **Transparent Integration** - Uses Codex's native hook mechanism (CLI and Desktop)
* ✅ **Real-time Protection** - Validates every prompt and tool call
* ✅ **Centralized Monitoring** - All events reported to Akto dashboard
* ✅ **Flexible Deployment** - Supports Argus and Atlas modes
* ✅ **Configurable Behavior** - Blocking or observation modes
* ✅ **Auto-detected API Host** - Automatically resolves Codex API endpoint from environment

## How It Works

Codex's hook system (shared by both CLI and Desktop) executes custom scripts at four critical points:

```mermaid
sequenceDiagram
    autonumber
    participant User
    participant PromptHook as UserPromptSubmit Hook
    participant Codex as Codex AI
    participant StopHook as Stop Hook
    participant PreToolHook as PreToolUse Hook
    participant Bash as Bash Tool
    participant PostToolHook as PostToolUse Hook
    participant Akto as Akto Dashboard

    User->>PromptHook: User submits prompt
    Note over PromptHook: Validate guardrail policies
    alt Safe Prompt
        PromptHook->>Codex: Forward to API
        PromptHook-->>Akto: Report event
    else Malicious
        PromptHook-->>User: Block
        PromptHook-->>Akto: Report security event
    end

    Codex->>StopHook: Codex response
    Note over StopHook: Ingest prompt/response pair
    StopHook-->>Akto: Report event
    StopHook->>User: Response

    Codex->>PreToolHook: Tool request (Bash)
    Note over PreToolHook: Validate tool parameters
    alt Safe Tool Call
        PreToolHook->>Bash: Execute tool
        PreToolHook-->>Akto: Report event
    else Malicious
        PreToolHook-->>Codex: Deny execution
        PreToolHook-->>Akto: Report security event
    end

    Bash->>PostToolHook: Tool result
    Note over PostToolHook: Ingest tool input/output
    PostToolHook-->>Akto: Report event
    PostToolHook->>Codex: Result
```

**4 Hook Points:**

1. `UserPromptSubmit` - Validates prompts before sending to Codex API
2. `Stop` - Ingests prompt/response pair when Codex finishes generating
3. `PreToolUse` - Validates tool requests before execution (blocks if malicious)
4. `PostToolUse` - Ingests tool input/output after execution (observational only)

> **Note:** Codex currently only supports the `Bash` tool for `PreToolUse` and `PostToolUse` hooks (both CLI and Desktop).

## File Structure

```
~/.codex/
├── hooks.json                                  # Hook configuration
├── config.toml                                 # Codex CLI config (feature flag required)
├── hooks/
│   ├── akto-validate-prompt-wrapper.sh         # Prompt validation wrapper
│   ├── akto-validate-prompt.py                 # Prompt validation logic
│   ├── akto-validate-response-wrapper.sh       # Response ingestion wrapper
│   ├── akto-validate-response.py               # Response ingestion logic
│   ├── akto-validate-pre-tool-wrapper.sh       # Pre-tool validation wrapper
│   ├── akto-validate-pre-tool.py               # Pre-tool validation logic
│   ├── akto-validate-post-tool-wrapper.sh      # Post-tool ingestion wrapper
│   ├── akto-validate-post-tool.py              # Post-tool ingestion logic
│   ├── akto_ingestion_utility.py               # Shared validation/ingestion logic
│   └── akto_machine_id.py                      # Device ID utility
└── akto/
    └── logs/
        ├── validate-prompt.log
        ├── validate-response.log
        ├── validate-pre-tool.log
        └── validate-post-tool.log
```

**Key Files:**

* **Wrapper scripts (`.sh`)**: Set environment variables, invoke Python scripts
  * ⚠️ **Contains `AKTO_DATA_INGESTION_URL` placeholder** - Must be replaced with your Akto instance URL
* **Python scripts (`.py`)**: Core validation and ingestion logic, Akto API communication
* **`akto_ingestion_utility.py`**: Shared validation/ingestion logic imported by every hook script — lives in a different GitHub directory (`shared/`, not `codex-cli-hooks/`), so it needs its own download step
* **`akto_machine_id.py`**: Generates unique device identifiers for Atlas mode
* **`hooks.json`**: Links hooks to wrapper scripts
* **`config.toml`**: Must enable the `codex_hooks` feature flag

## Setup Guide

### Prerequisites

* Codex CLI or Codex Desktop installed
* Akto instance URL
* Python 3.7+
* macOS, Linux, or Windows with bash/zsh

### Enabling Local Hooks in Managed Environments

{% hint style="info" %}
This section is only relevant if your machine is managed by an organization (MDM, ChatGPT Business/Enterprise). If you're on a personal or unmanaged device, skip ahead to [Installation Steps](#installation-steps).
{% endhint %}

In managed environments, organizational policies may override local Codex hook configuration. This section helps administrators identify and resolve restrictions so that local hooks can execute.

#### Configuration Precedence

Codex evaluates configuration sources in this order — higher-precedence sources win:

1. Cloud-managed requirements (ChatGPT Business / Enterprise)
2. macOS managed preferences (MDM)
3. Local user configuration (`~/.codex/config.toml`)
4. Other defaults

#### Scenario 1: Cloud-Managed Requirements

Organization administrators should review settings in the ChatGPT administration environment under:

* Codex Settings → Managed Requirements
* Policies → Developer Tools Settings
* Hooks Restrictions / Managed Hooks Configuration

Look for settings that disable hooks globally or restrict execution to organization-managed hooks only:

```toml
hooks_enabled = false
managed-hooks-only = true
```

**To allow local hooks**, ensure:

```toml
hooks_enabled = true
managed-hooks-only = false
```

Or remove the restriction entirely.

#### Scenario 2: macOS Managed Preferences (MDM)

MDM-managed Codex configuration is delivered through the preference domain `com.openai.codex` via platforms such as Jamf Pro, Kandji, Microsoft Intune, Mosyle, or VMware Workspace ONE.

**Check current managed configuration on the device:**

```bash
# View installed profiles
profiles show
# or
sudo profiles show

# Read managed preferences
defaults read /Library/Managed\ Preferences/com.openai.codex
```

Locate the `requirements_toml_base64` field, decode it, and inspect for restrictions such as:

```toml
hooks_enabled = false
managed-hooks-only = true
codex_hooks = false
```

**To allow local hooks**, update the MDM profile so that:

```toml
hooks_enabled = true
managed-hooks-only = false
```

Or remove the managed hook restriction entirely. After updating:

1. Save the configuration.
2. Push the updated profile to managed devices.
3. Restart Codex.
4. Verify hook discovery and execution.

#### How an Administrator Can Change Codex MDM Configuration

Administrators should modify the source profile in the MDM console rather than editing files on individual devices. The settings visible on a Mac under `defaults read /Library/Managed\ Preferences/com.openai.codex` are generated from that profile.

<details>

<summary>Jamf Pro</summary>

1. Log in to Jamf Pro.
2. Navigate to **Computers** → **Configuration Profiles**.
3. Locate the profile managing `com.openai.codex`.
4. Open the profile and review **Application & Custom Settings** → **Custom Schema** / Property List payloads.
5. Find the key `com.openai.codex` and inspect `requirements_toml_base64`.
6. Decode and modify the TOML configuration as required.
7. Save the profile and redeploy or wait for device check-in.

</details>

<details>

<summary>Kandji</summary>

1. Open Kandji Admin Portal.
2. Navigate to **Library** → **Custom Profiles**.
3. Locate the profile containing `com.openai.codex`.
4. Review the payload and modify the `requirements_toml_base64` value.
5. Save and assign the updated profile.
6. Force a device sync if required.

</details>

<details>

<summary>Microsoft Intune</summary>

1. Open Intune Admin Center.
2. Navigate to **Devices** → **Configuration Profiles**.
3. Locate the profile managing Codex and open **Custom Settings**.
4. Review the preference domain `com.openai.codex`.
5. Update the managed configuration, save, and assign the profile.
6. Sync target devices.

</details>

<details>

<summary>Mosyle</summary>

1. Open Mosyle Dashboard.
2. Navigate to **Management** → **Profiles**.
3. Locate the profile containing `com.openai.codex`.
4. Modify the payload, save changes, and push the updated profile.

</details>

**What settings to change**

Inspect the decoded TOML for any hook restrictions, for example:

```toml
managed-hooks-only = true
hooks_enabled = false
codex_hooks = false
```

To permit user-defined local hooks, update or remove the restricting settings:

```toml
managed-hooks-only = false
hooks_enabled = true
```

**Validation after deployment**

On a managed Mac, confirm the updated configuration is present:

```bash
defaults read /Library/Managed\ Preferences/com.openai.codex
```

Then restart Codex, ensure local hook files exist under `~/.codex/hooks/` or `~/.codex/hooks.json`, and verify hook discovery through Codex logs.

#### Local User Configuration

Once organizational restrictions are removed, users enable hooks locally:

```toml
# ~/.codex/config.toml
[features]
codex_hooks = true
```

Hook files can then be placed in `~/.codex/hooks/` or `~/.codex/hooks.json`.

#### Validation

After enabling local hooks:

1. Restart Codex.
2. Execute an action that should trigger a hook.
3. Verify logs show events such as:

```
Hook discovered
Hook started
Hook completed
```

If hooks are not discovered, re-check cloud-managed requirements and MDM-managed preferences, as they take precedence over local configuration.

### Installation Steps

{% stepper %}
{% step %}
**Enable Codex Hooks Feature Flag**

Codex hooks are experimental. Enable them in `~/.codex/config.toml` (used by both CLI and Desktop):

```toml
[features]
codex_hooks = true
```

{% endstep %}

{% step %}
**Create Directories**

```bash
mkdir -p ~/.codex/hooks
mkdir -p ~/.codex/akto/logs
```

{% endstep %}

{% step %}
**Download Hook Scripts**

```bash
# Base URLs for downloading hooks
HOOKS_BASE="https://raw.githubusercontent.com/akto-api-security/akto/master/apps/mcp-endpoint-shield/codex-cli-hooks"
SHARED_BASE="https://raw.githubusercontent.com/akto-api-security/akto/master/apps/mcp-endpoint-shield/shared"

# Download prompt validation hooks
curl -o ~/.codex/hooks/akto-validate-prompt-wrapper.sh \
  "${HOOKS_BASE}/akto-validate-prompt-wrapper.sh"
curl -o ~/.codex/hooks/akto-validate-prompt.py \
  "${HOOKS_BASE}/akto-validate-prompt.py"

# Download response ingestion hooks
curl -o ~/.codex/hooks/akto-validate-response-wrapper.sh \
  "${HOOKS_BASE}/akto-validate-response-wrapper.sh"
curl -o ~/.codex/hooks/akto-validate-response.py \
  "${HOOKS_BASE}/akto-validate-response.py"

# Download pre-tool validation hooks
curl -o ~/.codex/hooks/akto-validate-pre-tool-wrapper.sh \
  "${HOOKS_BASE}/akto-validate-pre-tool-wrapper.sh"
curl -o ~/.codex/hooks/akto-validate-pre-tool.py \
  "${HOOKS_BASE}/akto-validate-pre-tool.py"

# Download post-tool ingestion hooks
curl -o ~/.codex/hooks/akto-validate-post-tool-wrapper.sh \
  "${HOOKS_BASE}/akto-validate-post-tool-wrapper.sh"
curl -o ~/.codex/hooks/akto-validate-post-tool.py \
  "${HOOKS_BASE}/akto-validate-post-tool.py"

# Download utility
curl -o ~/.codex/hooks/akto_machine_id.py \
  "${HOOKS_BASE}/akto_machine_id.py"

# Download shared ingestion utility (note: SHARED_BASE, not HOOKS_BASE)
curl -o ~/.codex/hooks/akto_ingestion_utility.py \
  "${SHARED_BASE}/akto_ingestion_utility.py"

# Make executable
chmod +x ~/.codex/hooks/*.sh
```

{% hint style="info" %}
`akto_ingestion_utility.py` must land in the same directory as the hook scripts — they import it as a plain top-level module, resolved from the script's own directory. Skipping this download makes every hook fail with `ModuleNotFoundError: No module named 'akto_ingestion_utility'`.
{% endhint %}
{% endstep %}

{% step %}
**Configure Akto Ingestion URL and API Token** ⚠️ **CRITICAL STEP**

{% hint style="warning" %}
All wrapper scripts contain the placeholders `{{AKTO_DATA_INGESTION_URL}}` and `{{AKTO_API_TOKEN}}` that **must be replaced** — the URL with your actual Akto instance URL, and the token with your Akto API token (obtain it from **Akto Atlas → Connectors → Setup Guardrail** card). If your deployment does not require auth, set the token to an empty string so the placeholder is removed (an unsubstituted `{{AKTO_API_TOKEN}}` would be sent as an invalid `Authorization` header).
{% endhint %}

**Automated replacement:**

```bash
# Set your Akto ingestion URL and API token
AKTO_URL="https://your-akto-instance.com"
AKTO_API_TOKEN="your-akto-api-token"   # leave empty ("") if your deployment doesn't require auth

# Update all wrapper scripts
sed -i.bak "s|{{AKTO_DATA_INGESTION_URL}}|${AKTO_URL}|g" ~/.codex/hooks/*-wrapper.sh
sed -i.bak "s|{{AKTO_API_TOKEN}}|${AKTO_API_TOKEN}|g" ~/.codex/hooks/*-wrapper.sh

# Verify replacement
grep -E "AKTO_DATA_INGESTION_URL|AKTO_API_TOKEN" ~/.codex/hooks/*-wrapper.sh
```

**Manual replacement (alternative):**

Edit each wrapper script and replace:

```bash
AKTO_DATA_INGESTION_URL="{{AKTO_DATA_INGESTION_URL}}"
AKTO_API_TOKEN="{{AKTO_API_TOKEN}}"
```

With:

```bash
AKTO_DATA_INGESTION_URL="https://your-akto-instance.com"
AKTO_API_TOKEN="your-akto-api-token"
```

Files to update:

* `akto-validate-prompt-wrapper.sh`
* `akto-validate-response-wrapper.sh`
* `akto-validate-pre-tool-wrapper.sh`
* `akto-validate-post-tool-wrapper.sh`
  {% endstep %}

{% step %}
**Configure Hooks**

Copy `hooks.json` to `~/.codex/hooks.json`:

```bash
cat > ~/.codex/hooks.json << 'EOF'
{
  "hooks": {
    "UserPromptSubmit": [
      {
        "hooks": [
          {
            "type": "command",
            "command": "bash ~/.codex/hooks/akto-validate-prompt-wrapper.sh",
            "timeout": 10
          }
        ]
      }
    ],
    "Stop": [
      {
        "hooks": [
          {
            "type": "command",
            "command": "bash ~/.codex/hooks/akto-validate-response-wrapper.sh",
            "timeout": 10
          }
        ]
      }
    ],
    "PreToolUse": [
      {
        "hooks": [
          {
            "type": "command",
            "command": "bash ~/.codex/hooks/akto-validate-pre-tool-wrapper.sh",
            "timeout": 10
          }
        ]
      }
    ],
    "PostToolUse": [
      {
        "hooks": [
          {
            "type": "command",
            "command": "bash ~/.codex/hooks/akto-validate-post-tool-wrapper.sh",
            "timeout": 10
          }
        ]
      }
    ]
  }
}
EOF
```

> **Note:** You can also place `hooks.json` at `<repo>/.codex/hooks.json` for repository-level hooks.
> {% endstep %}

{% step %}
**Configure Hook Behavior (Optional)**

Edit wrapper scripts to customize:

```bash
# In each *-wrapper.sh file:

MODE="atlas"                    # "argus" or "atlas"
AKTO_SYNC_MODE="true"          # "true" (blocking) or "false" (observe only)
AKTO_TIMEOUT="5"               # Timeout in seconds
AKTO_CONNECTOR="codex_cli"
```

**Mode Options:**

* **Argus**: Standard validation and reporting
* **Atlas**: Includes device-specific metadata

**Sync Mode:**

* **true**: Blocks threats (prompt validation + tool validation)
* **false**: Reports but allows execution
  {% endstep %}

{% step %}
**Verify Installation**

Check logs to confirm hooks are working:

```bash
# Tail all logs
tail -f ~/.codex/akto/logs/*.log
```

Test by running a Codex command:

* **CLI**: `codex "What is 2+2?"`
* **Desktop**: Open Codex Desktop and send a message in the chat

You should see log entries indicating validation occurred.
{% endstep %}
{% endstepper %}

## Configuration Reference

<details>

<summary>Wrapper Script Variables</summary>

```bash
MODE="atlas"                                            # "argus" or "atlas"
AKTO_DATA_INGESTION_URL="{{AKTO_DATA_INGESTION_URL}}"  # ⚠️ MUST REPLACE
AKTO_API_TOKEN="{{AKTO_API_TOKEN}}"                    # Akto API token (Authorization header)
AKTO_SYNC_MODE="true"                                  # "true" or "false"
AKTO_TIMEOUT="5"                                       # Timeout in seconds
AKTO_CONNECTOR="codex_cli"                             # Connector identifier
CONTEXT_SOURCE="ENDPOINT"                              # Context source tag
LOG_LEVEL="INFO"                                       # DEBUG, INFO, WARNING, ERROR
LOG_PAYLOADS="false"                                   # Log payload previews
```

</details>

<details>

<summary>Environment Variables (Optional)</summary>

Override defaults via environment variables in `~/.zshrc` or `~/.bashrc`:

```bash
export MODE="atlas"
export AKTO_DATA_INGESTION_URL="https://your-akto-instance.com"
export AKTO_API_TOKEN="your-akto-api-token"
export AKTO_SYNC_MODE="true"
export AKTO_TIMEOUT="5"
export DEVICE_ID=""                        # Optional: custom device ID for Atlas mode
export LOG_DIR="~/.codex/akto/logs"       # Log directory
export LOG_LEVEL="INFO"                   # Logging verbosity
export LOG_PAYLOADS="false"               # Log request/response previews
```

Then reload your shell:

```bash
source ~/.zshrc
```

</details>

<details>

<summary>Codex API Host Auto-Detection</summary>

The Codex API host and path are automatically resolved from the same environment variables Codex CLI uses:

| Scenario              | Host                       | Path                           |
| --------------------- | -------------------------- | ------------------------------ |
| `OPENAI_BASE_URL` set | value of `OPENAI_BASE_URL` | `/v1/responses`                |
| `OPENAI_API_KEY` set  | `api.openai.com`           | `/v1/responses`                |
| ChatGPT browser login | `chatgpt.com`              | `/backend-api/codex/responses` |

</details>

<details>

<summary>Hook Input Fields</summary>

All hooks receive a common JSON payload on stdin, plus event-specific fields:

| Event              | Additional Fields                                         |
| ------------------ | --------------------------------------------------------- |
| `UserPromptSubmit` | `prompt`                                                  |
| `Stop`             | `last_assistant_message`, `stop_hook_active`              |
| `PreToolUse`       | `tool_name`, `tool_use_id`, `tool_input`                  |
| `PostToolUse`      | `tool_name`, `tool_use_id`, `tool_input`, `tool_response` |

</details>

## Troubleshooting

<details>

<summary>ModuleNotFoundError: No module named 'akto_ingestion_utility'</summary>

The shared ingestion utility was not downloaded, or landed outside `~/.codex/hooks/`. It lives in the `shared/` directory on GitHub, **not** under `HOOKS_BASE`, so it needs its own `curl`.

```bash
# Confirm the file is missing
ls -l ~/.codex/hooks/akto_ingestion_utility.py

# Fetch it into the same directory as the hook scripts
SHARED_BASE="https://raw.githubusercontent.com/akto-api-security/akto/master/apps/mcp-endpoint-shield/shared"
curl -o ~/.codex/hooks/akto_ingestion_utility.py \
  "${SHARED_BASE}/akto_ingestion_utility.py"

# Verify the import resolves
python3 -c "import sys; sys.path.insert(0, '$HOME/.codex/hooks'); import akto_ingestion_utility; print('OK')"
```

If the file is present and the import still fails, check that `PYTHONSAFEPATH` is unset — it suppresses the script-directory entry on `sys.path` that this import relies on.

```bash
env | grep -i pythonsafepath   # must return nothing
```

</details>

<details>

<summary>Hooks Not Executing</summary>

```bash
# 1. Verify hooks feature flag is enabled
cat ~/.codex/config.toml | grep codex_hooks

# 2. Check hooks.json exists and is valid
cat ~/.codex/hooks.json | python3 -m json.tool

# 3. Verify scripts are executable
ls -la ~/.codex/hooks/
chmod +x ~/.codex/hooks/*.sh

# 4. Check Python 3 is installed
python3 --version

# 5. Check logs
tail -f ~/.codex/akto/logs/*.log
```

</details>

<details>

<summary>Ingestion URL Not Configured</summary>

```bash
# Check if placeholder still exists
grep "{{AKTO_DATA_INGESTION_URL}}" ~/.codex/hooks/*-wrapper.sh

# Replace with actual URL
AKTO_URL="https://your-akto-instance.com"
sed -i.bak "s|{{AKTO_DATA_INGESTION_URL}}|${AKTO_URL}|g" ~/.codex/hooks/*-wrapper.sh
```

</details>

<details>

<summary>Check Logs for Errors</summary>

```bash
# View individual logs
cat ~/.codex/akto/logs/validate-prompt.log
cat ~/.codex/akto/logs/validate-response.log
cat ~/.codex/akto/logs/validate-pre-tool.log
cat ~/.codex/akto/logs/validate-post-tool.log

# Check for API call failures
grep "API CALL FAILED" ~/.codex/akto/logs/*.log

# Check for blocked events
grep "BLOCKING" ~/.codex/akto/logs/*.log
```

</details>

<details>

<summary>Events Not in Dashboard</summary>

```bash
# Test API connectivity
curl -X POST "${AKTO_DATA_INGESTION_URL}/api/v1/events" \
  -H "Content-Type: application/json" \
  -d '{"test": "event"}'

# Verify URL in wrapper scripts
grep "AKTO_DATA_INGESTION_URL" ~/.codex/hooks/*-wrapper.sh
```

</details>

<details>

<summary>Service Unavailable</summary>

If Akto is unreachable:

* With `AKTO_SYNC_MODE=true`: hooks fail open and allow execution (fail-safe)
* With `AKTO_SYNC_MODE=false`: hooks skip ingestion silently

</details>

## Uninstallation

To completely remove Akto hooks from Codex CLI or Codex Desktop:

<details>

<summary>Complete Removal</summary>

```bash
# 1. Remove hook configuration
rm ~/.codex/hooks.json

# 2. Remove Akto hook scripts
rm -rf ~/.codex/hooks/

# 3. Remove feature flag from config.toml
# Edit ~/.codex/config.toml and remove or set codex_hooks = false

# 4. Remove Akto logs (optional - keeps historical data if skipped)
rm -rf ~/.codex/akto/

# 5. No restart needed - Codex reads config on each invocation (CLI and Desktop)
```

</details>

<details>

<summary>Selective Removal (Keep Logs)</summary>

```bash
# Remove only hooks and configuration
rm ~/.codex/hooks.json
rm -rf ~/.codex/hooks/

# Akto logs preserved in ~/.codex/akto/
```

</details>

<details>

<summary>Backup Before Removal</summary>

```bash
# Backup configuration and logs before removal
mkdir -p ~/akto-backup
cp ~/.codex/hooks.json ~/akto-backup/codex-hooks.json.bak 2>/dev/null
cp -r ~/.codex/akto/ ~/akto-backup/codex-akto-logs/ 2>/dev/null

# Then proceed with removal steps above
```

</details>

<details>

<summary>Verify Removal</summary>

```bash
# Check that hooks are removed
test -f ~/.codex/hooks.json && echo "⚠️  hooks.json still exists" || echo "✅ hooks.json removed"
test -d ~/.codex/hooks && echo "⚠️  Hook scripts still exist" || echo "✅ Hook scripts removed"

# Check if logs are removed (if you chose to remove them)
test -d ~/.codex/akto && echo "ℹ️  Logs still present" || echo "✅ Logs removed"
```

</details>

<details>

<summary>Restore Codex to Default</summary>

After uninstallation, Codex CLI and Codex Desktop will operate without Akto security monitoring. Test with:

* **CLI**: `codex "Test message"`
* **Desktop**: Open Codex Desktop and send a message — no hook logs should appear

</details>

## Enterprise Deployment

### Automated Deployment Script

<details>

<summary>deploy-codex-cli-hooks.sh</summary>

```bash
#!/bin/bash
# deploy-codex-cli-hooks.sh

set -e
AKTO_URL="${1:-https://your-akto-instance.com}"
AKTO_API_TOKEN="${2:-}"   # optional: pass your Akto API token as the 2nd argument

echo "🔧 Installing Akto Guardrails for Codex (CLI & Desktop)..."

# Enable feature flag
mkdir -p ~/.codex
if ! grep -q "codex_hooks" ~/.codex/config.toml 2>/dev/null; then
  cat >> ~/.codex/config.toml << 'EOFTOML'

[features]
codex_hooks = true
EOFTOML
fi

# Create directories
mkdir -p ~/.codex/hooks ~/.codex/akto/logs

# Download hooks
HOOKS_BASE="https://raw.githubusercontent.com/akto-api-security/akto/master/apps/mcp-endpoint-shield/codex-cli-hooks"
SHARED_BASE="https://raw.githubusercontent.com/akto-api-security/akto/master/apps/mcp-endpoint-shield/shared"
curl -s "${HOOKS_BASE}/akto-validate-prompt-wrapper.sh" -o ~/.codex/hooks/akto-validate-prompt-wrapper.sh
curl -s "${HOOKS_BASE}/akto-validate-prompt.py" -o ~/.codex/hooks/akto-validate-prompt.py
curl -s "${HOOKS_BASE}/akto-validate-response-wrapper.sh" -o ~/.codex/hooks/akto-validate-response-wrapper.sh
curl -s "${HOOKS_BASE}/akto-validate-response.py" -o ~/.codex/hooks/akto-validate-response.py
curl -s "${HOOKS_BASE}/akto-validate-pre-tool-wrapper.sh" -o ~/.codex/hooks/akto-validate-pre-tool-wrapper.sh
curl -s "${HOOKS_BASE}/akto-validate-pre-tool.py" -o ~/.codex/hooks/akto-validate-pre-tool.py
curl -s "${HOOKS_BASE}/akto-validate-post-tool-wrapper.sh" -o ~/.codex/hooks/akto-validate-post-tool-wrapper.sh
curl -s "${HOOKS_BASE}/akto-validate-post-tool.py" -o ~/.codex/hooks/akto-validate-post-tool.py
curl -s "${HOOKS_BASE}/akto_machine_id.py" -o ~/.codex/hooks/akto_machine_id.py
curl -s "${SHARED_BASE}/akto_ingestion_utility.py" -o ~/.codex/hooks/akto_ingestion_utility.py

# Make executable
chmod +x ~/.codex/hooks/*.sh

# Configure URL and token
sed -i.bak "s|{{AKTO_DATA_INGESTION_URL}}|${AKTO_URL}|g" ~/.codex/hooks/*-wrapper.sh
sed -i.bak "s|{{AKTO_API_TOKEN}}|${AKTO_API_TOKEN}|g" ~/.codex/hooks/*-wrapper.sh

# Create hooks.json
cat > ~/.codex/hooks.json << 'EOFHOOKS'
{
  "hooks": {
    "UserPromptSubmit": [
      {"hooks": [{"type": "command", "command": "bash ~/.codex/hooks/akto-validate-prompt-wrapper.sh", "timeout": 10}]}
    ],
    "Stop": [
      {"hooks": [{"type": "command", "command": "bash ~/.codex/hooks/akto-validate-response-wrapper.sh", "timeout": 10}]}
    ],
    "PreToolUse": [
      {"hooks": [{"type": "command", "command": "bash ~/.codex/hooks/akto-validate-pre-tool-wrapper.sh", "timeout": 10}]}
    ],
    "PostToolUse": [
      {"hooks": [{"type": "command", "command": "bash ~/.codex/hooks/akto-validate-post-tool-wrapper.sh", "timeout": 10}]}
    ]
  }
}
EOFHOOKS

echo "✅ Installation complete!"
echo "📍 Akto instance: ${AKTO_URL}"
echo "Test with: codex 'What is 2+2?' (CLI) or open Codex Desktop and send a message"
```

</details>

**Deploy to developers:**

```bash
curl -fsSL https://your-org.com/deploy-codex-cli-hooks.sh | bash -s https://your-akto-instance.com
```

## Resources

* **GitHub**: <https://github.com/akto-api-security/akto>
* **Support**: <support@akto.io>
* **Community**: <https://www.akto.io/community>


# Neovim Hooks

Akto Guardrails for Neovim provides security validation and observability for AI plugin interactions directly inside Neovim. It intercepts LLM API calls made by Neovim AI plugins, validates prompts against security policies, blocks risky behavior, and reports all events to your Akto dashboard — without proxying or redirecting traffic.

## Key Features

* ✅ **Zero Proxy** - Plugins always talk to LLM APIs directly; no traffic redirection
* ✅ **Broad Plugin Coverage** - Covers 7 major Neovim AI plugins out of the box
* ✅ **Transparent Integration** - Hooks into each plugin's native HTTP/LSP mechanism
* ✅ **Real-time Protection** - Blocks prompts before they reach the LLM in sync mode
* ✅ **Centralized Monitoring** - All events reported to Akto dashboard
* ✅ **Flexible Deployment** - Sync (blocking) or async (observability) modes
* ✅ **Selective Coverage** - Enable or disable hooks per plugin

## Supported Plugins

| Plugin             | Stars | Hook Module        | How It Works                         |
| ------------------ | ----- | ------------------ | ------------------------------------ |
| avante.nvim        | 17.7k | `plenary_hook`     | Wraps `plenary.curl`                 |
| copilot.vim        | 11.5k | `copilot_vim_hook` | Wraps `_copilot.lsp_request`         |
| codecompanion.nvim | 6.4k  | `plenary_hook`     | Wraps `plenary.curl`                 |
| windsurf.vim       | 5.1k  | `windsurf_hook`    | Wraps `vim.fn.jobstart` + `chansend` |
| copilot.lua        | 4.0k  | `copilot_hook`     | Wraps `copilot.api.request`          |
| ChatGPT.nvim       | 4.0k  | `plenary_hook`     | Wraps `plenary.job`                  |
| CopilotChat.nvim   | 3.6k  | `plenary_hook`     | Wraps `plenary.curl`                 |

## How It Works

The Akto Neovim plugin wraps the HTTP and LSP functions each AI plugin uses internally. When a plugin makes an LLM API call:

```mermaid
sequenceDiagram
    autonumber
    participant User
    participant Plugin as AI Plugin
    participant Hook as Akto Hook
    participant Akto as Akto Dashboard
    participant LLM as LLM API

    User->>Plugin: User submits prompt

    alt Sync Mode (sync_mode = true)
        Plugin->>Hook: LLM API call intercepted
        Note over Hook: Guardrails check (synchronous)
        alt Safe Prompt
            Hook->>LLM: Forward request directly
            LLM->>Hook: Response
            Hook->>Plugin: Return response
            Hook-->>Akto: Ingest request + response (async)
        else Blocked
            Hook-->>Plugin: Return 403 error
            Hook-->>Akto: Ingest blocked event (async)
            Plugin-->>User: Display block notification
        end
    else Async Mode (sync_mode = false)
        Plugin->>Hook: LLM API call intercepted
        Hook->>LLM: Forward request directly (no delay)
        LLM->>Hook: Response
        Hook->>Plugin: Return response
        Hook-->>Akto: Guardrails + ingest (async, non-blocking)
    end
```

**Two Operating Modes:**

1. **Sync mode** (`sync_mode = true`, default) — Guardrails run **before** the LLM call. Blocked prompts never reach the LLM. Adds latency equal to the guardrails check.
2. **Async mode** (`sync_mode = false`) — LLM call goes through immediately. Guardrails and ingestion happen asynchronously after the call. Best for observability without blocking.

**Monitored LLM APIs:**

The plenary hook intercepts calls to the following API hosts:

* `api.openai.com`
* `api.anthropic.com`
* `generativelanguage.googleapis.com`
* `api.cohere.ai`
* `api.mistral.ai`
* `api.groq.com`
* `openrouter.ai`

## File Structure

```
~/.config/nvim/lua/akto/
├── init.lua              # Setup, enable/disable, Neovim commands
├── http.lua              # Shared HTTP helpers (payload builder, Akto API calls)
├── plenary_hook.lua      # Wraps plenary.curl + plenary.job
├── copilot_hook.lua      # Wraps copilot.lua API
├── copilot_vim_hook.lua  # Wraps copilot.vim LSP bridge
├── windsurf_hook.lua     # Wraps vim.fn.jobstart for Codeium/Windsurf
└── events.lua            # Autocmd listeners for plugin events
```

**Key Files:**

* **`init.lua`**: Entry point — `require("akto").setup(...)` configures and activates all hooks
* **`http.lua`**: Shared payload builder and Akto API communication; used by all hook modules
* **`plenary_hook.lua`**: Intercepts `plenary.curl` (avante, codecompanion, CopilotChat) and `plenary.job` (ChatGPT.nvim); supports both sync and async modes
* **`copilot_hook.lua`**: Intercepts `copilot.api.request` for copilot.lua; ingestion-only
* **`copilot_vim_hook.lua`**: Intercepts `_copilot.lsp_request` for copilot.vim; ingestion-only
* **`windsurf_hook.lua`**: Intercepts `vim.fn.jobstart` + `chansend` for Codeium/windsurf.vim; ingestion-only
* **`events.lua`**: Registers autocmd listeners for plugin-level events (CodeCompanion, CopilotChat, avante)

## Setup Guide

### Prerequisites

* Neovim 0.9+
* `curl` on PATH (used for Akto backend calls)
* Akto instance running and accessible (e.g. `https://your-akto-instance.com`)

### Installation Steps

{% stepper %}
{% step %}
**Create Plugin Directory**

```bash
mkdir -p ~/.config/nvim/lua/akto
```

{% endstep %}

{% step %}
**Download Plugin Files**

```bash
# Base URL for downloading plugin files
HOOKS_BASE="https://raw.githubusercontent.com/akto-api-security/akto/master/apps/mcp-endpoint-shield/neovim/lua/akto"

curl -o ~/.config/nvim/lua/akto/init.lua              "${HOOKS_BASE}/init.lua"
curl -o ~/.config/nvim/lua/akto/http.lua              "${HOOKS_BASE}/http.lua"
curl -o ~/.config/nvim/lua/akto/plenary_hook.lua      "${HOOKS_BASE}/plenary_hook.lua"
curl -o ~/.config/nvim/lua/akto/copilot_hook.lua      "${HOOKS_BASE}/copilot_hook.lua"
curl -o ~/.config/nvim/lua/akto/copilot_vim_hook.lua  "${HOOKS_BASE}/copilot_vim_hook.lua"
curl -o ~/.config/nvim/lua/akto/windsurf_hook.lua     "${HOOKS_BASE}/windsurf_hook.lua"
curl -o ~/.config/nvim/lua/akto/events.lua            "${HOOKS_BASE}/events.lua"
```

{% endstep %}

{% step %}
**Add to Your Neovim Config**

Add the following to your `~/.config/nvim/init.lua` **after** your plugin manager setup:

```lua
-- ~/.config/nvim/init.lua
-- Load plugins first (lazy.nvim, packer, etc.), then akto:

require("lazy").setup({ ... })

require("akto").setup({
  akto_url = "https://your-akto-instance.com",
})
```

{% hint style="warning" %}
`require("akto").setup(...)` must be called **after** your plugin manager loads plugins so that the AI plugin modules are available for wrapping.
{% endhint %}
{% endstep %}

{% step %}
**Configure Hook Behavior (Optional)**

Customize which hooks are active and how they behave:

```lua
require("akto").setup({
  akto_url         = "https://your-akto-instance.com",  -- ⚠️ REQUIRED
  sync_mode        = true,    -- true: block before LLM call, false: observe after
  timeout          = 5,       -- seconds for guardrails check
  plenary_hook     = true,    -- avante, codecompanion, CopilotChat, ChatGPT
  copilot_hook     = true,    -- copilot.lua
  copilot_vim_hook = true,    -- copilot.vim
  windsurf_hook    = true,    -- windsurf.vim
  events           = true,    -- autocmd listeners for plugin events
})
```

**Mode Options:**

* **`sync_mode = true`** (default): Guardrails check runs synchronously before LLM call. Blocked prompts never reach the LLM.
* **`sync_mode = false`**: LLM call proceeds immediately. Guardrails and ingestion happen asynchronously. Use for observability without blocking.
  {% endstep %}

{% step %}
**Restart Neovim**

```bash
# Restart Neovim to load the plugin
nvim
```

On startup you should see a notification:

```
[akto] enabled (sync): https://your-akto-instance.com
```

{% endstep %}

{% step %}
**Verify Installation**

Run the status command inside Neovim:

```vim
:AktoStatus
```

Expected output:

```
[akto] ACTIVE (sync): https://your-akto-instance.com
  plenary_hook     = true
  copilot_hook     = true
  copilot_vim_hook = true
  windsurf_hook    = true
  events           = true
```

Test by using any supported AI plugin. Akto will validate the prompt and ingest the interaction.
{% endstep %}
{% endstepper %}

## Configuration Reference

### Setup Options

You can obtain the API token (`akto_api_token`) from **Akto Atlas → Connectors → Setup Guardrail** card.

```lua
require("akto").setup({
  akto_url         = "",      -- Akto backend URL (required)
  akto_api_token   = "",      -- Akto API token sent as the Authorization header (optional)
  sync_mode        = true,    -- true: block before LLM call, false: observe after
  timeout          = 5,       -- seconds for guardrails check and ingestion calls
  plenary_hook     = true,    -- enable hook for plenary.curl + plenary.job
  copilot_hook     = true,    -- enable hook for copilot.lua
  copilot_vim_hook = true,    -- enable hook for copilot.vim
  windsurf_hook    = true,    -- enable hook for windsurf.vim (Codeium)
  events           = true,    -- enable autocmd event listeners
})
```

### Disabling Specific Hooks

```lua
-- Only cover plenary-based plugins, skip copilot and windsurf
require("akto").setup({
  akto_url         = "https://your-akto-instance.com",
  copilot_hook     = false,
  copilot_vim_hook = false,
  windsurf_hook    = false,
})
```

### Neovim Commands

| Command        | Description                                            |
| -------------- | ------------------------------------------------------ |
| `:AktoEnable`  | Enable all hooks (re-enables after `:AktoDisable`)     |
| `:AktoDisable` | Disable all hooks, restoring original plugin functions |
| `:AktoStatus`  | Show current state, mode, and per-hook configuration   |

## Hook Behavior by Plugin

| Plugin             | Hook Module        | Blocking Support   | Ingestion |
| ------------------ | ------------------ | ------------------ | --------- |
| avante.nvim        | `plenary_hook`     | ✅ (sync mode)      | ✅         |
| codecompanion.nvim | `plenary_hook`     | ✅ (sync mode)      | ✅         |
| CopilotChat.nvim   | `plenary_hook`     | ✅ (sync mode)      | ✅         |
| ChatGPT.nvim       | `plenary_hook`     | ✅ (sync mode)      | ✅         |
| copilot.lua        | `copilot_hook`     | ❌ (ingestion only) | ✅         |
| copilot.vim        | `copilot_vim_hook` | ❌ (ingestion only) | ✅         |
| windsurf.vim       | `windsurf_hook`    | ❌ (ingestion only) | ✅         |

> **Note:** copilot.lua, copilot.vim, and windsurf.vim hooks intercept at the LSP/process level and operate in ingestion-only mode regardless of `sync_mode`.

## Troubleshooting

### Plugin Not Loading

```vim
" Check if akto module is found
:lua print(require("akto"))

" Check for errors during setup
:messages
```

```bash
# Verify files exist
ls -la ~/.config/nvim/lua/akto/
```

### No Events in Dashboard

```bash
# Test Akto backend connectivity
curl -X POST "https://your-akto-instance.com/api/http-proxy?akto_connector=neovim&ingest_data=true" \
  -H "Content-Type: application/json" \
  -d '{"test": "event"}'

# Verify curl is on PATH
which curl
```

### Hook Not Intercepting Calls

```vim
" Check status
:AktoStatus

" Try disabling and re-enabling
:AktoDisable
:AktoEnable
```

Ensure `require("akto").setup(...)` is called **after** your plugin manager loads AI plugins. If a plugin was already loaded before `setup`, run `:AktoDisable` then `:AktoEnable` to re-wrap.

### Blocked Requests Not Showing Notification

Ensure `events = true` in your setup config. The autocmd listeners register block notifications for CodeCompanion, CopilotChat, and avante.

### Slow Response / High Latency

Switch to async mode to remove guardrails latency from the LLM call path:

```lua
require("akto").setup({
  akto_url  = "https://your-akto-instance.com",
  sync_mode = false,   -- observe only, no blocking latency
})
```

## Uninstallation

To completely remove Akto Neovim hooks:

### Complete Removal

```bash
# 1. Remove Akto plugin files
rm -rf ~/.config/nvim/lua/akto/

# 2. Remove setup call from init.lua
# Edit ~/.config/nvim/init.lua and remove the require("akto").setup(...) block

# 3. Restart Neovim
```

### Selective Removal (Keep Files, Disable)

Add `enabled = false` or simply remove the `setup` call from your config. The plugin files remain on disk but are not loaded.

Alternatively, use the Neovim command while running:

```vim
:AktoDisable
```

This restores all original plugin functions for the current session without removing files.

### Backup Before Removal

```bash
# Backup plugin files
mkdir -p ~/akto-backup
cp -r ~/.config/nvim/lua/akto/ ~/akto-backup/neovim-akto-plugin/

# Then proceed with removal
```

### Verify Removal

```bash
# Check plugin files are removed
test -d ~/.config/nvim/lua/akto && echo "⚠️  Plugin files still exist" || echo "✅ Plugin removed"
```

### Restore to Default

After uninstallation, all AI plugins will operate without Akto security monitoring. No additional configuration is needed beyond removing the files and the `setup` call.

## Enterprise Deployment

### Automated Deployment Script

```bash
#!/bin/bash
# deploy-neovim-hooks.sh

set -e
AKTO_URL="${1:-https://your-akto-instance.com}"
SYNC_MODE="${2:-true}"

echo "🔧 Installing Akto Guardrails for Neovim..."

# Create plugin directory
mkdir -p ~/.config/nvim/lua/akto

# Download plugin files
HOOKS_BASE="https://raw.githubusercontent.com/akto-api-security/akto/master/apps/mcp-endpoint-shield/neovim/lua/akto"
for f in init.lua http.lua plenary_hook.lua copilot_hook.lua copilot_vim_hook.lua windsurf_hook.lua events.lua; do
  curl -s "${HOOKS_BASE}/${f}" -o ~/.config/nvim/lua/akto/${f}
done

# Add setup call to init.lua if not already present
INIT_FILE="$HOME/.config/nvim/init.lua"
if ! grep -q 'require("akto").setup' "${INIT_FILE}" 2>/dev/null; then
  cat >> "${INIT_FILE}" << EOFLUA

-- Akto Guardrails
require("akto").setup({
  akto_url  = "${AKTO_URL}",
  sync_mode = ${SYNC_MODE},
})
EOFLUA
fi

echo "✅ Installation complete! Restart Neovim."
echo "📍 Akto instance: ${AKTO_URL}"
echo "📍 Sync mode: ${SYNC_MODE}"
echo "Run :AktoStatus inside Neovim to verify."
```

**Deploy to developers:**

```bash
curl -fsSL https://your-org.com/deploy-neovim-hooks.sh | bash -s https://your-akto-instance.com true
```

## Quick Setup Summary

```bash
# 1. Create plugin directory
mkdir -p ~/.config/nvim/lua/akto

# 2. Download all plugin files from GitHub (see step 2 above)

# 3. Add to ~/.config/nvim/init.lua (after plugin manager):
# require("akto").setup({ akto_url = "https://your-akto-instance.com" })

# 4. Restart Neovim

# 5. Verify with :AktoStatus
```

## Resources

* **GitHub**: <https://github.com/akto-api-security/akto>
* **Support**: <support@akto.io>
* **Community**: <https://www.akto.io/community>


# Amp Hooks

Akto Guardrails for [Amp](https://ampcode.com) provides security validation for AI coding agent interactions. It intercepts prompts before the turn starts, tool calls before they execute, and tool results and responses after they complete — validating each against security policies, blocking risky behavior, and reporting events to your Akto dashboard.

## Key Features

* ✅ **Zero Installation** - No standalone apps to install
* ✅ **Transparent Integration** - Uses Amp's native plugin mechanism
* ✅ **Real-time Protection** - Validates every prompt, tool call, tool result and response
* ✅ **MCP Coverage** - Tool calls are reported as JSON-RPC `tools/call`, so MCP servers and tools show up in your inventory
* ✅ **Centralized Monitoring** - All events reported to Akto dashboard
* ✅ **Flexible Deployment** - Supports Argus and Atlas modes
* ✅ **Configurable Behavior** - Blocking or observation modes

{% hint style="warning" %}
**Amp has no shell-command hook mechanism.** Unlike Claude CLI or Codex CLI, Amp cannot run a script on a lifecycle event. Its only interception point is a **plugin** — a TypeScript module loaded from `.amp/plugins/` and executed by Bun. Akto therefore ships `akto-guardrails-plugin.ts`, a thin bridge that dispatches to the same Python validators every other Akto connector uses. There is no `amp.hooks` setting and no `-wrapper.sh` scripts.

Verified against Amp `0.0.1786450425`.
{% endhint %}

## How It Works

The plugin subscribes to five Amp lifecycle events — two around the conversation, two around every tool call, and one when a thread session starts:

```mermaid
sequenceDiagram
    autonumber
    participant User
    participant PromptHook as agent.start
    participant Amp as Amp Agent
    participant PreTool as tool.call
    participant MCP as MCP Server / Tool
    participant PostTool as tool.result
    participant ResponseHook as agent.end
    participant Akto as Akto Dashboard

    User->>PromptHook: User submits prompt
    Note over PromptHook: Validate guardrail policies
    alt Safe Prompt
        PromptHook->>Amp: Turn starts
        PromptHook-->>Akto: Report event
    else Malicious
        PromptHook-->>User: thread.cancel() — turn never starts
        PromptHook-->>Akto: Report security event
    end

    Amp->>PreTool: Tool call (mcp__server__tool)
    Note over PreTool: Validate tool input
    alt Safe Tool Call
        PreTool->>MCP: Execute tool
        PreTool-->>Akto: Report event
    else Malicious
        PreTool-->>Amp: reject-and-continue
        PreTool-->>Akto: Report security event
    end

    MCP->>PostTool: Tool result
    Note over PostTool: Capture result
    PostTool-->>Akto: Report event
    PostTool->>Amp: Result

    Amp->>ResponseHook: Agent finishes turn
    Note over ResponseHook: Capture prompt/response pair
    ResponseHook-->>Akto: Report event
    ResponseHook->>User: Response
```

**5 Event Points:**

1. `session.start` — Registers the thread session for observability. Cannot block
2. `agent.start` — Validates prompts before the turn starts. Blocks by calling `thread.cancel()`, which Amp documents as preventing the turn from starting
3. `tool.call` — Validates tool input before execution. The only event that can stop a tool: it returns `reject-and-continue` with a reason, so the tool never runs and the model can choose another route. It can also return `modify` to run the tool with guardrail-sanitized arguments
4. `tool.result` — Captures tool results for observability and response guardrails. Cannot block
5. `agent.end` — Captures the prompt/response pair when the agent finishes. Cannot block

{% hint style="info" %}
**How MCP tool calls are recognised.** Amp names MCP tools `mcp__<server>__<tool>` — the same convention as Claude Code. The `tool.call` validator parses that shape, and for a match reports the call to Akto as a JSON-RPC `tools/call` on the `/mcp` path, so it lands in your MCP inventory with the server and tool broken out. Tool calls that are **not** MCP (`shell_command`, `apply_patch`, `read_web_page`, …) still pass through the same validator; they are mirrored to `/tool/<tool-name>` instead. Ingestion of non-MCP tool calls is off by default — set `AKTO_INGEST_NON_MCP_TOOLS=true` to enable it.

Run `amp tools list` to see the built-in and MCP tools available in your install.
{% endhint %}

{% hint style="info" %}
**Prompt blocking differs from the CLI hook connectors.** Amp's `agent.start` result can only *append* context to a turn — it has no deny verdict. A real block is therefore `thread.cancel()`, and the reason is surfaced to the user through an Amp notification rather than inline in the transcript.
{% endhint %}

## File Structure

```
~/.config/amp/
├── plugins/
│   ├── akto-guardrails-plugin.ts     # Amp plugin — bridges events to the validators
│   ├── akto-hooks.py                  # Session-start observability dispatcher
│   ├── akto-validate-prompt.py        # Prompt validation logic
│   ├── akto-validate-pre-tool.py      # Tool input validation (MCP + built-in)
│   ├── akto-validate-post-tool.py     # Tool result capture
│   ├── akto-validate-response.py      # Turn/response capture
│   ├── akto_amp_common.py             # Shared config, HTTP and payload building
│   ├── akto_ingestion_utility.py      # Shared validation/ingestion logic
│   ├── akto_heartbeat.py              # Device heartbeat publisher
│   └── akto_machine_id.py             # Device ID utility
└── akto/
    ├── config                         # Akto URL, token, device label
    └── logs/
        ├── akto-guardrails.log
        ├── hook-executions.log
        ├── validate-prompt.log
        ├── validate-pre-tool.log
        ├── validate-post-tool.log
        └── validate-response.log
```

**Key Files:**

* **`akto-guardrails-plugin.ts`**: The only file Amp loads. Subscribes to the five events, spawns the Python validators, and maps their decisions onto Amp's actions (`thread.cancel()`, `reject-and-continue`, `modify`)
  * ⚠️ Reads `~/.config/amp/akto/config` for the Akto URL and token — see the configuration step
* **Python scripts (`.py`)**: Core validation logic and Akto API communication. The plugin resolves them **relative to its own path**, so they must sit in the same directory
* **`akto-validate-pre-tool.py`**: Validates every tool call before it runs. Reports MCP calls (`mcp__<server>__<tool>`) as JSON-RPC `tools/call` on `/mcp`; can reject the call or rewrite its arguments
* **`akto-validate-post-tool.py`**: Captures the tool result as a JSON-RPC result. Observational — it cannot block
* **`akto_ingestion_utility.py`**: lives in the `shared/` GitHub directory, **not** `amp-cli-hooks/`, so it is fetched from `SHARED_BASE` — miss it and session correlation degrades
* **`akto_heartbeat.py`**: Registers this device with Akto every 30s. Required — without a heartbeat record, mini-runtime cannot resolve the device to a user and **drops every event before indexing**, so the endpoint never appears under LLM observability / traces even though ingestion succeeds
* **`akto_machine_id.py`**: Generates unique device identifiers for Atlas mode

{% hint style="info" %}
**No `settings.json` entry is needed.** Amp auto-discovers plugins from `~/.config/amp/plugins/` (system-wide) and `<repo>/.amp/plugins/` (per project). Amp's `settings.json` is only used to register MCP servers, which the plugin then guards automatically.
{% endhint %}

## Setup Guide

### Prerequisites

* Amp CLI installed and authenticated ([ampcode.com](https://ampcode.com)) — run `amp --version` to verify
* Akto instance URL and API token
* Python 3.7+ (standard library only — the validators need no third-party packages)
* macOS, Linux, or Windows with bash/zsh

### Installation Steps

{% stepper %}
{% step %}
**Create Directories**

```bash
mkdir -p ~/.config/amp/plugins
mkdir -p ~/.config/amp/akto/logs
```

{% endstep %}

{% step %}
**Download the Plugin and Validators**

```bash
# Base URLs for downloading
HOOKS_BASE="https://raw.githubusercontent.com/akto-api-security/akto/master/apps/mcp-endpoint-shield/amp-cli-hooks"
SHARED_BASE="https://raw.githubusercontent.com/akto-api-security/akto/master/apps/mcp-endpoint-shield/shared"

# Plugin entry point + validators + local modules
for f in akto-guardrails-plugin.ts \
         akto-hooks.py \
         akto-validate-prompt.py \
         akto-validate-pre-tool.py \
         akto-validate-post-tool.py \
         akto-validate-response.py \
         akto_amp_common.py \
         akto_heartbeat.py \
         akto_machine_id.py; do
  curl -fsSL -o ~/.config/amp/plugins/"$f" "${HOOKS_BASE}/${f}" \
    || { echo "❌ failed to download $f"; exit 1; }
done

# Shared module (note: SHARED_BASE, not HOOKS_BASE — it lives in a different
# GitHub directory). It must land next to the validators.
curl -fsSL -o ~/.config/amp/plugins/akto_ingestion_utility.py \
  "${SHARED_BASE}/akto_ingestion_utility.py" \
  || { echo "❌ failed to download akto_ingestion_utility.py"; exit 1; }

# Sanity-check: a silent 404 would leave 14-byte "404: Not Found" files behind
find ~/.config/amp/plugins -name 'akto*' -size -100c -print | grep . \
  && echo "⚠️  truncated downloads above — re-run this step" \
  || echo "✅ all files downloaded"
```

{% hint style="info" %}
Every `.py` file must land in the **same directory** as `akto-guardrails-plugin.ts` — the plugin resolves them relative to its own path, and they import each other as plain top-level modules resolved from the script's own directory.
{% endhint %}

For a single repository instead of system-wide, use `<repo>/.amp/plugins/` as the destination.
{% endstep %}

{% step %}
**Configure Akto Ingestion URL, API Token and Device ID** ⚠️ **CRITICAL STEP**

{% hint style="warning" %}
Amp starts the plugin as a long-lived process and passes on only its own environment — a GUI-launched Amp does **not** inherit your shell profile. Use the config file so the install works regardless of how Amp was started. Obtain the API token from **Akto Atlas → Connectors → Setup Guardrail** card. If your deployment does not require auth, leave the token empty.
{% endhint %}

```bash
# Set your Akto ingestion URL and API token
AKTO_URL="https://your-akto-instance.com"
AKTO_API_TOKEN="your-akto-api-token"   # leave empty ("") if your deployment doesn't require auth

# Build the device label: <computer-name>-<first 8 chars of machine id>
# Works on macOS (scutil/ioreg) and Linux (hostname//etc/machine-id).
# Non-alphanumerics become '-' so the label cannot contain a dot: the dashboard
# splits the reported host on '.', and a dotted label would be truncated.
DEVICE_NAME=$(scutil --get ComputerName 2>/dev/null | tr -d '\n')
if [ -z "$DEVICE_NAME" ]; then DEVICE_NAME=$(hostname 2>/dev/null | tr -d '\n'); fi
if [ -z "$DEVICE_NAME" ]; then DEVICE_NAME=$(uname -n 2>/dev/null | tr -d '\n'); fi
DEVICE_NAME=$(printf '%s' "${DEVICE_NAME%.local}" | sed 's/[^a-zA-Z0-9]/-/g')

MACHINE_ID=$(ioreg -rd1 -c IOPlatformExpertDevice 2>/dev/null | awk -F'"' '/IOPlatformUUID/{print $4}')
if [ -z "$MACHINE_ID" ] && [ -r /etc/machine-id ]; then MACHINE_ID=$(tr -d '\n' < /etc/machine-id); fi
MACHINE_ID=$(printf '%s' "$MACHINE_ID" | tr -cd 'a-fA-F0-9' | tr '[:upper:]' '[:lower:]')

DEVICE_ID="${DEVICE_NAME:-unknown-device}"
if [ -n "$MACHINE_ID" ]; then DEVICE_ID="${DEVICE_ID}-$(printf '%s' "$MACHINE_ID" | cut -c1-8)"; fi
echo "Device label: $DEVICE_ID"

# Write the config file the plugin reads
cat > ~/.config/amp/akto/config << EOFCONFIG
AKTO_DATA_INGESTION_URL=${AKTO_URL}
AKTO_API_TOKEN=${AKTO_API_TOKEN}
DEVICE_ID=${DEVICE_ID}
AKTO_SYNC_MODE=true
AKTO_TIMEOUT=5
MODE=atlas
AMP_API_URL=https://ampcode.com
EOFCONFIG

chmod 600 ~/.config/amp/akto/config

# Verify
cat ~/.config/amp/akto/config
```

Environment variables of the same name still take precedence over the file, so a shell `export` can override any single value for a one-off run.
{% endstep %}

{% step %}
**Reload Amp**

Amp auto-discovers the plugin — no configuration entry is required. Open the command palette (`Ctrl+O`) and run `plugins: reload`, or restart Amp.

```bash
# Confirm Amp loaded the plugin
amp plugins list
```

You should see `akto-guardrails-plugin.ts active`.
{% endstep %}

{% step %}
**Configure MCP Servers (Optional)**

MCP servers are registered in Amp's own settings. The plugin guards whatever is configured — no extra wiring.

```bash
cat > ~/.config/amp/settings.json << 'EOF'
{
  "amp.mcpServers": {
    "playwright": {
      "command": "npx",
      "args": ["-y", "@playwright/mcp@latest"]
    }
  }
}
EOF
```

{% endstep %}

{% step %}
**Verify Installation**

```bash
# View logs
tail -f ~/.config/amp/akto/logs/akto-guardrails.log
tail -f ~/.config/amp/akto/logs/validate-prompt.log
```

Test by running an Amp command:

```bash
amp -x "What is 2+2?"
```

You should see a `PLUGIN_INIT` line followed by `SESSION_START` and `PROMPT_ALLOWED` entries.
{% endstep %}
{% endstepper %}

## Configuration Reference

### Config File Variables

Read from `~/.config/amp/akto/config` (override the path with `AKTO_CONFIG_FILE`). Every key can also be supplied as an environment variable, which takes precedence.

```bash
MODE=atlas                                  # "argus" or "atlas"
AKTO_DATA_INGESTION_URL=https://your-akto-instance.com   # ⚠️ REQUIRED
AKTO_API_TOKEN=your-akto-api-token          # Akto API token (Authorization header)
DEVICE_ID=My-MacBook-Pro-f0929fe8           # ⚠️ becomes the device name
AKTO_SYNC_MODE=true                         # "true" (blocking) or "false" (observe only)
AKTO_TIMEOUT=5                              # Timeout in seconds
AKTO_CONNECTOR=amp                          # Connector identifier
AMP_API_URL=https://ampcode.com             # Amp endpoint recorded for non-MCP traffic
AKTO_PYTHON=python3                         # Interpreter used to run the validators
DATABASE_ABSTRACTOR_SERVICE_URL=https://cyborg.akto.io   # Heartbeat target (on-prem: override)
```

**Mode Options:**

* **Argus**: Standard validation and reporting
* **Atlas**: Includes device-specific metadata

**Sync Mode:**

* **true**: Blocks threats
* **false**: Reports but allows execution. Every event is still ingested — observe mode changes enforcement only, not coverage

### Tool Event Variables

Read by `akto-validate-pre-tool.py` / `akto-validate-post-tool.py`. All optional — the defaults match what the enterprise installer configures.

```bash
MCP_INGEST_PATH="/mcp"                  # Path MCP tools/call events are mirrored to
AKTO_INGEST_NON_MCP_TOOLS="false"       # "true" also ingests built-in tools (shell_command, apply_patch, …)
NON_MCP_TOOL_PATH_PREFIX="/tool"        # Path prefix for non-MCP tools -> /tool/<tool-name>
NON_MCP_INGEST_PATH=""                  # Set to collapse all non-MCP tools onto one fixed path
```

### Logging Variables

```bash
LOG_DIR="~/.config/amp/akto/logs"       # Directory for log files
LOG_LEVEL="INFO"                        # DEBUG, INFO, WARNING, ERROR
LOG_PAYLOADS="false"                    # Log request/response payload previews
```

{% hint style="warning" %}
**On-prem deployments must override `DATABASE_ABSTRACTOR_SERVICE_URL`.** It defaults to the SaaS cyborg endpoint. If your Akto runs on-prem, point it at your own abstractor before the heartbeat can register the device — and until it registers, LLM observability and traces stay empty.

```bash
echo 'DATABASE_ABSTRACTOR_SERVICE_URL=https://cyborg.your-akto-instance.com' \
  >> ~/.config/amp/akto/config
```

{% endhint %}

**How `DEVICE_ID` is reported:** the validators send `<DEVICE_ID>.ai-agent.amp` as the request host, and the dashboard uses the first label of that host as the device name. If `DEVICE_ID` is empty they fall back to the machine UUID — which is why a device sometimes shows up as a bare hex string.

## Troubleshooting

### Plugin Not Loading

```bash
# Does Amp see it?
amp plugins list

# Is the file in the right place?
ls -l ~/.config/amp/plugins/akto-guardrails-plugin.ts

# Did it initialise?
grep PLUGIN_INIT ~/.config/amp/akto/logs/akto-guardrails.log | tail -1
```

Reload with the command palette (`Ctrl+O` → `plugins: reload`) or restart Amp. A `PLUGIN_INIT` line with `"ingestionConfigured":false` means the plugin started but found no `AKTO_DATA_INGESTION_URL` in the config file or environment — it stays inactive until that is set.

### Nothing Is Being Validated

```bash
# Is the config file present and readable?
cat ~/.config/amp/akto/config

# Are the validators next to the plugin?
ls -l ~/.config/amp/plugins/akto-validate-*.py

# Did the plugin fail to find one?
grep SCRIPT_NOT_FOUND ~/.config/amp/akto/logs/akto-guardrails.log
```

### `ModuleNotFoundError: No module named 'akto_ingestion_utility'`

The shared ingestion utility was not downloaded, or landed outside the plugin directory. It lives in the `shared/` directory on GitHub, **not** under `HOOKS_BASE`, so it needs its own `curl`.

```bash
# Confirm the file is missing
ls -l ~/.config/amp/plugins/akto_ingestion_utility.py

# Fetch it into the same directory as the plugin
SHARED_BASE="https://raw.githubusercontent.com/akto-api-security/akto/master/apps/mcp-endpoint-shield/shared"
curl -o ~/.config/amp/plugins/akto_ingestion_utility.py \
  "${SHARED_BASE}/akto_ingestion_utility.py"

# Verify the import resolves
python3 -c "import sys; sys.path.insert(0, '$HOME/.config/amp/plugins'); import akto_ingestion_utility; print('OK')"
```

If the file is present and the import still fails, check that `PYTHONSAFEPATH` is unset — it suppresses the script-directory entry on `sys.path` that this import relies on.

```bash
env | grep -i pythonsafepath   # must return nothing
```

### MCP Tool Calls Not Appearing

`tool.call` fires for **every** tool, but only names matching `mcp__<server>__<tool>` are reported as MCP `tools/call` on `/mcp`. Built-in tools (`shell_command`, `apply_patch`, …) take the non-MCP path and are **not** ingested unless you opt in.

```bash
# What tools does this install expose?
amp tools list

# Did the validator run, and how did it classify the call?
tail -20 ~/.config/amp/akto/logs/validate-pre-tool.log

# To also ingest built-in (non-MCP) tool calls
echo 'AKTO_INGEST_NON_MCP_TOOLS=true' >> ~/.config/amp/akto/config
```

If the log shows `Processing built-in tool request`, the call was not an MCP tool — that is expected for Amp's own tools.

### Endpoint Appears in Inventory but Traces / LLM Observability Are Empty

Ingestion and trace indexing are separate paths. mini-runtime resolves each event's device to a user via the heartbeat record (`moduleInfo.name` → `additionalData.username`); an event whose device has no heartbeat, and which carries no `user_email` header, is discarded before indexing. Amp's plugin payloads never carry an email, so the heartbeat is the only thing that can satisfy this — the collection still shows up in inventory, which is why the endpoint looks connected.

```bash
# Was the heartbeat publisher installed?
ls -l ~/.config/amp/plugins/akto_heartbeat.py

# Has it sent recently? (unix timestamp of the last successful send)
cat ~/.config/amp/akto/logs/last_heartbeat

# Look for the send/skip line
grep -i heartbeat ~/.config/amp/akto/logs/*.log | tail -5
```

If the file is missing, re-run the download step. If it is present but never sends, confirm `DATABASE_ABSTRACTOR_SERVICE_URL` points at a reachable abstractor (see the hint above) and that the token in `~/.config/amp/akto/config` is valid — the publisher sends it as the `Authorization` header and swallows its own errors, so a rejected heartbeat is silent apart from the log line.

```bash
# Force a send and watch the result
rm -f ~/.config/amp/akto/logs/last_heartbeat
LOG_LEVEL=DEBUG amp -x "hello"
grep -i heartbeat ~/.config/amp/akto/logs/*.log | tail -3
```

### Prompt Blocks Are Not Visible in the Transcript

This is expected. Amp cannot reject a prompt inline, so a blocked prompt cancels the turn and the reason is delivered as an Amp notification. Confirm the block happened in the log:

```bash
grep PROMPT_BLOCKED ~/.config/amp/akto/logs/akto-guardrails.log | tail -5
```

### Guardrails Time Out

Guardrail evaluation typically takes 1–2 seconds per call. If your policies are slower, raise the timeout — the plugin kills a validator that exceeds it and **allows** the action (fail-open).

```bash
echo 'AKTO_TIMEOUT=10' >> ~/.config/amp/akto/config
grep VALIDATION_TIMEOUT ~/.config/amp/akto/logs/akto-guardrails.log | tail -5
```

### Check Logs for Errors

```bash
# Plugin-level activity (event dispatch, decisions)
cat ~/.config/amp/akto/logs/akto-guardrails.log

# Validator detail
grep -i error ~/.config/amp/akto/logs/*.log
grep "API CALL FAILED" ~/.config/amp/akto/logs/*.log
```

## Uninstallation

To completely remove Akto Guardrails from Amp:

### Complete Removal

```bash
# 1. Remove the plugin and validators
rm -f ~/.config/amp/plugins/akto-guardrails-plugin.ts
rm -f ~/.config/amp/plugins/akto-*.py
rm -f ~/.config/amp/plugins/akto_*.py

# 2. Remove Akto config and logs (optional - keeps historical data if skipped)
rm -rf ~/.config/amp/akto/

# 3. Reload Amp (Ctrl+O -> "plugins: reload") or restart it
```

### Selective Removal (Keep Logs)

```bash
rm -f ~/.config/amp/plugins/akto-guardrails-plugin.ts
rm -f ~/.config/amp/plugins/akto-*.py ~/.config/amp/plugins/akto_*.py

# Akto logs preserved in ~/.config/amp/akto/logs/
```

### Backup Before Removal

```bash
mkdir -p ~/akto-backup
cp ~/.config/amp/akto/config ~/akto-backup/amp-akto-config.bak 2>/dev/null
cp -r ~/.config/amp/akto/logs ~/akto-backup/amp-akto-logs/ 2>/dev/null
```

### Verify Removal

```bash
test -f ~/.config/amp/plugins/akto-guardrails-plugin.ts && echo "⚠️  plugin still exists" || echo "✅ plugin removed"
amp plugins list   # should no longer list akto-guardrails-plugin.ts
```

## Enterprise Deployment

### Automated Deployment Script

```bash
#!/bin/bash
# deploy-amp-hooks.sh

set -e
AKTO_URL="${1:-https://your-akto-instance.com}"
AKTO_API_TOKEN="${2:-}"   # optional: pass your Akto API token as the 2nd argument

echo "🔧 Installing Akto Guardrails for Amp..."

# Create directories
mkdir -p ~/.config/amp/plugins ~/.config/amp/akto/logs

# Download the plugin and validators
HOOKS_BASE="https://raw.githubusercontent.com/akto-api-security/akto/master/apps/mcp-endpoint-shield/amp-cli-hooks"
SHARED_BASE="https://raw.githubusercontent.com/akto-api-security/akto/master/apps/mcp-endpoint-shield/shared"
for f in akto-guardrails-plugin.ts akto-hooks.py akto-validate-prompt.py \
         akto-validate-pre-tool.py akto-validate-post-tool.py akto-validate-response.py \
         akto_amp_common.py akto_heartbeat.py akto_machine_id.py; do
  curl -fsSL "${HOOKS_BASE}/${f}" -o ~/.config/amp/plugins/"$f"
done
curl -fsSL "${SHARED_BASE}/akto_ingestion_utility.py" -o ~/.config/amp/plugins/akto_ingestion_utility.py

# Build the device label: <computer-name>-<first 8 chars of machine id>
DEVICE_NAME=$(scutil --get ComputerName 2>/dev/null | tr -d '\n')
if [ -z "$DEVICE_NAME" ]; then DEVICE_NAME=$(hostname 2>/dev/null | tr -d '\n'); fi
if [ -z "$DEVICE_NAME" ]; then DEVICE_NAME=$(uname -n 2>/dev/null | tr -d '\n'); fi
DEVICE_NAME=$(printf '%s' "${DEVICE_NAME%.local}" | sed 's/[^a-zA-Z0-9]/-/g')
MACHINE_ID=$(ioreg -rd1 -c IOPlatformExpertDevice 2>/dev/null | awk -F'"' '/IOPlatformUUID/{print $4}')
if [ -z "$MACHINE_ID" ] && [ -r /etc/machine-id ]; then MACHINE_ID=$(tr -d '\n' < /etc/machine-id); fi
MACHINE_ID=$(printf '%s' "$MACHINE_ID" | tr -cd 'a-fA-F0-9' | tr '[:upper:]' '[:lower:]')
DEVICE_ID="${DEVICE_NAME:-unknown-device}"
if [ -n "$MACHINE_ID" ]; then DEVICE_ID="${DEVICE_ID}-$(printf '%s' "$MACHINE_ID" | cut -c1-8)"; fi

# Create config file
cat > ~/.config/amp/akto/config << EOFCONFIG
AKTO_DATA_INGESTION_URL=${AKTO_URL}
AKTO_API_TOKEN=${AKTO_API_TOKEN}
DEVICE_ID=${DEVICE_ID}
AKTO_SYNC_MODE=true
AKTO_TIMEOUT=5
MODE=atlas
AMP_API_URL=https://ampcode.com
EOFCONFIG
chmod 600 ~/.config/amp/akto/config

echo "✅ Installation complete!"
echo "📍 Akto instance: ${AKTO_URL}"
echo "🖥️  Device label:  ${DEVICE_ID}"
echo "Reload Amp (Ctrl+O -> 'plugins: reload'), then test with: amp -x 'What is 2+2?'"
```

**Deploy to developers:**

```bash
curl -fsSL https://your-org.com/deploy-amp-hooks.sh | bash -s https://your-akto-instance.com
```

## Quick Setup Summary

```bash
# 1. Create directories
mkdir -p ~/.config/amp/plugins ~/.config/amp/akto/logs

# 2. Download the plugin, validators and shared module
HOOKS_BASE="https://raw.githubusercontent.com/akto-api-security/akto/master/apps/mcp-endpoint-shield/amp-cli-hooks"
SHARED_BASE="https://raw.githubusercontent.com/akto-api-security/akto/master/apps/mcp-endpoint-shield/shared"
for f in akto-guardrails-plugin.ts akto-hooks.py akto-validate-prompt.py \
         akto-validate-pre-tool.py akto-validate-post-tool.py akto-validate-response.py \
         akto_amp_common.py akto_heartbeat.py akto_machine_id.py; do
  curl -fsSL -o ~/.config/amp/plugins/"$f" "${HOOKS_BASE}/${f}" || { echo "❌ $f"; exit 1; }
done
curl -fsSL -o ~/.config/amp/plugins/akto_ingestion_utility.py \
  "${SHARED_BASE}/akto_ingestion_utility.py" || { echo "❌ akto_ingestion_utility.py"; exit 1; }

# 3. ⚠️ Configure Akto URL, API token and device label (ALL REQUIRED)
AKTO_URL="https://your-akto-instance.com"
AKTO_API_TOKEN="your-akto-api-token"   # leave empty ("") if your deployment doesn't require auth
DEVICE_NAME=$(scutil --get ComputerName 2>/dev/null | tr -d '\n')
if [ -z "$DEVICE_NAME" ]; then DEVICE_NAME=$(hostname 2>/dev/null | tr -d '\n'); fi
DEVICE_NAME=$(printf '%s' "${DEVICE_NAME%.local}" | sed 's/[^a-zA-Z0-9]/-/g')
MACHINE_ID=$(ioreg -rd1 -c IOPlatformExpertDevice 2>/dev/null | awk -F'"' '/IOPlatformUUID/{print $4}')
if [ -z "$MACHINE_ID" ] && [ -r /etc/machine-id ]; then MACHINE_ID=$(tr -d '\n' < /etc/machine-id); fi
MACHINE_ID=$(printf '%s' "$MACHINE_ID" | tr -cd 'a-fA-F0-9' | tr '[:upper:]' '[:lower:]')
DEVICE_ID="${DEVICE_NAME:-unknown-device}"
if [ -n "$MACHINE_ID" ]; then DEVICE_ID="${DEVICE_ID}-$(printf '%s' "$MACHINE_ID" | cut -c1-8)"; fi
cat > ~/.config/amp/akto/config << EOFCONFIG
AKTO_DATA_INGESTION_URL=${AKTO_URL}
AKTO_API_TOKEN=${AKTO_API_TOKEN}
DEVICE_ID=${DEVICE_ID}
AKTO_SYNC_MODE=true
MODE=atlas
EOFCONFIG
chmod 600 ~/.config/amp/akto/config

# 4. Reload Amp (Ctrl+O -> "plugins: reload") and confirm
amp plugins list

# 5. Test
amp -x "What is 2+2?"
```

## Resources

* **Amp Manual — Plugins**: <https://ampcode.com/manual#plugins>
* **Amp Plugin API Reference**: <https://ampcode.com/manual/plugin-api>
* **GitHub**: <https://github.com/akto-api-security/akto>
* **Support**: <support@akto.io>
* **Community**: <https://www.akto.io/community>


# Deploy via Microsoft Defender Endpoint

## Overview

Microsoft Defender for Endpoint provides centralized visibility and remote management for enterprise devices. Microsoft Defender Live Response allows you to run scripts remotely on managed devices.

You can use Microsoft Defender Live Response to deploy the Akto AI Endpoint Shield hook on developer machines. Hook installation enables Akto to monitor agent interactions from tools such as Cursor, Claude, or Gemini.

## Prerequisites

Microsoft Defender integration requires the following environment configuration.

* Administrator access to the **Microsoft Defender portal**
* **Microsoft Defender for Endpoint Plan 2** license (Live Response is a Plan 2-only capability)
* Devices onboarded to **Microsoft Defender for Endpoint**
* Supported operating systems: **macOS, Windows, Linux**

<div data-with-frame="true"><figure><img src="/files/JuYjDUfGXm1JU86swaky" alt="" width="563"><figcaption></figcaption></figure></div>

Devices must be onboarded using one of the supported onboarding methods:

* **Microsoft Intune onboarding**
* **Local onboarding script or installation package**

Verify device enrolment before running queries or deploying hooks.

1. Open the **Microsoft Defender portal**.
2. Navigate to **Assets → Devices**.
3. Confirm that device status shows **Active**.

Active device status confirms that Microsoft Defender receives endpoint telemetry.

### Required Microsoft Entra Application Permissions

Akto authenticates to Microsoft Defender using the OAuth 2.0 client credentials flow against an app registration in your Microsoft Entra tenant. Grant the app registration the following **Microsoft Threat Protection** / **WindowsDefenderATP** API permissions (all **Application** type, not Delegated), then **grant admin consent** in the Entra portal.

| Permission               | Type        | Why Akto needs it                                                                                                                                                                                                                                                                                                                 |
| ------------------------ | ----------- | --------------------------------------------------------------------------------------------------------------------------------------------------------------------------------------------------------------------------------------------------------------------------------------------------------------------------------- |
| `AdvancedQuery.Read.All` | Application | Run KQL Advanced Hunting queries (`POST /api/advancedqueries/run`) — used to discover installed AI software (`DeviceTvmSoftwareInventory`) and AI CLI process activity (`DeviceProcessEvents`).                                                                                                                                   |
| `Machine.ReadWrite.All`  | Application | List onboarded devices (`GET /api/machines`), read live-response action status (`GET /api/machineactions/{id}`), and obtain the result download link (`GET /api/machineactions/{id}/GetLiveResponseResultDownloadLink`). Microsoft requires `Machine.ReadWrite.All` (not just `Machine.Read.All`) for the download-link endpoint. |
| `Machine.LiveResponse`   | Application | Initiate a Live Response session on a device (`POST /api/machines/{id}/runliveresponse`) — used to push and execute Akto's MCP/skill discovery scripts.                                                                                                                                                                           |
| `Library.Manage`         | Application | Upload discovery scripts to the Live Response file library (`POST /api/libraryfiles`) before they can be invoked on devices.                                                                                                                                                                                                      |

#### Additional Defender configuration (separate from API permissions)

API permissions alone are not sufficient for Live Response. Confirm the following on the Defender side:

1. **Live Response feature enabled** — In the Defender portal: `Settings → Endpoints → Advanced features → Live Response` must be **On**. For Linux/macOS targets, also enable `Live Response for servers` and `Live Response unsigned script execution` if your scripts are unsigned.
2. **Device group automated remediation level** — Each device group used by Akto must have an automated remediation level of at least **Standard**. Live Response API calls return HTTP 400 (`Forbidden — needs minimum remediation level`) for devices in groups configured as **No remediation**.
3. **Defender RBAC scope** — If your tenant uses Defender role-based access (rather than the default *Use basic permissions* model), the app registration's service principal must be assigned a custom Defender role that grants both **View data** and **Active remediation actions**, scoped to the device groups Akto should reach.

#### Common 403 errors and what they mean

| Error message                                                                            | Missing permission                                                                                                             |
| ---------------------------------------------------------------------------------------- | ------------------------------------------------------------------------------------------------------------------------------ |
| `Missing application roles. API required roles: Machine.Read.All, Machine.ReadWrite.All` | `Machine.ReadWrite.All` not consented on the app registration.                                                                 |
| `Missing application roles. API required roles: AdvancedQuery.Read.All`                  | `AdvancedQuery.Read.All` not consented on the app registration.                                                                |
| `Forbidden — needs minimum remediation level`                                            | Device group has automated remediation set to **No remediation** — raise it to **Standard** or higher.                         |
| `ActiveRequestAlreadyExists` (HTTP 400, not 403)                                         | A prior Live Response action on the same device hasn't finished. Akto retries automatically after cancelling the stale action. |

## Steps to Deploy

The deployment workflow consists of two stages:

1. Optional visibility queries to identify AI agents and MCP usage across devices.
2. Installation of the Akto AI Endpoint Shield hook on developer machines.

{% stepper %}
{% step %}
**(Optional) Identify AI Agent Software Installed on Devices**

Software inventory queries help you identify which AI development tools exist across enterprise devices.

1. Open the **Microsoft Defender portal**.
2. Navigate to **Investigation & response → Hunting → Advanced hunting**.

   <div data-with-frame="true"><figure><img src="/files/prh9H5r7EYXcKWch8VWo" alt="" width="563"><figcaption></figcaption></figure></div>
3. Paste the following query into the query editor.
4. Replace `<your-device-name>` with a hostname from the **Devices** inventory.
5. Click **Run query**.

```kql
DeviceTvmSoftwareInventory
| where DeviceName contains "<your-device-name>"
| where SoftwareName has_any (
    'cursor',
    'windsurf',
    'visual studio code', 'vscode', 'microsoft visual studio code',
    'claude', 'anthropic claude',
    'openai codex', 'codex'
  )
  or (SoftwareName has 'claude' and SoftwareVendor has 'anthropic')
| project DeviceId, DeviceName, SoftwareName, SoftwareVersion, SoftwareVendor, OSPlatform
| order by SoftwareName asc
```

Query results show devices where AI tools such as **Cursor, Windsurf, Claude, VS Code, or Codex** are installed.

Remove the `DeviceName` filter to scan the entire device fleet.
{% endstep %}

{% step %}
**(Optional) Identify AI CLI Activity on Devices**

Process telemetry queries help you determine which devices actively run AI CLI agents.

1. Open **Advanced hunting** in the Microsoft Defender portal.
2. Paste the following query into the query editor.
3. Replace `<your-device-name>` with the target device hostname.
4. Click **Run query**.

```kql
DeviceProcessEvents
| where DeviceName contains "<your-device-name>"
| extend fn = tolower(FileName),
         cmd = tolower(ProcessCommandLine),
         icmd = tolower(InitiatingProcessCommandLine)
| where
    fn in ("gh","gh.exe","claude","claude.exe","agent","agent.exe","gemini","gemini.exe","codex","codex.exe")
    or cmd has_any (" gh ", "gh copilot", " github copilot", " claude ", " claude-code ", " agent ", " gemini ", " codex ")
    or icmd has_any (" gh ", "gh copilot", " github copilot", " claude ", " claude-code ", " agent ", " gemini ", " codex ")
| extend Tool = case(
    fn startswith "gh" or cmd has "gh copilot" or cmd has " gh ", "GitHub CLI",
    fn startswith "claude" or cmd has " claude " or cmd has " claude-code ", "Claude CLI",
    fn startswith "agent" or cmd has " agent ", "Cursor CLI",
    fn startswith "gemini" or cmd has " gemini ", "Gemini CLI",
    fn startswith "codex" or cmd has " codex ", "Codex CLI",
    "Other/Unknown"
)
| project Timestamp, DeviceId, DeviceName, Tool, FileName, FolderPath, ProcessCommandLine, InitiatingProcessFileName, InitiatingProcessCommandLine, AccountName
| order by Timestamp desc
| limit 200
```

Query results show which CLI tools run on enterprise devices, including **Claude CLI, GitHub Copilot CLI, Gemini CLI, Codex CLI, and Cursor CLI**.
{% endstep %}

{% step %}
**(Optional) Detect MCP Configuration File Usage**

MCP configuration files often define agent integrations and tool execution paths. Process telemetry queries help you detect devices referencing MCP configuration files.

1. Open **Advanced hunting** in the Microsoft Defender portal.
2. Paste the following query into the editor.
3. Replace `<your-device-name>` with the device hostname.
4. Click **Run query**.

```kql
DeviceProcessEvents
| where DeviceName contains "<your-device-name>"
| where ProcessCommandLine has 'mcp.json'
    or ProcessCommandLine has 'mcp_config.json'
    or ProcessCommandLine has 'claude_desktop_config.json'
    or InitiatingProcessCommandLine has 'mcp.json'
    or InitiatingProcessCommandLine has 'mcp_config.json'
    or InitiatingProcessCommandLine has 'claude_desktop_config.json'
| extend ExtractedPath = extract(@'([^\s"]+(?:mcp\.json|mcp_config\.json|claude_desktop_config\.json))', 1, coalesce(ProcessCommandLine, InitiatingProcessCommandLine))
| where isnotempty(ExtractedPath)
| summarize LastSeen=max(Timestamp) by DeviceId, DeviceName, ExtractedPath, FileName
| order by LastSeen desc
| limit 100
```

Query results show devices referencing MCP configuration files such as:

* `mcp.json`
* `mcp_config.json`
* `claude_desktop_config.json`

You can modify the query to add or remove file names depending on the MCP configurations used in your environment.
{% endstep %}

{% step %}
**Request the AI Endpoint Shield Hook Script from Akto**

AI Endpoint Shield deployment requires a hook installation script provided by Akto.

{% hint style="info" %}
Contact the **Akto support team at** [**support@akto.io**](mailto:support@akto.io) to obtain the required hook script.
{% endhint %}
{% endstep %}

{% step %}
**Upload the Hook Script to the Microsoft Defender Live Response Library**

Microsoft Defender Live Response allows you to run scripts remotely on enterprise devices.

1. Open the **Microsoft Defender portal**.
2. Navigate to **Settings**.
3. Select **Endpoints → General → Live response library**.
4. Click **Upload file**.

   <div data-with-frame="true"><figure><img src="/files/h6qzNsWkBvrQPcM8Tw85" alt="" width="563"><figcaption></figcaption></figure></div>
5. Upload the hook script received from the Akto support team.

Example script files include:

* `install_cursor_hooks.sh`
* `install_claude_hooks.sh`

6. Add a description such as **Akto – Install AI Endpoint Shield hooks**.
7. Click **Save**.

The script must exist in the Live Response library before execution. Upload the script again whenever the script version changes.
{% endstep %}

{% step %}
**Run the Hook Script on a Device Using Live Response**

Microsoft Defender Live Response allows script execution on individual devices.

1. Open the **Microsoft Defender portal**.
2. Navigate to **Assets → Devices**.
3. Select the target device.
4. Open the device details page.
5. Click **Initiate live response session**.
6. Wait until the Live Response session connects. Session initialization may take **up to two minutes**.
7. After the Live Response console opens, run the hook installation command.

   Here we have taken the cursor hook script example:

   ```bash
   run install_cursor.sh -parameters "AKTO_DATA_INGESTION_URL=<your.guardrails.akto.io>"
   ```

The script name must match the file uploaded to the Live Response library.

The console displays execution output as the script runs.

<div data-with-frame="true"><figure><img src="/files/6ORwbDYou2C30FK97tKr" alt="" width="563"><figcaption></figcaption></figure></div>

* Successful execution ends with:

  ```
  ✅ Cursor IDE hooks installed successfully!
  ```
* Devices without the required IDE installed exit safely with the following output:

  ```
  Cursor IDE not detected - skipping hook installation
  ```

{% endstep %}
{% endstepper %}

## Operational Notes

* Microsoft Defender **Live Response requires Microsoft Defender for Endpoint Plan 2**.
* Microsoft Defender Advanced Hunting queries support a **maximum time range of 30 days**.
* Queries scope to a single device by default using `DeviceName contains`.
* Removing the device filter runs queries across the entire device fleet and may return larger result sets.

## Get Support for your Akto setup

There are multiple ways to request support from Akto. We are 24X7 available on the following:

1. In-app `intercom` support. Message us with your query on intercom in Akto dashboard and someone will reply.
2. Join our [discord channel](https://www.akto.io/community) for community support.
3. Contact `support@akto.io` for email support.


# Run Live Response & Queries via Akto

## Overview

You can use **Microsoft Defender Run Queries** in Akto Atlas to discover agentic activity and endpoints directly from employee devices.

To access this feature, navigate to:

**Akto Atlas → Connectors → Microsoft Defender → Run Queries**

<div data-with-frame="true"><figure><img src="/files/EdbnTZ1PKMA2d0kXGFQ9" alt="" width="563"><figcaption></figcaption></figure></div>

This integration allows you to:

* Run scripts on endpoints (**Live Response**)
* Query Defender telemetry (**KQL / Advanced Hunting**)

Both methods help you uncover API usage, shadow endpoints, and external services used across your organisation.

### What You Use This For in Akto

This feature has two clear purposes:

<table><thead><tr><th width="250.984375">Option</th><th width="489.26953125">Usecase</th></tr></thead><tbody><tr><td><a href="#option-1-run-live-response-scripts"><strong>Deploy Guardrails (Live Response)</strong></a></td><td>Remotely install Akto scripts for guardrails on endpoint devices.</td></tr><tr><td><a href="#option-2-run-kql-queries"><strong>Detect Agentic Applications (KQL Queries)</strong></a></td><td>Identify AI tools like Cursor, Claude, and similar applications running on endpoints.</td></tr></tbody></table>

## 1. **Set Up Microsoft Defender Connector**

Before running queries or deploying guardrails, you need to connect Microsoft Defender to Akto.

You can find this setup in:

**Akto Atlas → Connectors → Microsoft Defender for Endpoint**

In the connector setup screen, provide the following:

* **Tenant ID**
* **Client ID**
* **Client Secret**
* **Data Ingestion Service URL**
* **Polling Interval (seconds)**

  <div data-with-frame="true"><figure><img src="/files/LyssCnMnXtFQBUNVMrsj" alt="" width="375"><figcaption></figcaption></figure></div>

### Credentials & Permissions (Required)

Akto authenticates to Microsoft Defender via the OAuth 2.0 client credentials flow against a Microsoft Entra app registration. Grant the app the following four **Application** API permissions (under **Microsoft Threat Protection** / **WindowsDefenderATP**) and **grant admin consent** in the Entra portal.

<details>

<summary><strong>Permissions Required (minimal set)</strong></summary>

<table><thead><tr><th width="220">Permission</th><th width="120">Type</th><th>Why Akto needs it</th></tr></thead><tbody><tr><td><code>AdvancedQuery.Read.All</code></td><td>Application</td><td><strong>Critical</strong> — Run KQL Advanced Hunting queries (<code>POST /api/advancedqueries/run</code>) used to discover installed AI software and AI CLI process activity.</td></tr><tr><td><code>Machine.ReadWrite.All</code></td><td>Application</td><td>List onboarded devices (<code>GET /api/machines</code>), read Live Response action status (<code>GET /api/machineactions/{id}</code>), and obtain the result download link (<code>GetLiveResponseResultDownloadLink</code>). Microsoft requires <code>Machine.ReadWrite.All</code> (not just <code>Machine.Read.All</code>) for the download-link endpoint.</td></tr><tr><td><code>Machine.LiveResponse</code></td><td>Application</td><td><strong>Critical</strong> — Initiate Live Response sessions on devices (<code>POST /api/machines/{id}/runliveresponse</code>) to deploy Akto guardrails or run discovery scripts.</td></tr><tr><td><code>Library.Manage</code></td><td>Application</td><td>Upload Akto scripts to the Live Response file library (<code>POST /api/libraryfiles</code>) before they can be executed on devices.</td></tr></tbody></table>

</details>

<details>

<summary><strong>Additional Defender configuration (not API permissions)</strong></summary>

API permissions alone are not enough for Live Response. Also confirm:

1. **Microsoft Defender for Endpoint Plan 2** license — Live Response is a Plan 2-only capability.
2. **Live Response feature enabled** in `Settings → Endpoints → Advanced features → Live Response`. Enable `Live Response for servers` and `Live Response unsigned script execution` if your discovery scripts are unsigned or your targets include servers/Linux/macOS.
3. **Device group automated remediation level** must be at least **Standard** for every group Akto should reach. Groups configured as **No remediation** will reject Live Response API calls.
4. **Defender RBAC** — If your tenant uses Defender role-based access (instead of the default *Use basic permissions*), the app's service principal must be assigned a custom role with **View data** + **Active remediation actions**, scoped to the relevant device groups.

</details>

<details>

<summary><strong>Common 403 errors and what they mean</strong></summary>

| Error                                                                                    | Cause                                                                                       |
| ---------------------------------------------------------------------------------------- | ------------------------------------------------------------------------------------------- |
| `Missing application roles. API required roles: Machine.Read.All, Machine.ReadWrite.All` | `Machine.ReadWrite.All` is missing or admin consent wasn't granted.                         |
| `Missing application roles. API required roles: AdvancedQuery.Read.All`                  | `AdvancedQuery.Read.All` is missing or admin consent wasn't granted.                        |
| `Forbidden — needs minimum remediation level`                                            | Device group automated remediation is **No remediation** — raise to **Standard** or higher. |

</details>

## Option 1: Run Live Response Scripts

You run scripts on selected devices to actively collect data.

Use this when you want to:

* Deploy Akto collectors
* Extract API traffic or logs
* Gather system/network metadata from endpoints

<div data-with-frame="true"><figure><img src="/files/71whpbJdNsAQNxDsm7JZ" alt="" width="375"><figcaption></figcaption></figure></div>

### Steps to Run

{% stepper %}
{% step %}
**Select Live Response**

Choose **Live Response** from the Run Queries screen.
{% endstep %}

{% step %}
**Select Devices**

Search and select the devices where you want to run your script.

* You can select multiple devices
* Scripts will run sequentially on each device
  {% endstep %}

{% step %}
**Add Your Script**

You have two options:

* **Upload new script**
* **Use existing library script**

Supported formats:

* `.ps1` (Windows)
* `.sh` (macOS/Linux)
* `.bat`
  {% endstep %}

{% step %}
**(Optional) Add Script Parameters**

You can pass parameters to your script at runtime.

Example:

```
AKTO_PROXY_URL=https://example.ngrok-free.dev/v1
```

{% endstep %}

{% step %}
**Run the Script**

Click **Run on Selected Devices** to execute the script.
{% endstep %}
{% endstepper %}

### What Happens Next

* The script runs remotely via Microsoft Defender
* Guardrails are installed on each selected device
* Execution happens sequentially per endpoint

### Example Use Cases

You use Live Response primarily to:

* Deploy **Akto guardrails** across endpoint devices
* Enforce safe usage policies for agentic AI tools
* Standardize security controls across your organization

## Option 2: Run KQL Queries

You can query existing Microsoft Defender telemetry using Kusto Query Language (KQL).

You use KQL queries to:

* Detect installations of agentic tools such as:
  * Cursor
  * Claude
  * Other AI-assisted development tools
* Identify which devices are running these applications
* Monitor adoption and potential risk exposure

<div data-with-frame="true"><figure><img src="/files/o5KINOHyDJgwFUDM8HSn" alt="" width="375"><figcaption></figcaption></figure></div>

### Steps to Run

{% stepper %}
{% step %}
**Select KQL Query**

Switch to the **KQL Query** tab.
{% endstep %}

{% step %}
**Enter Your Query**

Example:

```kql
DeviceNetworkEvents
| where RemotePort == 443
| project DeviceName, RemoteIP, RemoteUrl
| limit 100
```

{% endstep %}

{% step %}
**Run Query**

Click **Run Query** to execute.
{% endstep %}
{% endstepper %}

## What You Get

You’ll receive structured results showing:

* Devices with agentic tools installed
* Software versions
* Visibility into tool distribution across your organization

#### Best Practices for You

* Always filter results to keep queries fast
* Use `limit` to control output size
* Focus on relevant fields like `RemoteUrl`
* Start simple, then refine queries

## What Next

Now that you’ve configured and used Microsoft Defender Run Queries, you can proceed with:

* **Deploy via Microsoft Defender Endpoints**\
  Continue setting up endpoint-level integration and guardrail deployment:

  [Deploy via Microsoft Defender Endpoint](/akto-atlas-agentic-ai-security-for-employee-endpoints/endpoints-discovery-agents/deploy-via-microsoft-defender)
* **Need Help?**\
  Reach out to the Akto team or explore support resources:

  [Support](/troubleshooting/support)


# Deploy via SentinelOne

## Overview

SentinelOne provides centralized visibility and management for enterprise endpoints.\
Akto integrates with SentinelOne to help security teams discover AI coding tools and deploy guardrails on managed devices.

With this integration, you can:

* Discover AI agents and AI coding tools running on SentinelOne-managed endpoints
* Configure and deploy guardrails for selected devices directly from Akto

## Prerequisites

Before connecting SentinelOne to Akto, ensure the following:

* **SentinelOne admin account access** (required to generate and use API token)
* **SentinelOne Console URL** (typically in the format `https://<your-tenant>.sentinelone.net`)
* **SentinelOne API Token**
* **Akto Data Ingestion Service URL** (`AKTO_DATA_INGESTION_URL`)

{% hint style="info" %}
Your SentinelOne account should have sufficient permissions to access endpoint inventory and run integration actions for your organization.
{% endhint %}

## Steps to Integrate

The integration flow has two stages:

1. Connect SentinelOne in Akto to discover AI agents on managed endpoints
2. Configure and run guardrails on selected devices

{% stepper %}
{% step %}
**Connect SentinelOne to Akto**

1. Open **Akto ATLAS Dashboard**.
2. Go to Connectors.
3. Go to **Endpoint Management**.
4. Select **SentinelOne** and click **Connect**.

   <div data-with-frame="true"><figure><img src="/files/bOKAZYqxJgLCU3f4pV26" alt="" width="563"><figcaption></figcaption></figure></div>
5. Fill in the following fields:

* **SentinelOne Console URL**: `https://<your-tenant>.sentinelone.net`
* **API Token**: SentinelOne admin API token
* **Data Ingestion Service URL**: your Akto ingestion endpoint (`AKTO_DATA_INGESTION_URL`)
* **Polling Interval (seconds)**: keep default or set based on your monitoring preference

  <div data-with-frame="true"><figure><img src="/files/rpFauarmseSVk4iNk8Ak" alt="" width="375"><figcaption></figcaption></figure></div>

6. Click **Save**.

After saving, Akto starts discovering AI coding tools and related agent activity from SentinelOne-managed endpoints.
{% endstep %}

{% step %}
**Discover AI Agents on Managed Endpoints**

Once integration is active, Akto uses SentinelOne endpoint telemetry to identify AI tooling usage (for example Cursor, Claude , and other supported agent clients) on managed devices.

You can then:

* Review discovered endpoints in Akto
* Select target devices for guardrail deployment
* Continue monitoring newly discovered devices as polling runs
  {% endstep %}

{% step %}
**Configure and Run Guardrails**

1. Open the SentinelOne integration setup in Akto.
2. In **Guardrails Installation**, choose the guardrails you want to deploy.
3. Select specific devices, or use **Run on all devices**.
4. Click **Save & Run Guardrails**.

   <div data-with-frame="true"><figure><img src="/files/CZJmUXZ0HeFZy0SLqH1z" alt="" width="375"><figcaption></figcaption></figure></div>

**Cursor Guardrails**

Enable **Cursor IDE Hooks** to install Akto guardrail hooks for Cursor IDE on selected SentinelOne-managed devices.

`AKTO_DATA_INGESTION_URL` is used as the default ingestion destination.

**Claude CLI Guardrails**

Enable **Claude CLI Hooks** to monitor and secure Claude CLI assistant usage on selected devices.

`AKTO_DATA_INGESTION_URL` is used as the default ingestion destination.

**OpenClaw Guardrails**

Enable **OpenClaw Guardrails** to install AI Endpoint Shield guardrails for OpenClaw (Clawdbot).

OpenClaw requires additional model/runtime fields in the setup form, such as:

* **API Key** (provider key used by your selected model provider)
* **Original Provider**
* **Model ID**

You can use providers beyond OpenAI, including Anthropic , Gemini model setups, as long as valid provider and model values are configured.

{% hint style="info" %}
For guardrails that require additional environment values, Akto displays the required input fields dynamically in the setup panel.
{% endhint %}
{% endstep %}
{% endstepper %}

## Operational Notes

* Use a SentinelOne account with admin-level API access for reliable integration setup.
* Use a valid `AKTO_DATA_INGESTION_URL` that is reachable from managed endpoints.
* Polling interval controls how frequently Akto refreshes endpoint discovery data.
* Guardrails can be deployed to selected devices or across all managed devices.

## Get Support for your Akto setup

There are multiple ways to request support from Akto. We are 24X7 available on the following:

1. In-app `intercom` support. Message us with your query on intercom in Akto dashboard and someone will reply.
2. Join our [discord channel](https://www.akto.io/community) for community support.
3. Contact `support@akto.io` for email support.


# Deploy via CrowdStrike

## Overview

CrowdStrike Falcon provides centralized visibility and management for enterprise endpoints.\
Akto integrates with CrowdStrike to help security teams discover AI coding tools and deploy guardrails on managed devices.

With this integration, you can:

* Discover AI agents and AI coding tools running on CrowdStrike-managed endpoints
* Configure and deploy guardrails for selected devices directly from Akto

## Prerequisites

Before connecting CrowdStrike to Akto, ensure the following:

* **CrowdStrike Falcon API Client** with a valid **Client ID** and **Client Secret**
* **CrowdStrike Base URL** (defaults to `https://api.crowdstrike.com` if left empty)
* **Akto Data Ingestion Service URL** (`AKTO_DATA_INGESTION_URL`) — contact the Akto support team to get the URL for your account. It follows the format `https://<account_id>-guardrails.akto.io`
* **Akto API Token** (`AKTO_API_TOKEN`) — see [Getting API Token](/akto-argus-agentic-ai-security-for-homegrown-ai/connectors/others/hybrid-saas#getting-api-token): open the **Setup Guardrail** card under **Connectors** in Akto and copy your token from there

{% hint style="info" %}
Your CrowdStrike API client should have sufficient scope to access endpoint inventory and run integration actions for your organization.
{% endhint %}

### How Akto Discovers AI Agents via CrowdStrike

Akto uses the CrowdStrike Falcon **device inventory** API to list and read details of managed hosts, and the **Real Time Response (RTR)** API to run discovery scripts on those hosts that scan for installed AI coding tools, CLI agents, and MCP configuration files. The same RTR capability is used to push and execute the Akto guardrail hook installation scripts when you run guardrails from Akto.

### Required CrowdStrike API Client Scopes

Akto authenticates to CrowdStrike Falcon using the OAuth 2.0 client credentials flow (`Client ID` / `Client Secret`). When creating the API client in the Falcon console, grant it the following scopes:

| Scope                                 | Why Akto needs it                                                                                                                                                     |
| ------------------------------------- | --------------------------------------------------------------------------------------------------------------------------------------------------------------------- |
| **Hosts: Read**                       | List managed devices and read device details, which are used to identify targets for discovery and guardrail deployment.                                              |
| **Real Time Response: Read/Write**    | Initiate and close RTR sessions (including batch sessions) on managed hosts.                                                                                          |
| **Real Time Response (Admin): Write** | Upload/update discovery and guardrail scripts to the RTR script library, and run those scripts on hosts (`runscript`) to detect AI tools and install guardrail hooks. |

{% hint style="warning" %}
`Real Time Response (Admin): Write` is required even for read-only discovery, because uploading and executing scripts via RTR's `runscript` action requires the admin scope. An API client with only the base `Real Time Response: Read/Write` scope (non-admin) will get **403 Forbidden** errors on script upload and execution.
{% endhint %}

## Steps to Integrate

The integration flow has two stages:

1. Connect CrowdStrike in Akto to discover AI agents on managed endpoints
2. Configure and run guardrails on selected devices

{% stepper %}
{% step %}
**Connect CrowdStrike to Akto**

1. Open **Akto ATLAS Dashboard**.
2. Go to Connectors.
3. Go to **Endpoint Management**.
4. Select **CrowdStrike** and click **Connect**.

   <div data-with-frame="true"><figure><img src="/files/tPhWVmIkVnxHyjJuljlg" alt="" width="563"><figcaption></figcaption></figure></div>
5. Fill in the following fields:

* **Client ID**: CrowdStrike Falcon API client ID
* **Client Secret**: CrowdStrike Falcon API client secret
* **Base URL**: `https://api.crowdstrike.com` (leave empty to use the default CrowdStrike API endpoint)
* **Data Ingestion Service URL**: your Akto ingestion endpoint (`AKTO_DATA_INGESTION_URL`), format `https://<account_id>-guardrails.akto.io`
* **Akto API Token**: common token used by all guardrail hook installs (`AKTO_API_TOKEN`) — see [Getting API Token](/akto-argus-agentic-ai-security-for-homegrown-ai/connectors/others/hybrid-saas#getting-api-token)
* **Polling Interval (seconds)**: keep default or set based on your monitoring preference

  <div data-with-frame="true"><figure><img src="/files/qy09jc3L97Y7yqNxTj33" alt="" width="375"><figcaption></figcaption></figure></div>

6. Click **Save**.

After saving, Akto starts discovering AI coding tools and related agent activity from CrowdStrike-managed endpoints.
{% endstep %}

{% step %}
**Discover AI Agents on Managed Endpoints**

Once integration is active, Akto uses CrowdStrike Falcon telemetry to identify AI tooling usage (for example Cursor, Claude, Copilot, and other supported agent clients) on managed devices.

You can then:

* Review discovered endpoints in Akto
* Select target devices for guardrail deployment
* Continue monitoring newly discovered devices as polling runs
  {% endstep %}

{% step %}
**Configure and Run Guardrails**

1. Open the CrowdStrike integration setup in Akto.
2. In **Guardrails Installation**, choose the guardrails you want to deploy for your CrowdStrike Falcon-managed endpoints.

   <div data-with-frame="true"><figure><img src="/files/EwUPrrjrYSnrAbg1yUnB" alt="" width="375"><figcaption></figcaption></figure></div>
3. Select specific devices, or use **Run on all devices**.
4. Click **Save & Run Guardrails**.

Each guardrail installs the corresponding Akto hook on the selected devices, using `AKTO_DATA_INGESTION_URL` and `AKTO_API_TOKEN` as the default ingestion destination and auth token.

{% hint style="info" %}
For guardrails that require additional environment values, Akto displays the required input fields dynamically in the setup panel.
{% endhint %}
{% endstep %}
{% endstepper %}

## Operational Notes

* Use a CrowdStrike Falcon API client with sufficient scope for reliable integration setup.
* Use a valid `AKTO_DATA_INGESTION_URL` that is reachable from managed endpoints.
* Use a valid `AKTO_API_TOKEN` so guardrail hook installs can authenticate with Akto.
* Polling interval controls how frequently Akto refreshes endpoint discovery data.
* Guardrails can be deployed to selected devices or across all managed devices.

## Get Support for your Akto setup

There are multiple ways to request support from Akto. We are 24X7 available on the following:

1. In-app `intercom` support. Message us with your query on intercom in Akto dashboard and someone will reply.
2. Join our [discord channel](https://www.akto.io/community) for community support.
3. Contact `support@akto.io` for email support.


# Agentic Shield

:rocket: Discover and Protect LLM calls done from your **Local Environment**.

{% hint style="info" %}
This feature is coming soon....
{% endhint %}

***

### Get Support for your Akto setup

There are multiple ways to request support from Akto. We are 24X7 available on the following:

1. In-app `intercom` support. Message us with your query on intercom in Akto dashboard and someone will reply.
2. Join our [discord channel](https://www.akto.io/community) for community support.
3. Contact `help@akto.io` for email support.
4. Contact us [here](https://www.akto.io/contact-us).


# Anthropic Connector

## Overview

The **Anthropic Connector** integrates Akto Atlas with Anthropic's **Compliance API** to give your security team real-time visibility into how employees interact with Claude across Claude.ai, Claude Console, and the Claude API.

Once connected, Akto continuously pulls your organization's activity data from Anthropic and surfaces it in your dashboard, so you can track who is using Claude, what files are being uploaded, which projects are active, and flag compliance-relevant events without deploying any endpoint agents.

## What Akto Ingests

Akto uses the Anthropic Compliance API's **Activity Feed** and **Objects APIs** to pull the following data:

| Data Category             | What Akto Discovers                                           |
| ------------------------- | ------------------------------------------------------------- |
| **Chat activity**         | Chats created, viewed, updated, or deleted by users           |
| **User & org management** | Invite accepted/rejected, user role changes, group membership |
| **MCP server events**     | MCP server additions, removals, and tool policy updates       |
| **Skills Activity**       | Skills created, replaced, or deleted                          |

## How It Works

```
Anthropic Compliance API
        │
        │  Pull activity feed + objects data
        ▼
  Akto Connector
        │
        │  Stream to ingestion service
        ▼
  Akto Dashboard
  (Agentic AI Discovery, Security Posture)
```

Akto polls the Anthropic Compliance API at regular intervals using your **Compliance Access Key** (for Claude.ai). All ingested events appear in your Akto dashboard for investigation, alerting, and reporting.

## Prerequisites

Before setting up the connector, ensure:

* You have an **Akto Atlas** account with the Connectors section accessible
* Your Akto **Data Ingestion Service URL** is available (visible in your Akto instance settings)
* You have the appropriate Anthropic key for your product:

| Product       | Key Type              | Who Creates It                     |
| ------------- | --------------------- | ---------------------------------- |
| **Claude.ai** | Compliance Access Key | Primary Owner of the Claude.ai org |

{% hint style="info" %}
**Admin keys** (Claude Console) only grant access to the Activity Feed. They cannot access chat, file, or project content — those endpoints are exclusive to Claude.ai Compliance Access Keys.
{% endhint %}

## Create a Compliance Access Key in Anthropic

{% stepper %}
{% step %}
**Log into Claude.ai** as the **Primary Owner** of your organisation.
{% endstep %}

{% step %}
Go to **Organisation Settings → Data and Privacy**.

Verify that the **Compliance API** is enabled for your organisation. If not, enable it here.
{% endstep %}

{% step %}
Navigate to the **Compliance access keys** section.
{% endstep %}

{% step %}
Click **+ Create key**.

Name your key (e.g., `Akto Atlas Integration`) and select the scopes needed:

<table><thead><tr><th width="282.23046875">Scope</th><th>Required For</th></tr></thead><tbody><tr><td><code>read:compliance_activities</code></td><td>Activity feed (auth, chats, files, admin actions)</td></tr><tr><td><code>read:compliance_user_data</code></td><td>Reading chat messages, files, project content, org users</td></tr><tr><td><code>read:compliance_org_data</code></td><td>Reading org metadata, roles, groups</td></tr></tbody></table>
{% endstep %}

{% step %}
Copy and **securely store** the generated key, it is shown only once.
{% endstep %}
{% endstepper %}

{% hint style="warning" %}
Scopes are **immutable** once a key is created. If you need additional scopes later, you must create a new key.
{% endhint %}

## Connect in Akto Atlas

{% stepper %}
{% step %}
Open your **Akto Atlas** dashboard and navigate to **Connectors**.
{% endstep %}

{% step %}
Under **Platform connectors**, locate the **Anthropic** card and click **Connect**.

<div data-with-frame="true"><figure><img src="/files/k4wJisJEdMxCCaayGq14" alt="" width="563"><figcaption></figcaption></figure></div>
{% endstep %}

{% step %}
In the **Set up guide** panel that opens on the right, fill in the following fields:

<table><thead><tr><th width="297.84375">Field</th><th>Value</th></tr></thead><tbody><tr><td><strong>API key</strong></td><td>Your Compliance Access Key (or Admin Key for Console/API)</td></tr><tr><td><strong>API base URL</strong> <em>(optional)</em></td><td>Leave as <code>https://api.anthropic.com</code> unless Anthropic has given you a custom endpoint for your tenant</td></tr><tr><td><strong>URL for Data Ingestion Service</strong></td><td>Your Akto instance's ingestion URL (e.g., <code>https://ingestion.your-akto.com</code>)</td></tr></tbody></table>
{% endstep %}

{% step %}
Click **Import** to save the configuration and start ingestion.

Akto will verify the key and begin pulling your organiasation's activity data.
{% endstep %}
{% endstepper %}

## What You'll See in Akto

Once connected, data from Anthropic flows into the following areas of your Akto Atlas dashboard:

* **Agentic AI Discovery →** [**Agentic Assets**](/akto-atlas-agentic-ai-security-for-employee-endpoints/ai-agent-activity/agentic-assets): A **Claude Compliance** asset appears, representing all discovered Claude usage across your organisation
* [**Atlas Guardrails**](/akto-atlas-agentic-ai-security-for-employee-endpoints/atlas-guardrails): Akto applies **asynchronous guardrails** to Claude Compliance data — after activity is pulled from the Anthropic Compliance API, Akto evaluates events against your configured security policies, flagging violations such as sensitive data in chat messages, unexpected file sharing, or anomalous access patterns, and surfaces them as alerts

## Troubleshooting

**Connector not importing data**

* Confirm the API key has **at least** the `read:compliance_activities` scope
* Verify the **Data Ingestion Service URL** is reachable from Akto's backend
* Check that the Compliance API is enabled in your Claude.ai org settings (Data and Privacy section)
* Admin keys from Claude Console only work for the Activity Feed — they will return 401 errors on all other endpoints

**Missing chat or file data**

* Chat and file content requires the `read:compliance_user_data` scope
* This data is only available via **Claude.ai Compliance Access Keys** - Admin keys cannot access it
* Confirm the user accounts generating the activity are members of the org tied to the key

**Key shows as invalid**

* The key may have been disabled or deleted in Claude.ai Compliance access keys settings
* Re-enable the key or create a new one and update the connector configuration in Akto

## Get Support for your Akto setup

There are multiple ways to request support from Akto. We are 24X7 available on the following:

1. In-app `intercom` support. Message us with your query on intercom in Akto dashboard and someone will reply.
2. Join our [discord channel](https://www.akto.io/community) for community support.
3. Contact `support@akto.io` for email support.
4. Contact us [here](https://www.akto.io/contact-us).


# Claude Inference Hooks

Use Akto Atlas as the AI security server behind Anthropic's Inference Hooks to allow or deny Claude prompts inline, before inference runs.

## Overview

[Inference Hooks](https://platform.claude.com/docs/en/manage-claude/inference-hooks) is a Claude Enterprise feature that routes every governed prompt through an organization's own **AI security server**, an HTTPS endpoint that returns an allow or deny verdict, before inference runs. A denied prompt never reaches the model.

Akto Atlas can act as that AI security server. Point your organization's Inference Hooks configuration at Akto, and every governed prompt across claude.ai, Cowork, and Claude Code is evaluated against your **Atlas Guardrail policies** inline, before the model ever sees it, with no endpoint agent, browser extension, or IDE hook required.

This is the only Claude integration in Atlas that can **block a prompt before it runs**. The [Anthropic Connector](/akto-atlas-agentic-ai-security-for-employee-endpoints/endpoints-discovery-agents/anthropic-connector) and [Claude Cowork Connector](/akto-atlas-agentic-ai-security-for-employee-endpoints/endpoints-discovery-agents/claude-cowork-connector) give you visibility after or alongside the fact; Inference Hooks gives you enforcement in the critical path.

## How It Works

1. A user submits a prompt on a governed surface (claude.ai, Cowork, or Claude Code).
2. Anthropic sends an HTTPS `POST` containing the conversation transcript to Akto's verdict endpoint, signed per the [Standard Webhooks](https://www.standardwebhooks.com/) spec so Atlas can verify it came from Anthropic, and carrying an `Authorization` header with your Akto token so Atlas can identify your account.
3. Atlas evaluates the transcript against your configured Guardrail policies and returns a verdict within your organization's verdict timeout (5 seconds by default).
4. On `allow`, inference proceeds normally. On `deny`, Anthropic blocks the request and shows the user a policy message built from Atlas's per-request reason plus your standing contact/exception text. The decision is logged to your Akto dashboard either way.

```mermaid
sequenceDiagram
    autonumber
    participant User
    participant Claude as Claude.ai / Cowork / Claude Code
    participant Anthropic
    participant Atlas as Akto Atlas<br/>(AI Security Server)
    participant Model as Claude Model

    User->>Claude: Submits prompt
    Claude->>Anthropic: Governed inference request
    Anthropic->>Atlas: POST signed transcript
    Note over Atlas: Evaluate against<br/>Atlas Guardrail policies
    alt Allow
        Atlas-->>Anthropic: {"action": "allow"}
        Anthropic->>Model: Run inference
        Model-->>User: Response
    else Deny
        Atlas-->>Anthropic: {"action": "deny", "deny_reason": "..."}
        Anthropic-->>User: Blocked-by-policy message
    end
    Atlas-->>Atlas: Log verdict to Akto Dashboard
```

Today the only hook event is `prompt`, firing once per governed request before inference begins. Response-side enforcement is on Anthropic's roadmap, not yet available.

## What Atlas Evaluates

Every transcript Anthropic forwards is scored against the same Guardrail policies Atlas already enforces at the endpoint. See [Agent Guard](/agentic-guardrails/concepts/agent-guard) for the full scanner list. Typical uses of the hook:

* **Sensitive data exposure**: PII, secrets, source code, or other regulated data in the prompt
* **Unsafe prompts and jailbreaks**: prompt injection or jailbreak patterns
* **Policy engines**: model allowlists, project-scoped restrictions, or working-hours controls
* **Compliance archival**: always return `allow` and use the transcript purely to archive activity in real time, as a push-based alternative to polling the Anthropic Compliance API

## What Atlas Can and Cannot See

Anthropic forwards what the user sees: transcript text, tool calls and their results, and text extracted from attachments. It never forwards raw file or image bytes, system prompts, or Anthropic-internal context, so image-only content (a screenshot of a document, for example) cannot be inspected or blocked on this path.

## Prerequisites

* A **Claude Enterprise** organization, with Inference Hooks enabled (currently in beta)
* A user with the `organization:manage` permission in claude.ai (built-in Admin, Owner, and Primary owner roles hold this)
* An **Akto Atlas** account with the Connectors section accessible

## Setting It Up

Akto exposes a dedicated webhook endpoint for Claude Inference Hooks, scoped to your Akto account:

```
https://<your-account-id>-guardrails.akto.io/api/v1/webhooks/claude/guardrail
```

Register this URL as your AI security server in claude.ai, under **Organization Settings → Inference Hooks**, and set the request's **`Authorization`** header to your **database abstractor token**, the same API token used by your other Akto connectors. Get it from **Connectors → Setup Guardrail** in your Akto Atlas dashboard.

{% hint style="info" %}
**Contact the Akto team** to set this up, via in-app Intercom support or <support@akto.io>. They'll confirm your account's webhook URL and token, and walk you through registering them in claude.ai.
{% endhint %}

## What You'll See in Akto

* **Atlas Guardrails → Guardrail Activity**: every verdict Atlas returned (allow or deny, the policy that fired, and the full transcript context), alongside guardrail events from your other endpoints
* **Agentic AI Discovery → Agentic Assets**: governed Claude usage attributed to the requesting user, correlated with any Anthropic Connector or Cowork Connector data for the same org

## Get Support for your Akto setup

There are multiple ways to request support from Akto. We are 24X7 available on the following:

1. In-app `intercom` support. Message us with your query on intercom in Akto dashboard and someone will reply.
2. Join our [discord channel](https://www.akto.io/community) for community support.
3. Contact `support@akto.io` for email support.
4. Contact us [here](https://www.akto.io/contact-us).


# OpenAI Connector

## Overview

The **OpenAI Connector** integrates Akto Atlas with OpenAI's **Admin API** to give your security team real-time visibility into how employees interact with ChatGPT and OpenAI models across your organisation.

Once connected, Akto continuously pulls your organisation's activity data from OpenAI and surfaces it in your dashboard, so you can track who is using ChatGPT, what projects are active, and flag compliance-relevant events without deploying any endpoint agents.

## What Akto Ingests

Akto uses the OpenAI Admin API's **Audit Logs** and **Organization APIs** to pull the following data:

| Data Category             | What Akto Discovers                                           |
| ------------------------- | ------------------------------------------------------------- |
| **Chat activity**         | Chats created, viewed, updated, or deleted by users           |
| **User & org management** | Invite accepted/rejected, user role changes, group membership |
| **MCP server events**     | MCP server additions, removals, and tool policy updates       |
| **Skills Activity**       | Skills created, replaced, or deleted                          |

## How It Works

```
OpenAI Admin API
        │
        │  Pull audit logs + org data
        ▼
  Akto Connector
        │
        │  Stream to ingestion service
        ▼
  Akto Dashboard
  (Agentic AI Discovery)
```

Akto polls the OpenAI Admin API at regular intervals using your **Admin API key**. All ingested events appear in your Akto dashboard for investigation, alerting, and reporting.

## Prerequisites

Before setting up the connector, ensure:

* You have an **Akto Atlas** account with the Connectors section accessible
* Your Akto **Data Ingestion Service URL** is available (visible in your Akto instance settings)
* You have an OpenAI **Admin API key** — these are created by an Owner of the OpenAI organisation.

{% hint style="info" %}
Admin API keys are available to **ChatGPT Enterprise** and **OpenAI API** organisations. You must be an Owner of the organisation to create one.
{% endhint %}

## Setup

{% stepper %}
{% step %}
**Create an Admin API key in OpenAI**

In the OpenAI Platform, go to **Settings → Organisation → Admin keys** and create a new key. Copy and securely store it — it is shown only once.
{% endstep %}

{% step %}
Open your **Akto Atlas** dashboard and navigate to **Connectors**.
{% endstep %}

{% step %}
Under **Platform connectors**, locate the **OpenAI** card and click **Connect**.
{% endstep %}

{% step %}
In the **Set up guide** panel that opens on the right, fill in the following fields:

| Field                              | Value                                                                                    |
| ---------------------------------- | ---------------------------------------------------------------------------------------- |
| **API key**                        | Your OpenAI Admin API key                                                                |
| **API base URL** *(optional)*      | Leave as `https://api.openai.com` unless you are using a custom or Azure-hosted endpoint |
| **URL for Data Ingestion Service** | Your Akto instance's ingestion URL (e.g., `https://ingestion.your-akto.com`)             |
| {% endstep %}                      |                                                                                          |

{% step %}
Click **Import** to save the configuration and start ingestion.

Akto will verify the key and begin pulling your organisation's activity data.
{% endstep %}
{% endstepper %}

## What You'll See in Akto

Once connected, data from OpenAI flows into the following areas of your Akto Atlas dashboard:

* **Agentic AI Discovery →** [**Agentic Assets**](/akto-atlas-agentic-ai-security-for-employee-endpoints/ai-agent-activity/agentic-assets): A **ChatGPT Compliance** asset appears, representing all discovered OpenAI usage across your organisation
* [**Atlas Guardrails**](/akto-atlas-agentic-ai-security-for-employee-endpoints/atlas-guardrails): Akto applies **asynchronous guardrails** to ChatGPT Compliance data — after activity is pulled from the OpenAI Admin API, Akto evaluates events against your configured security policies, flagging violations such as sensitive data in conversations, unexpected API key creation, or anomalous access patterns, and surfaces them as alerts

## Troubleshooting

**Connector not importing data**

* Confirm the Admin API key belongs to an **Owner** of the OpenAI organisation
* Verify the **Data Ingestion Service URL** is reachable from Akto's backend
* Ensure the key has not expired — OpenAI Admin keys can be created with an expiry date

**Missing conversation or user data**

* Audit log access requires a **ChatGPT Enterprise** subscription
* Confirm the users generating activity are members of the organisation tied to the Admin key

**Key shows as invalid**

* The key may have expired or been revoked in OpenAI Platform settings
* Create a new Admin key and update the connector configuration in Akto

## Get Support for your Akto setup

There are multiple ways to request support from Akto. We are 24X7 available on the following:

1. In-app `intercom` support. Message us with your query on intercom in Akto dashboard and someone will reply.
2. Join our [discord channel](https://www.akto.io/community) for community support.
3. Contact `support@akto.io` for email support.
4. Contact us [here](https://www.akto.io/contact-us).


# Claude Cowork Connector

Connect Akto Atlas with Claude Cowork

## Overview

Claude Cowork is an enterprise feature of the Claude desktop app that runs Claude AI inside a sandboxed virtual machine with full tool execution, file system access, and granular permission controls. Employees use it to run agentic workflows directly from their machines.

The Akto Claude Cowork connector gives your security team real-time visibility into Cowork sessions across your organization — every prompt, tool execution, API call, and permission decision — without deploying additional endpoint agents.

Available on Claude **Team** and **Enterprise** plans, requiring desktop app **v1.1.4173 or later**.

## How It Works

Claude Cowork exports OpenTelemetry (OTel) telemetry from within the Cowork VM. You configure Akto's OTLP collector endpoint in your Claude admin settings, and events are pushed directly to Akto in real time.

```mermaid
flowchart LR
    A[Claude Cowork\nDesktop App] -->|pushes OTel events| B[Akto OTLP\nCollector]
    B --> C[Akto Data\nIngestion Service]
    C --> D[Akto Dashboard]
```

{% hint style="info" %}
**Push mode** — Cowork pushes events to Akto the moment they occur. Unlike polling-based connectors, events typically appear in the Akto dashboard within seconds of the interaction.
{% endhint %}

## What Akto Ingests

| Event              | What Akto Discovers                                                                                        |
| ------------------ | ---------------------------------------------------------------------------------------------------------- |
| **user\_prompt**   | Prompt submitted by the user, prompt length, and (optionally) full prompt content                          |
| **tool\_result**   | Tool name, execution duration, success/failure, error details, and (optionally) tool inputs and file paths |
| **api\_request**   | Claude model used, token counts, cost estimate, and latency per API call                                   |
| **api\_error**     | Failed API requests with HTTP status codes and retry attempt counts                                        |
| **tool\_decision** | Permission accept/reject decisions and their source for each tool invocation                               |

All events include standard correlation attributes: `session.id`, `organization.id`, `user.email`, `user.account_uuid`, `prompt.id` (links all events from a single interaction), and `workspace.host_paths` (directories the Cowork VM has access to).

{% hint style="warning" %}
`user.email` is always included in every event. Ensure your data retention and privacy policies account for PII in telemetry data.
{% endhint %}

## Prerequisites

* Claude desktop app version **1.1.4173 or later** installed on employee machines
* Claude **Team** or **Enterprise** plan
* Admin access to your Claude organization settings at [claude.ai](https://claude.ai)
* Akto Atlas account with the Connectors section accessible

## Steps to Connect

{% stepper %}
{% step %}
**Get your Akto OTLP endpoint and token**

* **OTLP collector URL** — `https://kakashi.akto.io`
* **Bearer token** — from **Connectors → Setup Guardrails**
  {% endstep %}

{% step %}
**Configure the OTLP exporter in Claude admin settings**

Log in to [claude.ai](https://claude.ai) as an **admin**. Go to **Admin settings → Cowork** and fill in the monitoring fields:

| Field             | Value                                              |
| ----------------- | -------------------------------------------------- |
| **OTLP endpoint** | The Akto OTLP collector URL from the previous step |
| **OTLP protocol** | `http/json`                                        |
| **OTLP headers**  | `Authorization=Bearer <your-akto-token>`           |

Click **Save**. Settings apply to new Cowork sessions started after this point — active sessions are not affected.
{% endstep %}

{% step %}
**(Optional) Enable content capture**

By default, Akto receives metadata only (lengths, durations, token counts). To enable prompt injection detection and deeper security analysis, turn on `otlpContentCapture` in your Claude admin settings:

* **userPrompts** — exports full prompt text with each `user_prompt` event
* **toolDetails** — exports `tool_input` fields (file paths, URLs, command parameters) with each `tool_result` event

Enable only what your security policies permit.
{% endstep %}

{% step %}
**(Optional) Allowlist Akto's collector domain**

If your organization has network egress restrictions enabled in Claude, add Akto's collector domain to the allowlist at **Admin settings → Capabilities → Network egress**.

{% hint style="warning" %}
Traffic to non-allowlisted domains is silently dropped by the Cowork VM. If you see no events in Akto, this is the most common cause.
{% endhint %}
{% endstep %}

{% step %}
**Verify data in Akto**

Have a user start a new Claude Cowork session on their desktop and submit a prompt. Within seconds, confirm that events appear in your Akto Atlas dashboard under **Agentic AI Discovery**.
{% endstep %}
{% endstepper %}

## What You'll See in Akto

Once connected, Claude Cowork data flows into the following areas of your Akto Atlas dashboard:

* **Agentic AI Discovery → Agentic Assets**: A **Claude Cowork** asset appears, representing all discovered Cowork sessions across your organization
* **Atlas Guardrails**: Akto evaluates Cowork events against your configured security policies in real time, flagging prompt injection attempts, sensitive data exposure in tool inputs, and risky tool executions as they happen

## Get Support for your Akto setup

There are multiple ways to request support from Akto. We are 24X7 available on the following:

1. In-app `intercom` support. Message us with your query on intercom in Akto dashboard and someone will reply.
2. Join our [discord channel](https://www.akto.io/community) for community support.
3. Contact <support@akto.io> for email support.
4. Contact us [here](https://www.akto.io/contact-us).


# Copilot Studio

Connect Akto with Microsoft Copilot Studio

## Overview

[Microsoft Copilot Studio](https://learn.microsoft.com/en-us/microsoft-copilot-studio/fundamentals-what-is-copilot-studio) is a low-code platform for building and deploying conversational AI agents and copilots. Connect Akto Atlas to your Copilot Studio environment to discover deployed agents and ingest conversation transcripts for security analysis.

Once connected, Akto Atlas automatically:

* **Discovers Copilot agents** configured in your Power Platform environment
* **Ingests conversation transcripts** captured by Copilot Studio in Microsoft Dataverse
* **Pairs user prompts with bot responses** to reconstruct full conversation flows
* **Sends traffic to Akto** for prompt injection, PII, and policy-violation analysis

The connector reads conversation transcripts from the [Dataverse Web API](https://learn.microsoft.com/en-us/power-apps/developer/data-platform/webapi/overview) using a service principal - no changes are required to your Copilot Studio agents or their deployment.

## How It Works

```
Microsoft Copilot Studio
         ↓ (transcripts persisted)
Microsoft Dataverse  ──── (Dataverse Web API v9.1 + OAuth 2.0)
         ↓
Akto Atlas Connector  ── (every 5 minutes)
         ↓
Akto Data Ingestion Service
         ↓
Akto Dashboard
```

1. **Polling** - The connector polls Dataverse on a recurring schedule (default: every 5 minutes) for new [conversation transcripts](https://learn.microsoft.com/en-us/microsoft-copilot-studio/analytics-transcripts-powerapps).
2. **Authentication** - [OAuth 2.0 client-credentials flow](https://learn.microsoft.com/en-us/entra/identity-platform/v2-oauth2-client-creds-grant-flow) using a Microsoft Entra ID app registration and a Dataverse application user.
3. **Pairing** - Each transcript's `activities` array is parsed; user messages (`role: 1`) are paired with the next bot response (`role: 0`) to form request/response pairs.
4. **Publishing** - Each pair is forwarded to your Akto Data Ingestion Service for ingestion into the Akto platform.

## Prerequisites

Before setting up the Copilot Studio connector, ensure the following requirements are met. **Most setup issues are caused by missing prerequisites - please review them carefully.**

### 1. Supported Power Platform Environment

Per the [Microsoft documentation on transcript controls](https://learn.microsoft.com/en-us/microsoft-copilot-studio/admin-transcript-controls), Microsoft does **not** persist Copilot Studio conversation transcripts to Dataverse for the following [environment types](https://learn.microsoft.com/en-us/power-platform/admin/environments-overview):

* Dataverse **developer** environments
* Microsoft Dataverse for Teams environments
* Microsoft 365 Copilot agents

Your agents must be deployed to a **Sandbox** or **Production** environment with a Dataverse database enabled. Verify the environment type in the [Power Platform admin center](https://admin.powerplatform.microsoft.com). For instructions on creating a new environment, see [Create and manage environments](https://learn.microsoft.com/en-us/power-platform/admin/create-environment).

### 2. Transcript Saving Enabled

The Power Platform environment setting **"Allow conversation transcripts and their associated metadata to be saved in Dataverse"** must be turned **on** for your environment. Full details are in the [Microsoft transcript-controls documentation](https://learn.microsoft.com/en-us/microsoft-copilot-studio/admin-transcript-controls#configure-transcript-recording-and-download).

To verify or enable it:

1. Open the [Power Platform admin center](https://admin.powerplatform.microsoft.com).
2. Go to **Manage** → **Environments** → select your environment → **Settings**.
3. Expand **Product** → **Features** → scroll to **Copilot Studio agents**.
4. Ensure **"Allow conversation transcripts and their associated metadata to be saved in Dataverse"** is enabled, then **Save**.

{% hint style="info" %}
Transcripts take **up to 30 minutes** to appear in Dataverse after a conversation ends. The default Dataverse retention for transcripts is 30 days; this can be extended - see [Change the default retention period](https://learn.microsoft.com/en-us/microsoft-copilot-studio/analytics-transcripts-powerapps#change-the-default-retention-period).
{% endhint %}

### 3. Copilot Studio License

A paid [Copilot Studio license](https://learn.microsoft.com/en-us/microsoft-copilot-studio/requirements-licensing) must be assigned to the account that owns the agents. Trial licenses do not always sync conversation transcripts to Dataverse.

### 4. Akto Data Ingestion Service

Your self-hosted Akto **Data Ingestion Service** must be deployed and reachable from the Akto Atlas connector. The connector forwards each conversation pair to this endpoint.

### 5. Required Permissions

Two distinct sets of permissions are involved in this integration. Note the difference - confusing them is the most common setup mistake.

#### 5a. Permissions for the person running the setup (one-time)

The user performing **Part 1** of the setup needs a Dataverse [security role](https://learn.microsoft.com/en-us/power-platform/admin/security-roles-privileges) that grants the following privileges in the target environment, because the setup creates a new application user and assigns a role to it:

| Privilege             | Entity            | Why it's needed                          |
| --------------------- | ----------------- | ---------------------------------------- |
| `prvCreateSystemUser` | User (SystemUser) | Create the new application user record   |
| `prvReadSystemUser`   | User (SystemUser) | List existing users to detect duplicates |
| `prvAppendSystemUser` | User (SystemUser) | Attach the user to the business unit     |
| `prvReadRole`         | Security Role     | List roles assignable to the app user    |
| `prvAssignRole`       | Security Role     | Bind a role to the new application user  |

The simplest way to satisfy all of these is to assign yourself the built-in **System Administrator** role for the target environment. If your organization restricts that role, ask the tenant's [Global administrator or Dynamics 365 administrator](https://learn.microsoft.com/en-us/power-platform/admin/manage-high-privileged-admin-roles) to either run the setup for you or temporarily grant the role.

These permissions are **only** needed at setup time - they are not used by the connector at runtime.

#### 5b. Permissions for the application user (used by Akto at runtime)

The Dataverse application user that Akto authenticates as needs only **read access on two tables**. No write, delete, or admin privileges are required.

| Privilege                     | Entity                  | Logical name             | Used by                                                          |
| ----------------------------- | ----------------------- | ------------------------ | ---------------------------------------------------------------- |
| **Read** (Organization scope) | Bot                     | `bot`                    | `GET /api/data/v9.1/bots` - agent discovery                      |
| **Read** (Organization scope) | Conversation Transcript | `conversationtranscript` | `GET /api/data/v9.1/conversationtranscripts` - traffic ingestion |

You have two ways to grant these:

* **Recommended (least privilege)**: Create a [custom security role](https://learn.microsoft.com/en-us/power-platform/admin/create-edit-security-role) with **Read = Organization** on the **Bot** and **Conversation Transcript** tables and nothing else. Assign that role to the application user.
* **Faster (broader access)**: Assign the built-in [**Bot Transcript Viewer**](https://learn.microsoft.com/en-us/microsoft-copilot-studio/admin-share-bots#assign-the-bot-transcript-viewer-security-role-during-agent-sharing) role (covers `conversationtranscript` reads) plus the built-in **Environment Maker** role (covers `bot` reads). This grants more than strictly necessary; prefer the custom role in production.

{% hint style="warning" %}
Do **not** assign **System Administrator** to the application user. It is far broader than needed and violates the principle of least privilege - the connector only reads two tables.
{% endhint %}

## Steps to Connect

### Part 1 - Set Up Microsoft Entra ID and Dataverse Access

You only need to complete Part 1 once per Power Platform environment. The steps below mirror Microsoft's [confidential client app registration tutorial for Dataverse](https://learn.microsoft.com/en-us/power-apps/developer/data-platform/walkthrough-register-app-azure-active-directory#confidential-client-app-registration).

{% stepper %}
{% step %}
**Register an Application in Microsoft Entra ID**

1. Sign in to the [Azure portal](https://portal.azure.com) with an account that has administrator permission.
2. Go to [**Microsoft Entra ID**](https://learn.microsoft.com/en-us/entra/fundamentals/whatis) → **App registrations** → **+ New registration**. (See Microsoft's [Register an application](https://learn.microsoft.com/en-us/entra/identity-platform/quickstart-register-app) guide for screenshots.)
3. Enter the following:
   * **Name**: `akto-copilot-studio-connector` (or any meaningful name)
   * **Supported account types**: **Accounts in this organizational directory only (single tenant)**
4. Select **Register**.
5. On the **Overview** page, copy and save the following values - you will paste them into the Akto dashboard later:
   * **Application (client) ID**
   * **Directory (tenant) ID**
     {% endstep %}

{% step %}
**Create a Client Secret**

Follow Microsoft's [Add a client secret](https://learn.microsoft.com/en-us/entra/identity-platform/quickstart-register-app#add-a-client-secret) guidance:

1. In your newly registered app, go to **Certificates & secrets** in the left navigation.
2. Select **+ New client secret**.
3. Enter a description and select an expiry (recommended: 12 months or as per your organization's policy).
4. Select **Add**.
5. Immediately copy the **Value** of the secret and save it securely.

{% hint style="warning" %}
The secret value is shown only once. If you navigate away before copying it, you will need to create a new secret.
{% endhint %}
{% endstep %}

{% step %}
**Create a Dataverse Application User**

The Microsoft Entra app must be bound to an [application user](https://learn.microsoft.com/en-us/power-platform/admin/manage-application-users) inside Dataverse before it can read data. You need the setup-time permissions listed in [Prerequisites § 5a](#5a-permissions-for-the-person-running-the-setup-one-time) to complete this step.

{% hint style="info" %}
**If you hit `There was a problem adding ...` or `We couldn't be able to fetch app users` (missing `prvReadApplicationUser`) on the default environment, self-elevate first.**

Per [Microsoft's Dataverse security role documentation](https://learn.microsoft.com/en-us/power-platform/admin/database-security#environments-with-a-dataverse-database), tenant-level roles (Global Admin, Power Platform Admin, Dynamics 365 Service Admin) are no longer automatically granted the **System Administrator** Dataverse role on the default environment. Self-elevate before continuing:

1. Open the [Power Platform admin center](https://admin.powerplatform.microsoft.com).
2. Select **Manage** → **Environments** → select your target environment (e.g. **Default**).
3. In the top toolbar (or under the **More** menu), select **Membership** → **Add me**.
4. Confirm the **System Administrator** role is granted to your user, then reload the **Application users** page.

If your tenant uses [Entra Privileged Identity Management for Power Platform](https://learn.microsoft.com/en-us/power-platform/admin/manage-high-privileged-admin-roles), activate the eligible Dataverse System Administrator assignment instead. The PowerShell cmdlet `Set-AdminPowerAppEnvironmentRoleAssignment` does **not** work on environments with a Dataverse database (returns `403 Forbidden`) - use the **Membership** UI.
{% endhint %}

1. Open the [Power Platform admin center](https://admin.powerplatform.microsoft.com).
2. Select **Manage** → **Environments** → select your target environment.
3. Open **Settings** → **Users + permissions** → [**Application users**](https://learn.microsoft.com/en-us/power-platform/admin/manage-application-users#create-an-application-user).
4. Select **+ New app user**.
5. In the side panel, select **+ Add an app** and search for the app registration you created in Step 1. Select it and choose **Add**.
6. Select the appropriate **Business unit** (typically the default).
7. Assign the runtime security role described in [Prerequisites § 5b](#5b-permissions-for-the-application-user-used-by-akto-at-runtime). Choose **one** of:
   * **Custom role (recommended)** - A role you create in advance with **Read = Organization** on the **Bot** and **Conversation Transcript** tables only.
   * **Built-in fallback** - **Bot Transcript Viewer** + **Environment Maker** (grants more than required, but works out of the box).
8. Select **Create**.
   {% endstep %}

{% step %}
**(Optional but recommended) Create a Custom Security Role for the App User**

If you want the least-privilege option from [Prerequisites § 5b](#5b-permissions-for-the-application-user-used-by-akto-at-runtime), create the custom role **before** assigning it to the application user above. Full reference: Microsoft's [Create or edit a security role](https://learn.microsoft.com/en-us/power-platform/admin/create-edit-security-role) guide.

1. Open the [Power Platform admin center](https://admin.powerplatform.microsoft.com).
2. Select **Manage** → **Environments** → select your target environment.
3. Open **Settings** → **Users + permissions** → **Security roles**.
4. Select **+ New role**.
5. **Details** tab - enter a name (e.g. `Akto Copilot Connector`) and select a business unit (typically the root).
6. **Tables** tab → search for `Bot` → set **Read** to **Organization** (full green circle). Leave all other privileges blank.
7. Search for `Conversation Transcript` → set **Read** to **Organization**. Leave all other privileges blank.
8. **Miscellaneous Privileges** tab - leave everything unchecked.
9. Select **Save and Close**.

Return to **Step 3** above and assign this role to the application user.
{% endstep %}

{% step %}
**Locate the Dataverse Environment URL**

1. In the [Power Platform admin center](https://admin.powerplatform.microsoft.com), open **Manage** → **Environments**.
2. Select your environment to view its details.
3. Copy the **Environment URL** value - it has the form:
   * `https://<your-org>.crm.dynamics.com` (North America)
   * `https://<your-org>.crm<region>.dynamics.com` (other regions, e.g., `crm4` for EMEA)

For the full list of regional URL suffixes, see Microsoft's [Datacenter regions](https://learn.microsoft.com/en-us/power-platform/admin/regions-overview) and [discover the URL of your environment](https://learn.microsoft.com/en-us/power-apps/developer/data-platform/webapi/compose-http-requests-handle-errors#web-api-url-and-versions) guides.
{% endstep %}
{% endstepper %}

### Part 2 - Connect from the Akto Dashboard

{% stepper %}
{% step %}
**Open the Copilot Studio Connector in Akto Atlas**

1. Navigate to **Akto Atlas** in your Akto dashboard.
2. Open **Connectors**.
3. Under **AI Agent Security**, locate the **Copilot Studio** connector card.
4. Select **Connect** to open the setup dialog.
   {% endstep %}

{% step %}
**Enter the Dataverse Environment URL**

Paste the environment URL you copied in Part 1, Step 4 into the **Dataverse Environment URL** field.

* Format: `https://your-org.crm.dynamics.com`
* Do **not** include a trailing slash.
  {% endstep %}

{% step %}
**Enter the Azure AD Tenant ID**

Paste the **Directory (tenant) ID** copied in Part 1, Step 1 into the **Azure AD Tenant ID** field.

* Format: `xxxxxxxx-xxxx-xxxx-xxxx-xxxxxxxxxxxx`
  {% endstep %}

{% step %}
**Enter the Azure AD App Client ID**

Paste the **Application (client) ID** copied in Part 1, Step 1 into the **Azure AD App Client ID** field.

* Format: `xxxxxxxx-xxxx-xxxx-xxxx-xxxxxxxxxxxx`
  {% endstep %}

{% step %}
**Enter the Azure AD App Client Secret**

Paste the client secret value you saved in Part 1, Step 2 into the **Azure AD App Client Secret** field.

{% hint style="info" %}
If you did not save the value when it was created, return to the Azure portal, generate a new secret in your app registration, and use the new value.
{% endhint %}
{% endstep %}

{% step %}
**Enter the Data Ingestion Service URL**

In the **URL for Data Ingestion Service** field, enter the base URL of your self-hosted Akto Data Ingestion Service.

* Format: `https://ingestion.your-domain.com`

{% hint style="warning" %}

* The ingestion service must be deployed and reachable from the connector.
* The endpoint receives every conversation pair captured from Copilot Studio.
  {% endhint %}
  {% endstep %}

{% step %}
**Complete the Integration**

1. Review all entered values.
2. Select **Import** to finalise the connection.

The connector runs immediately and then continues on a 5-minute recurring schedule. Conversations should begin appearing in your Akto dashboard within one or two cycles, provided transcripts exist in Dataverse for the polling window.
{% endstep %}
{% endstepper %}

## Data Collected

The Copilot Studio connector ingests two categories of information:

### Agent Inventory

* **Bot ID and display name** for every Copilot Studio agent in the environment
* **Published date** and current status

### Conversation Traffic

For each conversation transcript, the connector emits one record per **user message → bot response** pair:

| Field             | Description                                                 |
| ----------------- | ----------------------------------------------------------- |
| `path`            | `/copilot/conversation/{transcript_id}/message/{index}`     |
| `requestPayload`  | JSON object containing the user's prompt text               |
| `responsePayload` | JSON object containing the bot's response text              |
| `host`            | `copilot.microsoft.com` (the bot name is tagged separately) |
| `time`            | Unix timestamp of the user message                          |
| `tag.source`      | `COPILOT_STUDIO`                                            |
| `tag.bot-name`    | Sanitised bot display name                                  |

Edge cases handled automatically:

* **Bot greetings** (no preceding user prompt) - emitted with an empty `requestPayload`.
* **Unanswered user prompts** - emitted with an empty `responsePayload`.
* **Multiple bot replies** - each paired with the most recent user message.

## Troubleshooting

### No Conversations Appearing in Akto

This is the most common issue. Work through the checks below in order:

1. **Environment type** - Confirm you are connected to a **Sandbox** or **Production** environment. Developer and Teams environments do not persist transcripts.
2. **Transcript saving enabled** - Verify the **"Allow conversation transcripts and their associated metadata to be saved in Dataverse"** setting is ON (see Prerequisites, item 2).
3. **Sync delay** - Transcripts can take up to 30 minutes to appear in Dataverse after a conversation ends. Have a test conversation and wait 30+ minutes before retesting.
4. **License** - Confirm a **paid** Copilot Studio license is assigned to the account that owns the agents.
5. **Transcripts visible in Power Apps** - Open [make.powerapps.com](https://make.powerapps.com), select your environment, go to **Tables** → search **Conversation Transcript** (see Microsoft's [download conversation transcripts guide](https://learn.microsoft.com/en-us/microsoft-copilot-studio/analytics-transcripts-powerapps)). If no rows appear there, the connector cannot ingest them either - fix the source first.

### Authentication Errors

**`401 Unauthorized`**

* Verify the **Azure AD App Client ID** and **Client Secret** are correct.
* Verify the secret has not expired. If it has, generate a new one and update the connector configuration.
* Confirm the **Tenant ID** matches the tenant where the app is registered.

**`403 Forbidden`**

* The Microsoft Entra app exists but has no permission inside Dataverse. Verify that a corresponding **Application user** exists in the Power Platform environment (Part 1, Step 3).
* Confirm the application user's security role grants **Read** on **both** the `bot` and `conversationtranscript` tables at **Organization** scope - see [Prerequisites § 5b](#5b-permissions-for-the-application-user-used-by-akto-at-runtime). Business Unit scope is **not** sufficient, because transcripts created by other users won't be visible.
* If you assigned only the **Bot Transcript Viewer** role, add **Environment Maker** as well - Bot Transcript Viewer alone does not grant read on the `bot` table.

### "There was a problem adding ... to this environment"

Full error pattern:

```
There was a problem adding '<app-name>' to this environment.
Principal user (Id=..., type=8, roleCount=..., privilegeCount=..., ...
```

This is raised by Power Platform when **you** (the person clicking **Create**) do not have permission to add a new application user. The principal user described in the error is your account, not the app you're trying to add.

* Verify your own user has the privileges listed in [Prerequisites § 5a](#5a-permissions-for-the-person-running-the-setup-one-time).
* The simplest fix is to have a tenant admin assign you the **System Administrator** role in the target environment, then retry. Once setup is complete, you can remove the role.
* If `roleCount` in the error is `0` or `1`, your account is missing a Dataverse security role entirely - open [Power Platform admin center](https://admin.powerplatform.microsoft.com) → environment → **Settings → Users + permissions → Users**, open your user, and confirm role assignments.

### Connection Test Fails

* Verify the **Dataverse Environment URL** is correct and has no trailing slash.
* Confirm the URL is reachable from your network (or from the Akto-hosted connector).
* Verify there are no [Conditional Access](https://learn.microsoft.com/en-us/entra/identity/conditional-access/overview) or IP allow-list rules in Microsoft Entra ID blocking the service principal.

### Rate Limiting (`429 Too Many Requests`)

Dataverse enforces [service protection API limits](https://learn.microsoft.com/en-us/power-apps/developer/data-platform/api-limits) (6,000 requests per 5 minutes per user). The default 5-minute polling interval stays well within these limits. If you see `429` errors:

* Reduce concurrent connectors against the same environment.
* Contact Akto support to adjust the recurring interval.

## Security and Privacy

* **Credentials at rest** - The Microsoft Entra client secret is stored encrypted in Akto's secure configuration store and is never displayed back to the user after import.
* **Least privilege** - Akto recommends [creating a custom Dataverse security role](https://learn.microsoft.com/en-us/power-platform/admin/create-edit-security-role) with read-only access to the `bot` and `conversationtranscript` tables, rather than System Administrator.
* **Secret rotation** - Rotate the Microsoft Entra client secret per your organization's policy (see Microsoft's [credential management best practices](https://learn.microsoft.com/en-us/entra/identity-platform/howto-create-service-principal-portal#option-3-create-a-new-client-secret)). After rotating, return to the connector and re-import with the new value.
* **Network** - All Dataverse and ingestion traffic is sent over HTTPS.
* **Data residency** - Conversation transcripts remain in your Dataverse environment; Akto reads them via the Web API. Pairs are then forwarded to your self-hosted Akto Data Ingestion Service.

## Get Support

If you need assistance with the Copilot Studio connector:

* **In-app Chat** - Use the chat widget in your Akto dashboard for instant support.
* **Discord Community** - Join our community at [discord.gg/Wpc6xVME4s](https://discord.gg/Wpc6xVME4s).
* **Email Support** - Contact us at <help@akto.io>.
* **Contact Form** - Submit a support request at <https://www.akto.io/contact-us>.

Our team is available 24/7 to help with setup, troubleshooting, and best practices.


# Copilot Studio (Multi Environment)

Connect Akto Atlas to Microsoft Copilot Studio across multiple Power Platform environments

## Overview

The Copilot Studio Multi Environment connector allows you to connect your entire Power Platform tenant to Akto Atlas once. Akto automatically discovers all Power Platform environments in your tenant and provisions application users in each environment, then ingests Copilot Studio conversation transcripts from all of them simultaneously.

Once connected, Akto Atlas automatically:

* **Discovers all Power Platform environments** in your tenant
* **Auto-provisions application users** in each environment with the required permissions
* **Ingests conversation transcripts** from Copilot Studio agents across all environments
* **Pairs user prompts with bot responses** to reconstruct full conversation flows
* **Builds an agent graph** for every agent — its connectors, MCP servers, knowledge sources and flows — from the Power Platform inventory API
* **Sends traffic to Akto** for prompt injection, PII, and policy-violation analysis

## Prerequisites

Before setting up the Multi Environment Copilot Studio connector, ensure the following requirements are met. **Most setup issues are caused by missing prerequisites - please review them carefully.**

### 1. Supported Power Platform Environments

Per the [Microsoft documentation on transcript controls](https://learn.microsoft.com/en-us/microsoft-copilot-studio/admin-transcript-controls), Microsoft does **not** persist Copilot Studio conversation transcripts to Dataverse for the following [environment types](https://learn.microsoft.com/en-us/power-platform/admin/environments-overview):

* Dataverse **developer** environments
* Microsoft Dataverse for Teams environments
* Microsoft 365 Copilot agents

Your agents must be deployed to **Sandbox** or **Production** environments with Dataverse database enabled. Verify environment types in the [Power Platform admin center](https://admin.powerplatform.microsoft.com).

### 2. Transcript Saving Enabled

The Power Platform environment setting **"Allow conversation transcripts and their associated metadata to be saved in Dataverse"** must be turned **on** for each environment. Full details are in the [Microsoft transcript-controls documentation](https://learn.microsoft.com/en-us/microsoft-copilot-studio/admin-transcript-controls#configure-transcript-recording-and-download).

To verify or enable it for each environment:

1. Open the [Power Platform admin center](https://admin.powerplatform.microsoft.com).
2. Go to **Manage** → **Environments** → select each environment → **Settings**.
3. Expand **Product** → **Features** → scroll to **Copilot Studio agents**.
4. Ensure **"Allow conversation transcripts and their associated metadata to be saved in Dataverse"** is enabled, then **Save**.

{% hint style="info" %}
Transcripts take **up to 30 minutes** to appear in Dataverse after a conversation ends. The default Dataverse retention for transcripts is 30 days; this can be extended (see [Change the default retention period](https://learn.microsoft.com/en-us/microsoft-copilot-studio/analytics-transcripts-powerapps#change-the-default-retention-period)).
{% endhint %}

#### 2.1 Enable via Environment Group (Recommended for Multiple Environments)

Instead of enabling transcript saving one environment at a time, you can create an environment group in the Power Platform admin center and publish the **Accessing transcripts from conversations in Copilot Studio agents** rule on that group. This enables transcript saving in Dataverse across every environment in the group at once.

1. Sign in to the [Power Platform admin center](https://admin.powerplatform.microsoft.com).
2. Select **Manage** in the navigation pane, then select **Environment groups**.
3. Select **New group**.
4. In the **Create group** pane, enter a **Name** and **Description**, then select **Create**.
5. Select the group you just created, then select **Add environments** in the command bar. Choose all the environments you want Akto to discover, then select **Add**.
6. Select the **Rules** tab for the group.
7. Select the **Accessing transcripts from conversations in Copilot Studio agents** rule to open its configuration panel.
8. Turn on the setting to allow conversation transcripts and their associated metadata to be saved in Dataverse, then select **Save**.
9. Select **Publish rules** in the command bar to apply the rule across every environment in the group.

{% hint style="warning" %}
Only published rules are enforced. If you configure the rule but skip **Publish rules**, none of the environments in the group will have transcript saving enabled.
{% endhint %}

For detailed steps, see Microsoft's [Create an environment group](https://learn.microsoft.com/en-us/power-platform/admin/environment-groups#create-an-environment-group) guide and the full list of [available rules](https://learn.microsoft.com/en-us/power-platform/admin/environment-groups-rules).

### 3. Copilot Studio License

A paid [Copilot Studio license](https://learn.microsoft.com/en-us/microsoft-copilot-studio/requirements-licensing) must be assigned to the account that owns the agents in each environment. Trial licenses do not always sync conversation transcripts to Dataverse.

### 4. Akto Data Ingestion Service

Your self-hosted Akto **Data Ingestion Service** must be deployed and reachable from the Akto Atlas connector. The connector forwards conversation pairs from all environments to this endpoint.

### 5. Required Permissions

Three distinct sets of permissions are involved in this integration. Note the differences: confusing them is the most common setup mistake.

#### 5a. Permissions for the person running the setup (one-time sign-in, used continuously afterward)

The user performing the setup needs to be a **Global Administrator** or **Power Platform Administrator** at the tenant level, because the setup auto-discovers environments and provisions users across all of them.

Signing in is a one-time action, but its result isn't: Akto stores a refresh token from this sign-in and silently renews it on every recurring job run to call the Power Platform inventory API for agent graphs (see 5c). You aren't prompted again, but this identity stays in continuous use — it's not a one-time-only credential.

#### 5b. Permissions for the application user (used by Akto at runtime)

Akto automatically provisions the application user in each discovered environment, using the one-time Microsoft interactive login described in [Part 2](#part-2-connect-from-the-akto-dashboard). This application user is created with default **System Administrator** access, since it is auto-provisioned across every environment in the tenant rather than configured manually per environment.

At runtime, the connector only reads two tables using this application user:

| Privilege                     | Entity                  | Logical name             | Used by           |
| ----------------------------- | ----------------------- | ------------------------ | ----------------- |
| **Read** (Organization scope) | Bot                     | `bot`                    | Agent discovery   |
| **Read** (Organization scope) | Conversation Transcript | `conversationtranscript` | Traffic ingestion |

{% hint style="info" %}
If you require least-privilege access instead of System Administrator for the auto-provisioned application user, contact Akto support to discuss a custom role setup.
{% endhint %}

#### 5c. Permissions used for agent graphs (via the signed-in admin's delegated token, not the application user)

Separate from the application user above, Akto's recurring job also calls the Power Platform inventory API — tenant-wide, across every environment — to build each agent's graph of connectors, MCP servers, knowledge sources and flows. This call uses the **delegated token from the Part 1/2 sign-in** (the `Power Platform API` > `ResourceQuery.Resources.Read` permission), not the per-environment application user, since this API only accepts delegated (user) tokens.

## Steps to Connect

### Part 1 - Create an App Registration in Microsoft Entra

You only need to complete Part 1 once at the tenant level. This app registration allows Akto to authenticate with Microsoft Copilot Studio across all your Power Platform environments.

#### Register the App

{% stepper %}
{% step %}
Go to [Microsoft Entra](https://entra.microsoft.com) > **App registrations** > **New registration**.

<div data-with-frame="true"><figure><img src="/files/Sqg0ioEFIle6CTBY7p5T" alt="" width="563"><figcaption></figcaption></figure></div>
{% endstep %}

{% step %}
Give the app a name (e.g. `akto-copilot-studio-multi-env-connector`) and set supported account types to **Single tenant**.
{% endstep %}

{% step %}
Configure the Redirect URI

* Select platform as **Web** and add the following as the URI:

  <pre data-overflow="wrap"><code>https://app.akto.io/copilot/oauth/callback
  </code></pre>
* Click **Register**.

{% hint style="info" %}
You will be prompted to log in once with your Microsoft account when you [connect from the Akto dashboard](#part-2-connect-from-the-akto-dashboard) in Part 2.
{% endhint %}
{% endstep %}

{% step %}
Note down:

* **Application (Client) ID**
* **Directory (Tenant) ID**

<div data-with-frame="true"><figure><img src="/files/FhmQvzwpZhUkoczQCE6N" alt="" width="563"><figcaption></figcaption></figure></div>
{% endstep %}
{% endstepper %}

#### Create a Client Secret

{% stepper %}
{% step %}
Go to **Certificates & secrets** > **New client secret**.
{% endstep %}

{% step %}
Set an expiry and click **Add**.
{% endstep %}

{% step %}
**Copy the secret value immediately**: it is not shown again.
{% endstep %}
{% endstepper %}

#### Add API Permissions

{% stepper %}
{% step %}
Go to **API Permissions** > **Add a permission**.
{% endstep %}

{% step %}
Select the **APIs my organization uses** tab. Add the following **delegated permissions**:

* **PowerApps Service** > `User`
* **Power Platform API** > `ResourceQuery.Resources.Read`
  {% endstep %}

{% step %}
Add the following **application permission**:

* **Microsoft Graph** > `User.Read.All` (requires admin consent)
  {% endstep %}
  {% endstepper %}

{% hint style="warning" %}
Because `User.Read.All` requires admin consent, a non-admin user completing [Part 2](#part-2-connect-from-the-akto-dashboard) will hit a **"Need admin approval"** screen — a tenant admin must sign in or grant consent instead.
{% endhint %}

### Part 2 - Connect from the Akto Dashboard

{% hint style="info" %}
**Why does Akto ask for a Microsoft interactive login?**

When you enter your details in the Akto dashboard, you'll be asked to log in to your Microsoft account **once per tenant**. This one-time login:

* Registers the app you created in Part 1 with the Power Platform admin center
* Lets Akto automate the creation of application users in each environment, so you don't have to create them manually
* Creates each application user with default access (**System Administrator**), used to fetch conversation transcripts
* Also stores a refresh token for your own sign-in, renewed silently on every recurring job run to fetch agent graph data (see 5c below)
  {% endhint %}

{% stepper %}
{% step %}
**Open the Copilot Studio (Multi Environment) Connector in Akto Atlas**

1. Navigate to **Akto Atlas** in your Akto dashboard.
2. Open **Connectors**.
3. Under **Platform Connector**, locate the **Copilot Studio (Multi Environment)** connector card.
4. Select **Connect** to open the setup dialog.
   {% endstep %}

{% step %}
**Enter the Azure AD Tenant ID**

Paste the **Directory (tenant) ID** you noted down in Part 1 into the **Azure AD Tenant ID** field.

* Format: `xxxxxxxx-xxxx-xxxx-xxxx-xxxxxxxxxxxx`

{% hint style="info" %}
The multi-environment connector will use this tenant ID to auto-discover and connect to all Power Platform environments in your organization.
{% endhint %}
{% endstep %}

{% step %}
**Enter the Azure AD App Client ID**

Paste the **Application (client) ID** you noted down in Part 1 into the **Azure AD App Client ID** field.

* Format: `xxxxxxxx-xxxx-xxxx-xxxx-xxxxxxxxxxxx`
  {% endstep %}

{% step %}
**Enter the Azure AD App Client Secret**

Paste the client secret value you saved in Part 1 into the **Azure AD App Client Secret** field.

{% hint style="info" %}
If you did not save the value when it was created, return to the Azure portal, generate a new secret in your app registration, and use the new value.
{% endhint %}
{% endstep %}

{% step %}
**Enter the Data Ingestion Service URL**

In the **URL for Data Ingestion Service** field, enter the base URL of your self-hosted Akto Data Ingestion Service.

* Format: `https://ingestion.your-domain.com`

{% hint style="warning" %}

* The ingestion service must be deployed and reachable from the connector.
* The endpoint receives conversation pairs from all discovered environments.
  {% endhint %}
  {% endstep %}

{% step %}
**Complete Microsoft Sign-In**

After entering your credentials, you will be taken to the Microsoft login page. Complete the sign-in with an account that has permission to register the app in the Power Platform admin center.

{% hint style="info" %}
This sign-in is required only once per tenant. See [Why does Akto ask for a Microsoft interactive login?](#part-2-connect-from-the-akto-dashboard) above for details.
{% endhint %}
{% endstep %}

{% step %}
**Review Discovered Environments**

After completing the sign-in, Akto will automatically discover all Power Platform environments in your tenant. A **Review discovered environments** section will appear showing:

* **Environment name** (e.g. "Production", "Default")
* **Environment URL** (e.g., `https://org12345.crm.dynamics.com/`)

Review the list to confirm all environments are present. Akto will provision an application user in each environment to read Copilot Studio transcripts.

{% hint style="info" %}
If you don't see an expected environment, verify that:

* It is a **Sandbox** or **Production** environment (not Developer or Teams)
* Transcript saving is enabled in that environment
* You have the appropriate permissions to access it
  {% endhint %}
  {% endstep %}

{% step %}
**Confirm & Connect**

1. Review all entered values and the discovered environments list.
2. Select **Confirm & Connect** to finalize the integration.

Akto will now:

* Provision application users in each discovered environment
* Start polling Copilot Studio transcripts from all environments every 30 minutes
* Pull the tenant-wide agent inventory on the same schedule to build each agent's graph
* Begin importing conversation data and agent graphs to your Akto dashboard

Conversations should begin appearing in your Akto dashboard within one or two polling cycles, provided transcripts exist in Dataverse for the polling window. Agent graphs populate on the same cycle, independent of transcript availability.
{% endstep %}
{% endstepper %}

### Enabling Agent Graphs on an Existing Connection

Agent graphs shipped after this connector did, so if you connected before the feature existed, it stays off until you opt in — transcript ingestion keeps running unaffected either way.

<div data-with-frame="true"><figure><img src="/files/dCuvakQc8zcj0eoTVRKk" alt="" width="563"><figcaption></figcaption></figure></div>

{% stepper %}
{% step %}
**Open the connector's setup guide**

Go to **Connectors** → find the **Copilot Studio (Multi Environment)** card (already showing **Connected**) → open its setup guide.
{% endstep %}

{% step %}
**Check "Enable agent graphs"**

{% hint style="warning" %}
Checking the box alone isn't enough. Agent graphs need the `Power Platform API` > `ResourceQuery.Resources.Read` delegated permission (see **Required Permissions** above) — a scope your original sign-in never consented to if you connected before this feature existed. Until you reconnect, the recurring job silently skips agent-graph publishing; transcripts keep working normally in the meantime.
{% endhint %}
{% endstep %}

{% step %}
**Select Reconnect**

This re-runs the Microsoft sign-in from Part 2, forcing a fresh consent screen so the new permission is surfaced and granted. Akto stores the resulting refresh token — now carrying the new scope — replacing the old one.
{% endstep %}

{% step %}
**Confirm status still shows Connected**

Agent graphs begin populating on the same recurring schedule as transcripts, independent of transcript availability.
{% endstep %}
{% endstepper %}

## Troubleshooting

For common issues and solutions, refer to the [single environment documentation](/akto-atlas-agentic-ai-security-for-employee-endpoints/endpoints-discovery-agents/microsoft-copilot-studio#troubleshooting). The troubleshooting guide covers most issues that also apply to the multi-environment setup.

## Get Support

If you need assistance with the Multi Environment Copilot Studio connector:

* **In-app Chat** Use the chat widget in your Akto dashboard for instant support.
* **Email Support** Contact us at <support@akto.io>.


# AI Security Posture

The **AI Security Posture** dashboard gives you a high-level, executive view of AI security across your organization’s endpoints. It is designed to help you quickly understand risk exposure, AI usage, threat activity, and compliance gaps, without needing to dive into operational details.

With a single view, you can assess how AI agents, MCP servers, and LLMs are being used across your environment and where your organization is most vulnerable.

<div data-with-frame="true"><figure><img src="/files/9Q84KjfXgK5f27zJfnJ9" alt="" width="563"><figcaption></figcaption></figure></div>

## What You Get at a Glance

* A summary of your **AI-powered endpoint footprint**
* Visibility into **exploits and sensitive data risks**
* Insight into **how employees are using AI tools**
* A clear view of **top threats and guardrail effectiveness**
* Alignment with **key compliance frameworks**

## Key Capabilities

### 1. Executive Summary of AI Risk

You get a quick snapshot of your overall security posture:

* **Total Agentic Assets** → How widely AI is deployed across your endpoints
* **Successful Exploits** → Where attacks are succeeding
* **Sensitive Data Events** → Potential data exposure risks
* **Guardrail Score** → How effectively your protections are working

This allows you to **instantly gauge whether your AI security posture is improving or deteriorating**.

### 2. Visibility into AI Usage Across Endpoints

You can see how AI is actually being used in your organization:

* Which **AI agents and tools** (e.g., IDEs, CLIs) are most active
* Which **LLMs are accessed via browsers**, including potential shadow usage
* Which **MCP servers** are most commonly connected

This helps you answer critical questions like:

* *Where is AI being used the most?*
* *Are there unmanaged or risky tools in use?*

### 3. Guardrail Activity Overview

You get a categorised view of threats across your environment:

* Prompt injection (direct and indirect)
* Malicious components
* Policy violations
* Sensitive data detection

The trend view helps you:

* Spot **spikes in attacks**
* Understand **emerging risk patterns**
* Track how threats evolve over time

### 4. Guardrail Effectiveness

You can evaluate how well your AI protections are performing:

* See your **overall guardrail score**
* Identify the **most triggered security policies**
* Understand which risks are most common (e.g., prompt injection, malicious code)

This helps you decide:

* Where controls are working
* Where additional enforcement or tuning is needed

### 5. Data Protection Trends

You can track how effectively your organization is protecting sensitive data:

* Monitor trends in **data exposure attempts**
* Identify **recurring risks or weak points**
* Evaluate whether your **data protection posture is improving over ti**

### 6. Compliance Risk Overview

You can see how your AI usage aligns with major frameworks:

* FedRAMP
* MITRE ATLAS
* CIS Controls
* CMMC

Each framework shows the **percentage of controls at risk**, helping you:

* Quickly understand compliance exposure
* Prioritise remediation aligned with regulatory requirements

## Why This Matters for You

As an executive, you don’t need raw logs, you need **clarity and direction**.

This dashboard helps you:

* Understand your **organization’s AI risk posture in seconds**
* Identify **where attention is needed most**
* Track whether your **security investments are effective**
* Ensure your organization stays **secure and compliant as AI adoption grows**


# Agentic AI Discovery

The **AI Agent Activity** section provides visibility into AI agent–related data collected from Atlas connectors.

This section is intended for **IT and AI teams** to review and analyze AI agent activity using the views available below.

## Available Views

### **Collections**

Organise and review AI agent activity using logical groupings.

### [**Audit Data**](/akto-argus-agentic-ai-security-for-homegrown-ai/agentic-ai-discovery/concepts/audit-data)

Access audit records related to AI agent activity for review, compliance, and investigation.

### [**Sensitive Data**](/akto-argus-agentic-ai-security-for-homegrown-ai/agentic-ai-discovery/concepts/sensitive-data)

Review visibility into sensitive data associated with AI agent activity, based on collected data.

### [**Endpoint Shield Details**](/akto-atlas-agentic-ai-security-for-employee-endpoints/ai-agent-activity/view-endpoint-shield-details)

View Endpoint Shield details to understand endpoint-level protections related to observed activity.


# Agentic Assets

## Overview

The **Agentic Assets** in Akto Atlas provides an inventory of all agentic systems discovered in your environment. Each entry represents a distinct AI-driven system observed in live traffic.

This page is the starting point for navigating into agentic collections and individual components.

## What an Agentic Asset Represents

An **agentic asset** represents a logical agentic system such as an AI agent, MCP server, or LLM endpoint.\
Each asset groups all observed endpoints and execution contexts associated with that system.

<div data-with-frame="true"><figure><img src="/files/bvmUSXcCs1HSvQPBhojT" alt="" width="563"><figcaption></figcaption></figure></div>

### Agentic Assets Summary

The summary section provides a high-level view of discovered agentic systems.

1. Agentic assets: Total number of distinct agentic systems discovered
2. Total endpoints: Total number of endpoints across all agentic assets

### Agentic Assets Table

The table lists all discovered agentic assets.

| Column            | Description                                               |
| ----------------- | --------------------------------------------------------- |
| Agentic asset     | Identifier derived from hostname, provider, or agent name |
| Type              | Category of agentic system (AI Agent, MCP Server, LLM)    |
| Endpoints         | Number of endpoints associated with the asset             |
| Risk score        | Aggregated risk score across all associated components    |
| Sensitive data    | Indicates whether sensitive data was detected             |
| Last traffic seen | Time of most recent observed interaction                  |

{% hint style="success" %}
**Search and Filtering**

* Search: Filters assets by name
* Type filter: Filters assets by agentic system type
  {% endhint %}

{% hint style="info" %}
**Personal Account Badge**

Endpoints originating from personal accounts are flagged with a personal account badge on the Asset page, making them easier to identify at a glance.
{% endhint %}

## Navigating into an Agentic Asset

Selecting an agentic asset opens the **Agentic Asset Details** view.\
The Agentic Asset Details view provides endpoint-level visibility for the selected agentic asset.

<figure><img src="/files/ZR4FkzcWcgS9NiocKWDe" alt="" width="563"><figcaption></figcaption></figure>

### Endpoint List

The endpoint list displays all endpoints through which the agentic asset was observed.

| Column            | Description                                     |
| ----------------- | ----------------------------------------------- |
| Endpoint ID       | Unique identifier generated by Akto             |
| Username          | Execution identity associated with the endpoint |
| Risk score        | Risk score calculated for the endpoint          |
| Sensitive data    | Indicates sensitive data detection              |
| Last traffic seen | Timestamp of most recent activity               |
| Discovered        | Timestamp of initial discovery                  |

### Endpoint Expansion

Expanding an endpoint row reveals additional execution context associated with the endpoint, such as tool or client identifiers.

This expansion helps distinguish different execution environments using the same agentic asset.

{% hint style="info" %}
**Asset-Level Actions**

The Agentic Asset Details view includes asset-level controls.

* Explore Mode : Enables interactive exploration of the selected asset
* More Actions : Provides additional asset-level options
  * Export as CSV
    {% endhint %}

## What Next

After reviewing an agentic asset and its endpoints, you can drill down into individual [**agentic components**](/akto-argus-agentic-ai-security-for-homegrown-ai/agentic-ai-discovery/concepts/endpoints/agent-component) exposed by those endpoints.


# Take Actions on Collections

Actions on Agentic Asset Details Page

## Overview

Actions on the **Agentic Asset Details** page operate on **selected endpoints**.

{% hint style="warning" %}
You must select at least one endpoint before any action becomes available.
{% endhint %}

<div data-with-frame="true"><figure><img src="/files/6uQy2l34Ezx77TyT71i5" alt="" width="563"><figcaption></figcaption></figure></div>

## Available Actions

### 1. Export as CSV

Use this action to download endpoint-level data for external analysis.

#### Steps to export endpoints as CSV

{% stepper %}
{% step %}
Navigate to the Akto Atlas → **Agentic Asset** and **s**elect an **asset** from the list.
{% endstep %}

{% step %}
Select one or more endpoints using the checkbox column.
{% endstep %}

{% step %}
Click **More Actions** in the top-right corner, or use the action bar.
{% endstep %}

{% step %}
Select **Export as CSV**.
{% endstep %}

{% step %}
Download the generated CSV file.
{% endstep %}
{% endstepper %}

The exported file includes metadata such as endpoint ID, username, risk score, and discovery timestamps.

### 2. Deactivate Collection

Use this action to stop active monitoring for selected endpoints without removing historical data.

#### Steps to deactivate endpoints

{% stepper %}
{% step %}
Navigate to the Akto Atlas → **Agentic Asset** and **s**elect an **asset** from the list.
{% endstep %}

{% step %}
Select one or more endpoints.
{% endstep %}

{% step %}
Click **Deactivate collection** from the action bar.
{% endstep %}

{% step %}
Confirm the action.
{% endstep %}
{% endstepper %}

The selected endpoints remain visible but no longer process new agentic activity.

### 3. Delete Collection

Use this action to permanently remove endpoints from the agentic asset.

#### Steps to delete endpoints

{% stepper %}
{% step %}
Navigate to the Akto Atlas → **Agentic Asset** and **s**elect an **asset** from the list.
{% endstep %}

{% step %}
Select one or more endpoints.
{% endstep %}

{% step %}
Click **Delete collection** from the action bar.
{% endstep %}

{% step %}
Confirm deletion when prompted.
{% endstep %}
{% endstepper %}

Deleted endpoints are removed permanently and cannot be recovered.

### 4. Mark Collection as Out of Scanning Scope

Use this action to exclude endpoints from active scanning workflows.

#### Steps to mark endpoints out of scope

{% stepper %}
{% step %}
Navigate to the Akto Atlas → **Agentic Asset** and **s**elect an **asset** from the list.
{% endstep %}

{% step %}
Select one or more endpoints.
{% endstep %}

{% step %}
Click **Mark collection as out of scanning scope**.
{% endstep %}

{% step %}
Confirm the scope change.
{% endstep %}
{% endstepper %}

Out-of-scope endpoints remain visible but are excluded from scanning and evaluation.

### 5. Set Tags

Use this action to apply environment and custom tags to selected endpoints.

#### Steps to set tags on endpoints

{% stepper %}
{% step %}
Navigate to the Akto Atlas → **Agentic Asset** and **s**elect an **asset** from the list.
{% endstep %}

{% step %}
Select one or more endpoints.
{% endstep %}

{% step %}
Click **Set tags** in the action bar.
{% endstep %}

{% step %}
In the **Environment** section, select one of the following:

* **Staging**
* **Production**
  {% endstep %}

{% step %}
In the **Custom tags** section:

* Review existing tags
* Remove a tag using the delete icon, if needed

  <div data-with-frame="true"><figure><img src="/files/S0nq3E64YtlPvL0LlCAb" alt="" width="335"><figcaption></figcaption></figure></div>

{% endstep %}

{% step %}
Click **Add custom tag** to add a new tag in `key=value` format.

<figure><img src="/files/jJB8b3ZTsCtaZrSqiXpC" alt="" width="563"><figcaption></figcaption></figure>
{% endstep %}

{% step %}
Click **Reset** to clear selections made in the current session, if required.
{% endstep %}

{% step %}
Close the tag dialog to apply the changes.
{% endstep %}
{% endstepper %}

Tags are applied immediately to all selected endpoints.

{% hint style="info" %}
**Action Scopes**

* Actions apply only to the endpoints selected at the time of execution.
* Multiple endpoints can be updated in a single action.
* Agentic asset–level metadata remains unchanged unless endpoints are deleted.
  {% endhint %}

## What Next

After performing endpoint-level actions, you can continue analysis by:

* Review runtime behaviour and schemas in the [**Agentic Components**](/akto-argus-agentic-ai-security-for-homegrown-ai/agentic-ai-discovery/concepts/endpoints/agent-component)


# Agentic Components

## Overview

The **Agentic Components** page provides visibility into individual agentic operations exposed by an endpoint.\
Each component represents a discrete agentic capability, such as a tool invocation or MCP method allowing you to review exposure, authentication posture, and observed behavior at the component level.

## What an Agentic Component Present

An **agentic component** represents a single callable operation exposed by an agentic system.\
Examples include:

* Tool calls
* MCP methods
* Initialisation or listing operations

Each component is discovered from observed runtime traffic.

<div data-with-frame="true"><figure><img src="/files/cK3ZU5O7vlvgcBUPxzm1" alt="" width="563"><figcaption></figcaption></figure></div>

### Agentic Components List

The Agentic Components list displays all components discovered for a selected endpoint.

{% hint style="info" %}
**Component Filters**

You can filter components using predefined categories.

* All: Displays all discovered components
* New: Components recently discovered
* Sensitive: Components handling sensitive parameters
* High risk: Components with elevated risk scores
* No auth: Components exposed without authentication
* Shadow: Components not mapped to known specifications
* Zombie: Inactive components with no recent traffic
  {% endhint %}

### Agentic Components Table

| Column            | Description                                |
| ----------------- | ------------------------------------------ |
| Agentic component | Method and path of the operation           |
| Risk score        | Component-level risk assessment            |
| Hostname          | Host where the component was observed      |
| Access type       | Public or private accessibility            |
| Auth type         | Authentication status                      |
| Sensitive params  | Indicates sensitive parameters in requests |

Selecting a component opens the **Agentic Component Details** panel.

## Agentic Component Details

The Agentic Component Details panel opens alongside the components list and provides an in-depth view of the selected component.

<div data-with-frame="true"><figure><img src="/files/0oA7L5Dny9aUufJCy7aC" alt="" width="375"><figcaption></figcaption></figure></div>

### Component Metadata

The metadata section summarises discovery and exposure information.

| Field          | Description                                          |
| -------------- | ---------------------------------------------------- |
| Component name | Tool or method identifier                            |
| Endpoint       | Endpoint where the component was observed            |
| Access type    | Public or private                                    |
| Auth type      | Authentication status                                |
| First seen     | Initial discovery timestamp                          |
| Last seen      | Most recent observed activity                        |
| Change status  | Indicates whether the component behavior has changed |

### Values Tab

The **Values** tab shows observed runtime samples for the component.

#### Sample Values

* Request: Observed request method, headers, and payload
* Arguments: Input arguments passed to the component
* Transport: Protocol used for invocation
* Response: Observed response status and payload

Sample values reflect real traffic and help validate how the component is invoked in practice.

### Schema Tab

The **Schema** tab shows the inferred structure of requests and responses for the selected agentic component.\
The schema is generated from observed runtime traffic and represents the actual fields used during execution.

{% tabs %}
{% tab title="Request Schema" %}
The **Request** section lists all observed request fields.\
Fields are grouped by location and displayed using dot-notation to represent nested structures.

You can switch between **Header** and **Payload** to view fields from each part of the request.

**Example request fields**

* `id`
* `jsonrpc`
* `method`
* `params._meta.progressToken`
* `params.arguments.adults`
* `params.arguments.checkin`
  {% endtab %}

{% tab title="Response Schema" %}
The **Response** section lists fields observed in responses returned by the component.

You can switch between **Header** and **Payload** to view response-specific fields.

**Example response fields**

* `error.code`
* `error.message`
* `id`
  {% endtab %}
  {% endtabs %}

<div data-with-frame="true"><figure><img src="/files/OGTfPAq1ZVbaVUngOB6g" alt="" width="375"><figcaption></figcaption></figure></div>

{% hint style="info" %}
**Schema Behaviour Notes**

* The schema reflects only fields observed in live traffic.
* Fields appear when they are first detected.
  {% endhint %}

## What Next

The **Agentic Components** view is the deepest level of agentic inspection in Akto ATLAS.\
After reviewing component behaviour, you can return to:

* [**Agentic Assets**](/akto-atlas-agentic-ai-security-for-employee-endpoints/ai-agent-activity/agentic-assets) to review other agentic systems
* [**Sensitive Data**](/akto-argus-agentic-ai-security-for-homegrown-ai/agentic-ai-discovery/concepts/sensitive-data) and [**Audit Data**](/akto-argus-agentic-ai-security-for-homegrown-ai/agentic-ai-discovery/concepts/audit-data) views to correlate findings


# Take View Level Actions

More Actions on Agentic Components Page

## Overview

The **More Actions** menu in the top-right corner provides actions that operate on the **current agentic components view**.

<div data-with-frame="true"><figure><img src="/files/PEwi9S0rX8dXNN9vJwUv" alt="" width="563"><figcaption></figcaption></figure></div>

{% hint style="warning" %}
These actions do **not** require selecting individual components unless explicitly stated.
{% endhint %}

## Navigating to Agentic Components

To access **Agentic Components** in Akto ATLAS, follow these steps:

{% stepper %}
{% step %}
Go to **Akto Atlas**.
{% endstep %}

{% step %}
Navigate to **Agentic Assets**.
{% endstep %}

{% step %}
Select an **agentic asset** from the list.
{% endstep %}

{% step %}
In the Agentic Asset Details view, select an **endpoint collection**.
{% endstep %}

{% step %}
The **Agentic Components** list for the selected collection is displayed.
{% endstep %}
{% endstepper %}

## How to Switch Views

### Display Graph View

Use this action to visualise relationships between agentic components in a graph format.

The graph view helps you understand how agentic components are connected and invoked relative to each other.

#### Steps to display the graph view

{% stepper %}
{% step %}
[Navigate to the **Agentic Components** page.](#navigating-to-agentic-components)
{% endstep %}

{% step %}
Click **More Actions** in the top-right corner.
{% endstep %}

{% step %}
Select **Display graph view**.
{% endstep %}
{% endstepper %}

Akto switches the current view from a table layout to a graph-based visualization

## Re-Compute

### Refresh

Use this action to reload the agentic components list with the most recent state.

#### Steps to refresh the view

{% stepper %}
{% step %}
[Navigate to the **Agentic Components** page.](#navigating-to-agentic-components)
{% endstep %}

{% step %}
Click **More Actions**.
{% endstep %}

{% step %}
Select **Refresh**.
{% endstep %}
{% endstepper %}

The page reloads without modifying component data.

### Upload Files

### Upload OpenAPI File

Use this action to upload an OpenAPI specification to align discovered components with a known contract.

#### Steps to upload an OpenAPI file

{% stepper %}
{% step %}
[Navigate to the **Agentic Components** page.](#navigating-to-agentic-components)
{% endstep %}

{% step %}
Click **More Actions**.
{% endstep %}

{% step %}
Select **Upload OpenAPI file**.
{% endstep %}

{% step %}
Upload a valid OpenAPI specification file.
{% endstep %}
{% endstepper %}

The uploaded specification is used to enrich component definitions and structure.

## Export The Collection

### Export as OpenAPI Spec

Use this action to export the current agentic components view as an OpenAPI specification.

#### Steps to export as OpenAPI

{% stepper %}
{% step %}
Click **More Actions**.
{% endstep %}

{% step %}
Select **OpenAPI spec**.
{% endstep %}
{% endstepper %}

Akto generates and downloads an OpenAPI file based on discovered components.

### Export as Postman format

Use this action to export agentic components in Postman format.

#### Steps to export as Postman collection

{% stepper %}
{% step %}
Click **More Actions**.
{% endstep %}

{% step %}
Select **Postman**.
{% endstep %}
{% endstepper %}

The exported collection can be imported into Postman for testing and exploration.

### Export as CSV

Use this action to export the agentic components list as a CSV file.

#### Steps to export as CSV

{% stepper %}
{% step %}
[Navigate to the **Agentic Components** page.](#navigating-to-agentic-components)
{% endstep %}

{% step %}
Click **More Actions**.
{% endstep %}

{% step %}
Select **CSV**.
{% endstep %}
{% endstepper %}

The CSV file contains component-level metadata from the current view.

## Other Actions

### Show Workflow Tests

Use this action to view or create workflow tests associated with agentic components.

#### Steps to access workflow tests

{% stepper %}
{% step %}
[Navigate to the **Agentic Components** page.](#navigating-to-agentic-components)
{% endstep %}

{% step %}
Click **More Actions** in the top-right corner.
{% endstep %}

{% step %}
Select **Show workflow tests**.
{% endstep %}

{% step %}
You are redirected to the **Workflow Tests** page.

From the Workflow Tests page, you can:

* Select an existing workflow test
* Create a new workflow test for the selected component

  <div data-with-frame="true"><figure><img src="/files/PZ10zRI7fEqe0evsj20D" alt="" width="563"><figcaption></figcaption></figure></div>

{% endstep %}
{% endstepper %}

Workflow tests help validate multi-step agentic behaviour across components.

### Redact

Use this action to remove existing sample payload values and redact all future payload data for the current collection.

#### Steps to enable redaction

{% stepper %}
{% step %}
Click **More Actions**.
{% endstep %}

{% step %}
Select **Redact**.
{% endstep %}

{% step %}
Review the confirmation note displayed in the dialog.

<div data-with-frame="true"><figure><img src="/files/1RoGJnrU1qcJemkBl9W3" alt="" width="563"><figcaption></figcaption></figure></div>
{% endstep %}

{% step %}
Click **Enable** to confirm.
{% endstep %}
{% endstepper %}

{% hint style="info" %}
**Redaction behavior**

When redaction is enabled:

* Existing sample payload values for the collection are deleted
* All future payload values for the collection are redacted
* Agentic Inventory data remains unchanged
* Sensitive data detection remains intact

Only sample payload values are affected by this action
{% endhint %}


# Take Bulk Actions

## Overview

Actions on the **Agentic Components** page operate on **selected agentic components**.

{% hint style="warning" %}
You must select at least one endpoint before any action becomes available.
{% endhint %}

<div data-with-frame="true"><figure><img src="/files/4pgJ8HspOXBLP4FDZgfx" alt="" width="563"><figcaption></figcaption></figure></div>

## Navigating to Agentic Components

To access **Agentic Components** in Akto ATLAS, follow these steps:

{% stepper %}
{% step %}
Go to **Akto Atlas**.
{% endstep %}

{% step %}
Navigate to **Agentic Assets**.
{% endstep %}

{% step %}
Select an **agentic asset** from the list.
{% endstep %}

{% step %}
In the Agentic Asset Details view, select an **endpoint collection**.
{% endstep %}

{% step %}
The **Agentic Components** list for the selected collection is displayed.
{% endstep %}
{% endstepper %}

## Available Actions

### Export as CSV

Use this action to download agentic component data for external analysis or reporting.

#### Steps to export agentic components as CSV

{% stepper %}
{% step %}
Navigate to the **Agentic Components** list under an endpoint.
{% endstep %}

{% step %}
Select one or more agentic components using the checkboxes.
{% endstep %}

{% step %}
Click **Export as CSV** from the action bar.
{% endstep %}

{% step %}
Download the generated CSV file.
{% endstep %}
{% endstepper %}

The exported file includes component identifiers, access type, authentication status, and risk-related metadata.

### Add to Agentic Component Group

Use this action to group multiple agentic components together for management and analysis.

#### Steps to add components to a group

{% stepper %}
{% step %}
Navigate to the **Agentic Components** list.
{% endstep %}

{% step %}
Select one or more agentic components.
{% endstep %}

{% step %}
Click **Add to Agentic Component group**.
{% endstep %}

{% step %}
Choose an existing group or create a new group.

<div data-with-frame="true"><figure><img src="/files/Vi3To7eLms0zZdwetM6E" alt="" width="563"><figcaption></figcaption></figure></div>
{% endstep %}

{% step %}
Confirm the action.
{% endstep %}
{% endstepper %}

The selected components are added to the chosen group.

### De-merge Agentic Components

Use this action to separate previously grouped agentic components.

#### Steps to de-merge agentic components

{% stepper %}
{% step %}
Navigate to the **Agentic Components** list.
{% endstep %}

{% step %}
Select one or more grouped agentic components.
{% endstep %}

{% step %}
Click **De-merge Agentic Components**.
{% endstep %}

{% step %}
Confirm the de-merge action.
{% endstep %}
{% endstepper %}

Each selected component becomes an independent agentic component again.

### Delete Agentic Components

Use this action to permanently remove agentic components from the asset.

#### Steps to delete agentic components

{% stepper %}
{% step %}
Navigate to the **Agentic Components** list.
{% endstep %}

{% step %}
Select one or more agentic components.
{% endstep %}

{% step %}
Click **Delete Agentic Components**.
{% endstep %}

{% step %}
Confirm deletion when prompted.
{% endstep %}
{% endstepper %}

Deleted components are removed permanently and cannot be recovered.

## What Next

After performing component-level actions, you can continue analysis by:

* Opening an [individual component to review **Values** and **Schema**](/akto-argus-agentic-ai-security-for-homegrown-ai/agentic-ai-discovery/concepts/endpoints/agent-component#how-to-view-agent-components)
* Returning to [**Agentic Assets**](/akto-atlas-agentic-ai-security-for-employee-endpoints/ai-agent-activity/agentic-assets) to manage other agentic systems


# Endpoint Shield Details

## Overview

The Endpoint Shield page shows you every protected endpoint and gives you a clear view of agent activity, deployment status, and shielded MCP servers.

## Accessing Endpoint Shield

Navigate to **Agentic Discovery ->** **Endpoint Shield** in the left sidebar to view your complete agent inventory across all employee devices.

## Agent List

The Agent List displays all endpoints where the shield is active. Each row contains:

| Column             | Description                                                          |
| ------------------ | -------------------------------------------------------------------- |
| **Agent ID**       | Unique identifier of the shielded agent running on the endpoint.     |
| **Device ID**      | Device identifier of the machine where the agent is deployed.        |
| **Username**       | User associated with the device on which the agent is installed.     |
| **Last Heartbeat** | Timestamp of the most recent health check sent by the agent.         |
| **Last Deployed**  | Timestamp showing when the latest shield configuration was deployed. |

<figure><img src="/files/qpFzkFdkiOjjEtTnUBCJ" alt="" width="563"><figcaption></figcaption></figure>

You can select any Agent ID to view deeper information.

## Agent Details Drilldown

When you click an **Agent ID**, you see two tabs that help you understand what is running on that endpoint.

### User Analysis

The **User Analysis** helps you understand how a specific user is interacting with an AI agent on their endpoint. It gives you deeper visibility into user behaviour so you can quickly identify unusual activity and assess potential risks.

Here, you can:

* **View User Analysis Summary**\
  Get a high-level, AI-generated summary of how the user is leveraging the agent. This includes the tools being used (e.g., MCP servers), the nature of tasks performed, and an inferred user profile based on activity patterns.
* **Track Token Usage**\
  See the total **Input Tokens** and **Output Tokens**, helping you understand the scale and intensity of agent usage.
* **Identify Dominant Topics**\
  View key areas the user is working on (e.g., automation, scraping, testing). This helps you quickly understand the primary use cases of the agent.
* **Monitor Emerging Risk Signals**\
  The **Queries Flagged** section (when available) highlights potentially risky or policy-violating interactions for further investigation.

<div data-with-frame="true"><figure><img src="/files/e6apwIn2CO7SeeM547TB" alt="" width="563"><figcaption></figcaption></figure></div>

### MCP Servers

This tab shows you the MCP servers associated with the selected agent. You can review server details and the specific endpoints or commands that are shielded on that device.

<div data-with-frame="true"><figure><img src="/files/RRmzjrzcQQ7DyqhGGgIV" alt="" width="563"><figcaption></figcaption></figure></div>

### Agent Logs

This tab provides a chronological log of the agent’s activity. You can track what the agent executed, when it checked in, and how enforcement behaved on that endpoint.

<div data-with-frame="true"><figure><img src="/files/6gO86ZSE0yBjcW1QOSiC" alt="" width="563"><figcaption></figcaption></figure></div>

## Learn More

To understand how Endpoint Shield works at a conceptual level, including architecture, workflow, and protection mechanics, refer to the [**AI Endpoint Shield**](https://docs.akto.io/ai-endpoint-shield)**.**


# Agentic Skills

## Overview

Agentic Skills are callable capabilities exposed by AI agents, each skill represents an action your agents can perform, mapped to underlying APIs or system operations. As skills become a primary attack vector for credential theft, prompt injection, and data exfiltration, understanding and securing your skill footprint is critical.

Akto discovers skills across your entire environment, analyzes each skill file for security risks, and enforces controls to prevent malicious skill execution.

You can view skills by navigating through the Akto Atlas interface:

* **Akto Atlas → Agentic AI Discovery → Agentic Assets → Skills tab**

<div data-with-frame="true"><figure><img src="/files/B5OcgoMQ4FpVBwl2zXLc" alt="" width="563"><figcaption></figcaption></figure></div>

The Skills table shows endpoint coverage, sensitive data indicators, and last observed activity for each skill. The visibility into usage patterns helps you make informed enforcement decisions.

{% hint style="info" %}
**Skill Discovery Updates**

Akto continuously identifies skills configured in your agents.

**New skills are discovered every 6 hours.**\
Regular updates keep your inventory aligned with agent configuration changes.
{% endhint %}

## Discovery Sources

Akto discovers skill files across every surface where AI agents are configured and run. Discovery covers:

* **Local developer workstations** — skill files used by IDE-based agents such as Cursor, VS Code, and Claude Code
* **Source code repositories** — skill files committed to GitHub, GitLab, and Bitbucket, including nested directories such as `.claude/skills/`
* **CI/CD pipelines** — skill files present in pipeline configurations and build environments
* **MCP servers and AI agent runtimes** — skills loaded and exposed by locally running or networked MCP servers
* **Local developer skill directories** — skills loaded from developer-managed local paths outside of version control
* **Third-party registries and marketplaces** — skills pulled in from external sources or community registries

## Skill Inventory

Akto generates and maintains a continuous inventory of all skills currently in use across your environment. The inventory captures skill source, hosting location, associated agents, and last observed activity — giving you a complete, up-to-date picture of your skill footprint.

## Malicious Skill Detection

When a skill is discovered, Akto analyzes its content for security risks. Each skill is evaluated and assigned a risk score, helping you quickly surface high-risk capabilities and take action before they are exploited. Risk scores are visible across the **Skills**, **Users & Devices**, and **Agentic Assets** views.

Akto detects risks across three risk categories:

* **Sensitive Data Exposure** — hardcoded credentials and sensitive identifiers in skill content
* **Malicious Instructions & Prompt Injection** — injected or adversarial directives designed to override agent behavior
* **Embedded Code & Script Risks** — unsafe execution logic, reverse shells, and dependency vulnerabilities

Analysis runs at discovery time and on every subsequent change detected. For detailed threat context and examples of each risk category, see [OWASP Agentic Skills Top 10](/akto-atlas-agentic-ai-security-for-employee-endpoints/ai-agent-activity/agentic-skills/owasp-agentic-skills-top-10).

{% hint style="info" %}
**Runtime Enforcement**

At runtime, if an injected instruction surfaces during execution, the **PromptInjection Guardrail** in Agent Guard enforces blocking. See [Agent Guard → PromptInjection Guardrail](/agentic-guardrails/concepts/agent-guard) for detection logic and configuration.
{% endhint %}

***

## Auditing Skills

Once you identify skills that are malicious, over-privileged, or pose a risk to your environment, Akto gives you fine-grained controls to block them at the device or agent level.

### Block Skills by Device

You can block a skill directly from the Skills view by selecting the devices where enforcement should apply. Device selection automatically includes all agents running on the selected endpoints.

This approach helps you restrict a capability only where required while allowing normal operation elsewhere.

**Steps to Block a Skill for Selected Devices**

{% stepper %}
{% step %}
Navigate the **Skills** tab under Agentic Assets.
{% endstep %}

{% step %}
Select the skill that you want to restrict and open its skill details view.
{% endstep %}

{% step %}
Select the endpoint IDs (devices) where you want to block the skill.

<div data-with-frame="true"><figure><img src="/files/Oyn1SmeHZySW3NxTcMf1" alt="" width="563"><figcaption></figcaption></figure></div>
{% endstep %}

{% step %}
Click **Block skill** from the action bar at the bottom.
{% endstep %}

{% step %}
Confirm the blocking action.
{% endstep %}
{% endstepper %}

**Expected Result After Blocking**

Akto prevents execution of the selected skill on all chosen devices.\
All agents running on the selected endpoint IDs lose access to the blocked skill.\
Agents on other devices continue to use the skill without interruption.

### Block Skills by Agent

You can block skills for a specific agent within a specific device using the Users and Devices view. Agent-level enforcement allows you to apply tighter controls without affecting other agents on the same device.

This approach supports environments where different agents require different access levels.

**Steps to Block Skills for a Specific Agent**

{% stepper %}
{% step %}
Navigate to **Users and Devices**.
{% endstep %}

{% step %}
Select the device where you want to enforce the restriction.
{% endstep %}

{% step %}
Open the list of agents associated with the selected device and select the agent.

<div data-with-frame="true"><figure><img src="/files/X5z9mQ62S0n2qODJSTVg" alt="" width="563"><figcaption></figcaption></figure></div>
{% endstep %}

{% step %}
Choose the skills that you want to block.

<div data-with-frame="true"><figure><img src="/files/2Vz0KjOXSar9Fi2H4Vag" alt="" width="563"><figcaption></figcaption></figure></div>
{% endstep %}

{% step %}
Click **Block Skills** from the action bar.
{% endstep %}

{% step %}
Confirm the blocking action.
{% endstep %}
{% endstepper %}

**Expected Result After Blocking**

Akto blocks execution of the selected skills only for the chosen agent on the selected device.\
Other agents on the same device retain access unless explicitly restricted.\
Agents on other devices continue to operate without any impact.

***

## Akto Guardrails

Akto monitors agent behavior at runtime to detect dangerous actions triggered by skill execution and enforce policy-based restrictions in real time through agentic guardrails.

### What Akto Monitors

* **Agent tool usage** — file access, shell commands, and network calls initiated by skill execution
* **Skill-triggered system actions** — system-level operations spawned directly by a skill
* **Data movement** — files, environment variables, or sensitive content leaving the endpoint
* **Outbound network activity** — destinations contacted during or after skill execution

### What Akto Detects

* Data exfiltration: environment variable leakage, credential forwarding, or file uploads to external destinations
* Unauthorized filesystem activity: access to sensitive paths such as `.env` files or credential stores
* Anomalous tool invocation patterns: unusual sequences or frequencies of tool calls that indicate abuse
* Pre-authorized dangerous tools configured within skill definitions

### Enforcement

Akto enforces controls in real time without requiring manual intervention:

* **Block dangerous commands** immediately upon detection
* **Restrict filesystem access** to sensitive paths based on policy
* **Limit outbound destinations** to approved endpoints only

**Integrations**

* **EDR / XDR platforms** — Akto correlates skill-triggered events with endpoint telemetry for unified threat visibility
* **Runtime agent gateways and proxies** — Akto integrates with agent middleware to enforce controls at the execution layer

***

## Governance & Compliance

### Skill Allowlists & Approval Workflows

Akto gives you controls to govern which skills can be introduced and activated across your environment.

* Maintain **approved skill registries** and allowlists to define which skills are permitted
* Require **approval workflows** before new skills can be introduced to a team or project
* Enforce **code review gates** so skill files go through review before activation
* Apply **policy gating** to prevent skills from being activated without explicit authorization

### Usage Tracking & Compliance Reporting

* Track skill usage across teams, projects, and devices
* Generate compliance reports covering skill inventory and usage history
* Align skill governance with security and regulatory requirements

***

## Detection Coverage

Akto measures detection effectiveness across four key risk categories for skills:

| Risk Category            | What Is Measured                                                                                         |
| ------------------------ | -------------------------------------------------------------------------------------------------------- |
| **Prompt Injection**     | Detection rate for injected instructions within skill files                                              |
| **Malicious Scripts**    | Detection rate for dangerous execution logic embedded in or linked from skills                           |
| **Credential Leakage**   | Detection rate for hardcoded secrets and sensitive identifiers in skill content                          |
| **Supply Chain Attacks** | Detection rate for compromised or malicious skills introduced via third-party registries or repositories |

{% hint style="info" %}
Detection rates are measured against a benchmark set of known-malicious skill samples covering each risk category. Methodology details are available on request.
{% endhint %}

***

## Continue with Guardrails

Agentic Skills shows you what your agents can do. Guardrails control what they are allowed to do.

You can:

* Map skills to guardrail policies
* Enforce restrictions on sensitive actions
* Monitor violations

Refer to:

* [Agentic Guardrails](/agentic-guardrails/overview)
* [Guardrail Policies](/agentic-guardrails/concepts/threat-policy)


# OWASP Agentic Skills Top 10

## Overview

The OWASP Agentic Skills Top 10 is a community-driven framework that identifies the most critical security risks associated with AI agent skills. Skills are callable capabilities exposed by AI agents - and as their adoption grows, so does their attack surface.

This page maps each OWASP risk to how Akto detects and addresses it across your environment.

## AST01: Malicious Skills

**Severity: Critical**

Rogue skills designed to steal data or execute unauthorized actions. The ClawHavoc campaign (February 2026) identified 1,184 confirmed malicious skills distributed through public registries.

**How Akto Addresses It**

**Detection**

* AI Endpoint Shield scans every discovered skill file using LLM-based analysis at discovery time and on every subsequent change, checking for malicious patterns including credential theft, data exfiltration, prompt injection, and system modification
* MCP tools exposed by MCP servers are evaluated using LLM scoring to identify malicious intent
* Skills discovered across all sources - workstations, repositories, CI/CD pipelines, MCP servers, local directories, and third-party registries - are all subject to the same analysis regardless of origin

**Risk Scoring & Visibility**

* Each skill is assigned a risk score based on findings, surfaced across the **Skills**, **Users & Devices**, and **Agentic Assets** views
* Findings are recorded in the audit database and available for review, reporting, and SOC forwarding

## AST02: Supply Chain Compromise

**Severity: Critical**

Attacks on skill distribution channels - typosquatting, backdoored packages, compromised publishers, or malicious updates introduced before a skill reaches the developer.\
**Example:** Claude Code CVE-2025-59536.

**How Akto Addresses It**

**Inventory & Tracking**

* Akto generates and maintains a full inventory of installed skills and MCP components across your environment, capturing skill source, hosting location, associated agents, and last observed activity
* AI Endpoint Shield continuously tracks which skills and MCP servers are present and active on each endpoint, giving you visibility into what entered your environment and when
* The inventory provides an audit trail that makes it possible to trace exactly when a component appeared and which agents were exposed

**Detection**

* Skills from all sources - including third-party registries and community marketplaces - are subject to full LLM-based analysis regardless of where they originated
* Any skill appearing from an unrecognized publisher or registry is flagged for review and included in the risk scoring pipeline

## AST03: Over-Privileged Skills

**Severity: High**

Skills request more permissions than their function requires. Research has identified hundreds of skills unnecessarily accessing credentials and sensitive files through overly broad permission declarations.

**How Akto Addresses It**

**Detection**

* Akto detects dangerous permission configurations including unrestricted shell access, permission bypass flags, and wildcard filesystem or network access declared in skill definitions
* Weakened isolation settings that expand a skill's access beyond its intended scope are flagged during analysis
* Skills with excessive or dangerous permission declarations receive elevated risk scores, surfaced across the Skills and Agentic Assets views for immediate prioritization

**Enforcement**

* Tool-call approval policies ensure privileged actions require explicit authorization before execution
* Skills identified as over-privileged can be blocked at the device or agent level without affecting other skills in your environment

## AST04: Insecure Metadata

**Severity: High**

Unsafe deserialization of skill configuration files creates opportunities for code injection and parser exploitation. Attackers also weaponize skill manifests through typosquatting and vendor impersonation - such as fake publisher accounts mimicking trusted organizations - delivering malicious payloads via YAML structures inside skill files.

**How Akto Addresses It**

**Detection**

* Akto's LLM-based skill analysis inspects skill configuration files for suspicious payloads and malicious content embedded within YAML and Markdown manifests
* Akto scores each tool based on how well its name and description match its actual declared behavior - a low match score surfaces skills where metadata has been manipulated to conceal malicious intent
* Both skills and MCP tools are evaluated for impersonation signals, flagging components where stated identity cannot be corroborated by declared behavior

## AST05: Untrusted External Instructions

**Severity: High**

Skills that fetch instructions from remote URLs introduce a runtime supply chain risk - the skill file itself may appear safe, but the behavior it loads at runtime can be changed by an attacker at any time after installation. Anthropic's own documentation warns that fetched URLs may contain malicious instructions. A proof-of-concept demonstrated potential takeover of 26,000 agents through this vector.

**How Akto Addresses It**

**Detection**

* Akto's LLM-based skill analysis inspects skill files for instructions that reference or delegate behavior to remote-controlled endpoints
* Skills that pull content from external URLs at runtime are flagged as high-risk regardless of what is currently at those URLs, since an attacker can change that content at any time after installation
* Flagged skills surface in the **Skills** view with elevated risk scores for immediate review and action

## AST06: Weak Isolation

**Severity: High**

Skills execute without sufficient separation from the host environment. Host-mode execution gives a compromised skill direct access to the underlying system.\
**Example:** OpenClaw host-mode execution.

**How Akto Addresses It**

**Detection**

* Akto detects isolation weaknesses in skill configurations including disabled sandbox settings, permissions that allow unsandboxed command execution, excluded command restrictions, filesystem and network scope expansion, and weakened nested sandbox modes
* Isolation posture is assessed at discovery time and factored directly into the skill's risk score

**Enforcement**

* Skills with identified isolation weaknesses can be blocked at the device or agent level, preventing execution until the configuration is remediated
* Runtime monitoring enforces filesystem and network access restrictions, providing a defense-in-depth layer even when host-level isolation is not configured

## AST07: Update Drift

**Severity: Medium**

Skills drift from their approved versions due to silent updates, patch lag, or failed updates. An attacker who gains access to a registry can push a compromised version of a previously trusted skill without triggering any visible change.\
**Example:** ClawJacked CVE-2026-28363.

**How Akto Addresses It**

**Continuous Revalidation**

* Skills are periodically revalidated approximately every 6 hours - newly malicious behavior introduced through an update is identified at the next revalidation cycle
* MCP tool definitions are revalidated continuously as tool list responses are observed, providing near-real-time coverage as definitions change
* If a skill passes initial analysis but is later modified to include malicious content, the change is caught at revalidation and the skill's risk score is updated accordingly

**Visibility**

* Revalidation findings appear in the same **Skills** and **Agentic Assets** views as initial discovery findings, giving your team a consistent place to track changes in skill risk posture over time.

## AST08: Poor Scanning

**Severity: Medium**

Security scanners that rely on pattern matching fail to detect behavioral and semantic threats. Attackers bypass detection through obfuscation, natural-language variation, and splitting malicious directives across multiple fields.

**How Akto Addresses It**

Akto applies multiple detection layers to address the limitations of single-method scanning:

**Static Analysis**

* Static policy rules covering 500+ threat patterns catch known malicious signatures and configurations
* Sensitive data and secret detection identifies credentials and internal identifiers embedded in skill content
* Prompt injection detection flags adversarial instructions targeting agent behavior

**Semantic Analysis**

* LLM-based semantic analysis evaluates natural-language instructions that evade rule-based detection through obfuscation, variation, or splitting across fields
* Component-level analysis for skills and MCP tools correlates findings across the skill file and its associated metadata

**Custom Coverage**

* Custom guardrails configurable to your environment extend detection coverage to organization-specific threat patterns

## AST09: No Governance

**Severity: Medium**

Organizations lack skill inventories, approval workflows, and audit logging. Without governance controls, security teams have no visibility into which skills are in use, who introduced them, or whether they have been reviewed. Research identified 53,000+ exposed instances with no security monitoring.

**How Akto Addresses It**

**Inventory & Audit**

* Akto generates and maintains a continuous inventory of all skills in use across your environment, capturing skill source, hosting location, associated agents, and last observed activity
* Review outcomes for each discovered component are tracked in the audit database and available for compliance reporting

**Governance Controls**

* Audit policies enforce tool-call approvals, requiring explicit authorization for sensitive actions
* Approved component lists restrict which skills and MCP servers can be active in your environment
* Approval workflows, code review gates, and policy gating govern which skills can be introduced and activated across teams and projects

**SOC Visibility**

* Threat events are forwarded to your SOC for continuous monitoring and response
* Compliance reports covering skill inventory and usage history are available for audit purposes

## AST10: Cross-Platform Reuse

**Severity: Medium**

Malicious skills are ported across ecosystems - Claude Code, Cursor, VS Code, MCP servers - to maximize reach. Metadata loss during conversion weakens the security controls applied to the original skill.\
**Example:** ClawHub to skills.sh migrations.

**How Akto Addresses It**

**Cross-Platform Discovery**

* Akto discovers and analyzes skill files across all major platforms and runtimes - Claude Code, Cursor, VS Code, MCP servers, CI/CD pipelines, and third-party registries - from a single deployment
* Every skill is evaluated independently regardless of its origin platform, ensuring that skills ported from another ecosystem are fully re-analyzed upon discovery

**Unified Risk Visibility**

* Risk scores and findings are consistent regardless of the platform a skill was discovered on, preventing coverage gaps that arise when security controls are applied per-platform rather than per-skill
* The unified inventory means that the same skill appearing under different names or formats across platforms is visible and accounted for in one place


# Audit Data - Akto Atlas

## Overview

The **Audit Data** page in **Akto Atlas** shows you all MCP servers your employee's agents interact with and lets you **control how those servers and their capabilities are used**.

From here, you can:

* See which MCP servers are being accessed
* Inspect the tools, resources, and prompts exposed by each server
* Approve, block, or conditionally allow access

## Explore Audit Data

The main page gives you a server-level view of activity in Akto Atlas. Each row represents an MCP server and the agent that access it.

<div data-with-frame="true"><figure><img src="/files/RyleMKCOK2CPLrhO20hq" alt="" width="563"><figcaption></figcaption></figure></div>

#### You will see:

<table><thead><tr><th width="147.92578125">Column</th><th>What it tells you</th></tr></thead><tbody><tr><td><strong>MCP Server</strong></td><td>The MCP server (domain or endpoint) being accessed</td></tr><tr><td><strong>AI Agent</strong></td><td>The agent accessing the server (e.g. VSCode, Claude, Cursor)</td></tr><tr><td><strong>Last Detected</strong></td><td>When the server was first observed in Atlas</td></tr><tr><td><strong>Updated</strong></td><td>Most recent activity for this server</td></tr><tr><td><strong>Access Type</strong></td><td>Type of access (e.g. public, private, third-party)</td></tr><tr><td><strong>Remarks</strong></td><td>Current decision: <strong>Approved</strong>, <strong>Rejected</strong>, or <strong>Conditionally Allowed</strong></td></tr><tr><td><strong>Marked By</strong></td><td>Who last updated the decision</td></tr></tbody></table>

## View Server Details

Click on any MCP server to view its details, including all tools, resources, and prompts it exposes.

<div data-with-frame="true"><figure><img src="/files/25JJ6LofRBkm2GDSlYx7" alt="" width="563"><figcaption></figcaption></figure></div>

### Capabilities

Each MCP server exposes capabilities used by agents. For each capability, you can see:

<table><thead><tr><th width="224.94921875">Field</th><th>What it tells you</th></tr></thead><tbody><tr><td><strong>Type</strong></td><td>Whether it's a Tool, Resource, or Prompt</td></tr><tr><td><strong>Risk Analysis</strong></td><td>Any risk signals like <strong>Privileged Access</strong> or <strong>Malicious</strong></td></tr><tr><td><strong>Name</strong></td><td>The identifier of the capability</td></tr><tr><td><strong>Access Types</strong></td><td>Whether the capability is public, private, or third-party</td></tr><tr><td><strong>Remarks</strong></td><td>Whether it's <strong>Approved</strong>, <strong>Rejected</strong>, or <strong>Conditionally Allowed</strong></td></tr><tr><td><strong>Marked By</strong></td><td>Who made the decision</td></tr></tbody></table>

### Access Control Options

You can set access decisions at both the server level (via the Action dropdown) and the individual tool level. Use the following options:

<div data-with-frame="true"><figure><img src="/files/xofphNMV5ApmYPfjuorz" alt="" width="563"><figcaption></figcaption></figure></div>

#### **Allow**

Grant full access to the MCP server or specific tool. The agent can use all capabilities without restrictions.

#### **Block**

Deny access entirely. The agent cannot interact with this server or tool.

#### Setting Conditional Approval

If you choose **Conditionally Allow**, you can set clear boundaries for how the component is allowed to operate. The following components can be set:

{% tabs %}
{% tab title="Time Duration Allowed" %}
You define how long the component can remain active. Once the duration expires, Akto automatically blocks it.

<figure><img src="/files/APWBNfkFhGC3mh6IYUCI" alt="" width="563"><figcaption></figcaption></figure>
{% endtab %}

{% tab title="IPs Allowed" %}
You control where the component can be used from. You can allow:

* All IPs
* Specific IPs
* An IP range (CIDR)

<figure><img src="/files/yUBw2lemN61KeRwiMJC2" alt="" width="563"><figcaption></figcaption></figure>
{% endtab %}

{% tab title="Endpoints Allowed" %}
You choose which endpoints the component can access.

<figure><img src="/files/aIs0tgWoA45W324EVK5a" alt="" width="563"><figcaption></figcaption></figure>
{% endtab %}

{% tab title="Justification" %}
You add a mandatory justification so your team understands why you approved the component with conditions.

<figure><img src="/files/5QdmyOZUNeAz1fn1wpve" alt="" width="563"><figcaption></figcaption></figure>
{% endtab %}
{% endtabs %}

After configuring everything, click **Approve with Conditions** to enforce the restricted access.

### Action Dropdown

From the **Action** dropdown at the top of the server details view, you can make server-level decisions:

* [**Allow this server**](#allow) – Grant full access to all capabilities
* [**Block this server**](#block) – Deny all access immediately for the particular AI Agent
* **Block for all agents** – Block this server across all agents in your organisation
* [**Conditionally allow this server**](#setting-conditional-approval) – Grant access with defined restrictions
* **Add to MCP registry** – Register the server in your organisation's MCP registry

  <div data-with-frame="true"><figure><img src="/files/MgjMPW0ECsdpUViIiajH" alt="" width="563"><figcaption></figcaption></figure></div>

{% hint style="info" %}
To use **Add to MCP registry**, you must first set up an MCP registry integration.

* Go to **Settings → Integrations → MCP Registry** to configure one.
  {% endhint %}


# Users and Devices

## Overview

The User and Devices page gives you a complete inventory of all users and devices discovered by Akto Atlas in your organisation. It shows who is using AI agents, which MCP servers they connect to, and what agentic assets are associated with each user.

From here, you can:

* See all discovered users and devices across your environment
* Assign teams and roles to users for better context and filtering
* Click into any user to inspect the endpoints their agents are accessing

Navigate to: **Akto Atlas → Agentic AI Discovery → Users and Devices**

## Explore the List

The page opens on the **Users** tab by default. Switch to the **Devices** tab to see the device-level inventory.

### Users Tab

Each row in the Users table represents a discovered user.

<table><thead><tr><th width="200">Column</th><th>What it tells you</th></tr></thead><tbody><tr><td><strong>User</strong></td><td>The username discovered from agent traffic</td></tr><tr><td><strong>Type</strong></td><td>The type of AI component the user interacts with (e.g. MCP Server, LLM)</td></tr><tr><td><strong>Agentic assets</strong></td><td>The number of agentic assets associated with this user</td></tr><tr><td><strong>Risk score</strong></td><td>A risk indicator based on the user's agent activity and exposure</td></tr><tr><td><strong>Sensitive data</strong></td><td>Whether sensitive data types have been detected in this user's traffic</td></tr><tr><td><strong>Last traffic seen</strong></td><td>When Akto last observed activity for this user</td></tr><tr><td><strong>Team</strong></td><td>The team you have assigned to this user</td></tr><tr><td><strong>User role</strong></td><td>The role you have assigned to this user</td></tr></tbody></table>

### Devices Tab

The Devices tab shows the same inventory organized by device instead of user. Each discovered device is listed with its associated agents and agentic assets.

## View User Details

Click on any user to open a detailed view listing all endpoints and agentic assets associated with that user.

The detail view shows:

<table><thead><tr><th width="200">Column</th><th>What it tells you</th></tr></thead><tbody><tr><td><strong>Endpoint ID</strong></td><td>The unique identifier for the discovered endpoint</td></tr><tr><td><strong>Type</strong></td><td>The component type (e.g. MCP Server)</td></tr><tr><td><strong>Username</strong></td><td>The username associated with this endpoint</td></tr><tr><td><strong>Risk score</strong></td><td>Risk level for this specific endpoint</td></tr><tr><td><strong>Sensitive data</strong></td><td>Sensitive data types detected on this endpoint</td></tr><tr><td><strong>Last traffic seen</strong></td><td>When this endpoint was last active</td></tr><tr><td><strong>Discovered</strong></td><td>When Akto first detected this endpoint</td></tr></tbody></table>

Expand any endpoint row to see the individual agentic assets (e.g. MCP servers) nested under it.

## Assign Teams and Roles

You can tag users with a team and role to add organizational context. This makes it easier to filter and investigate activity by team or function.

{% stepper %}
{% step %}
Select one or more users using the checkboxes in the Users table.
{% endstep %}

{% step %}
Click **Edit team & role** from the action bar that appears at the bottom of the screen.

<div data-with-frame="true"><figure><img src="/files/bAt7LvMdef79GeEdIi2x" alt="" width="563"><figcaption></figcaption></figure></div>
{% endstep %}

{% step %}
In the modal, enter a **Team** (e.g. Backend, DevOps) and a **User role** (e.g. Engineer, Architect).

<div data-with-frame="true"><figure><img src="/files/SsWtElvlaiTV0cf3uleD" alt="" width="563"><figcaption></figcaption></figure></div>
{% endstep %}

{% step %}
Click **Save**.
{% endstep %}
{% endstepper %}

{% hint style="info" %}
You can select multiple users at once and assign the same team and role to all of them in a single action.
{% endhint %}

## Filter by Team or User Role

Once teams and roles are assigned, use the filters at the top of the Users table to narrow down the list by **Team** or **User role**. This helps you focus on a specific group when investigating activity or reviewing risk.


# Traces

## Overview

The **Traces** page gives you visibility into every AI/LLM session initiated by users and agentic applications across your organization. It shows who is prompting which models, how much they're consuming, and lets you drill into individual sessions to see what was actually asked.

From here, you can:

* Track overall session and token volume across your organization
* See which users and models are driving the most usage
* Search and inspect individual sessions, including the topics queried and tokens consumed

Navigate to: **Akto Atlas → Agentic AI Discovery → Traces**

## Summary Cards

The top of the page gives you an at-a-glance view of activity over the selected time range (default: **All time**, adjustable from the top-right filter).

<table><thead><tr><th width="180">Card</th><th>What it tells you</th></tr></thead><tbody><tr><td><strong>Total sessions</strong></td><td>The total number of traced sessions, broken down by top contributing users</td></tr><tr><td><strong>Total tokens</strong></td><td>The total tokens consumed across all sessions, split into <strong>In</strong> (prompt) and <strong>Out</strong> (completion) tokens</td></tr><tr><td><strong>Top Users by tokens</strong></td><td>The users consuming the most tokens, ranked highest to lowest</td></tr><tr><td><strong>Top Models by sessions</strong></td><td>The LLMs seen most often, ranked by number of sessions</td></tr></tbody></table>

{% hint style="info" %}
Use the **All time** dropdown in the top-right corner to narrow the summary cards and session list to a specific time window.
{% endhint %}

## Explore Sessions

Below the summary cards, the **Sessions** table lists every traced session, one row per session. Use the **Search sessions** bar to filter by keywords found in the session.

<table><thead><tr><th width="160">Column</th><th>What it tells you</th></tr></thead><tbody><tr><td><strong>Session</strong></td><td>A preview of the session's content, such as the initial prompt or payload</td></tr><tr><td><strong>User</strong></td><td>The user or service account that initiated the session</td></tr><tr><td><strong>Model</strong></td><td>The LLM used for the session, if identified</td></tr><tr><td><strong>Application</strong></td><td>The agentic application the session came through (e.g. <strong>claudecli</strong>, <strong>claude_cowork</strong>, <strong>kirocli</strong>)</td></tr><tr><td><strong>Traces</strong></td><td>The number of individual traces (requests) recorded within the session</td></tr><tr><td><strong>Topics Queried</strong></td><td>Topic tags automatically classified from the session's content (e.g. Technology, Security)</td></tr><tr><td><strong>Tokens in / out</strong></td><td>Prompt and completion tokens consumed by the session</td></tr><tr><td><strong>Duration</strong></td><td>How long the session lasted</td></tr></tbody></table>

Use the **Columns** panel to add or remove columns from the table, and the **Filters** panel to narrow the list down, for example, by **User**, **Model**, or **Application**.

{% hint style="info" %}
Click on a session row to open its full detail, including the complete list of traces recorded within it.
{% endhint %}

## Session Detail

Clicking a session row opens a side panel with two tabs:

{% tabs %}
{% tab title="Overview" %}
The Overview tab summarises the session and visualises the flow of the request.

<table><thead><tr><th width="160">Field</th><th>What it tells you</th></tr></thead><tbody><tr><td><strong>Traces</strong></td><td>The number of individual traces recorded in this session</td></tr><tr><td><strong>Total tokens</strong></td><td>The combined input and output tokens consumed across the session</td></tr><tr><td><strong>Duration</strong></td><td>How long the session ran for</td></tr></tbody></table>

Below the summary, a flow diagram shows how the request moved through your environment: **User → Application → LLM**. Each node identifies the specific user, application, and model involved (the LLM node shows **Unknown** if the model could not be identified). Use the **+**/**-** controls or the fullscreen icon to zoom and pan the diagram.

<div data-with-frame="true"><figure><img src="/files/Lj38YKfeOjdDSP2RRvX3" alt="" width="563"><figcaption></figcaption></figure></div>

The **Session Details** section lists:

<table><thead><tr><th width="160">Field</th><th>What it tells you</th></tr></thead><tbody><tr><td><strong>User</strong></td><td>The user who initiated the session</td></tr><tr><td><strong>Application</strong></td><td>The agentic application the session came through</td></tr><tr><td><strong>Session ID</strong></td><td>The unique identifier for the session</td></tr><tr><td><strong>Models</strong></td><td>The LLM(s) used in the session, if identified</td></tr><tr><td><strong>Endpoint ID</strong></td><td>A link to the endpoint (device) the session originated from</td></tr><tr><td><strong>Topics queried</strong></td><td>Topic tags automatically classified from the session's content</td></tr></tbody></table>

{% hint style="info" %}
Use the **Ask anything about this session...** box at the bottom of the panel to ask Akto questions about the session directly.
{% endhint %}
{% endtab %}

{% tab title="Traces" %}
The Traces tab lists every individual trace recorded within the session, shown with its **Time**, a **Trace** preview, the **Application**, and the **Model** used.

Use **Search traces** to filter by keyword, and the **Columns** and **Filters** panels to customize the view.

<div data-with-frame="true"><figure><img src="/files/P6DKgWVuQYcWXWnPnFEB" alt="" width="563"><figcaption></figcaption></figure></div>
{% endtab %}
{% endtabs %}

## Trace Detail

Click on a trace from the Traces tab to drill into that single request/response exchange.

The top of the trace detail shows the **Application**, **Model**, **User**, **Duration**, and **Tokens in / out** for that specific trace.

<div data-with-frame="true"><figure><img src="/files/KzIldfrPKJJMbHK8vxRq" alt="" width="563"><figcaption></figcaption></figure></div>

Below that, the **LLM** card shows the full exchange:

* **INPUT**: The complete prompt sent to the model, along with its token count
* **OUTPUT**: The model's response, along with its token count

{% hint style="info" %}
Use the breadcrumb at the top of the panel (e.g. session ID **/** trace ID) to navigate back to the parent session.
{% endhint %}


# NHI Governance

## Overview

**NHI Governance** gives you visibility and control over the Non-Human Identities (NHIs) that your employees' agentic tools create and use. These are the API keys, bearer tokens, and secrets that IDEs, AI coding assistants, and MCP-connected tools accumulate as they access external services on behalf of employees.

<div data-with-frame="true"><figure><img src="/files/5w8dJL5WRlPhcglLe8iX" alt="" width="563"><figcaption></figcaption></figure></div>

## The Problem You Face

Agentic tools generate credentials silently, and those credentials rarely get cleaned up:

* Developers install an AI IDE plugin or MCP server, and it generates API keys or OAuth tokens that persist indefinitely.
* Keys are shared across devices, leaked into source code, or left active long after the tool is uninstalled.
* Security teams have no way to inventory what credentials exist, which ones are expired, or which are being misused until something goes wrong.
* Traditional IAM tools cover human and cloud-infrastructure identities, but the credentials spawned by developer AI tools fall through the gap.

## How NHI Governance Helps

Akto Atlas discovers NHIs as part of its endpoint agent activity collection. Every credential observed in agentic traffic API key, bearer token, service credential is catalogued automatically against the agentic asset it belongs to, the employee who owns it, and the policies that apply to it.

You get a continuous, centralised view of credential hygiene across your AI tooling estate.

## What NHI Governance Covers

* **Identities** a full inventory of discovered NHIs with expiry status, owner, type, and violation counts.
* **Violations** a list of policy breaches tied to specific identities, such as expired credentials still in use, over-privileged keys, or tokens with no expiry date.
* **Policies** the rules that define acceptable NHI behaviour, including expiry windows, allowed scopes, and required rotation cadences.

## Key Concepts

<table><thead><tr><th width="231.43359375">Term</th><th>Meaning</th></tr></thead><tbody><tr><td>Non-Human Identity (NHI)</td><td>A credential (API key, bearer token, secret) used by an agentic tool rather than a human user directly</td></tr><tr><td>Agentic Asset</td><td>The AI tool or MCP server that holds or uses the NHI (e.g. Claude CLI, Cursor, Windsurf)</td></tr><tr><td>Owner</td><td>The employee whose endpoint the credential was discovered on</td></tr><tr><td>Expiry Status</td><td>Whether the credential is active, nearing expiry, expired, or disabled</td></tr><tr><td>Violation</td><td>A breach of an NHI policy rule attached to an identity</td></tr></tbody></table>

## What You Can Do

* Audit every AI-tool credential in your organisation from a single dashboard.
* Identify expired or soon-to-expire identities before they cause incidents.
* Enforce rotation and expiry policies without relying on manual processes.
* Investigate violations and track remediation against specific identities.

## Learn More

* [Identities](/akto-atlas-agentic-ai-security-for-employee-endpoints/nhi-governance/identities) inventory and expiry tracking for discovered NHIs
* [Violations](/akto-atlas-agentic-ai-security-for-employee-endpoints/nhi-governance/violations) policy breaches tied to specific identities
* [Create NHI Policies](/akto-atlas-agentic-ai-security-for-employee-endpoints/nhi-governance/policies) rules that govern acceptable NHI behaviour


# Identities

The **Identities** view is the central inventory of all Non-Human Identities discovered across your employees' agentic tools. It shows every API key, bearer token, and service credential that Atlas has observed in endpoint traffic, along with who owns it, which agentic asset uses it, its current expiry state, and any policy violations attached to it.

<div data-with-frame="true"><figure><img src="/files/UW7C7UXyFf2Ix8kYbUwa" alt="" width="563"><figcaption></figcaption></figure></div>

## Summary Cards

At the top of the page, three cards give you an at-a-glance health check of your NHI estate.

<table><thead><tr><th width="211.28125">Card</th><th>What It Shows</th></tr></thead><tbody><tr><td>Total Identities</td><td>The total count of distinct NHIs discovered across all endpoints and agentic assets</td></tr><tr><td>Expired Identities</td><td>The number of NHIs whose credentials have passed their expiry date</td></tr><tr><td>Identities with Violations</td><td>The number of NHIs that have at least one active policy violation</td></tr></tbody></table>

## Identity Graph

Below the summary cards, Akto renders a relationship graph that maps NHIs to the agentic assets that use them. Each node represents either an identity or an agentic asset, and edges show which assets hold which credentials.

Use the graph to:

* Quickly spot identities connected to multiple agentic assets these carry wider blast radius if compromised.
* Identify isolated credentials with no active asset connections, which may indicate orphaned or forgotten keys.
* Navigate to an identity or asset directly by selecting its node.

## Identities Table

The table lists every discovered NHI with the columns below.

<table><thead><tr><th width="266.03125">Column</th><th>Description</th></tr></thead><tbody><tr><td>Identity</td><td>The name or identifier of the credential (e.g. <code>copilot-api-key</code>, <code>slack-token</code>)</td></tr><tr><td>Agentic Asset</td><td>The AI tool or MCP server that holds this credential (e.g. Claude CLI, Cursor, Windsurf)</td></tr><tr><td>Owner</td><td>The employee whose endpoint the credential was discovered on</td></tr><tr><td>Type</td><td>The credential type <code>API Key</code> or <code>Bearer Token</code></td></tr><tr><td>Violations</td><td>Count of active policy violations; the red badge shows critical violations, orange shows warnings</td></tr><tr><td>Expiry Status</td><td>Whether the credential is active, has a countdown to expiry, or has already expired</td></tr><tr><td>Discovered</td><td>The date Akto first observed this credential in endpoint traffic</td></tr></tbody></table>

<details>

<summary>Expiry Status Values</summary>

<table><thead><tr><th width="222.3671875">Status</th><th>Meaning</th></tr></thead><tbody><tr><td>Active</td><td>The credential is valid and within its allowed window</td></tr><tr><td><code>Xd left</code></td><td>The credential expires in X days</td></tr><tr><td><code>Expired Xd ago</code></td><td>The credential expired X days ago but may still be in use</td></tr><tr><td>No expiry</td><td>The credential has no expiry date configured</td></tr><tr><td>Disabled</td><td>The credential has been manually disabled</td></tr></tbody></table>

</details>

## Filters

Use the filter tabs at the top of the table to narrow the view:

* **All** shows every discovered identity regardless of status.
* **Expired** shows only identities whose expiry date has passed.
* **Disabled** shows identities that have been manually disabled.

## Identity Details

Clicking any row in the table opens the **Identity Details** panel. The panel header shows the credential name, its violation badge counts, and key metadata credential type, access level, and when it was last used.

### Actions

The **Action** button in the top-right corner of the panel lets you act on the identity without leaving the detail view.

**Disable Identity**

* Selecting **Disable** marks the identity as disabled in Akto.

  <div data-with-frame="true"><figure><img src="/files/psRjrk3WtO0O17KnOdyK" alt="" width="563"><figcaption></figcaption></figure></div>

A disabled identity is excluded from active monitoring and will no longer generate new violations. Use this when a credential has been revoked or decommissioned and you want to suppress further alerts without deleting the discovery record.

The panel has two tabs.

{% tabs %}
{% tab title="Overview" %}
The **Overview** tab shows a graph and an auto-generated description for the selected identity.

<div data-with-frame="true"><figure><img src="/files/Azy0hMpZvixzkeGaGQwm" alt="" width="563"><figcaption></figcaption></figure></div>

### Graph

The graph visualises the full access chain for the credential:

* **Owner** the employee whose endpoint the credential was discovered on.
* **AI Agent** the agentic tool that holds the credential (e.g. Windsurf, Claude CLI, Cursor).
* **Credential node** the identity itself, labelled with its name and type.
* **Downstream services** the external services the credential can reach, with the permission level on each edge (e.g. `READ_WRITE` to GitHub, `READ` to Slack, `ADMIN` to AWS S3).

Use the graph to understand the blast radius of a compromised credential every service reachable via that key is visible at a glance.

### Description

Below the graph, Akto generates a plain-language summary of the identity's current state: which agentic asset uses it, the access level it grants, and how many active violations it has.
{% endtab %}

{% tab title="Violations" %}
The **Violations** tab lists every active policy breach attached to this identity. The tab label shows the total violation count (e.g. `Violations 4`).

<div data-with-frame="true"><figure><img src="/files/Bzu40jvMFkx8uvWY93Oe" alt="" width="563"><figcaption></figcaption></figure></div>

<table><thead><tr><th width="173.82421875">Column</th><th>Description</th></tr></thead><tbody><tr><td>Violation</td><td>A plain-language description of the specific breach (e.g. "Agent credential accessing production S3 with admin privileges")</td></tr><tr><td>Identity</td><td>The credential the violation is attached to</td></tr><tr><td>Agentic Asset</td><td>The agentic tool associated with the identity at the time of the breach</td></tr><tr><td>Severity</td><td>The risk level <code>Critical</code>, <code>High</code>, <code>Medium</code>, or <code>Low</code></td></tr><tr><td>Policy</td><td>The policy rule that was breached (e.g. "Restrict Access to Sensitive Resources", "Rotate API Keys Every 30 Days")</td></tr><tr><td>Discovered</td><td>When Akto first detected this violation</td></tr></tbody></table>

Violations are paginated. Use the arrow controls at the bottom of the table to page through all entries.

For full details on violation types and remediation steps, see [Violations](/akto-atlas-agentic-ai-security-for-employee-endpoints/nhi-governance/violations).
{% endtab %}
{% endtabs %}

## What You Can Do

* Export the full identity list to CSV using the download icon at the top right of the table.


# Create NHI Policies

## Overview

The **Create NHI Policy** page allows you to define governance rules for Non-Human Identities discovered across employee endpoints. Each policy is built from a set of policy categories token segregation, expiration tracking, and rotation enforcement that Akto evaluates continuously against every NHI in scope.

When a NHI breaches a rule in an active policy, Akto raises a violation in the [Violations](/akto-atlas-agentic-ai-security-for-employee-endpoints/nhi-governance/violations) view and links it to the specific policy that was triggered.

## Access NHI Policies

You can access NHI policy configuration from the Akto Atlas console.

* Navigate to **Akto Atlas**.
* Select **NHI Governance → Policies**.

<div data-with-frame="true"><figure><img src="/files/NmMv8diYnplpbFU3yAwD" alt="" width="563"><figcaption></figcaption></figure></div>

The policies list displays all existing NHI policies and provides access to policy creation.

## Create an NHI Policy

### Access the Create Policy Form

1. Locate the **Create Policy** button at the top-right corner of the Policies page.
2. Select **Create Policy** to open the policy configuration wizard.

<div data-with-frame="true"><figure><img src="/files/aOWJFsFSS11ZBdgPTYdG" alt="" width="563"><figcaption></figcaption></figure></div>

The wizard walks through four policy categories in sequence. The left panel shows your progress across the steps a red indicator means a required field in that step is incomplete.

### Configure the Policy

<details>

<summary>1. Policy Details &#x26; Scope (Required)</summary>

This step defines the identity and scope of the policy.

**Policy Name**

Enter a name that describes what the policy enforces (e.g. `No Admin Credentials for Agent Identities`). The name is required and limited to 64 characters.

**Description**

Optionally provide a plain-language description of what the policy enforces. This helps other administrators understand the intent of the rule without reading its configuration.

**Scope**

Control which NHIs and agents the policy applies to.

* **Select Agents** choose specific agentic assets (e.g. Claude CLI, Cursor, Windsurf) to target. Defaults to all agents.
* **Select NHIs** choose specific identities to target. Defaults to all discovered NHIs.

Narrowing scope reduces noise by applying the policy only to the identities and agents where the rule is relevant.

<div data-with-frame="true"><figure><img src="/files/DBMYq6oiXQZ2AnIjj6Y1" alt="" width="563"><figcaption></figcaption></figure></div>

{% hint style="info" %}
Policy name is required. You cannot advance past this step or save the policy without providing a name.
{% endhint %}

</details>

<details>

<summary>2. Token Segregation</summary>

**Enable Token Segregation Monitoring**

When enabled, Akto detects and flags cases where a single token is shared across multiple agent profiles or environments.

Shared credentials increase the blast radius of a compromise one leaked token can grant access across multiple unrelated services. This rule raises a violation when the same identity is observed on more than one distinct agent profile or environment.

<div data-with-frame="true"><figure><img src="/files/Mae9A6Hm46QXdWBeDjGX" alt="" width="563"><figcaption></figcaption></figure></div>

</details>

<details>

<summary>3. Expiration Tracking</summary>

**Enable Token Lifecycle Tracking**

When enabled, Akto monitors token validity and flags credentials approaching their expiration date. This allows you to act before a token expires and causes service disruption or an undetected security gap.

**Flag already expired tokens in active use**

When enabled, Akto detects API calls or actions performed by an agent using an expired token. An expired token still in active use may indicate a misconfiguration where a tool was not updated after rotation or a security risk where an attacker is deliberately replaying a stolen credential.

<div data-with-frame="true"><figure><img src="/files/DJFEyQ2VY5mX7rI0RxpF" alt="" width="563"><figcaption></figcaption></figure></div>

</details>

<details>

<summary>4. Rotation Enforcement</summary>

**Enable Rotation Enforcement**

When enabled, Akto requires all API keys and tokens in scope to be rotated within a set number of days.

* Credentials that have passed the rotation deadline trigger a **High-severity violation**.
* Credentials approaching the rotation deadline trigger a **Medium-severity reminder violation**.

<div data-with-frame="true"><figure><img src="/files/afSyxmiXpl3SmUbROts0" alt="" width="563"><figcaption></figcaption></figure></div>

</details>

### Save the Policy

After completing the required and optional configuration steps:

* Select **Create Policy** to save the policy and begin enforcement against all NHIs in scope.

Akto evaluates the new policy against all existing identities immediately. Violations are raised for any NHI that already breaches a rule at the time of creation, and the policy continues to evaluate new identities as they are discovered.

## What's Next

After creating a policy, you can review the violations it has raised in the [Violations](/akto-atlas-agentic-ai-security-for-employee-endpoints/nhi-governance/violations) view. Each violation is linked to the specific policy rule that triggered it.

To modify, disable, or delete an existing policy, select it from the Policies list and use the options in the policy detail view.


# Violations

## Overview

The **Violations** page provides a unified view of all policy breaches raised against Non-Human Identities in your organisation. It enables you to monitor violation trends, assess severity distribution, and manage each breach from detection through to resolution from a single interface.

## Key Metrics

Two charts at the top of the page give you an at-a-glance picture of your NHI violation posture.

### Violations Over Time

A line chart showing the total number of violations detected across the selected time window. Use this to spot spikes in new violations and track whether your remediation efforts are reducing the open count over time.

### Violations by Severity

A donut chart breaking down all violations by severity level Critical, High, Medium, and Low. This helps you quickly understand the risk profile of your current violation backlog and prioritise which identities need attention first.

## Violations Table

The table lists every violation raised across all NHIs.

<div data-with-frame="true"><figure><img src="/files/mJ6pYEc7zxxflvAliQb9" alt="" width="563"><figcaption></figcaption></figure></div>

<table><thead><tr><th width="213.80859375">Column</th><th>Description</th></tr></thead><tbody><tr><td>Violation</td><td>A plain-language description of the specific breach</td></tr><tr><td>Identity</td><td>The NHI the violation is attached to</td></tr><tr><td>Agentic Asset</td><td>The agentic tool associated with the identity at the time of the breach</td></tr><tr><td>Severity</td><td>The risk level <code>Critical</code>, <code>High</code>, <code>Medium</code>, or <code>Low</code></td></tr><tr><td>Policy</td><td>The policy rule that was breached</td></tr><tr><td>Discovered</td><td>When Akto first raised this violation</td></tr></tbody></table>

### Filters

Use the filter tabs at the top of the table to narrow the view:

* **All** every violation regardless of status.
* **Open** violations that have not yet been resolved.
* **Fixed** violations that have been marked as fixed.

Use the **time filter** at the top-right of the page to scope the violation list and charts to a specific time window.

{% hint style="info" %}
**Search and Sort**

Use the search and filter icons at the top-right of the table to filter violations by identity, agentic asset, severity, or policy. Use the sort icon to re-order by any column.
{% endhint %}

## Take Bulk Action

You can act on multiple violations at once without opening each one individually.

{% stepper %}
{% step %}
Select violations using the checkbox at the start of each row. A selection count appears above the table (e.g. `2 selected`).
{% endstep %}

{% step %}
A bulk action bar appears at the bottom of the table with the following options:

* **Mark as Fixed** resolves the selected violations and moves them to the Fixed tab.
* **Open Jira Ticket** creates a Jira ticket for each selected violation to support internal tracking and remediation workflows.

<div data-with-frame="true"><figure><img src="/files/WBFcJTGTkMvPlOwQtsrh" alt="" width="563"><figcaption></figcaption></figure></div>
{% endstep %}
{% endstepper %}

## Violation Details

Clicking any row opens the **Violation Details** panel. The panel header shows the violation name, its severity badge, the identity it is attached to, and when it was last seen. An **Action** button in the top-right corner lets you act on the violation without leaving the panel.

### Actions

Expanding the **Action** dropdown gives you three options:

* **Open Jira Ticket** creates a Jira issue for this violation to track remediation in your existing workflow.
* **Mark as Fixed** resolves the violation and moves it to the Fixed tab. Use this once the underlying credential issue has been remediated.
* **Update Policy** navigates directly to the policy that triggered this violation so you can adjust its rules if needed.

<div data-with-frame="true"><figure><img src="/files/pUVqNPmy4eAGic83MTqj" alt="" width="563"><figcaption></figcaption></figure></div>

### Violation Detail Tabs

The panel is organised into three tabs.

{% tabs %}
{% tab title="Overview" %}
The **Overview** tab provides the full context needed to understand and prioritise the violation.

* **Description**

  A plain-language explanation of what was detected for example, which credential has which permission level on which service, and why that is a risk.
* **Policy Triggered**

  The name of the NHI policy whose rule was breached, linked directly to the policy configuration.
* **Affected Resources**\
  The downstream services exposed by this violation (e.g. GitHub Repos, GitHub Actions, AWS S3).
* **Discovered**\
  The timestamp when Akto first raised this violation.
* **Why This Triggered**\
  An explanation of the specific condition that caused the policy rule to fire for example, why the credential's scope violates the policy's intent.
* **Blast Radius**\
  A bulleted list of the potential consequences if the credential were compromised or misused, scoped to the actual permissions it holds.

<div data-with-frame="true"><figure><img src="/files/Qx8o9rSHEj0x1c9NRW5p" alt="" width="563"><figcaption></figcaption></figure></div>
{% endtab %}

{% tab title="Remediation" %}
The **Remediation** tab provides step-by-step guidance for resolving the violation, tailored to the specific policy rule that was breached.

**Steps to Resolve**

A numbered list of concrete actions to take for example:

1. Replace the credential with a scoped token that has only the permissions the agent actually requires.
2. Limit permissions to the minimum required for the agent task.
3. Enable audit log streaming on the affected service and review recent API activity.
4. Revoke or downgrade any admin-level scopes from the credential.

<div data-with-frame="true"><figure><img src="/files/46kDH9xBEq5H6HTul6rn" alt="" width="563"><figcaption></figcaption></figure></div>

After completing the steps, use **Mark as Fixed** from the Action menu to close the violation.
{% endtab %}

{% tab title="Timeline" %}
The **Timeline** tab shows a chronological record of events related to this violation from the initial credential creation through to policy breach detection and any subsequent activity.

Each entry shows a short description of the event and the date it occurred. Use the timeline to understand the full history of the identity's lifecycle and establish whether the issue is a misconfiguration or an active threat.

<div data-with-frame="true"><figure><img src="/files/toUegRmh34RhjHzdTL5e" alt="" width="563"><figcaption></figcaption></figure></div>
{% endtab %}
{% endtabs %}

## What Next

After resolving a violation, review the [Create NHI Policies](/akto-atlas-agentic-ai-security-for-employee-endpoints/nhi-governance/policies) page to tighten the policy rules that triggered it, or check the [Identities](/akto-atlas-agentic-ai-security-for-employee-endpoints/nhi-governance/identities) view to disable a credential that has been decommissioned.


# Atlas Guardrails

Akto Atlas applies guardrails directly at the endpoint, where employees actually interact with AI agents, MCP servers, and GenAI tools. Guardrails inspect every prompt, response, and tool call locally and block risky behavior before it ever leaves the device.

## The Problem You Face

AI usage on employee endpoints is hard to control with traditional perimeter tools:

* You cannot rely on cloud-side filtering when prompts and tool calls happen on developer laptops, browsers, and IDEs.
* Sensitive data such as source code, PII, and secrets can leak into AI tools long before any cloud gateway sees the traffic.
* Locally spun-up MCP servers and unvetted tools execute commands on the device with no built-in policy enforcement.

## How Atlas Guardrails Help

Atlas embeds enforcement into the same agents that already discover AI activity on the endpoint. You define policies centrally in Akto, and they are evaluated locally on each device, so risky prompts and tool calls are stopped at the source.

## What Atlas Guardrails Cover

* **Sensitive data exposure** - block prompts containing PII, secrets, source code, or other regulated data before they reach external AI tools.
* **Unsafe prompts and jailbreaks** - detect prompt injection, jailbreak patterns, and policy-violating instructions on the endpoint.
* **Risky MCP tool calls -** restrict destructive shell commands, file system access, and unvetted MCP tools from executing on the device.
* **Shadow AI usage** - enforce guardrails on AI tools and MCP servers that fall outside your approved list.
* **Personal account usage** - detect sign-ins to AI tools using personal email domains and restrict access to organization-approved accounts only.

Atlas ships with 20+ built-in guardrail policies covering input and output threats. See [**Agent Guard**](/agentic-guardrails/concepts/agent-guard) for the full list of scanners and what each one detects.

## How It Works

Guardrails run inside the same Atlas components that you deploy for discovery — browser extensions, IDE hooks, and the AI Endpoint Shield. Each component intercepts AI traffic on the device, applies input guardrails to the request and output guardrails to the response, and either forwards, redacts, or blocks based on your policies. Every decision is reported back to the Akto dashboard for monitoring and audit.

```mermaid
---
config:
  theme: redux-color
---
sequenceDiagram
    participant User
    participant Hooks as Hooks<br/>(Akto Guardrails)
    participant Agent as AI Agent<br/>(LLM / MCP Server / Tools)
    participant Akto as Akto Dashboard
    autonumber

    User ->> Hooks: Prompt / Tool call
    alt:
    Note over Hooks: Request guardrails
    Hooks ->> Agent: Forward valid request
    Agent ->> Hooks: Agent / Tool response
    Note over Hooks: Response guardrails
    end
    Hooks ->> User: Final Response<br/>(valid / blocked / redacted)
    Hooks ->> Akto: Log Data<br/>(Event / Threat)
```

## Where Guardrails Plug In

* [**Browser Extensions**](/akto-atlas-agentic-ai-security-for-employee-endpoints/endpoints-discovery-agents/browser-extensions) - apply guardrails to prompts and responses on web-based AI tools.
* [**AI Endpoint Shield**](/akto-atlas-agentic-ai-security-for-employee-endpoints/endpoints-discovery-agents/ai-endpoint-shield) - enforce guardrails on local MCP traffic across the device.
* [**IDE Hooks**](/akto-atlas-agentic-ai-security-for-employee-endpoints/endpoints-discovery-agents) - validate chat prompts, agent responses, and MCP tool calls inside Cursor, Claude, Copilot, Gemini, and other supported IDEs.

## What You Can Do

* Map skills and tools to guardrail policies and enforce them per user, device, or collection.
* Track endpoint-level guardrail effectiveness through the AI Security Posture dashboard.
* Review every blocked or allowed event with full endpoint, user, and device context.

## Learn More

For a deep dive into guardrail scanners, policies, threat dashboards, and remediation workflows, see the [**Agentic Guardrails**](/agentic-guardrails/overview) section.


# Overview

Akto Argus secures homegrown AI agents, MCP servers, and GenAI applications across the full lifecycle; from pre-deployment in CI/CD to runtime enforcement in cloud environments. Argus provides visibility, continuous security assessment, and runtime guardrails for autonomous AI systems that traditional AppSec and cloud security tools cannot adequately protect.

## The Problem You Face

Engineering teams are rapidly deploying AI agents, MCP servers, and GenAI applications into production. Security teams are expected to secure these systems, but face structural gaps:

* You lack clear visibility into which AI agents, MCP servers, and GenAI applications are running across cloud environments.
* AI agent behavior evolves dynamically at runtime, making static or pre-deployment scanning insufficient.
* Most AI agents ship without runtime controls, exposing production systems to prompt injection, tool abuse, unsafe actions, and data leakage.

## How Akto Argus Helps

Akto Argus is purpose-built for securing autonomous and agentic AI systems. Argus integrates directly into your CI/CD pipelines and cloud runtime to help you discover, scan, and control AI behavior before and after deployment.

### Why Argus Is Different

Traditional AppSec and cloud security platforms were designed for deterministic applications. Autonomous AI agents operate with dynamic prompts, tools, and decision paths, which require continuous assessment and runtime enforcement. Argus addresses these gaps with AI-specific discovery, scanning, and guardrails.

## Core Capabilities

### Discover Agentic AI in Your Cloud

* Automatically discover AI agents, MCP servers, and GenAI applications across cloud environments.
* Maintain a continuously updated inventory of agentic AI assets across development, staging, and production.

### Continuous Agentic AI Red Teaming

* Use Akto’s 4,000+ AI-specific probes to continuously scan AI agents, MCPs, and GenAI applications in CI/CD.
* Identify risks such as prompt injection, tool misuse, unsafe actions, policy bypass, and emerging attack patterns.

### Enforce Runtime Guardrails

* Define and enforce policies that control what AI agents can and cannot do in production.
* Restrict sensitive actions, tools, topics, and data access during runtime execution.

### Enterprise-Ready Deployment

* Deploy using Akto’s 50+ connectors, eBPF-based visibility, and cloud-native integrations.
* Route traffic through Akto’s MCP Gateway or AI Gateway for centralized control.
* Integrate with popular agent frameworks and platforms such as AWS Bedrock, n8n, and Databricks.

## Next Step: Homegrown Agentic Discovery

Begin by setting up [**Homegrown Agentic Discovery**](/akto-argus-agentic-ai-security-for-homegrown-ai/connectors) to automatically identify AI agents, MCP servers, and GenAI applications running in your cloud. This establishes the inventory required for continuous scanning and runtime guardrails.


# Connectors


# MCP Import

## Overview

Akto now supports direct import of **MCPs** (tools, resources, and prompts) into **MCP Inventory** via **Connectors**. With just your SSE endpoint URL, you can auto-discover all active MCP tools, resources, and prompts; no manual setup required.
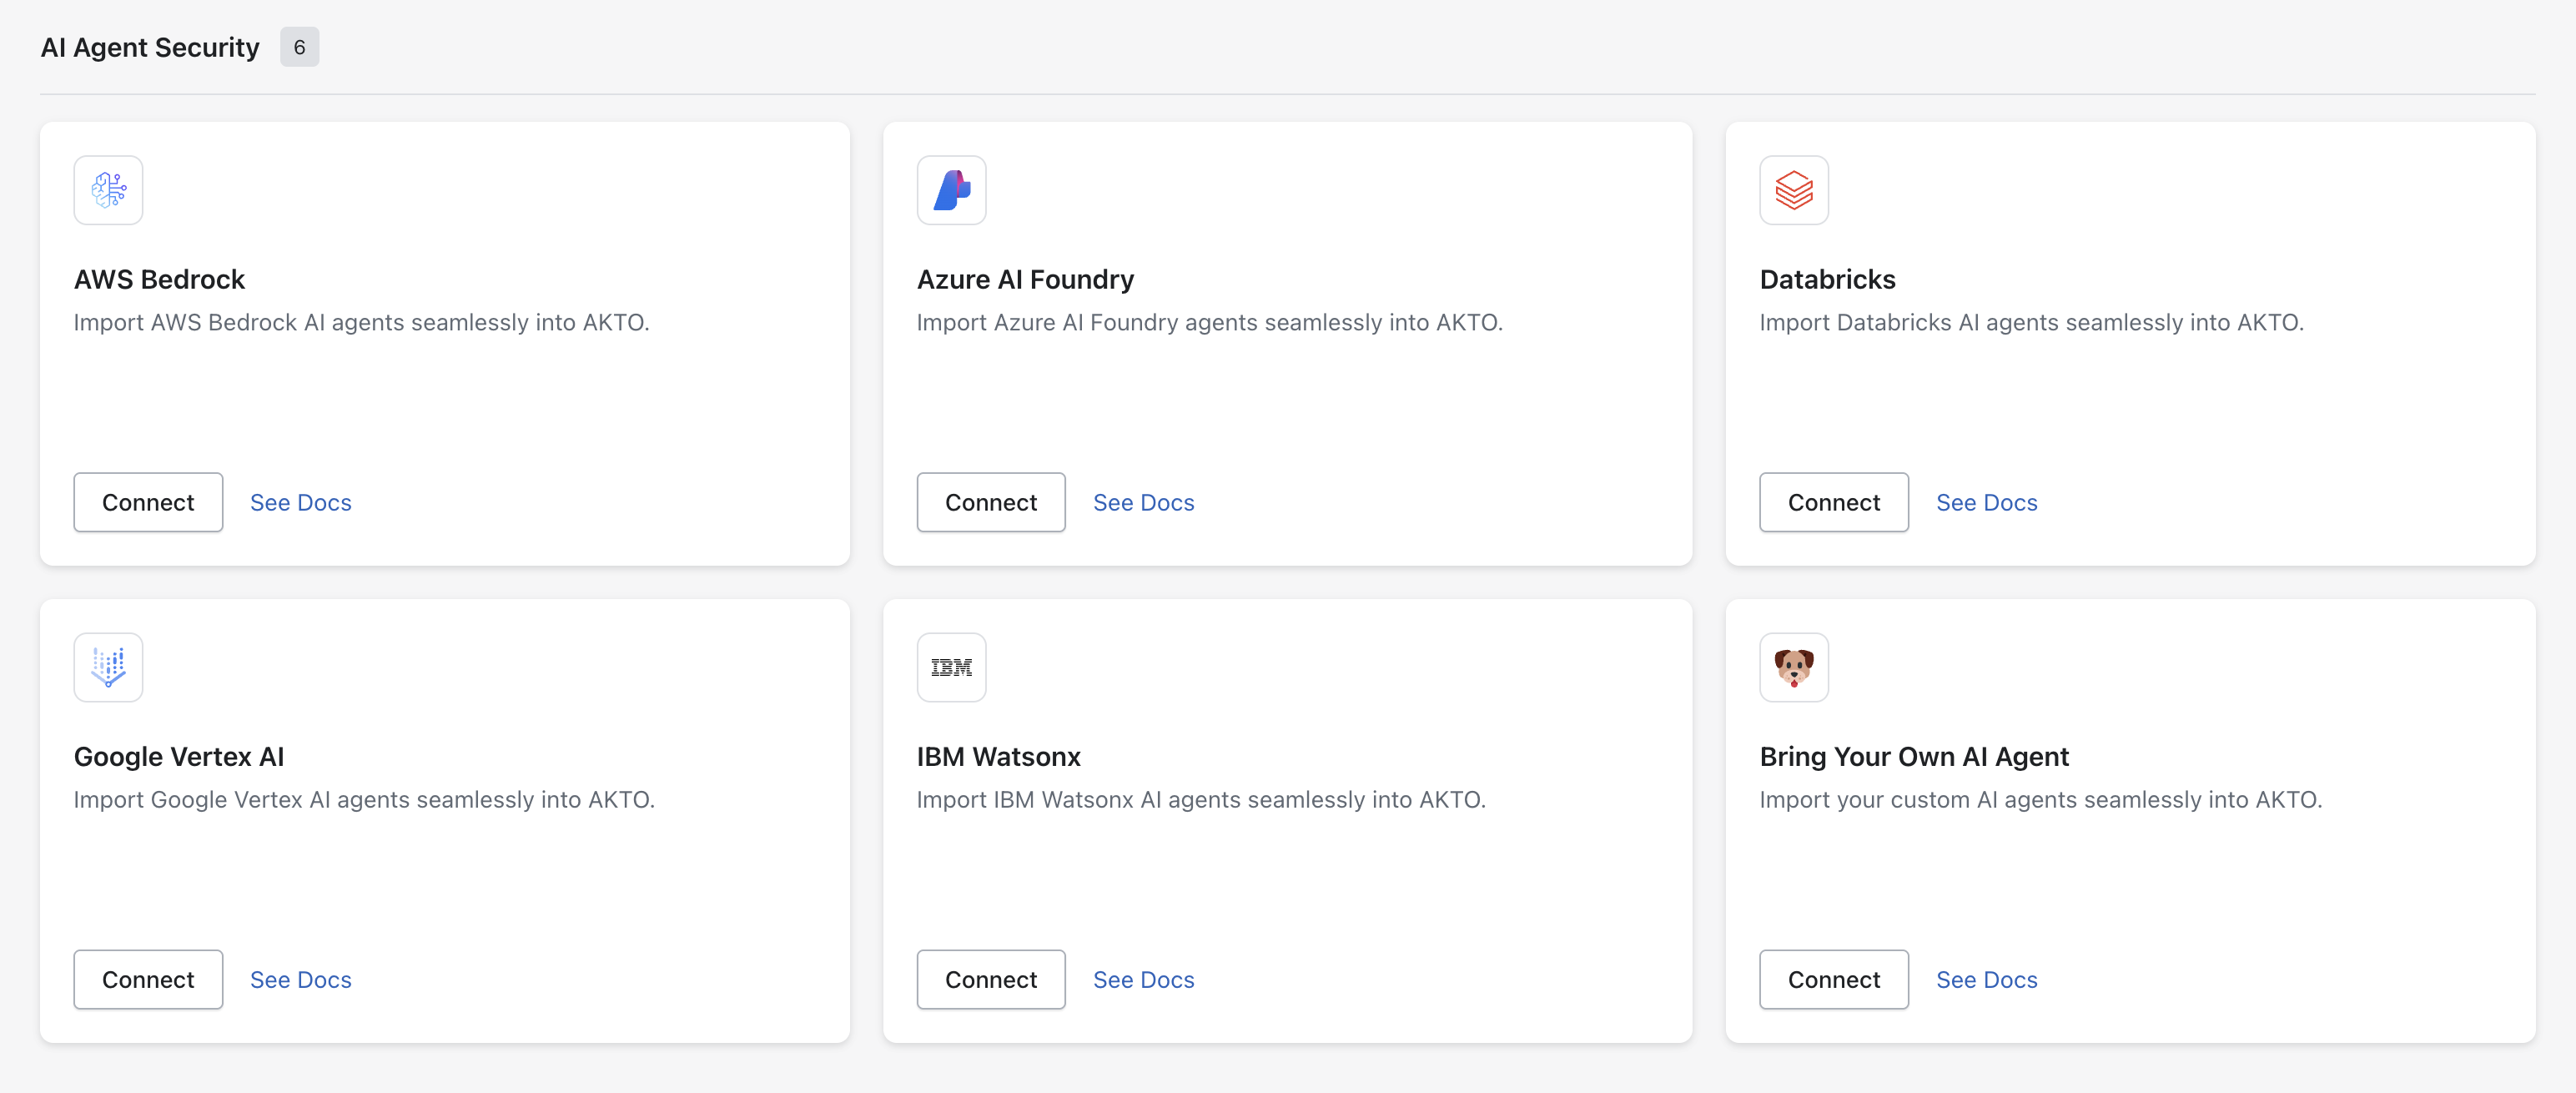
<figure><img src="/files/dMPxmKIAXaOI0IyUq1p1" alt="" width="563"><figcaption></figcaption></figure>

## What You Need

* **MCP SSE Endpoint URL** (e.g., ends with `/sse`)
* **(Optional) Authorization headers** – only if your MCP server requires them:

  ```
  Header Key: Authorization
  Header Value: Bearer <your-token>
  ```

## Steps to Import

{% stepper %}
{% step %}
*Open* **Akto Argus Dashboard** *→ Go to Connectors.*
{% endstep %}

{% step %}
Select **MCP Import.**
{% endstep %}

{% step %}
**Fill in MCP Initialize URL**

* SSE Endpoint URL: e.g., `https://mcp.example.com/sse`

  <figure><img src="/files/xxvDThfrxvuoXhEoXNwd" alt="" width="188"><figcaption></figcaption></figure>
* If your MCP server is secured, choose the `This site requires login?` tick box.
  {% endstep %}

{% step %}
**Fill in the Authentication Credentials (Optional)**

Enter the following details:

* *(Optional)* Add Auth Headers:

  ```
  Header Key: Authorization
  Header Value: Bearer your-token
  ```

<figure><img src="/files/JENk4aHJslzCPv8M5OZq" alt="" width="188"><figcaption></figcaption></figure>

{% hint style="info" %}
**Example With Authorisation**

```
SSE Endpoint URL: https://mcp.example.com/sse
Header Key: Authorization
Head
```

{% endhint %}
{% endstep %}

{% step %}
**Click Import**

Akto will then:

* Start listening to the SSE stream
* Scan events like `tool_call`, `resource_call`, and `prompt_response`
* Auto-register all observed MCP endpoints
  {% endstep %}
  {% endstepper %}

## What Gets Imported?

Akto will detect and add:

* All **tool endpoints** (`/v1/tools/...`) → tagged as `mcp-tools`
* All **resource endpoints** (`/v1/resources/...`) → tagged as `mcp-resources`
* All **prompt endpoints** (`/v1/prompts/...`) → tagged as `mcp-prompts`

These will appear in **MCP Inventory**, ready for monitoring and scanning.

{% hint style="success" %}
**Security**

* Auth headers (if any) are used **only once** during import and are **not stored**
* Akto uses **read-only access** to your SSE stream
  {% endhint %}

#### Get Support for your Akto setup

There are multiple ways to request support from Akto. We are 24X7 available on the following:

1. In-app `intercom` support. Message us with your query on intercom in Akto dashboard and someone will reply.
2. Join our [discord channel](https://www.akto.io/community) for community support.
3. Contact `help@akto.io` for email support.
4. Contact us [here](https://www.akto.io/contact-us).


# Sidecar Egress Proxy

## Overview

Akto Egress Proxy is a transparent mitmproxy-based security layer that intercepts and governs outbound AI API calls made by your agents or applications to LLM providers (OpenAI, Anthropic, Amazon Bedrock). It applies request and response guardrails on every AI API call — without requiring any changes to your agent code.

## Key Features

* **Outbound LLM Guardrails**: Inspect and enforce policies on every prompt your agent sends to OpenAI, Anthropic, or Bedrock before it reaches the provider
* **Response Guardrails**: Scan and filter LLM responses for PII, sensitive data, or policy violations before your agent consumes them
* **Request Modification**: Automatically rewrite prompts flagged for modification (e.g., strip PII, enforce system prompt constraints)
* **Selective Interception**: Only intercepts traffic to known AI providers — all other traffic passes through untouched
* **Zero Code Changes**: Routes through standard `HTTP_PROXY` / `HTTPS_PROXY` env vars; your agent code is unchanged
* **Open Source**: The proxy script and Docker setup are fully open source at [akto-api-security/akto-ai-egress](https://github.com/akto-api-security/akto-ai-egress)

## Architecture

```mermaid
flowchart LR
    A[AI Agent / App\nyour container] -->|all outbound traffic\nvia HTTP_PROXY| B[Akto Egress Proxy\nmitmproxy :8087]
    B -->|AI provider traffic\nintercepted + inspected| C[Akto Guardrails]
    C -->|allowed / modified| B
    B -->|forwarded to LLM| D[LLM Provider\nOpenAI / Anthropic / Bedrock]
    B -->|non-AI traffic\npassed through| E[Other External Services]
```

### Traffic Flow

1. Your agent makes an LLM API call (e.g., `POST https://api.anthropic.com/v1/messages`)
2. The call is transparently routed through the Egress Proxy via `HTTP_PROXY` / `HTTPS_PROXY`
3. The proxy intercepts the request and sends the message payload to Akto's guardrails endpoint
4. Akto evaluates the prompt against configured guardrails:
   * **Blocked**: Proxy returns a `403` error immediately; the LLM is never called
   * **Modified**: Proxy rewrites the request body before forwarding
   * **Allowed**: Request is forwarded to the LLM provider unchanged
5. The LLM response is intercepted and evaluated by Akto's response guardrails
6. The response is returned to the agent (original, blocked, or rewritten)

## Deployment

{% hint style="info" %}
**Prerequisites**

* Docker and Docker Compose installed
* An Akto instance (self-hosted or cloud) with your `AKTO_URL`
* Your AI agent or application running as a Docker container
  {% endhint %}

{% stepper %}
{% step %}

### Clone the repository

```bash
git clone https://github.com/akto-api-security/akto-ai-egress.git
cd akto-ai-egress
```

{% endstep %}

{% step %}

### Set environment variables

```bash
export AKTO_URL=https://akto.example.com   # your Akto instance base URL
export APP_NAME=my-ai-agent                # identifies your app in Akto guardrails
export ANTHROPIC_API_KEY=sk-ant-...        # (only needed for the bundled example agent)
```

| Variable      | Required | Description                                                                                                 |
| ------------- | -------- | ----------------------------------------------------------------------------------------------------------- |
| `AKTO_URL`    | Yes      | Base URL of your Akto instance (e.g. `https://akto.example.com`). The proxy appends `/api/http-proxy`.      |
| `APP_NAME`    | Yes      | Name of your application. Sent as the `host` header to Akto so traffic is grouped per app in the dashboard. |
| {% endstep %} |          |                                                                                                             |

{% step %}

### Start the proxy

```bash
docker compose up --build
```

The included `docker-compose.yml` starts two containers:

| Container           | Role                                                               |
| ------------------- | ------------------------------------------------------------------ |
| `akto-egress-proxy` | mitmproxy on port `8087`, runs `akto_guardrails.py` addon          |
| `anthropic-agent`   | Example Anthropic agent, pre-configured to route through the proxy |

On first run, mitmproxy auto-generates its CA certificate inside the `mitmproxy-data/` volume. The example agent container already mounts and trusts this cert.
{% endstep %}

{% step %}

### Connect your own agent

To route your existing agent through the proxy instead of the bundled example, add it to `docker-compose.yml` with the proxy env vars and the CA cert mount:

```yaml
services:
  your-agent:
    image: your-ai-agent:latest
    depends_on:
      - akto-egress-proxy
    environment:
      HTTP_PROXY: http://akto-egress-proxy:8087
      HTTPS_PROXY: http://akto-egress-proxy:8087
    volumes:
      - ./mitmproxy-data/mitmproxy-ca-cert.pem:/usr/local/share/ca-certificates/mitmproxy-ca-cert.crt:ro

  akto-egress-proxy:
    image: akto-egress-proxy
    build:
      context: ./akto-egress-proxy
    command:
      - mitmdump
      - --listen-host
      - 0.0.0.0
      - --listen-port
      - "8087"
      - --ignore-hosts
      - "^(?!.*((^|\\.)anthropic\\.com$|(^|\\.)openai\\.com$|(^|\\.)chatgpt\\.com$|(^|\\.)amazonaws\\.com$)).*$"
      - -s
      - /addons/akto_guardrails.py
    environment:
      AKTO_URL: ${AKTO_URL}
      APP_NAME: ${APP_NAME:-}
    volumes:
      - ./mitmproxy-data:/home/mitmproxy/.mitmproxy
      - ./akto-egress-proxy:/addons:ro
```

{% hint style="info" %}
**CA Certificate** The `mitmproxy-data/mitmproxy-ca-cert.pem` file is created automatically on first run (Step 3). Mount it into your agent container as a trusted CA so HTTPS interception works without certificate errors.
{% endhint %}
{% endstep %}

{% step %}

### Verify

Confirm the proxy is intercepting traffic by checking its logs:

```bash
docker logs -f akto-egress-proxy
```

You should see `[AKTO] URL: <your-akto-url>/api/http-proxy` on startup, and `evaluating request` / `evaluating response` log lines when your agent makes LLM calls.
{% endstep %}
{% endstepper %}

## Supported AI Providers

The proxy selectively intercepts traffic only to these hosts; all other traffic passes through unmodified:

* `api.openai.com`
* `api.anthropic.com`
* `chatgpt.com`
* `*.amazonaws.com` (Amazon Bedrock)

You can extend this list by editing the `--ignore-hosts` regex in the `docker-compose.yml` to include additional AI provider hostnames.

{% hint style="info" %}
**All outbound traffic is routed through the proxy container**

Because `HTTP_PROXY` / `HTTPS_PROXY` are set on the agent container, every outbound request — not just AI API calls — is sent through the mitmproxy process as a network hop. Mitmproxy only performs SSL interception and guardrail evaluation on the AI provider hosts listed above; all other traffic is tunnelled through without inspection.
{% endhint %}

## How Guardrails Work

See [Guardrail Schema](https://github.com/akto-api-security/Documentation/blob/agentic_security/akto-argus-agentic-ai-security-for-homegrown-ai/connectors/concepts/guardrail-schema.md) for the full data model and [Agent Guard](https://github.com/akto-api-security/Documentation/blob/agentic_security/akto-argus-agentic-ai-security-for-homegrown-ai/connectors/concepts/agent-guard.md) for how guardrails are evaluated against agentic traffic.

The proxy evaluates both the outbound request (prompt sent to the LLM) and the inbound response (LLM output) against Akto's guardrails. For each, Akto returns one of three decisions:

| Akto Decision                          | Proxy Behaviour                                                                                                                           |
| -------------------------------------- | ----------------------------------------------------------------------------------------------------------------------------------------- |
| `Allowed: true`                        | Request or response forwarded unchanged                                                                                                   |
| `Modified: true`                       | Payload replaced with `ModifiedPayload` before forwarding                                                                                 |
| `Allowed: false` or `behaviour: block` | Returns `403` with `{"error": "<reason>"}` and header `X-Akto-Guardrails-Decision: blocked`; the LLM is never called on a blocked request |

## Guardrail Configuration

All guardrail policies are configured in the Akto dashboard — no proxy restart is required when policies change.

* [Create guardrail policies](https://github.com/akto-api-security/Documentation/blob/agentic_security/akto-argus-agentic-ai-security-for-homegrown-ai/connectors/how-to/create-guardrail-policies.md) — set up rules for prompt injection detection, PII filtering, disallowed topics, and response redaction
* [Manage guardrail policies](https://github.com/akto-api-security/Documentation/blob/agentic_security/akto-argus-agentic-ai-security-for-homegrown-ai/connectors/how-to/manage-guardrail-policies.md) — edit, clone, or delete existing policies
* [Enable or disable guardrails](https://github.com/akto-api-security/Documentation/blob/agentic_security/akto-argus-agentic-ai-security-for-homegrown-ai/connectors/how-to/enable-or-disable-guardrails.md) — toggle guardrails per policy without deleting them

Policies are scoped per app using the `APP_NAME` identifier set in your environment variables.

## Monitoring

All intercepted traffic is ingested into Akto (`ingest_data=true`) and visible in the dashboard under your `APP_NAME`:

* [Guardrail Activity](https://github.com/akto-api-security/Documentation/blob/agentic_security/akto-argus-agentic-ai-security-for-homegrown-ai/connectors/concepts/guardrail-activity.md) — view all guardrail events, decisions, and flagged payloads
* [Guardrail Activity — Detailed View](https://github.com/akto-api-security/Documentation/blob/agentic_security/akto-argus-agentic-ai-security-for-homegrown-ai/connectors/how-to/guardrail-activity-detailed-view.md) — inspect individual blocked or modified requests
* [Threat Dashboard](https://github.com/akto-api-security/Documentation/blob/agentic_security/akto-argus-agentic-ai-security-for-homegrown-ai/connectors/concepts/threat-dashboard.md) — monitor threat actors, IPs, and anomalous LLM usage patterns

## Get Support

There are multiple ways to request support from Akto. We are 24X7 available on the following:

1. In-app `intercom` support. Message us with your query on intercom in Akto dashboard and someone will reply.
2. Join our [discord channel](https://www.akto.io/community) for community support.
3. Contact `help@akto.io` for email support.
4. Contact us [here](https://www.akto.io/contact-us).


# AI Agent Security

## Overview

Akto lets you seamlessly import **AI agents** such as **AWS Bedrock, Azure AI Foundry, Databricks, Google Vertex AI, IBM Watsonx**, or even your **custom agent** into **AI Agent Security**. With just the agent endpoint URL and optional configuration, you can start monitoring and scanning agent activity instantly.

<figure><img src="https://2916937215-files.gitbook.io/~/files/v0/b/gitbook-x-prod.appspot.com/o/spaces%2FRc4KTKGprZI2sPWKoaLe%2Fuploads%2Fgit-blob-26c83f936b6d7958a5830edb6b158a31fbdd2e2a%2Fimage.png?alt=media" alt="" width="563"><figcaption></figcaption></figure>

## Supported AI Agents

The following AI agents, platforms, and tools are supported by Akto Argus for agentic AI security, enabling visibility, governance, and protection across diverse AI ecosystems.

<table><thead><tr><th width="215.03515625">AI Agent/Connector</th><th>Description</th></tr></thead><tbody><tr><td><a href="/pages/IDwoOc0QKB9OsB8Im1Qv">AWS Bedrock</a></td><td>Secure and monitor AI agents built using AWS Bedrock managed foundation models.</td></tr><tr><td><a href="/pages/S7KRnuksb2wmxjHKWD4r">N8N</a></td><td>Secure autonomous workflows and AI-powered automations built using n8n.</td></tr><tr><td><a href="/pages/GTXuMDgfJ4tkQRmccEgb">LangChain</a></td><td>Monitor and govern LangChain-based AI agents and orchestration pipelines.</td></tr><tr><td><a href="/pages/7dqIsZJPGDPWFZfWyKdJ">Copilot Studio</a></td><td>Secure AI agents created using Microsoft Copilot Studio.</td></tr><tr><td><a href="/pages/Ui0fCZZaabASHm9frcTh">LiteLLM</a></td><td>Monitor and secure AI agents using LiteLLM for multi-model routing and management.</td></tr><tr><td><a href="/pages/nZiHqXi9OGbqpzldenXb">Dify</a></td><td>Secure Dify app inputs and outputs with Akto guardrails via Dify's Moderation API Extension.</td></tr><tr><td><a href="/pages/BKkdCzVQx9MNlxFb6Bjs">Hugging Face</a></td><td>Protect AI agents and models hosted or deployed via Hugging Face.</td></tr><tr><td><a href="/pages/FVCM4tzrs2QKFUG7QdTR">Azure AI Foundry</a></td><td>Protect AI agents developed and deployed via Azure AI Foundry.</td></tr><tr><td>Datadog</td><td>Integrate AI agent telemetry and observability signals from Datadog.</td></tr><tr><td>Anthropic</td><td>Secure AI agents powered by Anthropic models and APIs.</td></tr><tr><td><a href="/pages/suMI82xtFc4oV7CuvzPK">Portkey</a></td><td>Secure AI gateways and agent routing implemented using Portkey.</td></tr><tr><td><a href="/pages/9rLVfMxWTOjLQd489BJk">Databricks</a></td><td>Monitor and secure AI agents running on Databricks platforms.</td></tr><tr><td><a href="/pages/STRaroxtFhkonXzJpsgn">Snowflake</a></td><td>Secure AI agents and data-driven workflows built within Snowflake.</td></tr><tr><td>Vertex AI</td><td>Protect AI agents deployed using Google Vertex AI.</td></tr><tr><td>IBM Watsonx</td><td>Import and monitor Watsonx AI agents seamlessly within Akto Argus.</td></tr><tr><td>Microsoft Defender</td><td>Integrate security insights for AI agents from Microsoft Defender.</td></tr><tr><td>Zscaler</td><td>Secure AI agent traffic and access via Zscaler security controls.</td></tr><tr><td>CrowdStrike</td><td>Monitor AI agent behavior and threats using CrowdStrike telemetry.</td></tr><tr><td>ServiceNow</td><td>Secure AI agents integrated into ServiceNow workflows and automations.</td></tr><tr><td>Salesforce</td><td>Protect AI agents built on or integrated with Salesforce platforms.</td></tr><tr><td><a href="/pages/AEQ4c8jxzGUn12JUOL6K">TrueFoundry</a></td><td>Secure AI agents deployed using the TrueFoundry ML platform.</td></tr><tr><td>DigitalOcean</td><td>Monitor AI agents hosted on DigitalOcean infrastructure.</td></tr><tr><td>ChatGPT Enterprise</td><td>Secure enterprise-grade AI agents built using ChatGPT Enterprise.</td></tr><tr><td>Glean(Coming Soon)</td><td>Protect enterprise search and knowledge AI agents powered by Glean.</td></tr></tbody></table>

{% hint style="success" %}
**Bring Your Own AI Agent**

Akto Argus also supports **Bring Your Own Agent**, enabling organizations to secure **any custom, in-house, or self-hosted AI agent**, even if it is not built on a predefined platform.

**With Bring Your Own Agent, you can:**

* Secure proprietary and homegrown AI agents
* Integrate agents built using custom frameworks or internal tooling
* Monitor agent behavior, inputs, outputs, and tool usage
* Enforce security policies via Akto Argus APIs or SDKs
  {% endhint %}

## What You Need

* **AI Endpoint URL** (e.g., `https://api.example.com/ai-agent`)
* **(Optional) Custom Request Body** – for agents requiring specific input JSON
* **(Optional) Test Role for Authentication** – for agents with role-based access

<figure><img src="https://2916937215-files.gitbook.io/~/files/v0/b/gitbook-x-prod.appspot.com/o/spaces%2FRc4KTKGprZI2sPWKoaLe%2Fuploads%2Fgit-blob-2d67298aa334f86b23e720ea82b13f8fa50abba8%2Fimage.png?alt=media" alt="" width="563"><figcaption></figcaption></figure>

## Steps to Import

{% stepper %}
{% step %}
**Open Akto Argus Dashboard** → Go to Connectors
{% endstep %}

{% step %}
**Select your AI Agent provider** (Azure AI Foundry, Databricks, Vertex AI, Watsonx, or *Bring Your Own Agent*)
{% endstep %}

{% step %}
Click **Connect.**
{% endstep %}

{% step %}
**Fill in agent details**:

* **AI Endpoint URL**: e.g., `https://api.example.com/ai-agent`
* *(Optional)* Check **Use custom request body** and enter JSON payload:

  ```json
  { "key": "value" }
  ```
* *(Optional)* Enable **Use test role for authentication** and select a role (e.g., `ATTACKER_TOKEN_ALL`)
  {% endstep %}

{% step %}
Click **Import.**
{% endstep %}
{% endstepper %}

Akto will now automatically:

* Connect to the AI agent endpoint
* Send sample test requests to validate the configuration
* Register the agent into **AI Agent Security Inventory** for monitoring and scanning

{% hint style="success" %}
**Akto Access Scope**

* Auth/test roles (if any) are used **only during import** and are **not stored**
* Akto uses **read-only access** to interact with your AI agent
  {% endhint %}

## Get Support for your Akto setup

There are multiple ways to request support from Akto. We are 24X7 available on the following:

1. In-app `intercom` support. Message us with your query on intercom in Akto dashboard and someone will reply.
2. Join our [discord channel](https://www.akto.io/community) for community support.
3. Contact <support@akto.io> for email support.
4. Contact us [here](https://www.akto.io/contact-us).


# Amazon Quick

Connect Akto with Amazon Quick

## Overview

Amazon Quick Suite is an AWS-native agentic AI platform that lets employees query data, trigger workflows, and take actions across enterprise tools through natural language chat. Organizations use Amazon Quick to build and deploy AI-powered chat agents that connect to business systems like Jira, ServiceNow, Slack, and more.

The Akto Amazon Quick connector automatically:

* Discovers all Amazon Quick chat agents and action connectors in your environment
* Monitors chat conversations and agent interactions
* Sends activity data to Akto for security analysis and guardrail enforcement

## How It Works

Amazon Quick Suite records all agent and chat activity as logs. Akto reads these logs asynchronously, forwards them to Akto's Data Ingestion Service, and surfaces findings in your dashboard.

```mermaid
flowchart LR
    A[Amazon Quick] --> B[Activity Logs]
    B --> C[Akto Data\nIngestion Service]
    C --> D[Akto Dashboard]
```

{% hint style="info" %}
**Async mode** — Akto reads from Amazon Quick logs after the fact. There is an inherent delay between an event occurring in Amazon Quick and it appearing in Akto.
{% endhint %}

## What Data is Collected

| Category                     | What Akto Discovers                                                           |
| ---------------------------- | ----------------------------------------------------------------------------- |
| **Chat activity**            | User queries, agent responses, conversation sessions                          |
| **Action connector events**  | External service actions triggered from Quick (Jira, Slack, ServiceNow, etc.) |
| **Admin operations**         | Connector creation/deletion, permission and policy changes                    |
| **User & access management** | User additions, role changes, group membership updates                        |

## Steps to Connect

Reach out to the Akto support team via in-app intercom or using the contact links below. The team will provide the **CloudFormation Template (CFT)** and guide you through the full setup of the Amazon Quick connector in your AWS environment.

### IAM Permissions

The IAM policy below covers the permissions needed for the connector: enabling Quick's vended log delivery, managing the delivery source/destination, reading the delivered log objects from S3, writing execution logs, reading the Akto API key from Secrets Manager, and letting EventBridge invoke the forwarding function.

Replace the placeholders (`REGION`, `ACCOUNT_ID`, `CONVERSATION_BUCKET`, `LAMBDA_FUNCTION_NAME`, `AKTO_SECRET_ARN`) with your actual values.

```yaml
Version: "2012-10-17"

Statement:
  # -------------------------------------------------------------------------
  # 1. Enable Amazon Quick conversation logging
  # -------------------------------------------------------------------------
  - Sid: EnableQuickConversationLogging
    Effect: Allow
    Action:
      - quicksight:AllowVendedLogDeliveryForResource
    Resource:
      - arn:aws:quicksight:REGION:ACCOUNT_ID:account/ACCOUNT_ID

  - Sid: ManageQuickLogDelivery
    Effect: Allow
    Action:
      - logs:PutDeliverySource
      - logs:GetDeliverySource
      - logs:DeleteDeliverySource

      - logs:PutDeliveryDestination
      - logs:GetDeliveryDestination
      - logs:DeleteDeliveryDestination
      - logs:GetDeliveryDestinationPolicy
      - logs:PutDeliveryDestinationPolicy
      - logs:DeleteDeliveryDestinationPolicy

      - logs:CreateDelivery
      - logs:GetDelivery
      - logs:DeleteDelivery
      - logs:UpdateDeliveryConfiguration

      - logs:DescribeDeliverySources
      - logs:DescribeDeliveryDestinations
      - logs:DescribeDeliveries
      - logs:DescribeConfigurationTemplates

      - logs:TagResource
      - logs:UntagResource
      - logs:ListTagsForResource
    Resource: "*"

  # -------------------------------------------------------------------------
  # 2. Allow Lambda to discover and read Quick conversation files
  # -------------------------------------------------------------------------
  - Sid: ListQuickConversationObjects
    Effect: Allow
    Action:
      - s3:ListBucket
    Resource:
      - arn:aws:s3:::CONVERSATION_BUCKET
    Condition:
      StringLike:
        s3:prefix:
          - AWSLogs/ACCOUNT_ID
          - AWSLogs/ACCOUNT_ID/*

  - Sid: ReadQuickConversationObjects
    Effect: Allow
    Action:
      - s3:GetObject
    Resource:
      - arn:aws:s3:::CONVERSATION_BUCKET/AWSLogs/ACCOUNT_ID/*

  # -------------------------------------------------------------------------
  # 3. Allow Lambda to write its operational logs
  # -------------------------------------------------------------------------
  - Sid: CreateLambdaLogGroup
    Effect: Allow
    Action:
      - logs:CreateLogGroup
    Resource:
      - arn:aws:logs:REGION:ACCOUNT_ID:*

  - Sid: WriteLambdaLogs
    Effect: Allow
    Action:
      - logs:CreateLogStream
      - logs:PutLogEvents
    Resource:
      - arn:aws:logs:REGION:ACCOUNT_ID:log-group:/aws/lambda/LAMBDA_FUNCTION_NAME:*

  # -------------------------------------------------------------------------
  # 4. Allow Lambda to read the Akto API credential
  # -------------------------------------------------------------------------
  - Sid: ReadAktoApiCredential
    Effect: Allow
    Action:
      - secretsmanager:GetSecretValue
    Resource:
      - AKTO_SECRET_ARN

  # -------------------------------------------------------------------------
  # 5. Allow EventBridge Scheduler to invoke Lambda
  # -------------------------------------------------------------------------
  - Sid: InvokeQuickConversationLambda
    Effect: Allow
    Action:
      - lambda:InvokeFunction
    Resource:
      - arn:aws:lambda:REGION:ACCOUNT_ID:function:LAMBDA_FUNCTION_NAME
```

A quick breakdown of what each group is for:

1. **Enable Amazon Quick conversation logging**: lets you turn on vended log delivery for your Quick account, and manage the delivery source/destination through the CloudWatch Logs delivery APIs.
2. **Allow Lambda to discover and read Quick conversation files**: lets the Lambda list and read the delivered chat log objects in the destination S3 bucket, scoped to the `AWSLogs/ACCOUNT_ID/*` prefix.
3. **Allow Lambda to write its operational logs**: standard Lambda execution logging permissions.
4. **Allow Lambda to read the Akto API credential**: lets the Lambda pull the Akto API key out of Secrets Manager rather than hardcoding it.
5. **Allow EventBridge Scheduler to invoke Lambda**: lets the EventBridge schedule invoke the Lambda.

## Get Support for your Akto setup

There are multiple ways to request support from Akto. We are 24X7 available on the following:

1. In-app `intercom` support. Message us with your query on intercom in Akto dashboard and someone will reply.
2. Join our [discord channel](https://www.akto.io/community) for community support.
3. Email us at <support@akto.io> for direct help.
4. Contact us [here](https://www.akto.io/contact-us).


# Arcade

Integrate arcade.dev with Akto Argus

## Overview

Arcade is a real-time traffic processing engine that enables secure collection and forwarding of network events into Akto for runtime API visibility and analysis. This integration lets you capture API traffic and metadata from Arcade and send it into your Akto environment for security monitoring and enforcement.

The Arcade Integration automatically:

* Collects API request and response metadata from your Arcade deployment.
* Forwards structured traffic events to Akto’s Traffic Processor.
* Supports downstream security analysis and dashboard visualization in Akto.

## Steps to Connect

{% stepper %}
{% step %}
**Configure Akto Traffic Processor**

Set up and configure your Traffic Processor. The steps are mentioned [here](/akto-argus-agentic-ai-security-for-homegrown-ai/connectors/others/hybrid-saas).

{% hint style="warning" %}
**Important**

Keep the your Data ingestion URL ready. It will be required in the next steps.
{% endhint %}
{% endstep %}

{% step %}
**Navigate to Contextual Access in Arcade**

1. Log in to your Arcade Dashboard.
2. From the left navigation panel, select **Contextual Access**.
3. Under the **Extensions** section, click **Add Extension**.

   <div data-with-frame="true"><figure><img src="/files/UfduL0Fv3IHKluQZosuT" alt="" width="563"><figcaption></figcaption></figure></div>

{% endstep %}

{% step %}
**Create a New Webhook Extension**

In the **Add Extension** screen enter the Basic Information such as:

* **System Type:** Select `Webhook`
* **Name:** Provide a descriptive name (e.g., `Akto Security Integration`)
* **Description (optional):**\
  Example:\
  `Forwards tool execution events to Akto Traffic Processor for security analysis`
* **Scope:** Select the appropriate scope (Project or Organization)

  <div data-with-frame="true"><figure><img src="/files/DZvizaIugdsKr4FCtYaa" alt="" width="563"><figcaption></figcaption></figure></div>

{% endstep %}

{% step %}
**Configure Webhook Endpoints**

Under **Webhook Endpoints**, configure the execution stages that should be intercepted.

{% hint style="warning" %}
**Note**

You must enter your Akto Traffic Processor ingestion URL in each enabled stage.\
All other fields can be left as default unless you require a custom configuration.
{% endhint %}

**1. Tool Access**

Enable **Tool Access** if you want Akto to control which users can see or use specific tools.

**Configure:**

* **Webhook URL:**\
  Enter your Data Ingestion ingestion endpoint:

  ```
  <your-data-ingestion-url>
  ```
* **Priority:** Leave as default (`0`) unless you need custom execution ordering.
* **On Failure:** Controls what arcade.dev does if Akto's webhook is unreachable or returns an error. Set to `Allow request` to let the tool call proceed when Akto is unavailable, or `Block request` to deny the call if Akto cannot be reached.
* **Timeout:** Leave default (recommended: 5 seconds).
* **Response Caching:** Keep disabled unless explicitly required.

  <div data-with-frame="true"><figure><img src="/files/bh6L0MOlb30y8x1tM3FJ" alt="" width="563"><figcaption></figcaption></figure></div>

**2. Pre Tool Execution**

Enable **Pre tool execution** to validate and inspect tool inputs before the tool runs.

**Configure:**

* **Webhook URL:**

  ```
  <your-data-ingestion-url>
  ```
* Leave **Priority**, **Timeout**, and other fields as default unless you require custom behaviour.
* **On Failure:** Controls what arcade.dev does if Akto's webhook is unreachable or returns an error. Set to `Allow request` to let the tool call proceed when Akto is unavailable, or `Block request` to deny the call if Akto cannot be reached.

  <div data-with-frame="true"><figure><img src="/files/UKZFaS0Cafvft3u5JPts" alt="" width="563"><figcaption></figcaption></figure></div>

{% hint style="info" %}
**Blocking vs Async Mode**

* **Blocking mode (default):** Keep **Pre Tool Execution** enabled. Akto evaluates tool inputs before execution and can block unsafe or policy-violating calls.
* **Async / monitoring-only mode:** Disable **Pre Tool Execution** and rely solely on Post Tool Execution. Tool calls will not be intercepted — Akto will only observe and record outputs after execution. Use this when you want visibility without enforcement.
  {% endhint %}

**3. Post Tool Execution**

Enable **Post tool execution** to inspect tool outputs after execution.

**Configure:**

* **Webhook URL:**

  ```
  <your-data-ingestion-url>
  ```
* Leave **Priority**, **Timeout**, and other fields as default unless custom configuration is required.
* **On Failure:** Controls what arcade.dev does if Akto's webhook is unreachable or returns an error. Set to `Allow request` to let the tool call proceed when Akto is unavailable, or `Block request` to deny the call if Akto cannot be reached.

  <div data-with-frame="true"><figure><img src="/files/hBTihw4zqS5H0aoRpK7Z" alt="" width="563"><figcaption></figcaption></figure></div>

{% endstep %}

{% step %}
**Save and Enable the Extension**

After configuring all required webhook stages:

1. Click **Add Extension** present in the top right corner.
2. Ensure the extension is marked as **Enabled**.
3. Review the **Execution Order Preview** to confirm hooks are active.

   <div data-with-frame="true"><figure><img src="/files/FUNbR9HUoOfWsHzOAgwc" alt="" width="563"><figcaption></figcaption></figure></div>

{% endstep %}
{% endstepper %}

## Data Collected

The Arcade integration captures:

### Tool Access Events

* Tool visibility decisions
* User metadata
* Access enforcement decisions

### Pre-Execution Data

* Tool input payloads
* Validation and policy enforcement results

### Post-Execution Data

* Tool output payloads
* Redaction or blocking decisions

## Get Support

If you need assistance with the Snowflake connector:

* **In-app Chat**: Use the chat widget in your Akto dashboard for instant support
* **Discord Community**: Join our community at [discord.gg/Wpc6xVME4s](https://discord.gg/Wpc6xVME4s)
* **Email Support**: Contact us at <support@akto.io>
* **Contact Form**: Submit a support request at <https://www.akto.io/contact-us>

Our team is available 24/7 to help with setup, troubleshooting, and best practices.


# AWS Bedrock

## Overview

This guide provides step-by-step instructions for setting up AKTO's AWS Bedrock monitoring solution in your AWS account. This solution automatically captures, processes, and sends AWS Bedrock agent conversations to your AKTO instance for security analysis.

## System Architecture

```mermaid
flowchart LR
    A[AWS Bedrock Agent] --> B[Model Invocation Logging] --> C[S3 Bucket]
    C --> E[Lambda Function]
    D[EventBridge every 5 minutes] --> E
    E --> F[Data Ingestion API] --> G[AKTO Dashboard]


```

## What You'll Achieve

✅ **Automated Bedrock Monitoring**: Capture all AWS Bedrock agent conversations\
✅ **Real-time Processing**: Process logs every 5 minutes automatically\
✅ **Security Analysis**: Send conversation data to AKTO for guardrail detection\
✅ **Multi-Model Support**: Works with Amazon Nova, Claude, and other Bedrock models\
✅ **Client-Side Deployment**: Complete data isolation in your AWS account

## Prerequisites

### **1. AWS Account Requirements**

* AWS CLI installed and configured with user who has below permissions
* IAM permissions for:
  * Lambda functions
  * S3 buckets
  * EventBridge rules
  * Bedrock service access
  * IAM role creation

### **2. AKTO Instance Requirements**

* AKTO Data ingestion service instance running and accessible
* AKTO API key for authentication

## Step-by-Step Setup

{% tabs %}
{% tab title="Deploy via AWS Console" %}
{% stepper %}
{% step %}
**Prepare Your Information**

Before running the deployment, gather this information:

1. **S3 Bucket Name - LogsBucketName**: A bucket name where Bedrock logs are stored ie. where you have enabled model invocation logging
   * Make sure that you have enabled 'Model invocation logging' and the S3 bucket configured for invocation logs need to be provided.
   * Go to Amazon Bedrock - Settings - Check 'Model invocation logging' and the S3 logging destination selected. If not enabled, there would be no discovery possible.
   * Example: `my-company-bedrock-logs-2026`
2. **LogsPrefix**: (Optional) S3 prefix path for Bedrock logs. Default: AWSLogs/
   * Check 'Model invocation logging' and check the S3 location prefix configured for the bucket
   * Example: S3 location : `s3://akto-aws-bedrock-logs-02/bedrock-logs/`
   * In the above eg : LogsBucketName would be akto-aws-bedrock-logs-02 and LogsPrefix would be bedrock-logs/
   * This is optional field, if user has not configured any prefix then by default AWSLogs/ will be configured

<div data-with-frame="true"><figure><img src="/files/1PG0By4K4G5n5GfWiLBm" alt="" width="563"><figcaption></figcaption></figure></div>

3. **S3 Bucket Name - MarkersBucketName**: S3 bucket name to store AKTO marker files for processed conversations
   * Example: `akto-marker-logs`
4. **AKTO Data Ingestion URL**: Your AKTO endpoint
   * Format: `https://your-akto-instance.com/api/ingestData`
   * Contact AKTO support team to obtain your Data Ingestion URL
5. **AKTO API Key**: Authentication key for your AKTO instance
   * Navigate to: **AKTO Argus** → **Connectors** → **Setup Guardrails**
   * Copy the API key from there
6. **LambdaCodeVersion**: version
   * Contact AKTO support team to obtain your lambda version
     {% endstep %}

{% step %}
**Open CloudFormation**

1. Sign in to AWS Console
2. Search for "CloudFormation"
3. Click **CloudFormation** service
   {% endstep %}

{% step %}
**Create Stack**

1. Click **Create stack**
2. Select **Amazon S3 URL**
3. Enter the CloudFormation template URL:

   <pre data-overflow="wrap"><code>https://lambda-code-akto-us-east-1.s3.us-east-1.amazonaws.com/v1.2/client-aws-cf-template.yaml
   </code></pre>

   <div data-with-frame="true"><figure><img src="/files/7ZMloUxxbCnkI6HhAzdj" alt="" width="563"><figcaption></figcaption></figure></div>
4. Click **Next.**
   {% endstep %}

{% step %}
**Enter Stack Details**

Fill in the form with your information:

* **Stack name**: Enter a name for your stack (must be lowercase, no spaces)
  * Example: `akto-bedrock-discovery-prod`

**Parameters:**

* **S3BucketName**: Enter the S3 bucket name you gathered in Step 1
  * Example: `my-company-bedrock-logs-2026`
* **LogsPrefix**: (Optional) S3 prefix path for Bedrock logs
  * Example: `bedrock-logs`
* **MarkersBucketName**: S3 bucket name to store AKTO marker manifest file
* **DataIngestionEndpoint**: `<URL-obtained-from-akto-team>`
* **LambdaCodeVersion**: v1.2 `<Version-obtained-from-akto-team>`
* **AktoApiKey**: `<Akto-API-Key>`

<div data-with-frame="true"><figure><img src="/files/aNo7DcODAM8VBfiFQw7E" alt="" width="563"><figcaption></figcaption></figure></div>

Click **Next.**
{% endstep %}

{% step %}
**Configure Stack Options**

1. Leave defaults (no changes needed)
2. Scroll down to **Acknowledgment**
3. ✅ Check: "I acknowledge that AWS CloudFormation might create IAM resources with custom names"

{% hint style="warning" %}
CloudFormation needs this acknowledgement to create the Lambda execution role.
{% endhint %}

4. Click **Create stack**
   {% endstep %}

{% step %}
**Wait for Completion**

CloudFormation will create the following resources:

* ✅ Lambda Execution Role
* ✅ Lambda Function (akto-bedrock-log-processor-cf-)
* ✅ EventBridge Execution Role
* ✅ EventBridge Schedule Rule

**Expected Status:**

```
akto-bedrock-discovery-prod - CREATE_IN_PROGRESS
├─ LambdaExecutionRole - CREATE_COMPLETE ✓
├─ AktoBedrocklambdaFunction - CREATE_COMPLETE ✓
├─ EventBridgeExecutionRole - CREATE_COMPLETE ✓
├─ BedrocktogProcessingScheduleRule - CREATE_COMPLETE ✓
└─ akto-bedrock-discovery-prod - CREATE_COMPLETE ✓
```

⏳ **Typical time: 2-3 minutes**
{% endstep %}

{% step %}
**Verify Success**

1. **Stack Status** should show: **CREATE\_COMPLETE** (green)
2. Click **Outputs** tab
3. You should see:
   * LambdaFunctionName
   * LambdaFunctionArn
   * EventBridgeRuleName

✅ **Deployment successful!**
{% endstep %}

{% step %}
**Check Lambda Function**

1. Search for "Lambda" in AWS Console
2. Click **Lambda**
3. Look for function: `akto-bedrock-log-processor-cf-<account-id>`
4. Click on it
5. Should show: **Last modified: just now**
   {% endstep %}

{% step %}
**Check EventBridge Schedule**

1. Search for "EventBridge" in AWS Console
2. Click **EventBridge**
3. Click **Rules** (left sidebar)
4. Look for: `akto-bedrock-schedule-cf-<account-id>`
5. Should show: **State: Enabled** ✅
   {% endstep %}

{% step %}
**Check Lambda Logs**

1. From Lambda function page, click **Monitor** tab
2. Click **View CloudWatch logs**
3. Should see log stream with recent entries

✅ **Everything working!**
{% endstep %}
{% endstepper %}
{% endtab %}

{% tab title="Deploy via AWS CLI" %}
{% stepper %}
{% step %}
**Install AWS CLI if not installed**

If AWS CLI is already configured then move to Step 2

```bash
# On Mac:
brew install awscli

# On Windows: Download from https://aws.amazon.com/cli/
# On Linux:
curl "https://awscli.amazonaws.com/awscli-exe-linux-x86_64.zip" -o "awscliv2.zip"
unzip awscliv2.zip
sudo ./aws/install
```

1. **Install Node.js**

   ```bash
   # On Mac:
   brew install node

   # On Windows/Linux: Download from https://nodejs.org/
   ```
2. **Configure AWS Credentials**

   You need to tell AWS who you are:

   ```bash
   aws configure
   ```

   It will ask for:

   * **AWS Access Key ID**: Get from AWS Console → IAM → Users → Your User → Security credentials
   * **AWS Secret Access Key**: Same place as above
   * **Default region**: Use `us-east-1` (or your preferred region)
   * **Default output format**: Just press Enter
3. **Test AWS Access**

   ```bash
   aws sts get-caller-identity
   ```
4. Verify your AWS identity

   ```bash
   aws sts get-caller-identity
   ```

   Expected Output

   ```json
   {
       "UserId": "AIDACKXXXXXXXXXXXXXXXXX",
       "Account": "123456789***",
       "Arn": "arn:aws:iam::123456789012:user/your-username"
   }
   ```

   ✅ **Should show your account ID** - You're ready!\
   ❌ **Shows error** - Fix your credentials first
   {% endstep %}

{% step %}
**Download the Solution**

```bash
# Clone the repository
git clone https://github.com/akto-api-security/akto_aws_bedrock_discovery.git

# Navigate to the solution directory
cd akto_aws_bedrock_discovery

#Navigate to CloudFormation Directory
cd cloudformation

#Edit Your Environment Parameters
#Choose your environment and edit the parameters file:

#for development
nano parameters/dev-parameters.json

#for production
nano parameters/prod-parameters.json

#Update these values:
- `S3BucketName`: Your existing S3 bucket
- `DataIngestionEndpoint`: Your AKTO API endpoint
- `AktoApiKey`: Your AKTO authentication key

#Make Deployment Script Executable
chmod +x scripts/deploy.sh
```

{% endstep %}

{% step %}
**Prepare Your Information**

Before running the deployment, gather this information:

1. **S3 Bucket Name**: A unique bucket name for storing Bedrock logs
   * Example: `my-company-bedrock-logs-2024`
   * Must be globally unique across all AWS accounts
2. **AKTO Data Ingestion URL**: Your AKTO endpoint
   * Format: `https://your-akto-instance.com/api/ingestData`
   * Replace `your-akto-instance.com` with your actual AKTO domain/IP
3. **AKTO API Key**: Authentication key for your AKTO instance
   * Obtain from your AKTO dashboard
   * Example: `ak_live_xxxxxxxxxxxxxxxxxxxx`
     {% endstep %}

{% step %}
**Run the Deployment**

Execute the deployment script:

Choose which environment to deploy to:

```bash
#Development:

./scripts/deploy.sh dev
```

```bash
#Production:

./scripts/deploy.sh prod
```

The script will:

* ✅ Build the Lambda package automatically
* ✅ Create all AWS resources (roles, Lambda, EventBridge)
* ✅ Configure everything with one command
* ✅ Show you the results

```bash
 Deployment completed successfully!

📊 Retrieving stack outputs...
---------
|OutputKey|OutputValue|
---------
|LambdaFunctionName|akto-bedrock-log-processor-123456|
|LambdaFunctionArn|arn:aws:lambda:us-east-1:123456:function:...|
|EventBridgeRuleName|akto-bedrock-schedule-123456|

```

{% endstep %}

{% step %}
**Wait for Deployment**

The script will automatically:

1. **Create IAM Role**: Set up permissions for Lambda
2. **Deploy Lambda Function**: Upload and configure the processing function
3. **Set Up EventBridge**: Schedule processing every 5 minutes
4. **Configure Environment**: Set all required variables

**Expected Output:**

```bash
✅ Lambda package built successfully

📤 Uploading Lambda package to S3 (5.4 MB, may take 1-2 minutes)...
upload: ../akto-bedrock-processor.zip to s3://akto-aws-bedrock-logs-02/lambda-code/akto-bedrock-processor.zip
✅ Lambda package uploaded to S3: s3://akto-aws-bedrock-logs-02/lambda-code/akto-bedrock-processor.zip

🔧 Updating Lambda function code: akto-bedrock-log-processor-cf-041877753357
✅ Lambda function code updated successfully!

🔧 Updating CloudFormation stack: akto-bedrock-discovery-prod
⏳ Waiting for stack update to complete...
✅ Stack updated successfully!

## 📊 Retrieving stack outputs...

|                                                                   DescribeStacks                                                                   |
+------------------------------+----------------------+----------------------------------------------------------------------------------------------+
|          Description         |      OutputKey       |                                         OutputValue                                          |
+------------------------------+----------------------+----------------------------------------------------------------------------------------------+
|  ARN of the Lambda function  |  LambdaFunctionArn   |  arn:aws:lambda:us-east-1:xxxxxx:function:akto-bedrock-log-processor-cf-xxxxxx   |
|  Name of the Lambda function |  LambdaFunctionName  |  akto-bedrock-log-processor-cf-xxxxxx                                               |
|  Name of the EventBridge rule|  EventBridgeRuleName |  akto-bedrock-schedule-cf-xxxxxx                                                       |
|  CloudFormation stack name   |  StackName           |  akto-bedrock-discovery-prod                                                                 |
+------------------------------+----------------------+----------------------------------------------------------------------------------------------+

🎉 Deployment completed successfully!

🔍 Next steps:

1. Generate some AWS Bedrock conversations
2. Monitor Lambda logs:
aws logs tail /aws/lambda/akto-bedrock-log-processor-xxxxxx --follow --region us-east-1
3. Test manually:
aws lambda invoke --function-name akto-bedrock-log-processor-xxxxxx --region us-east-1 response.json

📌 CloudFormation Stack Information:
Stack Name: akto-bedrock-discovery-prod
Region: us-east-1
Environment: prod
```

{% endstep %}

{% step %}
**Verify the Deployment**

Run the verification script:

```bash
./test-solution.sh
```

This will check:

* ✅ Lambda function exists and is accessible
* ✅ S3 bucket is properly configured
* ✅ CloudWatch logs are working
* ✅ EventBridge schedule is active
  {% endstep %}

{% step %}
**Create S3 Bucket (If Needed)**

If you don't have an S3 bucket, create one:

```bash
# Replace 'my-company-bedrock-logs-2024' with your bucket name
aws s3 mb s3://my-company-bedrock-logs-2024

# Set bucket policy for Bedrock access (optional - Lambda will handle this)
aws s3api put-bucket-versioning \
    --bucket my-company-bedrock-logs-2024 \
    --versioning-configuration Status=Enabled
```

{% endstep %}

{% step %}
**Test with Bedrock**

Generate a test conversation:

```bash
# Example Bedrock API call
aws bedrock-runtime invoke-model \
    --model-id anthropic.claude-3-haiku-20240307-v1:0 \
    --body '{"messages":[{"role":"user","content":[{"type":"text","text":"Hello, this is a test message for AKTO monitoring."}]}],"max_tokens":50,"anthropic_version":"bedrock-2023-05-31"}' \
    --content-type application/json \
    test-output.json
```

{% endstep %}

{% step %}
**Monitor the System**

**Check Lambda Logs:**

```bash
aws logs tail /aws/lambda/akto-bedrock-log-processor-cf-YOUR_ACCOUNT_ID --follow
```

**Check S3 for Bedrock Logs:**

```bash
aws s3 ls s3://your-bucket-name/bedrock-logs/ --recursive
```

**Manual Lambda Test:**

```bash
aws lambda invoke \
    --function-name akto-bedrock-log-processor-YOUR_ACCOUNT_ID \
    --payload '{}' \
    response.json
```

{% endstep %}
{% endstepper %}
{% endtab %}
{% endtabs %}

## Integrate Both Bedrock and AgentCore (Unified Setup)

To integrate **both** AWS Bedrock discovery **and** [AWS Bedrock AgentCore](/akto-argus-agentic-ai-security-for-homegrown-ai/connectors/ai-agent-security/aws-bedrock-agentcore) gateway interception in a single stack, use the unified template below instead of the template referenced in the steps above.

**Unified CloudFormation Template:**

{% code overflow="wrap" %}

```
https://lambda-code-akto-us-east-1.s3.us-east-1.amazonaws.com/v4.1/client-aws-cf-template.yaml
```

{% endcode %}

This template adds one new parameter on top of the standard Bedrock discovery setup:

* **EnableGatewayInterception** (`true` / `false`)
  * `true` — Attaches the Akto interceptor to all available AgentCore Gateways. All gateway requests are routed through the interceptor (proxy) to Akto, in addition to discovery through agent traffic.
  * `false` — Only discovery through agent traffic is enabled; no gateway interceptor is attached.

Lambda package used by this template: `s3://lambda-code-akto-us-east-1/v4.1/akto-bedrock-processor.zip`

Deploy following the same **Deploy via AWS Console** steps in the [Step-by-Step Setup](#step-by-step-setup) section above, using this template URL and setting `EnableGatewayInterception` alongside the other parameters when filling in stack details.

{% hint style="info" %}

## **Important Notes**

1. **Bedrock Logging Configuration**: The Lambda function automatically enables Bedrock model invocation logging on first run if not enabled
2. **Processing Schedule**: Logs are processed every 5 minutes via EventBridge
3. **Data Format**: Conversations are formatted in AKTO StandardMessage format with security tags
4. **Security**: All data remains in your AWS account; no external access required
   {% endhint %}

## What Happens Next

Once deployed, the system will:

1. **Auto-Configure Bedrock**: Enable model invocation logging to your S3 bucket
2. **Process Conversations**: Extract and format conversation data every 5 minutes
3. **Send to AKTO**: Forward processed data to your AKTO instance for analysis
4. **Monitor Security**: AKTO will analyze conversations for potential threats

## Support

For issues or questions:

1. **Check CloudWatch Logs**: Monitor Lambda execution logs
2. **Review S3 Configuration**: Ensure bucket exists and is accessible
3. **Verify AKTO Connectivity**: Test endpoint and API key


# AWS Bedrock AgentCore

## Overview

AWS Bedrock AgentCore is Amazon's managed platform for building and operating production AI agents. Its **Gateway** is a managed MCP endpoint that aggregates tools (Lambda, OpenAPI, and MCP servers) and serves them to your agents and MCP clients over a single URL.

Akto secures this traffic with a **gateway interceptor**: an AWS Lambda function that AgentCore invokes on every request and response passing through the gateway. It validates MCP `tools/call` traffic against your Akto guardrail policies in real time: blocking disallowed tool calls, redacting sensitive tool results, and ingesting all tool activity into the Akto dashboard.

The interceptor code and deployment script are open source: [github.com/akto-api-security/aws-bedrock-agentcore](https://github.com/akto-api-security/aws-bedrock-agentcore).

## How It Works

A single Lambda is attached to the gateway at two interception points: **REQUEST** (before the tool runs) and **RESPONSE** (after the tool returns). The same function handles both; it detects which phase it is from the event.

```mermaid
sequenceDiagram
    autonumber
    participant Client as MCP Client / Agent
    participant Gateway as AgentCore Gateway
    participant Interceptor as Akto Interceptor Lambda
    participant Akto as Akto Guardrails
    participant Target as Tool / MCP Target

    Client->>Gateway: tools/call
    Gateway->>Interceptor: REQUEST event
    Interceptor->>Akto: validate request
    alt Blocked
        Akto-->>Interceptor: not allowed
        Interceptor-->>Gateway: JSON-RPC error (short-circuit)
        Gateway-->>Client: blocked, target never runs
    else Allowed
        Akto-->>Interceptor: allowed (optionally modified)
        Interceptor-->>Gateway: forward request
        Gateway->>Target: invoke tool
        Target-->>Gateway: tool result
        Gateway->>Interceptor: RESPONSE event
        Interceptor->>Akto: validate response
        Interceptor-->>Gateway: pass through / redact / block
        Gateway-->>Client: final result
    end
```

### What gets guardrailed

| MCP method                                            | REQUEST interceptor                       | RESPONSE interceptor                  |
| ----------------------------------------------------- | ----------------------------------------- | ------------------------------------- |
| `tools/call`                                          | Validated; blocked or arguments rewritten | Result validated; blocked or redacted |
| `tools/list`, `initialize`, `notifications/*`, `ping` | Passed through                            | Passed through                        |

## What You'll Achieve

✅ **Real-time tool-call guardrails**: block disallowed `tools/call` before the tool executes\
✅ **Response redaction**: strip or block sensitive data in tool results before the client sees them\
✅ **Full observability**: every MCP tool call and result is ingested into the Akto dashboard\
✅ **Managed enforcement**: runs inside AWS as a gateway interceptor; no proxy or sidecar to operate\
✅ **Fail-open by design**: if Akto is unreachable, traffic passes through so the gateway never breaks

## Prerequisites

### AWS

* An existing AgentCore **Gateway** (MCP protocol): note its **Gateway ID** and **Region**
* AWS credentials with permissions for `lambda:*`, `iam:CreateRole` / `PutRolePolicy` / `PassRole`, and `bedrock-agentcore-control:GetGateway` / `UpdateGateway`
* For the CLI method: `aws` CLI v2, `jq`, and `zip` installed locally

### Akto

* Akto **Data Ingestion URL** (`AKTO_DATA_INGESTION_URL`)
* Akto **API token** (`AKTO_API_TOKEN`)

## Setup

You can deploy via CloudFormation, with the provided CLI script, or manually from the AWS Console. All three attach the **same** Lambda to both interception points.

{% tabs %}
{% tab title="Deploy via CloudFormation (recommended)" %}
{% stepper %}
{% step %}
**Prepare Your Information**

Before running the deployment, gather this information:

1. **AKTO API Key**: Authentication key for your AKTO instance
   * Navigate to: **AKTO Argus** → **Connectors** → **Setup Guardrails**
   * Copy the API key from there
2. **AWS Region**: The region where your AgentCore Gateway is deployed
   * Example: `ap-south-1`
3. **Gateway ID(s)**: One or more AgentCore Gateway IDs to attach the interceptor to (comma-separated)
   * Example: `gateway-quick-start-9080a8`
4. **AKTO Data Ingestion URL**: Your AKTO endpoint
   * Format: `https://your-akto-instance.com/api/ingestData`
   * Contact AKTO support team to obtain your Data Ingestion URL
5. **S3 Bucket Name**: A bucket name for storing Bedrock conversation logs
   * Example: `bedrock-logs-agents`
     {% endstep %}

{% step %}
**Open CloudFormation**

1. Sign in to AWS Console
2. Search for "CloudFormation"
3. Click **CloudFormation** service
   {% endstep %}

{% step %}
**Create Stack**

1. Click **Create stack**
2. Select **Amazon S3 URL**
3. Enter the CloudFormation template URL:

   <pre data-overflow="wrap"><code>https://lambda-code-akto-ap-south-1.s3.ap-south-1.amazonaws.com/UNIFIED_TEMPLATE.yaml
   </code></pre>
4. Click **Next.**

<div data-with-frame="true"><figure><img src="/files/ZPQ77j9Oy8nSris2GodQ" alt="" width="563"><figcaption></figcaption></figure></div>
{% endstep %}

{% step %}
**Enter Stack Details**

Fill in the form with your information:

* **Stack name**: Enter a name for your stack (must be lowercase, no spaces)
  * Example: `aws-akto-discovery`

**Parameters:**

* **AktoApiKey**: `<Akto-API-Key>`
* **AwsRegion**: AWS region where Bedrock resources are deployed
  * Example: `ap-south-1`
* **ClientGatewayIds**: AgentCore Gateway IDs to attach interceptor to (comma-separated)
  * Example: `gateway-quick-start-9080a8`
* **DataIngestionEndpoint**: `<URL-obtained-from-akto-team>`
  * Example: `https://your-akto-instance.com/api/ingestData`
* **S3BucketName**: S3 bucket name where your Bedrock conversation logs will be stored via Model Invocation logging.
  * Make sure that you have enabled 'Model invocation logging' and the S3 bucket configured for invocation logs need to be provided.
  * Go to Amazon Bedrock - Settings - Check 'Model invocation logging' and the S3 logging destination selected. If not enabled, there would be no discovery possible.
  * Example: `bedrock-logs-agents`

<div data-with-frame="true"><figure><img src="/files/d9zrsXz0L5fKfL2RmxOY" alt="" width="563"><figcaption></figcaption></figure></div>

Click **Next.**
{% endstep %}

{% step %}
**Configure Stack Options**

1. Leave defaults (no changes needed)
2. Scroll down to **Acknowledgment**
3. ✅ Check: "I acknowledge that AWS CloudFormation might create IAM resources with custom names"

{% hint style="warning" %}
CloudFormation needs this acknowledgement to create the Lambda execution role.
{% endhint %}

4. Click **Create stack**
   {% endstep %}

{% step %}
**Wait for Completion**

CloudFormation will create the Lambda execution role, the unified Lambda function for discovery from provided S3 bucket and intercepting gateway, the CloudFormation helper lambda to attach interceptor configuration (REQUEST + RESPONSE) to each gateway listed in **ClientGatewayIds**.

**Expected Status:**

```
aws-akto-discovery - CREATE_IN_PROGRESS
├─ LambdaExecutionRole - CREATE_COMPLETE ✓
├─ AktoInterceptorLambdaFunction - CREATE_COMPLETE ✓
└─ aws-akto-discovery - CREATE_COMPLETE ✓
```

⏳ **Typical time: 2-3 minutes**
{% endstep %}

{% step %}
**Verify Success**

1. **Stack Status** should show: **CREATE\_COMPLETE** (green)
2. Click the **Outputs** tab
3. You should see the interceptor Lambda's function name and ARN

✅ **Deployment successful!**
{% endstep %}
{% endstepper %}
{% endtab %}

{% tab title="Deploy with CLI" %}
{% stepper %}
{% step %}
**Clone the repository**

```bash
git clone https://github.com/akto-api-security/aws-bedrock-agentcore.git
cd aws-bedrock-agentcore/deploy
```

{% endstep %}

{% step %}
**Create your `.env`**

```bash
cp .env.example .env
```

Fill in the four required values:

```bash
AKTO_DATA_INGESTION_URL=https://your-akto-instance.com
AKTO_API_TOKEN=your-akto-api-token
AWS_REGION=ap-south-1
GATEWAY_IDS=your-gateway-id          # one or many, comma/space separated
```

{% endstep %}

{% step %}
**Run the deploy script**

```bash
./deploy.sh
```

The script auto-fetches your AWS account ID, creates the Lambda execution role if needed, packages and deploys the interceptor, then for each gateway in `GATEWAY_IDS` grants invoke permission and attaches the interceptor (REQUEST + RESPONSE, with request headers enabled). It is idempotent: safe to re-run.
{% endstep %}
{% endstepper %}

{% hint style="info" %}
To attach to multiple gateways, list them in `GATEWAY_IDS` separated by commas or spaces. They must all be in the same `AWS_REGION`; for another region, run the script again with that region.
{% endhint %}
{% endtab %}

{% tab title="Deploy from AWS Console" %}
{% stepper %}
{% step %}
**Create the Lambda function**

Open the **AWS Lambda** console (in the same Region as your gateway) → **Create function** → **Author from scratch**.

* **Function name:** `akto-guardrails-interceptor`
* **Runtime:** **Python 3.12**
* **Architecture:** `x86_64` (default)

Click **Create function**.
{% endstep %}

{% step %}
**Add the interceptor code**

Download [`lambda/interceptor/handler.py`](https://github.com/akto-api-security/aws-bedrock-agentcore/blob/master/lambda/interceptor/handler.py) from the repository.

On the function page, open the **Code** tab and either:

* paste the file contents into the inline editor and rename the file to `handler.py`, **or**
* zip `handler.py` and use **Upload from → .zip file**

Then set the entry point: **Runtime settings → Edit → Handler** = `handler.lambda_handler`. Click **Save**.
{% endstep %}

{% step %}
**Set environment variables**

Go to **Configuration → Environment variables → Edit → Add environment variable** and add both:

| Key                       | Value                                                                                              |
| ------------------------- | -------------------------------------------------------------------------------------------------- |
| `AKTO_DATA_INGESTION_URL` | `https://your-akto-instance.com`                                                                   |
| `AKTO_API_TOKEN`          | your Akto API token (go to **Akto Argus → Connectors → Setup Guardrail** card and copy your token) |

Click **Save**.
{% endstep %}

{% step %}
Copy the **Function ARN** shown at the top right of the function page: you'll need it in the next steps.
{% endstep %}

{% step %}
**Allow the gateway to invoke the Lambda**

The gateway calls the interceptor using its own execution role, so that role needs `lambda:InvokeFunction` permission.

1. In the **Bedrock AgentCore** console, open your **Gateway** and note its **execution role** (an IAM role ARN under the gateway details).
2. Open the **IAM** console → **Roles** → find that role → **Add permissions → Create inline policy** → **JSON** tab, and paste (replace the ARN with your function ARN):

```json
{
  "Version": "2012-10-17",
  "Statement": [
    {
      "Effect": "Allow",
      "Action": "lambda:InvokeFunction",
      "Resource": "arn:aws:lambda:<region>:<account-id>:function:akto-guardrails-interceptor"
    }
  ]
}
```

3. Name it `invoke-akto-guardrails-interceptor` and **Create policy**.
   {% endstep %}

{% step %}
**Attach the interceptor to the gateway**

Back in the **Bedrock AgentCore** console → your **Gateway** → **Edit**, find the interceptor configuration and paste the **same** Function ARN into both fields:

* **Request Interceptor Lambda ARN** → your function ARN: set **Pass request header** to **True**
* **Response Interceptor Lambda ARN** → the **same** function ARN: set **Pass request header** to **True**
* Leave **Exclude the response body from the interceptor Lambda invocation** **unchecked**

Click **Save** / **Update gateway**.
{% endstep %}
{% endstepper %}

{% hint style="warning" %}
Set **Pass request header** to **True** on both interceptors: the interceptor forwards the `Mcp-Session-Id` header to Akto for session grouping; with it off, sessions can't be correlated. And keep **Exclude the response body** unchecked, or response-content guardrails become a no-op.
{% endhint %}
{% endtab %}
{% endtabs %}

## Verify the Integration

Tail the Lambda logs and make a tool call through the gateway:

```bash
aws logs tail /aws/lambda/akto-guardrails-interceptor --follow --region <your-region>
```

On a `tools/call` you should see:

```
Guardrailing REQUEST tools/call: <tool-name>
Akto response: status=200 ...
```

A blocked call returns a JSON-RPC error to the client instead of the tool result, and the tool activity appears in the Akto dashboard.

## Environment Variables

Only two settings are environment-driven; everything else is a fixed default tuned for the gateway use case.

| Variable                  | Default      | Description                                  |
| ------------------------- | ------------ | -------------------------------------------- |
| `AKTO_DATA_INGESTION_URL` | *(required)* | Base URL of your Akto data ingestion service |
| `AKTO_API_TOKEN`          | *(required)* | Authorization token sent to the Akto API     |

## Guardrail Behaviour

The interceptor reads the guardrail verdict from Akto and acts on the policy `behaviour`:

| Verdict              | Action at the gateway                                                                                        |
| -------------------- | ------------------------------------------------------------------------------------------------------------ |
| Allowed              | Traffic passes through                                                                                       |
| Blocked (`block`)    | Returns a JSON-RPC error; the tool never runs (REQUEST) or the result is replaced (RESPONSE)                 |
| `warn` / `alert`     | Traffic is **allowed and logged**: a gateway has no interactive resubmit path, so warnings cannot hard-block |
| Modified             | The tool arguments (REQUEST) or result (RESPONSE) are rewritten with Akto's redacted payload                 |
| Akto error / timeout | **Fail-open**: traffic passes through so the gateway never breaks                                            |

{% hint style="info" %}
Configure which tools and patterns to block, warn, or redact in the Akto dashboard under **Settings → Guardrails**. The interceptor enforces whatever policies you define there.
{% endhint %}

## Troubleshooting

### Interceptor not firing

```bash
# Confirm the interceptor is attached to the gateway
aws bedrock-agentcore-control get-gateway \
  --gateway-identifier <gateway-id> --region <region> \
  --query interceptorConfigurations
```

You should see your Lambda ARN with `interceptionPoints` of `["REQUEST","RESPONSE"]` and `passRequestHeaders: true`.

### Guardrails always allowing (fail-open)

The interceptor is fail-open by design: any Akto error allows the request through. Check the Lambda logs:

```bash
aws logs tail /aws/lambda/akto-guardrails-interceptor --region <region> | grep -i "fail-open\|error"
```

Common causes:

* `AKTO_DATA_INGESTION_URL` not set or unreachable from the Lambda
* The Lambda is in a VPC without outbound internet (NAT) to reach Akto
* Guardrail policies not configured in the Akto dashboard

### Tool results not guardrailed

Confirm the **Response Interceptor** is configured (same Lambda ARN) and that **Exclude the response body** is unchecked. Look for `Guardrailing RESPONSE tools/call result:` in the logs.

## Get Support for your Akto setup

There are multiple ways to request support from Akto. We are 24X7 available on the following:

1. In-app `intercom` support. Message us with your query on intercom in Akto dashboard and someone will reply.
2. Join our [discord channel](https://www.akto.io/community) for community support.
3. Contact `help@akto.io` for email support.
4. Contact us [here](https://www.akto.io/contact-us).


# Azure AI Foundry

## Overview

Azure AI Foundry is Microsoft's comprehensive platform for building, deploying, and scaling production-grade AI agents and applications. Integration with Akto enables you to **import Azure AI Foundry agents seamlessly into Akto**, providing comprehensive security monitoring for your AI agents, multi-agent workflows, and API interactions running on the Azure platform.

## What the Connector Does

The Azure AI Foundry connector automatically:

* **Discovers AI Agents**: Imports all AI agents deployed through Azure AI Foundry Agent Service
* **Monitors Agent Execution**: Captures agent interactions, including prompts, responses, and API calls
* **Analyzes Traffic**: Sends agent traffic data to Akto for comprehensive security analysis, including:
  * Prompt injection detection
  * Sensitive data exposure
  * Policy violations
  * Runtime guardrail detection
* **Multi-Agent Workflow Visibility**: Tracks interactions across multi-agent workflows and stateful processes
* **Unified Security Dashboard**: Provides centralized monitoring of all Azure AI Foundry agents alongside your other AI infrastructure

## Azure AI Foundry APIs Queried by Akto

The following table lists the Azure AI Foundry agentic components queried by Akto and the data collected from each endpoint.

| API Endpoint                                                              | What Akto Ingests                      |
| ------------------------------------------------------------------------- | -------------------------------------- |
| `AZURE_PROJECT_URL/assistants?api-version=v1&limit=100`                   | List of AI agents                      |
| `AZURE_PROJECT_URL/threads?api-version=v1&agent_id={id}&limit=100`        | Conversation sessions                  |
| `AZURE_PROJECT_URL/threads/{thread_id}/messages?api-version=v1&limit=100` | Chat messages from users and AI agents |

## Prerequisites

Before setting up the Azure AI Foundry connector, ensure you have:

1. **Active Azure Subscription** – With Azure AI Foundry resources provisioned
2. **Azure AI Foundry Agent Service** – At least one agent deployed and running in Agent Service
3. **Azure Credentials** – One of the following authentication methods:
   * Service Principal (Client ID + Client Secret)
   * Managed Identity
   * Azure AD authentication token
4. **Network Access** – The connector service must have access to:
   * Azure AI Foundry agentic endpoints
   * Akto Data Ingestion Service
   * Your deployed agents' endpoints
5. **Permissions** – Required Azure permissions:
   * `Cognitive Services User` role on AI Foundry resources
   * Read access to agent configurations
   * Access to Application Insights (for telemetry)

## Steps to Connect

#### Method 1: Import via Akto Dashboard (Recommended)

**Step 1: Navigate to AI Agent Connectors**

1. Log in to your Akto dashboard
2. Go to **Quick Start** > **AI Agent Connectors**
3. Select **Azure AI Foundry** from the connector list

**Step 2: Get Your Azure Project URL**

Before configuring the connector, locate your Azure AI Foundry Project URL:

1. Navigate to [Azure AI Foundry portal](https://ai.azure.com)
2. Select your project
3. Go to **Settings** > **Project details**
4. Copy the **Project connection string** or **Endpoint URL**
   * Format: `https://your-project.openai.azure.com`
   * Or: `https://your-resource.cognitiveservices.azure.com`

**Step 3: Configure Agent Endpoint**

Fill in the following information for your Azure AI Foundry agent:

**Basic Configuration:**

| Field                   | Description                              | Example                                                        |
| ----------------------- | ---------------------------------------- | -------------------------------------------------------------- |
| **Agent Name**          | Friendly name for your agent             | "Customer Support Agent"                                       |
| **Azure Project URL**   | Your Azure AI Foundry project endpoint   | `https://your-project.openai.azure.com`                        |
| **Agent Endpoint URL**  | Your Azure AI Foundry agent API endpoint | `https://your-agent.azurecontainerapps.io/v1/chat/completions` |
| **Authentication Type** | Select authentication method             | Service Principal, Managed Identity, or Bearer Token           |

**Authentication Details:**

For **Service Principal** authentication:

* **Tenant ID**: Your Azure AD tenant ID
* **Client ID**: Service principal application ID
* **Client Secret**: Service principal secret key

For **Bearer Token** authentication:

* **API Key/Token**: Your Azure AI Foundry API key or bearer token

**Advanced Settings (Optional):**

* **Request Headers**: Add custom headers (e.g., `api-version: 2024-02-15-preview`)
* **Request Timeout**: Timeout in seconds (default: 30)
* **Enable Streaming**: Track streaming responses

**Step 4: Test Connection**

1. Use the default test request provided:

   ```json
   {
     "messages": [
       {"role": "user", "content": "Why is the sky blue?"}
     ],
     "max_tokens": 100,
     "temperature": 0.7
   }
   ```
2. Click **Test Connection** to verify the agent responds correctly
3. Review the test response to ensure proper configuration

**Step 5: Import Agent**

1. Click **Import** to add the agent to Akto
2. The connector will automatically begin monitoring agent traffic
3. View the agent in **Akto Argus** > **Agents** section

**Step 6: Verify Monitoring**

1. Navigate to **Akto Argus** > **Agents**
2. Find your Azure AI Foundry agent in the list
3. Click on the agent to view:
   * Recent interactions
   * Security findings
   * Performance metrics
   * Traffic patterns

#### Method 2: Azure Container Apps Integration

For agents deployed on Azure Container Apps, you can integrate directly with Application Insights for automatic traffic capture.

**Step 1: Enable Application Insights**

Ensure your Azure Container App has Application Insights enabled:

```bash
# Using Azure CLI
az containerapp create \
  --name your-agent-app \
  --resource-group your-rg \
  --environment your-env \
  --enable-dapr \
  --instrumentation-key <app-insights-key>
```

**Step 2: Configure Akto Data Forwarder**

Deploy the Akto data forwarder as a sidecar container in your Container App:

```yaml
containers:
  - name: akto-forwarder
    image: aktosecurity/data-forwarder:latest
    env:
      - name: AKTO_INGESTION_URL
        value: "https://your-akto-ingestion-service.com"
      - name: SOURCE_TYPE
        value: "AZURE_AI_FOUNDRY"
      - name: APP_INSIGHTS_CONNECTION_STRING
        secretRef: app-insights-connection
```

**Step 3: Stream Logs to Akto**

Application Insights will automatically capture all agent requests and responses, forwarding them to Akto for analysis.

## Data Collection

### Agent Metadata Captured

The connector automatically fetches:

* **Agent Configurations**: All AI agents deployed in Azure AI Foundry
* **Model Information**: LLM models and versions being used (GPT-4, GPT-3.5, Azure OpenAI models)
* **Deployment Details**: Container App configurations, scaling settings
* **Integration Points**: Connected services (Microsoft 365, Teams, custom APIs)

### Execution Data Collected

For each agent interaction, the connector captures:

* **Input Data**: User prompts, queries, and conversation context
* **Output Data**: Agent responses and generated content
* **API Calls**: External API interactions and tool usage
* **Multi-Agent Communication**: Messages exchanged between agents in workflows
* **Timing Information**: Execution duration, latency metrics
* **Error Logs**: Failures, exceptions, and retry attempts
* **Memory State**: Agent memory and context retention

### Real-Time Monitoring

* Execution data is captured in real-time as agents process requests
* Historical analysis available in the Akto dashboard
* Sensitive data automatically detected and can be masked based on guardrail policies

## Troubleshooting

### Connection Issues

**Problem**: "Failed to connect to Azure AI Foundry agent"

**Solutions**:

* Verify the agent endpoint URL is correct and accessible
* Check that the agent is deployed and running in Azure Container Apps
* Ensure network connectivity from Akto to Azure
* Verify firewall rules allow outbound HTTPS connections

### Authentication Errors

**Problem**: "Authentication failed" or "Invalid credentials"

**Solutions**:

* **Service Principal**: Verify Client ID, Client Secret, and Tenant ID are correct
* **Bearer Token**: Ensure the API key or token is valid and not expired
* **Managed Identity**: Verify the managed identity has proper permissions
* Check Azure AD permissions for the service principal
* Regenerate credentials if necessary

### Permission Denied

**Problem**: "Access denied to agent resources"

**Solutions**:

* Grant `Cognitive Services User` role to your service principal:

  ```bash
  az role assignment create \
    --assignee <service-principal-id> \
    --role "Cognitive Services User" \
    --scope /subscriptions/<subscription-id>/resourceGroups/<rg>/providers/Microsoft.CognitiveServices/accounts/<resource-name>
  ```
* Verify resource group permissions
* Ensure subscription is active

### No Data Appearing

**Problem**: Connector is active but no agent traffic appears in Akto

**Solutions**:

* Verify agents are actively processing requests
* Check Application Insights is properly configured
* Ensure data forwarder is running (for Container Apps integration)
* Review Akto ingestion service logs
* Verify the `DATA_INGESTION_SERVICE_URL` is correct
* Check network connectivity between Azure and Akto

### Streaming Response Issues

**Problem**: Streaming responses not being captured

**Solutions**:

* Enable streaming support in connector configuration
* Verify Application Insights captures streaming data
* Check that the agent endpoint supports streaming
* Review data forwarder configuration

### Related Resources

* [Azure AI Foundry Agent Service](https://azure.microsoft.com/en-us/products/ai-foundry/agent-service) - Official Microsoft documentation
* [Get Started with AI Agents on Azure](https://github.com/Azure-Samples/get-started-with-ai-agents) - Sample implementations
* [Azure AI Foundry Quickstart](https://learn.microsoft.com/en-us/azure/ai-foundry/agents/quickstart) - Microsoft Learn guide
* [Building Conversational AI Agents](https://www.doit.com/blog/creating-conversational-ai-agents-with-azure-ai-foundry/) - Best practices guide

## Get Support for your Akto setup

There are multiple ways to request support from Akto. We are 24X7 available on the following:

1. In-app `intercom` support. Message us with your query on intercom in Akto dashboard and someone will reply.
2. Join our [discord channel](https://www.akto.io/community) for community support.
3. Contact `help@akto.io` for email support.
4. Contact us [here](https://www.akto.io/contact-us).


# Claude Agent SDK

Connect Akto with applications built on the Claude Agent SDK

Akto Guardrails for the Claude Agent SDK provides real-time security validation for server-side AI agent applications. It plugs directly into the Claude Agent SDK's native callback system to validate prompts and tool calls before execution, validate agent responses after generation, and ingest all events into your Akto dashboard.

## Key Features

* **Request Guardrails** — Validates user prompts against Akto security policies before they reach the model
* **Response Guardrails** — Validates agent responses against Akto security policies after generation
* **Tool Call Guardrails** — Validates MCP and built-in tool calls before execution
* **Observability** — Ingests all traffic (prompts, tool calls, responses) into the Akto dashboard
* **Sync & Async Modes** — Block violations in real time or run in observe-only mode
* **Zero External Dependencies** — Pure Python stdlib + asyncio; requires Python 3.8+

## How It Works

The integration hooks into four points of the Claude Agent SDK lifecycle:

```mermaid
sequenceDiagram
    autonumber
    participant User
    participant PromptHook as UserPromptSubmit Hook
    participant Model as Claude Model
    participant PreHook as PreToolUse Hook
    participant Tool as MCP / Built-in Tool
    participant PostHook as PostToolUse Hook
    participant StopHook as Stop Hook
    participant Akto as Akto Dashboard

    User->>PromptHook: User submits prompt
    Note over PromptHook: Request guardrails check
    alt Prompt blocked
        PromptHook-->>User: Block with reason
        PromptHook-->>Akto: Ingest blocked event
    else Prompt allowed
        PromptHook->>Model: Forward prompt
    end

    Model->>PreHook: Agent calls tool
    Note over PreHook: Tool call guardrails check
    alt Tool call blocked
        PreHook-->>Model: Deny with reason
        PreHook-->>Akto: Ingest blocked event
    else Tool call allowed
        PreHook->>Tool: Execute tool
        Tool-->>PostHook: Tool result
        PostHook-->>Akto: Ingest tool result
        PostHook->>Model: Return result
    end

    Model->>StopHook: Agent finishes (Stop)
    Note over StopHook: Response guardrails check
    alt Response blocked (SYNC_MODE=true)
        StopHook-->>Model: Re-enter loop with system message
        StopHook-->>Akto: Ingest blocked event
    else Response allowed
        StopHook-->>Akto: Ingest conversation
        StopHook->>User: Deliver response
    end
```

### Hook Coverage

| Hook                      | Event              | Sync Mode (`true`)                                 | Async Mode (`false`)                                    |
| ------------------------- | ------------------ | -------------------------------------------------- | ------------------------------------------------------- |
| `akto_user_prompt_submit` | `UserPromptSubmit` | Validates prompt; blocks if denied                 | Passes through; no validation                           |
| `akto_stop`               | `Stop`             | Validates response; re-enters agent loop if denied | Ingests with `response_guardrails=true` (observational) |
| `akto_pre_tool_use`       | `PreToolUse`       | Validates tool call; blocks if denied              | Passes through; no validation                           |
| `akto_post_tool_use`      | `PostToolUse`      | Ingests tool result (always)                       | Ingests tool result with guardrails flag (always)       |

## Prerequisites

* Python 3.8+
* Claude Agent SDK installed
* Akto Data Ingestion URL (`AKTO_DATA_INGESTION_URL`)

## Installation

No external packages required. Copy the three files into your project:

```
your-agent/
├── akto_machine_id.py
├── akto_guardrails_core.py
├── hooks.py
└── your_agent.py
```

Download from GitHub:

```bash
HOOKS_BASE="https://raw.githubusercontent.com/akto-api-security/akto/master/apps/mcp-endpoint-shield/claude-agent-sdk-hooks"

curl -o akto_machine_id.py     "${HOOKS_BASE}/akto_machine_id.py"
curl -o akto_guardrails_core.py "${HOOKS_BASE}/akto_guardrails_core.py"
curl -o hooks.py               "${HOOKS_BASE}/hooks.py"
```

## Usage

{% stepper %}
{% step %}
**Import and Create Hooks**

`create_hooks()` returns four async callbacks bound to the client IP of the incoming request. Call it once per request or session.

```python
from hooks import create_hooks
from claude_agent_sdk import ClaudeAgentOptions, HookMatcher

# Obtain client IP from your web framework (Flask, FastAPI, etc.)
user_prompt_submit, stop, pre_tool_use, post_tool_use = create_hooks(
    client_ip=request.remote_addr  # or however you obtain the client IP
)
```

If the client IP is not available, omit the argument — hooks fall back to `0.0.0.0`.
{% endstep %}

{% step %}
**Register Hooks with the Agent**

```python
options = ClaudeAgentOptions(
    hooks={
        "UserPromptSubmit": [HookMatcher(hooks=[user_prompt_submit])],
        "Stop":             [HookMatcher(hooks=[stop])],
        "PreToolUse":       [HookMatcher(hooks=[pre_tool_use])],
        "PostToolUse":      [HookMatcher(hooks=[post_tool_use])],
    }
)
```

{% endstep %}

{% step %}
**Set Environment Variables**

```bash
export AKTO_DATA_INGESTION_URL="https://your-akto-instance.com"
export AKTO_SYNC_MODE="true"          # "true" = block; "false" = observe only
export AKTO_HOST="api.anthropic.com"  # Hostname written into request headers for Akto's HTTP proxy
```

See [Environment Variables](#environment-variables) for the full reference.
{% endstep %}

{% step %}
**Run Your Agent**

```python
import asyncio
from claude_agent_sdk import run_agent

async def handle_request(user_message: str, client_ip: str):
    user_prompt_submit, stop, pre_tool_use, post_tool_use = create_hooks(client_ip=client_ip)

    options = ClaudeAgentOptions(
        hooks={
            "UserPromptSubmit": [HookMatcher(hooks=[user_prompt_submit])],
            "Stop":             [HookMatcher(hooks=[stop])],
            "PreToolUse":       [HookMatcher(hooks=[pre_tool_use])],
            "PostToolUse":      [HookMatcher(hooks=[post_tool_use])],
        }
    )

    async for event in run_agent(prompt=user_message, options=options):
        print(event)
```

{% endstep %}
{% endstepper %}

## Sync vs Async Mode

### `AKTO_SYNC_MODE=true` (default — blocking)

```
User prompt → UserPromptSubmit hook
    ├─ Denied: prompt blocked, reason returned to user
    └─ Allowed: forwarded to model

Agent calls tool → PreToolUse hook
    ├─ Denied: tool call blocked, deny reason returned to model
    └─ Allowed: tool executes, result ingested via PostToolUse hook

Agent finishes → Stop hook
    ├─ Response denied: agent re-enters loop with system message to regenerate
    └─ Response allowed: conversation ingested, response delivered to user
```

### `AKTO_SYNC_MODE=false` (observe only)

```
All hooks pass through without blocking.
PostToolUse and Stop ingest traffic to Akto with the guardrails flag set,
so violations are recorded on the Akto side without affecting the agent.
```

## Response Guardrails

The `Stop` hook runs response guardrails by sending the full conversation turn (user prompt + agent response) to Akto's `/validate/response` endpoint via the `response_guardrails=true` query parameter on the http-proxy API.

**Sync mode behaviour when response is denied:**

The hook returns `{"continue_": True, "systemMessage": "<block reason>"}` to re-enter the agent loop. The agent receives the system message and regenerates a safe response.

{% hint style="info" %}
The Stop hook fires after the agent has finished generating. In streaming deployments the response may already be partially visible to the user. The hook causes a follow-up regeneration but does not retroactively suppress already-streamed content.
{% endhint %}

## Environment Variables

| Variable                  | Default               | Description                                                     |
| ------------------------- | --------------------- | --------------------------------------------------------------- |
| `AKTO_DATA_INGESTION_URL` | *(required)*          | Base URL for Akto's data ingestion service                      |
| `AKTO_SYNC_MODE`          | `true`                | `true` = block on violations; `false` = observe-only            |
| `AKTO_HOST`               | `api.anthropic.com`   | Hostname written into request headers sent to Akto's HTTP proxy |
| `AKTO_TIMEOUT`            | `5`                   | HTTP request timeout in seconds                                 |
| `AKTO_TOKEN`              | `""`                  | Authorization header value sent to `AKTO_DATA_INGESTION_URL`    |
| `MODE`                    | `argus`               | `argus` (default) or `atlas`                                    |
| `AKTO_CONNECTOR`          | `claude_agent_sdk`    | Source label shown in the Akto dashboard                        |
| `LOG_DIR`                 | `~/.claude/akto/logs` | Directory for log files                                         |
| `LOG_LEVEL`               | `INFO`                | Logging level (`DEBUG`, `INFO`, `WARNING`, `ERROR`)             |
| `LOG_PAYLOADS`            | `false`               | Set to `true` to log full request/response bodies               |

## Logging

All hooks write to a single log file:

```
$LOG_DIR/akto-agent-sdk.log
# Default: ~/.claude/akto/logs/akto-agent-sdk.log
```

```bash
# Follow logs in real time
tail -f ~/.claude/akto/logs/akto-agent-sdk.log

# Filter for blocked events only
grep "BLOCKING" ~/.claude/akto/logs/akto-agent-sdk.log

# Filter errors
grep -i "error" ~/.claude/akto/logs/akto-agent-sdk.log
```

Set `LOG_PAYLOADS=true` to log full request/response bodies (useful for debugging; disable in production).

## Differences from Claude CLI Hooks

| Aspect                   | Claude CLI Hooks                   | Claude Agent SDK Hooks                                               |
| ------------------------ | ---------------------------------- | -------------------------------------------------------------------- |
| Invocation               | Shell command via `settings.json`  | Async Python callback function                                       |
| Input format             | JSON via stdin                     | `input_data` dict argument                                           |
| Block (UserPromptSubmit) | `print({"decision":"block",...})`  | `return {"continue_": False, "systemMessage": ...}`                  |
| Block (PreToolUse)       | `print({"decision":"block",...})`  | `return {"hookSpecificOutput": {"permissionDecision": "deny", ...}}` |
| Response guardrails      | Stop hook (`validate-response.py`) | Stop hook via `response_guardrails=true` parameter                   |
| HTTP calls               | Synchronous `urllib`               | `urllib` wrapped in `asyncio.to_thread`                              |
| Configuration            | Set by `.sh` wrapper scripts       | Standard environment variables                                       |
| `AKTO_CONNECTOR` default | `claude_code_cli`                  | `claude_agent_sdk`                                                   |
| Device/server ID         | Derived from machine UUID          | `AGENT_ID` env var                                                   |
| `contextSource`          | `ENDPOINT`                         | `AGENTIC` (hardcoded)                                                |

## Troubleshooting

### Hooks Not Triggering

```bash
# Verify environment variable is set
echo $AKTO_DATA_INGESTION_URL

# Check logs for initialisation message
grep "Akto Agent SDK hooks initialised" ~/.claude/akto/logs/akto-agent-sdk.log
```

### Guardrails Always Allowing (Fail-Open)

The hooks are fail-open by design — any network or API error allows the request through. Check logs for errors:

```bash
grep -i "error\|fail-open" ~/.claude/akto/logs/akto-agent-sdk.log
```

Common causes:

* `AKTO_DATA_INGESTION_URL` not set or unreachable
* `AKTO_SYNC_MODE` set to `false`
* Guardrail policies not configured in the Akto dashboard

### Events Not Appearing in Dashboard

```bash
# Test connectivity to Akto ingestion endpoint
curl -X POST "${AKTO_DATA_INGESTION_URL}/api/http-proxy?ingest_data=true&akto_connector=test" \
  -H "Content-Type: application/json" \
  -d '{"requestPayload": "{\"body\": \"test\"}", "path": "/v1/messages", "method": "POST"}'
```

### Response Guardrails Not Blocking

Confirm that `AKTO_SYNC_MODE=true` and that response guardrail policies are configured in the Akto dashboard under **Settings → Guardrails**. Response guardrails are a separate policy set from request guardrails.

## Get Support

1. In-app `intercom` support — message us from the Akto dashboard
2. Join our [Discord community](https://www.akto.io/community)
3. Email <help@akto.io>
4. [Contact us](https://www.akto.io/contact-us)


# Databricks

## Overview

Databricks is a unified analytics platform built on Apache Spark that enables data teams to collaborate on data engineering, machine learning, and analytics workloads. Connect Akto Argus to your Databricks workspace to discover agents and workflows defined in Unity Catalog and fetch related execution data.

The visibility helps you identify agentic workloads running in Databricks and assess associated security risks. Once connected, Akto Argus automatically:

* **Discovers AI Agents**: Fetches all AI agents and workflows configured in your Databricks workspace through Unity Catalog
* **Monitors Agent Activity**: Captures agent execution traces, including inputs, outputs, and API interactions
* **Sends Traffic to Akto**: Transmits API traffic data to Akto for comprehensive security analysis

## Prerequisites

Before setting up the Databricks connector, ensure you have completed the following:

1. **Traffic Processor** – Configure your Traffic Processor first. Follow the [Hybrid SaaS Setup Guide](/akto-argus-agentic-ai-security-for-homegrown-ai/connectors/others/hybrid-saas) for detailed instructions.
2. **Databricks Workspace** – An active Databricks workspace with Unity Catalog enabled
3. **Service Principal** – A Databricks Service Principal with appropriate permissions:
   * `USE CATALOG` permission on the target Unity Catalog
   * `USE SCHEMA` permission on the target schema
   * `SELECT` permission on agent-related tables
4. **Network Access** – Ensure connectivity between the connector service and:
   * Your Databricks workspace URL
   * Akto Data Ingestion Service

## Steps to Connect

{% stepper %}
{% step %}
**Open the Databricks Connector in Akto Argus**

1. Navigate to **Akto Argus**.
2. Open **Connectors**.
3. Under **AI Agent Security**, locate the **Databricks** connector card.
4. Select **Connect** to open the setup dialog.
   {% endstep %}

{% step %}
**Enter the Databricks Host**

Enter the base URL of your Databricks workspace in the **Databricks Host** field.

* Format: `https://your-workspace.cloud.databricks.com`
* The value can be found in the browser address bar when accessing your Databricks workspace.
  {% endstep %}

{% step %}
**Enter the Service Principal Credentials**

Create a Databricks Service Principal and enter its credentials:

1. In your Databricks workspace, go to **Settings** > **Identity and Access** > **Service Principals**.
2. Click **Add Service Principal**, then note the **Application (Client) ID**.
3. Generate a **Client Secret** and save it securely.
4. Grant the Service Principal the required permissions:

   ```sql
   -- Grant catalog access
   GRANT USE CATALOG ON CATALOG <your_catalog> TO `<service_principal_id>`;

   -- Grant schema access
   GRANT USE SCHEMA ON SCHEMA <your_catalog>.<your_schema> TO `<service_principal_id>`;

   -- Grant read access to tables
   GRANT SELECT ON SCHEMA <your_catalog>.<your_schema> TO `<service_principal_id>`;
   ```
5. Enter the **Application (Client) ID** in the **Databricks Client ID (Service Principal)** field.
6. Enter the generated secret in the **Databricks Client Secret** field.
   {% endstep %}

{% step %}
**Specify the Unity Catalog Name and Schema**

Enter the Unity Catalog and schema that contain your agent definitions:

* **Unity Catalog Name** – The name of the Unity Catalog to query (default: `workspace`).
* **Unity Catalog Schema** – The schema within the catalog (default: `default`).

These fields control which catalog and schema Akto Argus queries for agent discovery.
{% endstep %}

{% step %}
**Specify a Table Prefix (Optional)**

Optionally enter a value in the **Table Prefix (Optional)** field to scope agent discovery to tables matching a specific prefix.

* Leave this field empty to discover all agents in the specified catalog and schema.
* Use a prefix (e.g., `production_`) to limit discovery to tables starting with that value.
  {% endstep %}

{% step %}
**Enter the Data Ingestion Service URL**

Enter the URL of your **self-hosted data ingestion service** in the **URL for Data Ingestion Service** field in order to forward agent execution and telemetry data into your environment for processing.

{% hint style="warning" %}
**Note**

* The ingestion service must be deployed and exposed in your infrastructure.
* The URL must be reachable from Akto.
* The endpoint receives metadata collected by Akto for this connector.
  {% endhint %}
  {% endstep %}

{% step %}
**Complete the Integration**

1. Review all entered values.
2. Select **Import** to finalise the connection.
   {% endstep %}
   {% endstepper %}

## Data Collection

The Databricks connector captures two categories of information:

### Agent Metadata

* **Agent Configurations**: All AI agents and workflows defined in Unity Catalog
* **Model Information**: LLM models and versions being used
* **Catalog Structure**: Unity Catalog tables, schemas, and metadata related to AI workloads

### Agent Execution Data

* **Recent Activity**: Agent executions from the past 60 minutes
* **Input Data**: Prompts, queries, and parameters sent to agents
* **Output Data**: Agent responses and generated content
* **API Interactions**: External API calls made by agents
* **Timing Information**: Execution duration and timestamps
* **Error Logs**: Failures, exceptions, and error messages

## Troubleshooting

### Connection Issues

**Problem**: Cannot connect to Databricks workspace

**Solutions**:

* Verify the **Databricks Host** URL is correct and accessible
* Ensure Service Principal credentials are valid and not expired
* Check network connectivity from the connector service to Databricks
* Verify firewall rules allow outbound HTTPS connections

### Authentication Errors

**Problem**: "Authentication failed" or "Invalid client credentials"

**Solutions**:

* Double-check **Databricks Client ID (Service Principal)** and **Databricks Client Secret**
* Ensure the Service Principal exists and is not disabled
* Verify the secret has not expired; regenerate credentials if necessary

### Permission Issues

**Problem**: Access denied to catalog or schema

**Solutions**:

* Verify the Service Principal has the required permissions:

  ```sql
  SHOW GRANTS ON CATALOG <catalog_name>;
  SHOW GRANTS ON SCHEMA <catalog_name>.<schema_name>;
  ```
* Grant any missing permissions as described in the setup steps above
* Ensure Unity Catalog is enabled in your workspace

### No Agents Appearing

**Problem**: Connector is running but no agents appear in Akto

**Solutions**:

* Verify agents exist in the specified **Unity Catalog Name** and **Unity Catalog Schema**
* Check that **Table Prefix (Optional)** is not filtering out all tables
* Ensure the **URL for Data Ingestion Service** is correct and reachable
* Verify the Traffic Processor is running and accessible

## Get Support

If you need assistance with the Databricks connector:

* **In-app Chat**: Use the chat widget in your Akto dashboard for instant support
* **Discord Community**: Join our community at [discord.gg/Wpc6xVME4s](https://discord.gg/Wpc6xVME4s)
* **Email Support**: Contact us at <help@akto.io>
* **Contact Form**: Submit a support request at <https://www.akto.io/contact-us>

Our team is available 24/7 to help with setup, troubleshooting, and best practices.


# Dify

Connect Akto with Dify

## Overview

[Dify](https://dify.ai) is an open-source platform for building LLM applications such as chatbots, agents, and workflows. This integration uses Dify's [Moderation API Extension](https://docs.dify.ai/en/use-dify/workspace/api-extension/moderation-api-extension) to route end-user inputs and LLM outputs through Akto guardrails before they reach (or leave) your Dify app.

The Akto Dify connector provides the following capabilities:

* Validates Dify app inputs and outputs against security policies
* Detects PII, prompt injection, and policy violations
* Blocks violating content or redacts it inline (override) before it is shown
* Ingests traffic into Akto, creating a per-app collection for monitoring and analysis

{% hint style="success" %}
**No extra service to deploy**

Dify calls Akto's per-account guardrails service directly at `/api/http-proxy/dify`. There is no separate adapter or sidecar to run or maintain.
{% endhint %}

## How It Works

Dify's Moderation API Extension sends each input/output to an external endpoint. Akto exposes that endpoint on your account's guardrails service host, which validates the content against guardrails, ingests it for monitoring, and returns Dify's moderation verdict:

```
Dify app --(app.moderation.input / app.moderation.output)--> https://<accountId>-guardrails-service.akto.io/api/http-proxy/dify --> guardrails + ingestion
   ^                                                                                              |
   |------------------------ { flagged, action, preset_response / text } --------------------------|
```

| Extension point         | Behavior                                                     |
| ----------------------- | ------------------------------------------------------------ |
| `app.moderation.input`  | Validates end-user input (request guardrails) and ingests it |
| `app.moderation.output` | Validates LLM output (response guardrails) and ingests it    |
| `ping`                  | Health check (`{ "result": "pong" }`)                        |

Akto verdicts map to Dify responses as follows:

| Akto guardrails result | Dify response                                                               |
| ---------------------- | --------------------------------------------------------------------------- |
| Blocked                | `{ flagged: true, action: "direct_output", preset_response: <reason> }`     |
| Allowed but modified   | `{ flagged: true, action: "overridden", inputs/query \| text: <redacted> }` |
| Allowed                | `{ flagged: false }`                                                        |

The endpoint is fail-open: if guardrails are unreachable or error, content is allowed through.

## API Endpoint

Each Akto account has a dedicated guardrails service host:

```
https://<accountId>-guardrails-service.akto.io/api/http-proxy/dify
```

Replace `<accountId>` with your Akto account ID. The **Connectors → Dify** setup guide in the dashboard shows the full URL for your account — copy it from there.

## Prerequisites

Before integrating Akto with Dify, ensure the following are in place:

* A running Dify instance (cloud or self-hosted) with workspace settings access
* Network access from Dify to your Akto guardrails service (`https://<accountId>-guardrails-service.akto.io`)
* A token generated from **Akto Argus → Connectors → Dify**

## Steps to Connect

{% stepper %}
{% step %}
**Get your token from Akto**

In the Akto dashboard, go to **Connectors → Dify**, select a token expiry, and copy the generated token. You will use it as the API Key in Dify.
{% endstep %}

{% step %}
**Add the API Extension in Dify**

In Dify, go to **Settings → API Extension → Add** and fill in the fields as shown below:

<div data-with-frame="true"><figure><img src="/files/lX8KjmDpDpMrFGaB9KXZ" alt="Dify Add API Extension dialog with Name, API Endpoint, and API-key fields" width="563"><figcaption></figcaption></figure></div>

* **Name**: e.g. `Akto Guardrails`
* **API Endpoint**: `https://<accountId>-guardrails-service.akto.io/api/http-proxy/dify` (copy the exact URL from **Connectors → Dify** in your dashboard)
* **API-key**: the token from step 1 (Dify sends it as `Authorization: Bearer <token>`)

{% hint style="info" %}
**Authentication**

The token identifies your Akto account and is carried on every request. This endpoint is intended for guardrails service deployments that do not enforce strict token authentication on ingestion traffic (i.e. `AKTO_DI_AUTHENTICATE` is not enabled), which is the default for ingestion endpoints. If your deployment enforces it, reach out to Akto support so we can enable Dify's `Authorization: Bearer` format for your environment.
{% endhint %}
{% endstep %}

{% step %}
**Enable Content Moderation per app**

Open the app you want to protect → **Content Moderation**, choose the **Akto Guardrails** API extension, and enable **Review Input Content** and/or **Review Output Content**.
{% endstep %}

{% step %}
**Verify Integration**

Confirm the endpoint is reachable and the moderation contract works (replace `<accountId>` and `<token>`):

```bash
# Ping (Dify health check contract)
curl -X POST https://<accountId>-guardrails-service.akto.io/api/http-proxy/dify \
  -H "Authorization: Bearer <token>" \
  -H "Content-Type: application/json" \
  -d '{"point":"ping"}'

# Input moderation
curl -X POST https://<accountId>-guardrails-service.akto.io/api/http-proxy/dify \
  -H "Authorization: Bearer <token>" \
  -H "Content-Type: application/json" \
  -d '{"point":"app.moderation.input","params":{"app_id":"demo","inputs":{},"query":"My SSN is 123-45-6789"}}'
```

**Verify in the Akto dashboard:**

* Log into the Akto dashboard
* Navigate to the **Collections** section and confirm a `*.dify.agent` collection appears
* Confirm guardrail activity is visible under Agentic Guardrails
  {% endstep %}
  {% endstepper %}

## Get Support for your Akto setup

There are multiple ways to request support from Akto. We are 24X7 available on the following:

1. In-app `intercom` support. Message us with your query on intercom in Akto dashboard and someone will reply.
2. Join our [discord channel](https://www.akto.io/community) for community support.
3. Contact `help@akto.io` for email support.
4. Contact us [here](https://www.akto.io/contact-us).


# Glean

Add Akto guardrails to Glean agents using Glean's custom tools

## Overview

Glean is an enterprise AI platform that lets teams build and deploy AI agents across their organisation. The Akto guardrails integration adds inline security enforcement to any Glean agent - every user message and agent response is evaluated by Akto before reaching the model or the end user, so prompt injection, PII leaks, and policy violations can be blocked in real time.

The integration works through Glean's **Custom Tools** (formerly Actions). You create a custom tool that calls Akto's guardrails service, then attach it to whichever agents you want to protect.

## How It Works

```mermaid
flowchart LR
    A[User Message] --> B[Glean Agent\nAkto Custom Tool fires]
    B --> C[Akto Guardrails Service\nevaluates the request]
    C -->|Allowed| D[AI Model]
    D --> E[Response → User]
    C -->|Blocked| F[Block reason returned to User]
```

## Prerequisites

* A **Glean** account with admin access to the Admin Console
* The **Akto Guardrails service URL** - provisioned and shared by Akto
* An **Akto API Token** - retrieved from Akto Argus → **Connectors → Setup Guardrail**

## Steps to Connect

### Part 1 - Create the Custom Tool

{% stepper %}
{% step %}
**Open the Admin Console**

Log in to Glean as an admin. Navigate to the **Admin Console** and go to **Tools** in the left navigation.

<div data-with-frame="true"><figure><img src="/files/b9HOXqTaYd1GT15L2BFy" alt="" width="563"><figcaption></figcaption></figure></div>
{% endstep %}

{% step %}
**Create a new tool**

Click **Add**, then select **Create from Scratch**. The custom tool form opens.

<div data-with-frame="true"><figure><img src="/files/suLT7sQQg1a1mzVjMLTv" alt="" width="563"><figcaption></figcaption></figure></div>
{% endstep %}

{% step %}
**Fill in the basic info**

Give the tool a clear name (e.g. `Akto Guardrail`) and an optional description so agents and admins can identify it. Set the **Tool Type** to **Read**.

<div data-with-frame="true"><figure><img src="/files/WVi6lWvpdkBMLbLJ5sZA" alt="" width="563"><figcaption></figcaption></figure></div>
{% endstep %}

{% step %}
**Set the trigger condition**

Under **Trigger Condition**, add a custom prompt that tells the agent when to invoke this tool.

<details>

<summary>Custom Prompt</summary>

```
### SYSTEM PRE-FLIGHT REAL-TIME GUARDRAIL ###
1. BEFORE doing anything else, you MUST execute the 'evaluatePlatformGuardrail' tool immediately for every single incoming message.
2. YOU MUST MAP REAL-TIME VARIABLES EXACTLY USING THESE RULES:
   - For 'contextSource': Always pass the hardcoded string "ENDPOINT".
   - For 'ip': Look up the current client session connection string network address. If it is unavailable or returns "unknown", you MUST override it and pass "49.37.170.1" as a strict fallback string parameter.
   - For 'time': Convert the current system active clock epoch into a clean numerical string.
   - For 'requestHeaders': Extract the active tracking agent identifier name and map it as: "{\"host\":\"YOUR_AGENT_NAME.ai-agent.glean\"}".
   - For 'requestPayload': Fetch the literal text string the user just typed, escape inner punctuation, and pass it formatted as: "{\"body\":\"USER_PROMPT_HERE\"}".
3. CRITICAL INTERCEPTION RULE:
   - Read the returned JSON payload from the tool call carefully.
   - If the parameter "Allowed" evaluates to false, or "behaviour" is equal to "block": STOP processing instantly. Do not call downstream chat loops, search pipelines, or any other tools. 
   - Terminate the run immediately and output the RAW value from the "Reason" key exactly as it was received from the API response payload. Do not paraphrase, summarize, or alter this text. Even if it says "blocked by PII Policy Of Akto", display exactly that text block to the user as your entire response.
```

</details>

<div data-with-frame="true"><figure><img src="/files/yF5oSCGRKKrxJjQQdMg1" alt="" width="563"><figcaption></figcaption></figure></div>

This prompt determines when the guardrail fires - for example, you can configure it to trigger on every user message so no input reaches the model unchecked.
{% endstep %}

{% step %}
**Configure the functionality**

Under **Functionality**, click **Get Started**, then paste the OpenAPI spec below.

{% hint style="warning" %}

## Note

In the script, replace the placeholder URL with your **Akto Guardrails service URL**.

Your Akto Guardrails service URL is provisioned by Akto. If you do not have it, contact Akto support or retrieve it from your Akto Argus dashboard under **Connectors → Setup Guardrail**.
{% endhint %}

<details>

<summary>OpenAPI Spec</summary>

```json
openapi: 3.0.3
info:
  title: Centralized Platform Guardrail Middleware
  description: System-level interceptor that forces policy evaluation for all workspace agents.
  version: 1.0.0
servers:
  - url: <enter-your-guardrail-service-url>
paths:
  /api/validate/request:
    post:
      summary: Evaluate active session attributes against global enterprise policies
      operationId: evaluatePlatformGuardrail
      description: Main pipeline interceptor. Evaluates incoming agent sessions. A falsy Allowed bit immediately cuts the runtime thread.
      requestBody:
        required: true
        content:
          application/json:
            schema:
              type: object
              required:
                - requestHeaders
                - path
                - method
                - requestPayload
                - ip
                - time
                - contextSource
              properties:
                requestHeaders:
                  type: string
                  description: "Dynamic string matching format: {\\\"host\\\":\\\"<agent_name>.ai-agent.glean\\\"}"
                  example: "{\"host\":\"karan-s-macbook-pro.ai-agent.glean\"}"
                path:
                  type: string
                  default: "/backend-api/f/conversation"
                  description: "The application context routing path string."
                method:
                  type: string
                  default: "POST"
                  description: "The incoming transactional standard HTTP method verb."
                requestPayload:
                  type: string
                  description: "Capture user prompt and format: {\\\"body\\\": \\\"USER_PROMPT_HERE\\\"}"
                  example: "{\"body\":\"email check abc@akto.io\"}"
                ip:
                  type: string
                  default: "49.37.170.1"
                  description: "Fallback client IP address map if unresolved by cloud orchestrator."
                time:
                  type: string
                  description: "Live numerical timestamp in string format."
                  example: "1782325800000"
                statusCode:
                  type: string
                  default: "200"
                  description: "Interface transport validation state tracker."
                status:
                  type: string
                  default: "200"
                  description: "System routing workflow execution flag token."
                contextSource:
                  type: string
                  default: "ENDPOINT"
                  description: "Context structural classification tag locked at schema layer."
                  enum:
                    - "ENDPOINT"
      responses:
        '200':
          description: "Akto Guardrails Engine Evaluation Response Object"
          content:
            application/json:
              schema:
                type: object
                required:
                  - Allowed
                  - Reason
                  - behaviour
                properties:
                  Allowed:
                    type: boolean
                    description: "Status indicator flag. True passes, False breaks loop."
                  Modified:
                    type: boolean
                  ModifiedPayload:
                    type: string
                  Reason:
                    type: string
                    description: "The dynamic security policy rule failure message string from backend."
                    example: "blocked by PII Policy Of Akto"
                  Metadata:
                    type: object
                    properties:
                      policy_name:
                        type: string
                      rule_violated:
                        type: string
                  behaviour:
                    type: string
                    description: "The enforcement string action value (e.g., 'block')."
                    example: "block"
```

</details>

<div data-with-frame="true"><figure><img src="/files/jaJOLF91JEldRCjx8p3X" alt="" width="563"><figcaption></figcaption></figure></div>
{% endstep %}

{% step %}
**Configure authentication**

Under **Authentication**, set the type to **API Key**, then enter your **Akto API Token**.

To retrieve your token:

1. Open your **Akto Argus** dashboard.
2. Go to **Connectors → Setup Guardrail**.
3. Copy the API token shown on that page.

Paste the token into the API Key field in the Glean tool form.

<div data-with-frame="true"><figure><img src="/files/GMzhAQtgChoc0ZBDONG0" alt="" width="563"><figcaption></figcaption></figure></div>
{% endstep %}

{% step %}
**Configure deployment**

Open the **Deploy** tab and expand the **Agents** section. Under **Allow teammates to add tools to agents**, select one of the following:

* **Enable for all teammates** - any teammate can add this tool to agents.
* **Enable for selected teammates** - only the teammates you specify can add this tool to agents.

<div data-with-frame="true"><figure><img src="/files/iz2liTHM2bKu6XfYyy6c" alt="" width="563"><figcaption></figcaption></figure></div>
{% endstep %}

{% step %}
**Save the tool**

Click **Save**. The custom tool is now created and available to attach to agents.
{% endstep %}
{% endstepper %}

### Part 2 - Attach the Tool to an Agent

Repeat this for each agent you want to guardrail.

{% stepper %}
{% step %}
**Open the Agents list**

From the Glean home page, click **Agents** in the navigation.
{% endstep %}

{% step %}
**Select your agent**

Find the agent you want to protect and click on it to open its detail view.
{% endstep %}

{% step %}
**Open the agent setup**

Click **View Agent Setup**. The agent configuration panel opens.

<div data-with-frame="true"><figure><img src="/files/CHL6VjRAJBIeuiIuV7fh" alt="" width="563"><figcaption></figcaption></figure></div>
{% endstep %}

{% step %}
**Open the Tools panel**

In the right-side navigation of the agent setup, click the **Tools** icon.
{% endstep %}

{% step %}
**Add the Akto Guardrail tool**

Click **Add**, then search for the tool by name (e.g. `Akto Guardrail`). Alternatively, browse to it under the **Custom Tools** section.

Select the tool and confirm.

<div data-with-frame="true"><figure><img src="/files/f9oG8uCPRocgh9oSG0OR" alt="" width="563"><figcaption></figcaption></figure></div>
{% endstep %}

{% step %}
**Save the agent**

Save the agent configuration. The Akto guardrail is now active on this agent and will evaluate every incoming message before it reaches the model.
{% endstep %}
{% endstepper %}

## Get Support

There are multiple ways to request support from Akto. We are 24X7 available on the following:

1. In-app `intercom` support. Message us with your query on intercom in Akto dashboard and someone will reply.
2. Join our [discord channel](https://www.akto.io/community) for community support.
3. Contact <support@akto.io> for email support.
4. Contact us [here](https://www.akto.io/contact-us).


# Hugging Face

## Overview

This guide explains how to integrate **Akto AI Agent Gateway** with a **Hugging Face Private Inference Endpoint** used by customers to run private LLM inference. The gateway sits between the end user and the agent application (Option B) to monitor, enforce guardrails, and log model invocation traffic without modifying internal client code.

Akto AI Agent Gateway provides:

* Guardrail enforcement on both requests and responses
* Sensitive data redaction
* Security guardrail detection

Hugging Face’s Private Inference Endpoint provides a dedicated, managed model endpoint accessible only via AWS PrivateLink from within a VPC. Hugging Face does **not automatically log full prompt & response conversations** like AWS Bedrock, so Akto must capture this upstream.

## **Prerequisites**

Before integrating Akto Gateway:

1. A working **Hugging Face Private Inference Endpoint** configured with PrivateLink.
2. AWS VPC where the endpoint service is reachable.
3. The AI agent and Akto Gateway deployed in the same VPC or with network access to the PrivateLink interfaces.
4. Access credentials for Hugging Face inference (API token).

***

## **Architecture Diagram**

```mermaid
flowchart LR
    A[EndUser] --> B[Akto AI Agent Gateway] --> C[AI Agent App] --> D[HF Private Inference Endpoint]
    B --> E[Logs and Guardrails Analytics]


```

1. End user calls the **AI agent API**.
2. **Akto Gateway** intercepts requests (guardrail enforcement).
3. Gateway forwards to **HF Private Inference Endpoint** (via PrivateLink).
4. Responses pass back through Akto Gateway.
5. Akto logs, analyzes and optionally redacts or blocks results.

## **Setup Steps**

{% stepper %}
{% step %}
**Configure Hugging Face Private Inference Endpoint**

Ensure the endpoint is set up with:

* Model deployed
* **PrivateLink enabled**
* Correct AWS account and region
* VPC interface endpoint created in your VPC

Hugging Face does not log full request/response content by itself. You must capture it upstream.
{% endstep %}

{% step %}
**Deploy Akto AI Agent Gateway**

Deploy the gateway in the same VPC where:

* End user traffic enters
* The AI agent application runs
* The PrivateLink interface to HF endpoint exists
  {% endstep %}

{% step %}
**Configure Gateway Environment**

Here is an example config for the gateway:

```bash
export AKTO_API_TOKEN=<YOUR_AKTO_PROXY_TOKEN>
export AKTO_API_BASE_URL=<AKTO_API_BASE_URL>
export APP_URL=<HUGGING_FACE_PRIVATELINK_ENDPOINT_URL>
export LOG_LEVEL=INFO

```

* `AKTO_API_TOKEN`: Akto ingestion token (go to **Akto Argus → Connectors → Setup Guardrail** card to obtain it)
* `AKTO_API_BASE_URL`: Akto gateway ingestion server. Follows the format `https://<account_id>-guardrails.akto.io`; contact the Akto support team to get the URL for your account.
* `APP_URL`: Upstream target (the HF Private Inference Endpoint URL)
* `LOG_LEVEL`: Logging verbosity
  {% endstep %}

{% step %}
**Adjust Endpoint URL in Agent App**

Update the AI agent’s inference call configuration:

* Set model base URL to the **Akto Gateway endpoint**
* Pass Hugging Face authentication headers through gateway

For example:

```
AI_AGENT_INFERENCE_URL=https://akto-proxy.internal.svc
HF_AUTHORIZATION=Bearer <HF_TOKEN>

```

This ensures:

* Traffic flows through Akto Gateway
* Akto captures all inference calls
  {% endstep %}

{% step %}
**Validate Integration**

Verify end-to-end flow:

1. Send an inference request from the user
2. Akto Gateway receives and logs the call
3. Gateway enforces any guardrails
4. Gateway forwards to HF Private Endpoint
5. Response returns through Akto Gateway
6. Logs appear in Akto dashboard

Look for:

* Request/response pairs in gateway logs
* Guardrail hits (if configured)
* Redaction results
  {% endstep %}
  {% endstepper %}

## **Security & Guardrails**

Akto Gateway supports:

* Request guardrails (input sanitization)
* Response guardrails (filtering outputs)
* Redaction of sensitive tokens or PII
* Rate limiting and anomaly detection

Use our policy packs or define custom rules based on:

* Content patterns
* Risk categories
* Endpoint sensitivity

## **Logging & Monitoring**

Hugging Face Private Endpoints offer:

* Operational logs (status, errors)
* Metrics (latency, throughput)

They do **not log conversation content** by default.

Akto Gateway will log:

* Full request and response traces
* Guardrail decision events
* Alerts and incidents
* Metadata for analytics

## **Troubleshooting**

* **Gateway cannot reach HF Endpoint**: Check PrivateLink and VPC routing.
* **Auth failures**: Verify Hugging Face API token headers are passed by gateway.
* **No logs in Akto**: Confirm AKTO\_API\_TOKEN and ingestion config.
* **Guardrail not triggering**: Validate rule pack configuration.

## **Summary**

By integrating Akto AI Agent Gateway in front of a Hugging Face Private Inference Endpoint:

* You achieve guardrail enforcement without modifying the client code
* You capture and monitor model invocation traffic
* You gain observability of conversation logging

Akto Gateway becomes the enforcement and observability layer for private HF model usage.


# LangChain

Connect Akto with LangChain

## Overview

LangChain is a framework for developing applications powered by language models. Akto provides two ways to connect with your LangChain applications:

1. **LangChain Hooks (Recommended)** — A Python middleware that plugs directly into your LangChain agent via the `AgentMiddleware` interface. It validates prompts and responses against Akto guardrails in real time.
2. **LangSmith Connector** — A cron-based connector that pulls execution traces from LangSmith for monitoring.

The Akto LangChain integration automatically:

* Validates AI requests and responses against security policies
* Detects PII, prompt injection, and policy violations
* Blocks malicious requests (sync mode) or logs violations (async mode)
* Ingests traffic into Akto for monitoring and analysis

## Prerequisites

Before integrating Akto with LangChain, ensure you have:

* A LangChain application using `langchain` and `langgraph`
* Python 3.9+
* `httpx` package installed
* Akto guardrails service endpoint (your `AKTO_DATA_INGESTION_URL`)

***

## Option 1: LangChain Hooks (Recommended)

This approach uses Akto's `AktoGuardrailsMiddleware` — a class-based `AgentMiddleware` that intercepts model calls to enforce Akto guardrails before and after each LLM invocation.

### How It Works

The middleware hooks into two points of the LangChain agent lifecycle:

* **`before_model`** — Validates the prompt against Akto guardrails *before* the LLM is called. In sync mode, a policy violation blocks the request immediately.
* **`after_model`** — Ingests the completed interaction (prompt + response) into Akto for audit and dashboard visibility.

Both synchronous and asynchronous agent execution modes are supported.

### Request Flow (AKTO\_SYNC\_MODE=true)

```
1. Agent invokes model call
2. before_model hook intercepts the request
3. Prompt sent to Akto Data Ingestion Service for validation
   ├─ If BLOCKED: ValueError raised, LLM never called
   └─ If ALLOWED: Continue to step 4
4. Request forwarded to LLM provider
5. LLM response received
6. after_model hook intercepts the response
7. Full interaction sent to Akto for audit and dashboard display
```

### Request Flow (AKTO\_SYNC\_MODE=false)

```
1. Agent invokes model call
2. Request forwarded to LLM provider immediately (no pre-validation)
3. LLM response received
4. after_model hook sends the interaction to Akto asynchronously (log-only)
```

### Steps to Connect

{% stepper %}
{% step %}
**Install Dependencies**

Ensure the required packages are installed:

```bash
pip install httpx langchain langgraph
```

{% endstep %}

{% step %}
**Download the Middleware**

Download the `akto_middleware.py` file into your project:

```bash
curl -O https://raw.githubusercontent.com/akto-api-security/akto/master/apps/mcp-endpoint-shield/langchain-hooks/akto_middleware.py
```

{% endstep %}

{% step %}
**Configure Environment Variables**

Set the following environment variables in your shell or `.env` file:

```bash
# Required: Akto Data Ingestion Service URL — contact the Akto support team to get the URL for your account
AKTO_DATA_INGESTION_URL=https://<account_id>-guardrails.akto.io

# Required: Unique identifier for this LangChain application in Akto
PROJECT_NAME=my-langchain-agent

# Optional: Operation mode (default: "true")
AKTO_SYNC_MODE=true        # true = block violations, false = async log-only

# Optional: HTTP timeout in seconds (default: "5")
AKTO_TIMEOUT=5

# Optional: Logging
LOG_LEVEL=INFO             # Logging level (default: "INFO")
LOG_PAYLOADS=false         # Log full payloads — privacy-sensitive (default: "false")
```

{% hint style="warning" %}
**Note**

`AKTO_SYNC_MODE` determines behavior:

* `AKTO_SYNC_MODE=true`: Prompts are validated **before** being sent to the LLM. Policy violations raise a `ValueError` and block the request.
* `AKTO_SYNC_MODE=false`: All requests proceed immediately. Interactions are ingested after the fact for logging and audit only.
  {% endhint %}
  {% endstep %}

{% step %}
**Integrate the Middleware into Your Agent**

Import `AktoGuardrailsMiddleware` and pass it to your LangChain agent's middleware list:

```python
from akto_middleware import AktoGuardrailsMiddleware
from langchain.agents import create_agent

agent = create_agent(
    model="gpt-4.1",
    tools=[...],
    middleware=[AktoGuardrailsMiddleware()],
)
```

The middleware automatically handles both sync and async execution paths — no additional configuration is needed.
{% endstep %}

{% step %}
**Verify Integration**

Run your agent and check the logs for middleware initialization:

```
AktoGuardrailsMiddleware initialized | connector=langchain sync_mode=True url=https://<account_id>-guardrails.akto.io
```

Then verify in the Akto dashboard:

* Log into your Akto dashboard
* Navigate to the Collections section
* Verify you see requests from your LangChain application appearing
  {% endstep %}
  {% endstepper %}

### Configuration Reference

| Variable                  | Required | Default             | Description                                              |
| ------------------------- | -------- | ------------------- | -------------------------------------------------------- |
| `AKTO_DATA_INGESTION_URL` | Yes      |                     | Akto service base URL                                    |
| `PROJECT_NAME`            | Yes      |                     | Unique identifier for this LangChain application in Akto |
| `AKTO_SYNC_MODE`          | No       | `true`              | `true` to block on violation, `false` for log-only       |
| `AKTO_TIMEOUT`            | No       | `5`                 | HTTP timeout in seconds                                  |
| `LOG_LEVEL`               | No       | `INFO`              | Logging level                                            |
| `LOG_PAYLOADS`            | No       | `false`             | Log full request/response payloads (privacy-sensitive)   |
| `LANGCHAIN_API_HOST`      | No       | `api.langchain.com` | Host header used in the proxy payload                    |
| `LANGCHAIN_API_PATH`      | No       | `/langchain/chat`   | Path used in the proxy payload                           |

### Handling Blocked Requests

When `AKTO_SYNC_MODE=true` and a request is blocked by guardrails, the middleware raises a `ValueError`:

```
ValueError: Blocked by Akto Guardrails: <reason>
```

You can catch this in your application to handle blocked requests gracefully:

```python
try:
    result = agent.invoke({"messages": [{"role": "user", "content": user_input}]})
except ValueError as e:
    if "Blocked by Akto Guardrails" in str(e):
        print(f"Request blocked: {e}")
```

***

## Option 2: LangSmith Connector

This approach uses a cron-based connector that pulls execution traces from LangSmith for monitoring. Use this if you are already using LangSmith and want to monitor traffic without modifying your application code.

### Steps to Connect

{% stepper %}
{% step %}
**Configure Akto Traffic Processor**

Set up and configure your Traffic Processor. The steps are mentioned [here](/akto-argus-agentic-ai-security-for-homegrown-ai/connectors/others/hybrid-saas).
{% endstep %}

{% step %}
**Download Configuration Files**

```bash
wget https://raw.githubusercontent.com/akto-api-security/infra/refs/heads/feature/quick-setup/docker-compose-langchain-cron.yaml

wget https://raw.githubusercontent.com/akto-api-security/infra/refs/heads/feature/quick-setup/langchain-cron.env

wget https://raw.githubusercontent.com/akto-api-security/infra/refs/heads/feature/quick-setup/watchtower.env
```

{% endstep %}

{% step %}
**Update Environment Variables**

Update the following variables in the `langchain-cron.env` file:

```bash
LANGCHAIN_BASE_URL=https://<YOUR_LANGSMITH_URL>
LANGCHAIN_API_KEY=<API_KEY>
AKTO_KAFKA_BROKER_URL=kafka1:19092
```

{% endstep %}

{% step %}
**Start the LangChain Traffic Connector**

Run the following command to start the LangChain traffic connector:

```bash
docker compose -f docker-compose-langchain-cron.yaml up
```

This will start monitoring your LangChain applications and send API traffic data to Akto for analysis.
{% endstep %}
{% endstepper %}

### What Data is Collected?

#### Application Metadata

* All LangChain applications and traces

#### Execution Data

* Recent execution traces
* Input and output data

***

## Get Support for your Akto setup

There are multiple ways to request support from Akto. We are 24X7 available on the following:

1. In-app `intercom` support. Message us with your query on intercom in Akto dashboard and someone will reply.
2. Join our [discord channel](https://www.akto.io/community) for community support.
3. Contact `help@akto.io` for email support.
4. Contact us [here](https://www.akto.io/contact-us).


# LangGraph

Connect Akto with LangGraph

## Overview

LangGraph is a framework for building stateful, multi-actor AI agent applications using graph-based workflows. This integration lets you capture tool calls, agent interactions, and execution traces from your LangGraph applications and send them into Akto for security monitoring and policy enforcement.

Akto supports three integration methods for LangGraph depending on your deployment requirements.

## Integration Methods

### 1. Via LangSmith (Telemetry)

LangGraph natively integrates with LangSmith for observability and tracing. If your LangGraph application already reports traces to LangSmith, you can use Akto's existing LangChain connector to pull that data into Akto — no additional instrumentation required.

Follow the steps in the [LangChain connector guide](/akto-argus-agentic-ai-security-for-homegrown-ai/connectors/ai-agent-security/langchain) to configure the integration. The same connector works for LangGraph applications traced through LangSmith.

{% hint style="info" %}
**When to use this**

Use this method if you want passive observability; collecting execution traces and API traffic after the fact without intercepting live requests.
{% endhint %}

### 2. Via Gateway

Route your LangGraph agent's outbound LLM and tool calls through Akto's AI Agent Gateway. This gives you real-time inspection, guardrails enforcement, and response filtering on every request your agent makes, without modifying your application logic.

#### 1. Set Up the AI Agent Gateway

Configure an **AI Agent Gateway** in your environment so LangGraph agent requests can pass through the gateway before reaching the upstream LLM or tool APIs.

```mermaid
graph LR
    A[LangGraph Agent] --> B[Akto AI Agent Gateway]
    B --> C[LLM Provider / Tool APIs]
```

Akto Argus inspects prompts, evaluates guardrail policies, and filters responses before forwarding traffic to the upstream services.

Refer to the [AI Agent Gateway guide](/agentic-guardrails/overview/akto-agent-proxy) for setup instructions.

An enterprise platform team can deploy and manage the gateway within internal infrastructure. The deployed gateway endpoint becomes the `{PROXY_URL}` used in model routing configuration.

#### 2. Route Model Requests Through the Gateway

Update the model endpoint used by the LangGraph agent so requests pass through the gateway before reaching the model provider.

General model endpoint format:

```
https://{MODEL_HOST}/{MODEL_PATH}
```

Gateway endpoint format:

```
https://{PROXY_URL}/{MODEL_PATH}?openai_url=https://{MODEL_HOST}
```

| Configuration Element | Value                                                              |
| --------------------- | ------------------------------------------------------------------ |
| Model URL             | `https://{MODEL_HOST}/{MODEL_PATH}`                                |
| Gateway URL Format    | `https://{PROXY_URL}/{MODEL_PATH}?openai_url=https://{MODEL_HOST}` |

Akto Argus evaluates prompts, applies guardrail policies, and forwards the request to the upstream model provider.

<details>

<summary><strong>Example: Azure AI Foundry endpoint</strong></summary>

Azure AI Foundry model endpoint:

```
https://{AZURE_MODEL_URL}/openai/v1/
```

Gateway endpoint format:

```
https://{PROXY_URL}/openai/v1/?openai_url=https://{AZURE_MODEL_URL}
```

</details>

{% hint style="warning" %}
**Gateway URL usage**

If your team deployed an AI Agent Gateway in the previous step, use the gateway endpoint from that deployment as `{PROXY_URL}`.\
If your team prefers not to deploy a gateway, request a **managed gateway URL from the Akto support team** and use the provided endpoint as `{PROXY_URL}`.
{% endhint %}

{% hint style="info" %}
**When to use this**

Use this method if you want active enforcement — intercepting and inspecting requests in real time before they reach the LLM or tool.
{% endhint %}

### 3. Via Hooks (Recommended)

Akto provides `AktoGuardrailsMiddleware` — a class-based `AgentMiddleware` that hooks directly into the LangGraph agent lifecycle to enforce Akto guardrails on every model call. This requires no gateway and no external telemetry pipeline.

The middleware intercepts two points in the agent lifecycle:

* **`before_model`** — Validates the prompt against Akto guardrails *before* the LLM is called. In sync mode, a policy violation blocks the request immediately.
* **`after_model`** — Ingests the completed interaction (prompt + response) into Akto for audit and dashboard visibility.

Both synchronous and asynchronous agent execution modes are supported.

#### Request Flow (AKTO\_SYNC\_MODE=true)

```
1. Agent invokes model call
2. before_model hook intercepts the request
3. Prompt sent to Akto Data Ingestion Service for validation
   ├─ If BLOCKED: ValueError raised, LLM never called
   └─ If ALLOWED: Continue to step 4
4. Request forwarded to LLM provider
5. LLM response received
6. after_model hook intercepts the response
7. Full interaction sent to Akto for audit and dashboard display
```

#### Request Flow (AKTO\_SYNC\_MODE=false)

```
1. Agent invokes model call
2. Request forwarded to LLM provider immediately (no pre-validation)
3. LLM response received
4. after_model hook sends the interaction to Akto asynchronously (log-only)
```

#### Steps to Connect

{% stepper %}
{% step %}
**Install Dependencies**

Ensure the required packages are installed:

```bash
pip install httpx langchain langgraph
```

{% endstep %}

{% step %}
**Download the Middleware**

Download the `akto_middleware.py` file into your project:

```bash
curl -O https://raw.githubusercontent.com/akto-api-security/akto/master/apps/mcp-endpoint-shield/langchain-hooks/akto_middleware.py
```

{% endstep %}

{% step %}
**Configure Environment Variables**

Set the following environment variables in your shell or `.env` file:

```bash
# Required: Akto Data Ingestion Service URL — contact the Akto support team to get the URL for your account
AKTO_DATA_INGESTION_URL=https://<account_id>-guardrails.akto.io

# Required: Unique identifier for this LangGraph application in Akto
PROJECT_NAME=my-langgraph-agent

# Optional: Operation mode (default: "true")
AKTO_SYNC_MODE=true        # true = block violations, false = async log-only

# Optional: HTTP timeout in seconds (default: "5")
AKTO_TIMEOUT=5

# Optional: Logging
LOG_LEVEL=INFO             # Logging level (default: "INFO")
LOG_PAYLOADS=false         # Log full payloads — privacy-sensitive (default: "false")
```

{% hint style="warning" %}
**Note**

`AKTO_SYNC_MODE` determines behavior:

* `AKTO_SYNC_MODE=true`: Prompts are validated **before** being sent to the LLM. Policy violations raise a `ValueError` and block the request.
* `AKTO_SYNC_MODE=false`: All requests proceed immediately. Interactions are ingested after the fact for logging and audit only.
  {% endhint %}
  {% endstep %}

{% step %}
**Integrate the Middleware into Your LangGraph Agent**

Import `AktoGuardrailsMiddleware` and pass it to your LangGraph agent's middleware list:

```python
from akto_middleware import AktoGuardrailsMiddleware
from langgraph.prebuilt import create_react_agent

agent = create_react_agent(
    model="gpt-4.1",
    tools=[...],
    middleware=[AktoGuardrailsMiddleware()],
)
```

The middleware automatically handles both sync and async execution paths — no additional configuration is needed.
{% endstep %}

{% step %}
**Verify Integration**

Run your agent and check the logs for middleware initialization:

```
AktoGuardrailsMiddleware initialized | connector=langchain sync_mode=True url=https://<account_id>-guardrails.akto.io
```

Then verify in the Akto dashboard:

* Log into your Akto dashboard
* Navigate to the Collections section
* Verify you see requests from your LangGraph application appearing
  {% endstep %}
  {% endstepper %}

#### Configuration Reference

| Variable                  | Required | Default             | Description                                              |
| ------------------------- | -------- | ------------------- | -------------------------------------------------------- |
| `AKTO_DATA_INGESTION_URL` | Yes      |                     | Akto service base URL                                    |
| `PROJECT_NAME`            | Yes      |                     | Unique identifier for this LangGraph application in Akto |
| `AKTO_SYNC_MODE`          | No       | `true`              | `true` to block on violation, `false` for log-only       |
| `AKTO_TIMEOUT`            | No       | `5`                 | HTTP timeout in seconds                                  |
| `LOG_LEVEL`               | No       | `INFO`              | Logging level                                            |
| `LOG_PAYLOADS`            | No       | `false`             | Log full request/response payloads (privacy-sensitive)   |
| `LANGCHAIN_API_HOST`      | No       | `api.langchain.com` | Host header used in the proxy payload                    |
| `LANGCHAIN_API_PATH`      | No       | `/langchain/chat`   | Path used in the proxy payload                           |

#### Handling Blocked Requests

When `AKTO_SYNC_MODE=true` and a request is blocked by guardrails, the middleware raises a `ValueError`:

```
ValueError: Blocked by Akto Guardrails: <reason>
```

You can catch this in your application to handle blocked requests gracefully:

```python
try:
    result = agent.invoke({"messages": [{"role": "user", "content": user_input}]})
except ValueError as e:
    if "Blocked by Akto Guardrails" in str(e):
        print(f"Request blocked: {e}")
```

{% hint style="info" %}
**When to use this**

Use this method if you want guardrails enforcement directly inside your LangGraph agent without deploying a separate gateway. It provides the same validation and blocking capabilities as the gateway approach, with a simpler setup.
{% endhint %}

## Get Support

* **In-app Chat**: Use the chat widget in your Akto dashboard for instant support
* **Discord Community**: Join our community at [discord.gg/Wpc6xVME4s](https://discord.gg/Wpc6xVME4s)
* **Email Support**: Contact us at <support@akto.io>
* **Contact Form**: Submit a support request at <https://www.akto.io/contact-us>


# LiteLLM

Connect Akto with LiteLLM

## Overview

LiteLLM is a unified interface for calling 100+ LLM APIs in a consistent format. This integration enables monitoring of API traffic from a LiteLLM proxy and ensures AI-powered applications maintain security standards.

The Akto LiteLLM connector provides the following capabilities:

* Validates AI requests and responses against security policies
* Detects PII, prompt injection, and policy violations
* Ingests traffic into Akto for monitoring and analysis
* Blocks malicious requests (sync mode) or logs violations (async mode)
* Creates per-agent collections based on agent identity

## Prerequisites

Before integrating Akto with LiteLLM, ensure the following are in place:

* An existing LiteLLM proxy installation (running or ready to configure)
* An Akto guardrails service endpoint (URL and authentication token)

## Steps to Connect

{% stepper %}
{% step %}
**Download the Custom Hook**

Download the `custom_hooks.py` file to the LiteLLM configuration directory:

```bash
# Navigate to the LiteLLM config directory
cd /path/to/your/litellm/config

# Download the hook file
curl -O https://raw.githubusercontent.com/akto-api-security/akto/master/apps/mcp-endpoint-shield/litellm/custom_hooks.py
```

{% endstep %}

{% step %}
**Configure Environment Variables**

Add the following environment variables to the LiteLLM environment (`.env` file or system environment):

```bash
# URL of this LiteLLM proxy instance (used as the default collection host)
LITELLM_URL=http://your-litellm-instance-url

# Akto's Data Ingestion Service URL
DATA_INGESTION_SERVICE_URL=http://data-ingestion-service-url

# Akto API token used to authenticate to the Data Ingestion Service
AKTO_API_TOKEN=<your-akto-guardrail-service-token>

# Optional: Operation Mode
SYNC_MODE=true              # true = block violations, false = async logging only, default true

# Optional: timeout (in seconds) for calls to the Data Ingestion Service
TIMEOUT=5                   # default 5
```

The connector reads these variables (`custom_hooks.py`):

| Variable                     | Required | Default                 | Description                                                                                                                        |
| ---------------------------- | -------- | ----------------------- | ---------------------------------------------------------------------------------------------------------------------------------- |
| `DATA_INGESTION_SERVICE_URL` | Yes      | —                       | Akto Data Ingestion Service endpoint the hook sends traffic and validation requests to.                                            |
| `AKTO_API_TOKEN`             | Yes      | empty                   | Token sent in the `Authorization` header to the Data Ingestion Service. Obtain from **Akto Argus → Connectors → Setup Guardrail**. |
| `LITELLM_URL`                | Yes      | `http://localhost:4000` | This proxy's URL; its host is used as the default collection name when no agent identity is present.                               |
| `SYNC_MODE`                  | No       | `true`                  | `true` blocks violations before the LLM call; `false` validates asynchronously (log only).                                         |
| `TIMEOUT`                    | No       | `5`                     | Timeout in seconds for HTTP calls to the Data Ingestion Service.                                                                   |

{% hint style="warning" %}
**Note**

`SYNC_MODE` determines behavior:

* `SYNC_MODE=true`: Requests are validated before being sent to the LLM. Violations block the request immediately.
* `SYNC_MODE=false`: Requests proceed immediately. Validation occurs in the background.
  {% endhint %}
  {% endstep %}

{% step %}
**Update LiteLLM Configuration**

Edit the `config.yaml` to enable the custom hook:

```yaml
model_list:
  # Existing models

litellm_settings:
  callbacks: [custom_hooks.proxy_handler_instance]  # ← Add this line
  drop_params: true
  set_verbose: false
  request_timeout: 600
  num_retries: 2

# ... rest of the config ...
```

The required change is adding `callbacks: [custom_hooks.proxy_handler_instance]` to activate the Akto guardrails hook.
{% endstep %}

{% step %}
**Ensure Hook File is Accessible**

{% tabs %}
{% tab title="Using LiteLLM Directly" %}
Ensure `custom_hooks.py` is in the same directory as `config.yaml`, then start LiteLLM with the environment variables from the previous step set:

```bash
litellm --config config.yaml
```

{% hint style="info" %}
The Akto API Token can be obtained from **Akto Argus -> Connectors -> Setup Guardrail**.\
![](/files/NW2TeOXo0U8K3EsWqYsn)
{% endhint %}
{% endtab %}

{% tab title="Using Docker" %}
Mount the hook file in the docker compose configuration:

```yaml
services:
  litellm:
    image: docker.litellm.ai/berriai/litellm:main-stable
    volumes:
      - ./config.yaml:/app/config.yaml
      - ./custom_hooks.py:/app/custom_hooks.py
    environment:
      - LITELLM_URL=${LITELLM_URL}
      - DATA_INGESTION_SERVICE_URL=${DATA_INGESTION_SERVICE_URL}
      - AKTO_API_TOKEN=${AKTO_API_TOKEN}
      - SYNC_MODE=${SYNC_MODE}
    # ... rest of config ...
```

{% endtab %}
{% endtabs %}
{% endstep %}

{% step %}
**Start LiteLLM**

```bash
# Using Docker Compose
docker compose restart litellm

# Using Docker run
docker restart litellm-container

# Running directly (stop with Ctrl+C, then restart)
litellm --config config.yaml
```

{% endstep %}

{% step %}
**Verify Integration**

Confirm that LiteLLM starts successfully with the hook:

```bash
# Check logs for hook initialization
docker compose logs litellm | grep GuardrailsHandler

# Expected output:
# GuardrailsHandler initialized | sync_mode=True
```

**Send a test request:**

```bash
curl -X POST http://localhost:4000/chat/completions \
  -H "Authorization: Bearer YOUR_LITELLM_MASTER_KEY" \
  -H "Content-Type: application/json" \
  -d '{
    "model": "gpt-4",
    "messages": [{"role": "user", "content": "Hello!"}]
  }'
```

**Verify in the Akto dashboard:**

* Log into the Akto dashboard
* Navigate to the Collections section
* Confirm that requests from LiteLLM are appearing
  {% endstep %}
  {% endstepper %}

## Per-Agent Collections

By default, all LiteLLM traffic is grouped into a single collection named after the proxy host. The connector supports creating separate collections per agent, allowing each agent's API traffic to be tracked independently in the Akto dashboard.

### How Collections are Created

The connector extracts the agent identity from request metadata and uses it as the collection name. The following sources are checked in order of priority:

1. **`metadata.agent_name`** — explicitly provided by the user in the request body
2. **`key_alias`** — the human-readable name assigned to the LiteLLM virtual key
3. **`team_alias`** — the human-readable name assigned to the team the key belongs to

If none of the above are available, all traffic is grouped into a single collection named after the LiteLLM proxy host.

### Using Metadata

Users can specify an `agent_name` in the request metadata. This approach is supported across all SDKs:

{% tabs %}
{% tab title="OpenAI SDK" %}

```python
from openai import OpenAI

client = OpenAI(base_url="http://localhost:4000", api_key="sk-...")

response = client.chat.completions.create(
    model="gpt-4",
    messages=[{"role": "user", "content": "Hello!"}],
    extra_body={
        "metadata": {"agent_name": "chatbot-agent"}
    }
)
```

{% endtab %}

{% tab title="LiteLLM SDK" %}

```python
import litellm

response = litellm.completion(
    model="litellm_proxy/gpt-4",
    messages=[{"role": "user", "content": "Hello!"}],
    extra_body={
        "metadata": {"agent_name": "chatbot-agent"}
    },
    api_base="http://localhost:4000",
    api_key="sk-...",
)
```

{% endtab %}

{% tab title="curl" %}

```bash
curl -X POST http://localhost:4000/chat/completions \
  -H "Authorization: Bearer sk-..." \
  -H "Content-Type: application/json" \
  -d '{
    "model": "gpt-4",
    "messages": [{"role": "user", "content": "Hello!"}],
    "metadata": {"agent_name": "chatbot-agent"}
  }'
```

{% endtab %}
{% endtabs %}

The above creates a collection named **chatbot-agent** in the Akto dashboard.

### Using key\_alias

If the LiteLLM virtual keys have a `key_alias` configured (e.g., `"search-agent"`), the connector identifies the agent automatically. All traffic associated with that key is grouped into a collection named after the alias. No changes to the end user's code are required.

### Using team\_alias

If the key belongs to a team with a `team_alias` configured (e.g., `"search-agents"`), the connector uses it as the collection name. This groups all traffic from keys within that team into a single collection. No changes to the end user's code are required.

{% hint style="info" %}
**Priority**

The resolution order is: `metadata.agent_name` (highest) → `key_alias` → `team_alias` (lowest). When multiple sources are available, the highest priority value is used.
{% endhint %}

## Session-Based Guardrails

The connector supports session tracking, which lets the Akto guardrails service correlate multiple requests belonging to the same conversation or user session. This enables session-aware policies such as malicious-session detection and session-summary injection.

To enable this, send an `x-session-id` header on the request to the LiteLLM proxy. When present, the connector captures it and forwards it to the Akto guardrails service, which groups requests sharing the same session ID.

{% tabs %}
{% tab title="OpenAI SDK" %}

```python
from openai import OpenAI

client = OpenAI(base_url="http://localhost:4000", api_key="sk-...")

response = client.chat.completions.create(
    model="gpt-4",
    messages=[{"role": "user", "content": "Hello!"}],
    extra_headers={"x-session-id": "session-abc-123"}
)
```

{% endtab %}

{% tab title="curl" %}

```bash
curl -X POST http://localhost:4000/chat/completions \
  -H "Authorization: Bearer sk-..." \
  -H "Content-Type: application/json" \
  -H "x-session-id: session-abc-123" \
  -d '{
    "model": "gpt-4",
    "messages": [{"role": "user", "content": "Hello!"}]
  }'
```

{% endtab %}
{% endtabs %}

{% hint style="info" %}
**Note**

Session tracking is optional. Requests without an `x-session-id` header are processed normally and are simply not associated with a session. Session-based features on the guardrails service are controlled by the `SESSION_ENABLED` setting (enabled by default).
{% endhint %}

## How It Works

### Request Flow (SYNC\_MODE=true)

```
1. Client → LiteLLM Proxy
2. Hook intercepts the request (pre-call hook)
3. Request is sent to the Akto Data Ingestion Service API
4. Data Ingestion Service validates against policies
   ├─ If BLOCKED: Error returned to the client (LLM is not called)
   └─ If ALLOWED: Continue to step 5
5. Request is forwarded to the LLM provider
6. LLM response is received
7. Hook intercepts the response (post-call hook)
8. Response is sent to the Akto Data Ingestion Service API for display in the dashboard
```

### Request Flow (SYNC\_MODE=false)

```
1. Client → LiteLLM Proxy
2. Hook initiates a background validation task (non-blocking)
3. Request is immediately forwarded to the LLM provider
4. Response is returned to the client
5. Validation completes in the background (violations are logged only)
```

## Get Support for your Akto setup

There are multiple ways to request support from Akto. We are 24X7 available on the following:

1. In-app `intercom` support. Message us with your query on intercom in Akto dashboard and someone will reply.
2. Join our [discord channel](https://www.akto.io/community) for community support.
3. Contact `help@akto.io` for email support.
4. Contact us [here](https://www.akto.io/contact-us).


# Microsoft 365 Copilot

Connect Akto with Microsoft 365 Copilot

## Overview

Microsoft 365 Copilot is an AI assistant embedded across the Microsoft 365 suite — Word, Excel, PowerPoint, Teams, Outlook, and more. Employees use it to draft content, summarize meetings, query organizational data, and automate tasks across their daily workflows.

The Akto M365 Copilot connector automatically:

* Discovers all Microsoft 365 Copilot interactions across your organization
* Monitors user prompts, responses, and the resources Copilot accessed
* Sends activity data to Akto for security analysis and guardrail enforcement

## How It Works

Microsoft 365 Copilot activity is automatically logged in **Microsoft Purview eDiscovery**. Akto polls M365 directly at regular intervals, forwards the data to Akto's Data Ingestion Service, and surfaces findings in your dashboard.

```mermaid
flowchart LR
    A[Microsoft 365\nCopilot] --> B[Purview (eDiscovery) Log]
    B --> C[Akto Polls\nM365 directly]
    C --> D[Akto Data\nIngestion Service]
    D --> E[Akto Dashboard]
```

{% hint style="info" %}
**Async mode** — Akto reads Copilot audit events after the fact. Events typically appear within 1 hour of the interaction occurring in Microsoft 365.
{% endhint %}

## What Data is Collected

| Category                 | What Akto Discovers                         |
| ------------------------ | ------------------------------------------- |
| **Copilot interactions** | User prompts and responses across M365 apps |

## Steps to Connect

Reach out to the Akto support team via in-app intercom or using the contact links below. The team will guide you through connecting your Microsoft 365 environment to Akto.

## Get Support for your Akto setup

There are multiple ways to request support from Akto. We are 24X7 available on the following:

1. In-app `intercom` support. Message us with your query on intercom in Akto dashboard and someone will reply.
2. Join our [discord channel](https://www.akto.io/community) for community support.
3. Email us at <support@akto.io> for direct help.
4. Contact us [here](https://www.akto.io/contact-us).


# Microsoft Copilot Studio

Connect Akto with Microsoft Copilot Studio

[Microsoft Copilot Studio](https://learn.microsoft.com/en-us/microsoft-copilot-studio/fundamentals-what-is-copilot-studio) is a low-code platform for building and deploying conversational AI agents and copilots. Akto integrates with Copilot Studio in three ways — pick the one that matches your use case, or combine them.

<table><thead><tr><th width="240">Integration</th><th>Description</th></tr></thead><tbody><tr><td><a href="/pages/Cjn0sfDzgvn7q4use3XV">Connect to Akto (Async Mode)</a></td><td>Poll conversation transcripts from Microsoft Dataverse on a recurring schedule. No agent changes required. Detection-only — Akto observes traffic after the conversation has ended.</td></tr><tr><td><a href="/pages/L7YkDJzMZIahNjfdSOpv">Connect to Akto (Block Mode)</a></td><td>Inline request and response guardrails added directly inside the Copilot Studio agent topics. Blocks malicious prompts and scans AI responses in real time.</td></tr><tr><td><a href="/pages/KB17l9H5Ras39nuL43Ym">Route MCP Server via Akto Gateway</a></td><td>Route MCP server tool calls made by the agent through Akto's <code>agent-proxy</code> for inspection and policy enforcement on every MCP request and response.</td></tr></tbody></table>

## Which option to choose

* **Async Mode** — fastest to set up, zero agent changes, good for visibility and red-team analysis. Detect-only; cannot block.
* **Block Mode** — required if you want to **block** prompt-injection, PII leaks, or policy violations before the model or user sees them. Requires editing each agent's topics.
* **Route MCP Server via Akto Gateway** — required if your agent calls external **MCP servers** as tools and you want every MCP request and response to flow through Akto.

All three can run side-by-side on the same agent.


# Connect to Akto (Async Mode)

Discover agents and ingest Copilot Studio conversation transcripts from Microsoft Dataverse

## Overview

[Microsoft Copilot Studio](https://learn.microsoft.com/en-us/microsoft-copilot-studio/fundamentals-what-is-copilot-studio) is a low-code platform for building and deploying conversational AI agents and copilots. Connect Akto Argus to your Copilot Studio environment to discover deployed agents and ingest conversation transcripts for security analysis.

Once connected, Akto Argus automatically:

* **Discovers Copilot agents** configured in your Power Platform environment
* **Ingests conversation transcripts** captured by Copilot Studio in Microsoft Dataverse
* **Pairs user prompts with bot responses** to reconstruct full conversation flows
* **Sends traffic to Akto** for prompt injection, PII, and policy-violation analysis

The connector reads conversation transcripts from the [Dataverse Web API](https://learn.microsoft.com/en-us/power-apps/developer/data-platform/webapi/overview) using a service principal — no changes are required to your Copilot Studio agents or their deployment.

## How It Works

```
Microsoft Copilot Studio
         ↓ (transcripts persisted)
Microsoft Dataverse  ──── (Dataverse Web API v9.1 + OAuth 2.0)
         ↓
Akto Argus Connector  ── (every 5 minutes)
         ↓
Akto Data Ingestion Service
         ↓
Akto Dashboard
```

1. **Polling** — The connector polls Dataverse on a recurring schedule (default: every 5 minutes) for new [conversation transcripts](https://learn.microsoft.com/en-us/microsoft-copilot-studio/analytics-transcripts-powerapps).
2. **Authentication** — [OAuth 2.0 client-credentials flow](https://learn.microsoft.com/en-us/entra/identity-platform/v2-oauth2-client-creds-grant-flow) using a Microsoft Entra ID app registration and a Dataverse application user.
3. **Pairing** — Each transcript's `activities` array is parsed; user messages (`role: 1`) are paired with the next bot response (`role: 0`) to form request/response pairs.
4. **Publishing** — Each pair is forwarded to your Akto Data Ingestion Service for ingestion into the Akto platform.

## Prerequisites

Before setting up the Copilot Studio connector, ensure the following requirements are met. **Most setup issues are caused by missing prerequisites — please review them carefully.**

### 1. Supported Power Platform Environment

Per the [Microsoft documentation on transcript controls](https://learn.microsoft.com/en-us/microsoft-copilot-studio/admin-transcript-controls), Microsoft does **not** persist Copilot Studio conversation transcripts to Dataverse for the following [environment types](https://learn.microsoft.com/en-us/power-platform/admin/environments-overview):

* Dataverse **developer** environments
* Microsoft Dataverse for Teams environments
* Microsoft 365 Copilot agents

Your agents must be deployed to a **Sandbox** or **Production** environment with a Dataverse database enabled. Verify the environment type in the [Power Platform admin center](https://admin.powerplatform.microsoft.com). For instructions on creating a new environment, see [Create and manage environments](https://learn.microsoft.com/en-us/power-platform/admin/create-environment).

### 2. Transcript Saving Enabled

The Power Platform environment setting **"Allow conversation transcripts and their associated metadata to be saved in Dataverse"** must be turned **on** for your environment. Full details are in the [Microsoft transcript-controls documentation](https://learn.microsoft.com/en-us/microsoft-copilot-studio/admin-transcript-controls#configure-transcript-recording-and-download).

To verify or enable it:

1. Open the [Power Platform admin center](https://admin.powerplatform.microsoft.com).
2. Go to **Manage** → **Environments** → select your environment → **Settings**.
3. Expand **Product** → **Features** → scroll to **Copilot Studio agents**.
4. Ensure **"Allow conversation transcripts and their associated metadata to be saved in Dataverse"** is enabled, then **Save**.

{% hint style="info" %}
Transcripts take **up to 30 minutes** to appear in Dataverse after a conversation ends. The default Dataverse retention for transcripts is 30 days; this can be extended — see [Change the default retention period](https://learn.microsoft.com/en-us/microsoft-copilot-studio/analytics-transcripts-powerapps#change-the-default-retention-period).
{% endhint %}

### 3. Copilot Studio License

A paid [Copilot Studio license](https://learn.microsoft.com/en-us/microsoft-copilot-studio/requirements-licensing) must be assigned to the account that owns the agents. Trial licenses do not always sync conversation transcripts to Dataverse.

### 4. Akto Data Ingestion Service

Your self-hosted Akto **Data Ingestion Service** must be deployed and reachable from the Akto Argus connector. The connector forwards each conversation pair to this endpoint.

### 5. Required Permissions

Two distinct sets of permissions are involved in this integration. Note the difference — confusing them is the most common setup mistake.

#### 5a. Permissions for the person running the setup (one-time)

The user performing **Part 1** of the setup needs a Dataverse [security role](https://learn.microsoft.com/en-us/power-platform/admin/security-roles-privileges) that grants the following privileges in the target environment, because the setup creates a new application user and assigns a role to it:

| Privilege             | Entity            | Why it's needed                          |
| --------------------- | ----------------- | ---------------------------------------- |
| `prvCreateSystemUser` | User (SystemUser) | Create the new application user record   |
| `prvReadSystemUser`   | User (SystemUser) | List existing users to detect duplicates |
| `prvAppendSystemUser` | User (SystemUser) | Attach the user to the business unit     |
| `prvReadRole`         | Security Role     | List roles assignable to the app user    |
| `prvAssignRole`       | Security Role     | Bind a role to the new application user  |

The simplest way to satisfy all of these is to assign yourself the built-in **System Administrator** role for the target environment. If your organization restricts that role, ask the tenant's [Global administrator or Dynamics 365 administrator](https://learn.microsoft.com/en-us/power-platform/admin/manage-high-privileged-admin-roles) to either run the setup for you or temporarily grant the role.

These permissions are **only** needed at setup time — they are not used by the connector at runtime.

#### 5b. Permissions for the application user (used by Akto at runtime)

The Dataverse application user that Akto authenticates as needs only **read access on two tables**. No write, delete, or admin privileges are required.

| Privilege                     | Entity                  | Logical name             | Used by                                                          |
| ----------------------------- | ----------------------- | ------------------------ | ---------------------------------------------------------------- |
| **Read** (Organization scope) | Bot                     | `bot`                    | `GET /api/data/v9.1/bots` — agent discovery                      |
| **Read** (Organization scope) | Conversation Transcript | `conversationtranscript` | `GET /api/data/v9.1/conversationtranscripts` — traffic ingestion |

You have two ways to grant these:

* **Recommended (least privilege)**: Create a [custom security role](https://learn.microsoft.com/en-us/power-platform/admin/create-edit-security-role) with **Read = Organization** on the **Bot** and **Conversation Transcript** tables and nothing else. Assign that role to the application user.
* **Faster (broader access)**: Assign the built-in [**Bot Transcript Viewer**](https://learn.microsoft.com/en-us/microsoft-copilot-studio/admin-share-bots#assign-the-bot-transcript-viewer-security-role-during-agent-sharing) role (covers `conversationtranscript` reads) plus the built-in **Environment Maker** role (covers `bot` reads). This grants more than strictly necessary; prefer the custom role in production.

{% hint style="warning" %}
Do **not** assign **System Administrator** to the application user. It is far broader than needed and violates the principle of least privilege — the connector only reads two tables.
{% endhint %}

## Steps to Connect

### Part 1 — Set Up Microsoft Entra ID and Dataverse Access

You only need to complete Part 1 once per Power Platform environment. The steps below mirror Microsoft's [confidential client app registration tutorial for Dataverse](https://learn.microsoft.com/en-us/power-apps/developer/data-platform/walkthrough-register-app-azure-active-directory#confidential-client-app-registration).

{% stepper %}
{% step %}
**Register an Application in Microsoft Entra ID**

1. Sign in to the [Azure portal](https://portal.azure.com) with an account that has administrator permission.
2. Go to [**Microsoft Entra ID**](https://learn.microsoft.com/en-us/entra/fundamentals/whatis) → **App registrations** → **+ New registration**. (See Microsoft's [Register an application](https://learn.microsoft.com/en-us/entra/identity-platform/quickstart-register-app) guide for screenshots.)
3. Enter the following:
   * **Name**: `akto-copilot-studio-connector` (or any meaningful name)
   * **Supported account types**: **Accounts in this organizational directory only (single tenant)**
4. Select **Register**.
5. On the **Overview** page, copy and save the following values — you will paste them into the Akto dashboard later:
   * **Application (client) ID**
   * **Directory (tenant) ID**
     {% endstep %}

{% step %}
**Create a Client Secret**

Follow Microsoft's [Add a client secret](https://learn.microsoft.com/en-us/entra/identity-platform/quickstart-register-app#add-a-client-secret) guidance:

1. In your newly registered app, go to **Certificates & secrets** in the left navigation.
2. Select **+ New client secret**.
3. Enter a description and select an expiry (recommended: 12 months or as per your organization's policy).
4. Select **Add**.
5. Immediately copy the **Value** of the secret and save it securely.

{% hint style="warning" %}
The secret value is shown only once. If you navigate away before copying it, you will need to create a new secret.
{% endhint %}
{% endstep %}

{% step %}
**Create a Dataverse Application User**

The Microsoft Entra app must be bound to an [application user](https://learn.microsoft.com/en-us/power-platform/admin/manage-application-users) inside Dataverse before it can read data. You need the setup-time permissions listed in [Prerequisites § 5a](#5a-permissions-for-the-person-running-the-setup-one-time) to complete this step.

{% hint style="info" %}
**If you hit `There was a problem adding ...` or `We couldn't be able to fetch app users` (missing `prvReadApplicationUser`) on the default environment, self-elevate first.**

Per [Microsoft's Dataverse security role documentation](https://learn.microsoft.com/en-us/power-platform/admin/database-security#environments-with-a-dataverse-database), tenant-level roles (Global Admin, Power Platform Admin, Dynamics 365 Service Admin) are no longer automatically granted the **System Administrator** Dataverse role on the default environment. Self-elevate before continuing:

1. Open the [Power Platform admin center](https://admin.powerplatform.microsoft.com).
2. Select **Manage** → **Environments** → select your target environment (e.g. **Default**).
3. In the top toolbar (or under the **More** menu), select **Membership** → **Add me**.
4. Confirm the **System Administrator** role is granted to your user, then reload the **Application users** page.

If your tenant uses [Entra Privileged Identity Management for Power Platform](https://learn.microsoft.com/en-us/power-platform/admin/manage-high-privileged-admin-roles), activate the eligible Dataverse System Administrator assignment instead. The PowerShell cmdlet `Set-AdminPowerAppEnvironmentRoleAssignment` does **not** work on environments with a Dataverse database (returns `403 Forbidden`) — use the **Membership** UI.
{% endhint %}

1. Open the [Power Platform admin center](https://admin.powerplatform.microsoft.com).
2. Select **Manage** → **Environments** → select your target environment.
3. Open **Settings** → **Users + permissions** → [**Application users**](https://learn.microsoft.com/en-us/power-platform/admin/manage-application-users#create-an-application-user).
4. Select **+ New app user**.
5. In the side panel, select **+ Add an app** and search for the app registration you created in Step 1. Select it and choose **Add**.
6. Select the appropriate **Business unit** (typically the default).
7. Assign the runtime security role described in [Prerequisites § 5b](#5b-permissions-for-the-application-user-used-by-akto-at-runtime). Choose **one** of:
   * **Custom role (recommended)** — A role you create in advance with **Read = Organization** on the **Bot** and **Conversation Transcript** tables only.
   * **Built-in fallback** — **Bot Transcript Viewer** + **Environment Maker** (grants more than required, but works out of the box).
8. Select **Create**.
   {% endstep %}

{% step %}
**(Optional but recommended) Create a Custom Security Role for the App User**

If you want the least-privilege option from [Prerequisites § 5b](#5b-permissions-for-the-application-user-used-by-akto-at-runtime), create the custom role **before** assigning it to the application user above. Full reference: Microsoft's [Create or edit a security role](https://learn.microsoft.com/en-us/power-platform/admin/create-edit-security-role) guide.

1. Open the [Power Platform admin center](https://admin.powerplatform.microsoft.com).
2. Select **Manage** → **Environments** → select your target environment.
3. Open **Settings** → **Users + permissions** → **Security roles**.
4. Select **+ New role**.
5. **Details** tab — enter a name (e.g. `Akto Copilot Connector`) and select a business unit (typically the root).
6. **Tables** tab → search for `Bot` → set **Read** to **Organization** (full green circle). Leave all other privileges blank.
7. Search for `Conversation Transcript` → set **Read** to **Organization**. Leave all other privileges blank.
8. **Miscellaneous Privileges** tab — leave everything unchecked.
9. Select **Save and Close**.

Return to **Step 3** above and assign this role to the application user.
{% endstep %}

{% step %}
**Locate the Dataverse Environment URL**

1. In the [Power Platform admin center](https://admin.powerplatform.microsoft.com), open **Manage** → **Environments**.
2. Select your environment to view its details.
3. Copy the **Environment URL** value — it has the form:
   * `https://<your-org>.crm.dynamics.com` (North America)
   * `https://<your-org>.crm<region>.dynamics.com` (other regions, e.g., `crm4` for EMEA)

For the full list of regional URL suffixes, see Microsoft's [Datacenter regions](https://learn.microsoft.com/en-us/power-platform/admin/regions-overview) and [discover the URL of your environment](https://learn.microsoft.com/en-us/power-apps/developer/data-platform/webapi/compose-http-requests-handle-errors#web-api-url-and-versions) guides.
{% endstep %}
{% endstepper %}

### Part 2 — Connect from the Akto Dashboard

{% stepper %}
{% step %}
**Open the Copilot Studio Connector in Akto Argus**

1. Navigate to **Akto Argus** in your Akto dashboard.
2. Open **Connectors**.
3. Under **AI Agent Security**, locate the **Copilot Studio** connector card.
4. Select **Connect** to open the setup dialog.
   {% endstep %}

{% step %}
**Enter the Dataverse Environment URL**

Paste the environment URL you copied in Part 1, Step 4 into the **Dataverse Environment URL** field.

* Format: `https://your-org.crm.dynamics.com`
* Do **not** include a trailing slash.
  {% endstep %}

{% step %}
**Enter the Azure AD Tenant ID**

Paste the **Directory (tenant) ID** copied in Part 1, Step 1 into the **Azure AD Tenant ID** field.

* Format: `xxxxxxxx-xxxx-xxxx-xxxx-xxxxxxxxxxxx`
  {% endstep %}

{% step %}
**Enter the Azure AD App Client ID**

Paste the **Application (client) ID** copied in Part 1, Step 1 into the **Azure AD App Client ID** field.

* Format: `xxxxxxxx-xxxx-xxxx-xxxx-xxxxxxxxxxxx`
  {% endstep %}

{% step %}
**Enter the Azure AD App Client Secret**

Paste the client secret value you saved in Part 1, Step 2 into the **Azure AD App Client Secret** field.

{% hint style="info" %}
If you did not save the value when it was created, return to the Azure portal, generate a new secret in your app registration, and use the new value.
{% endhint %}
{% endstep %}

{% step %}
**(Optional) Enter Bot IDs to scope ingestion**

By default, Akto ingests transcripts for **every** Copilot agent in the Dataverse environment. To restrict ingestion to specific agents, paste their bot GUIDs (comma-separated) into the **Bot IDs (Optional)** field.

Leave the field empty to ingest all agents.

**How to find a bot GUID**

1. Go to [copilotstudio.microsoft.com](https://copilotstudio.microsoft.com) and pick the target environment.
2. Select **Agents** in the left navigation and open the agent you want to scope.
3. Look at the browser URL — it has the form:

   ```
   .../environments/<env-id>/bots/<bot-id>/...
   ```
4. Copy the GUID that appears **after** `/bots/`. That is the bot ID.

Repeat for every agent you want to include and separate the GUIDs with commas.

* Format: `xxxxxxxx-xxxx-xxxx-xxxx-xxxxxxxxxxxx,yyyyyyyy-yyyy-yyyy-yyyy-yyyyyyyyyyyy`

{% hint style="info" %}
The bot GUID in the URL is the same value returned by `botid` on the Dataverse `bot` table. Only transcripts whose `botid` matches one of the supplied GUIDs will be ingested.
{% endhint %}
{% endstep %}

{% step %}
**Enter the Data Ingestion Service URL**

In the **URL for Data Ingestion Service** field, enter the base URL of your self-hosted Akto Data Ingestion Service.

* Format: `https://ingestion.your-domain.com`

{% hint style="warning" %}

* The ingestion service must be deployed and reachable from the connector.
* The endpoint receives every conversation pair captured from Copilot Studio.
  {% endhint %}
  {% endstep %}

{% step %}
**Complete the Integration**

1. Review all entered values.
2. Select **Import** to finalise the connection.

The connector runs immediately and then continues on a 5-minute recurring schedule. Conversations should begin appearing in your Akto dashboard within one or two cycles, provided transcripts exist in Dataverse for the polling window.
{% endstep %}
{% endstepper %}

## Data Collected

The Copilot Studio connector ingests two categories of information:

### Agent Inventory

* **Bot ID and display name** for every Copilot Studio agent in the environment
* **Published date** and current status

### Conversation Traffic

For each conversation transcript, the connector emits one record per **user message → bot response** pair:

| Field             | Description                                                 |
| ----------------- | ----------------------------------------------------------- |
| `path`            | `/copilot/conversation/{transcript_id}/message/{index}`     |
| `requestPayload`  | JSON object containing the user's prompt text               |
| `responsePayload` | JSON object containing the bot's response text              |
| `host`            | `copilot.microsoft.com` (the bot name is tagged separately) |
| `time`            | Unix timestamp of the user message                          |
| `tag.source`      | `COPILOT_STUDIO`                                            |
| `tag.bot-name`    | Sanitised bot display name                                  |

Edge cases handled automatically:

* **Bot greetings** (no preceding user prompt) — emitted with an empty `requestPayload`.
* **Unanswered user prompts** — emitted with an empty `responsePayload`.
* **Multiple bot replies** — each paired with the most recent user message.

## Troubleshooting

### No Conversations Appearing in Akto

This is the most common issue. Work through the checks below in order:

1. **Environment type** — Confirm you are connected to a **Sandbox** or **Production** environment. Developer and Teams environments do not persist transcripts.
2. **Transcript saving enabled** — Verify the **"Allow conversation transcripts and their associated metadata to be saved in Dataverse"** setting is ON (see Prerequisites, item 2).
3. **Sync delay** — Transcripts can take up to 30 minutes to appear in Dataverse after a conversation ends. Have a test conversation and wait 30+ minutes before retesting.
4. **License** — Confirm a **paid** Copilot Studio license is assigned to the account that owns the agents.
5. **Transcripts visible in Power Apps** — Open [make.powerapps.com](https://make.powerapps.com), select your environment, go to **Tables** → search **Conversation Transcript** (see Microsoft's [download conversation transcripts guide](https://learn.microsoft.com/en-us/microsoft-copilot-studio/analytics-transcripts-powerapps)). If no rows appear there, the connector cannot ingest them either — fix the source first.

### Authentication Errors

**`401 Unauthorized`**

* Verify the **Azure AD App Client ID** and **Client Secret** are correct.
* Verify the secret has not expired. If it has, generate a new one and update the connector configuration.
* Confirm the **Tenant ID** matches the tenant where the app is registered.

**`403 Forbidden`**

* The Microsoft Entra app exists but has no permission inside Dataverse. Verify that a corresponding **Application user** exists in the Power Platform environment (Part 1, Step 3).
* Confirm the application user's security role grants **Read** on **both** the `bot` and `conversationtranscript` tables at **Organization** scope — see [Prerequisites § 5b](#5b-permissions-for-the-application-user-used-by-akto-at-runtime). Business Unit scope is **not** sufficient, because transcripts created by other users won't be visible.
* If you assigned only the **Bot Transcript Viewer** role, add **Environment Maker** as well — Bot Transcript Viewer alone does not grant read on the `bot` table.

### "There was a problem adding ... to this environment"

Full error pattern:

```
There was a problem adding '<app-name>' to this environment.
Principal user (Id=..., type=8, roleCount=..., privilegeCount=..., ...
```

This is raised by Power Platform when **you** (the person clicking **Create**) do not have permission to add a new application user. The principal user described in the error is your account, not the app you're trying to add.

* Verify your own user has the privileges listed in [Prerequisites § 5a](#5a-permissions-for-the-person-running-the-setup-one-time).
* The simplest fix is to have a tenant admin assign you the **System Administrator** role in the target environment, then retry. Once setup is complete, you can remove the role.
* If `roleCount` in the error is `0` or `1`, your account is missing a Dataverse security role entirely — open [Power Platform admin center](https://admin.powerplatform.microsoft.com) → environment → **Settings → Users + permissions → Users**, open your user, and confirm role assignments.

### Connection Test Fails

* Verify the **Dataverse Environment URL** is correct and has no trailing slash.
* Confirm the URL is reachable from your network (or from the Akto-hosted connector).
* Verify there are no [Conditional Access](https://learn.microsoft.com/en-us/entra/identity/conditional-access/overview) or IP allow-list rules in Microsoft Entra ID blocking the service principal.

### Rate Limiting (`429 Too Many Requests`)

Dataverse enforces [service protection API limits](https://learn.microsoft.com/en-us/power-apps/developer/data-platform/api-limits) (6,000 requests per 5 minutes per user). The default 5-minute polling interval stays well within these limits. If you see `429` errors:

* Reduce concurrent connectors against the same environment.
* Contact Akto support to adjust the recurring interval.

## Security and Privacy

* **Credentials at rest** — The Microsoft Entra client secret is stored encrypted in Akto's secure configuration store and is never displayed back to the user after import.
* **Least privilege** — Akto recommends [creating a custom Dataverse security role](https://learn.microsoft.com/en-us/power-platform/admin/create-edit-security-role) with read-only access to the `bot` and `conversationtranscript` tables, rather than System Administrator.
* **Secret rotation** — Rotate the Microsoft Entra client secret per your organization's policy (see Microsoft's [credential management best practices](https://learn.microsoft.com/en-us/entra/identity-platform/howto-create-service-principal-portal#option-3-create-a-new-client-secret)). After rotating, return to the connector and re-import with the new value.
* **Network** — All Dataverse and ingestion traffic is sent over HTTPS.
* **Data residency** — Conversation transcripts remain in your Dataverse environment; Akto reads them via the Web API. Pairs are then forwarded to your self-hosted Akto Data Ingestion Service.

## Get Support

If you need assistance with the Copilot Studio connector:

* **In-app Chat** — Use the chat widget in your Akto dashboard for instant support.
* **Discord Community** — Join our community at [discord.gg/Wpc6xVME4s](https://discord.gg/Wpc6xVME4s).
* **Email Support** — Contact us at <help@akto.io>.
* **Contact Form** — Submit a support request at <https://www.akto.io/contact-us>.

Our team is available 24/7 to help with setup, troubleshooting, and best practices.


# Connect to Akto (Block Mode)

Add inline request and response guardrails to Microsoft Copilot Studio agents

## Overview

The **sync** integration adds Akto guardrails **inside** your Microsoft Copilot Studio agent. Every user message and every AI-generated response is sent to Akto in real time so that prompt-injection, PII leaks, and policy violations can be **blocked** before they reach the model or the end user.

Unlike the [async integration](/akto-argus-agentic-ai-security-for-homegrown-ai/connectors/ai-agent-security/microsoft-copilot-studio/connect-akto-async) — which only observes traffic after the fact — the sync integration sits **on the conversation path** and can stop a request mid-flight.

Once configured, the agent will:

* **Intercept every user message** before it is sent to the AI model and block it if Akto returns `Allowed: false`.
* **Intercept every AI-generated response** before it is delivered to the user and scan it for violations.
* **Surface the block reason** returned by Akto directly inside the chat (e.g. "Request blocked: contains restricted PII").

## How It Works

```
User message
     ↓
Copilot Studio "Request Guardrail" topic ──► Akto (sync, blocking)
     ↓ (allowed)
AI model
     ↓
Copilot Studio "Response Guardrail" topic ──► Akto (async scan)
     ↓
User
```

1. **Request Guardrail topic** — fires on every incoming user message at **Priority 0** (before any other topic). Calls Akto's `http-proxy` endpoint and waits for a verdict. If `Allowed: false`, the topic sends the block reason to the user and ends the conversation turn.
2. **Response Guardrail topic** — fires when an AI-generated response is about to be sent. Forwards the prompt and response to Akto for background analysis; the response is delivered to the user immediately while Akto scans it.

## Prerequisites

* A **Microsoft Copilot Studio** agent you can edit (Author or Maker role on the agent).
* The **Akto Guardrails URL** — provisioned and shared by Akto. Follows the format `https://<account_id>-guardrails.akto.io`; contact the Akto support team to get the URL for your account.
* Permission to publish the agent after the new topics are added.

## Steps to Connect

### Part 1 — Request Guardrail (blocking)

This topic intercepts every user message **before** it reaches the AI model.

{% stepper %}
{% step %}
**Open your agent**

Go to [copilotstudio.microsoft.com](https://copilotstudio.microsoft.com) and open the agent you want to protect.
{% endstep %}

{% step %}
**Create a new topic**

Select **Topics → + Add a topic → From blank**.
{% endstep %}

{% step %}
**Name the topic**

Name it `Akto Request Guardrail` and select **Save**.
{% endstep %}

{% step %}
**Set the trigger**

1. Select the **Trigger** node and change its type to **"A message is received"** (not a keyword-based trigger).
2. Select **Edit** and set **Priority** to `0`.

{% hint style="info" %}
Priority `0` ensures this topic fires on **every** user message before any other topic — including agent-defined intents.

If another topic shares the same priority, Copilot Studio may not guarantee which fires first — meaning the guardrail could be skipped. Ensure no other topic in your agent is set to priority `0`.
{% endhint %}
{% endstep %}

{% step %}
**Add an HTTP Request action**

Select **+** below the trigger → **Advanced → Send HTTP request**.
{% endstep %}

{% step %}
**Configure the HTTP request**

| Field  | Value                                                                           |
| ------ | ------------------------------------------------------------------------------- |
| URL    | `https://<akto-guardrails-url>/api/http-proxy?ingest_data=true&guardrails=true` |
| Method | `POST`                                                                          |

**Body** — select **JSON Content**, then **Edit formula**, and paste:

```
{
    path: "/v1/messages",
    requestHeaders: JSON(
        {
            host: System.Bot.Name & ".copilotstudio.microsoft.com"
        },
        JSONFormat.Compact
    ),
    responseHeaders: "",
    requestPayload: JSON(
        {
            body: System.Activity.Text
        },
        JSONFormat.Compact
    ),
    responsePayload: "{}",
    method: "POST",
    ip: "127.0.0.1",
    destIp: "127.0.0.1",
    time: Text(DateDiff(DateTime(1970,1,1,0,0,0), Now(), TimeUnit.Seconds)),
    statusCode: "200",
    type: "HTTP/1.1",
    status: "200",
    akto_account_id: "1000000",
    akto_vxlan_id: "1000000",
    is_pending: "false",
    source: "MIRRORING",
    contextSource: "AGENTIC",
    tag: JSON(
        {
            'gen-ai': "Gen AI"
        },
        JSONFormat.Compact
    )
}
```

**Response Data Type** — choose **From a sample**, select **Get schema from sample data**, and paste:

```json
{
  "data": {
    "guardrailsResult": {
      "Allowed": false,
      "Modified": false,
      "ModifiedPayload": "",
      "Reason": "reason",
      "Metadata": {
        "policy_name": "",
        "rule_violated": ""
      },
      "behaviour": "block"
    },
    "success": true,
    "message": "Request processed successfully"
  },
  "message": "Request processed successfully",
  "success": true
}
```

**Save response as** → **Select a variable → Create new** → rename it to `GuardrailsResponse`.
{% endstep %}

{% step %}
**Handle blocked requests**

Add a **Condition** node below the HTTP request:

* **Variable**: `GuardrailsResponse.data.guardrailsResult.Allowed`
* **Condition**: **Is equal to** → `false`

**Left branch (blocked):**

1. **+ → Send a message** → insert the variable `GuardrailsResponse.data.guardrailsResult.Reason`.
2. **+ → Topic Management → End All Topics**.

**Right branch (allowed):**

Leave empty — the conversation continues to the next topic or the AI model.
{% endstep %}

{% step %}
**Save the topic**

Select **Save** in the top-right corner of the topic editor.
{% endstep %}
{% endstepper %}

### Part 2 — Response Guardrail (async scan)

This topic captures the AI-generated response and forwards it to Akto for background analysis. The user receives the response immediately; Akto flags violations asynchronously.

{% stepper %}
{% step %}
**Create a new topic**

Select **Topics → + Add a topic → From blank**.
{% endstep %}

{% step %}
**Name the topic**

Name it `Akto Response Guardrail` and select **Save**.
{% endstep %}

{% step %}
**Set the trigger**

Select the **Trigger** node and change its type to **"An AI generated response is about to be sent"**.
{% endstep %}

{% step %}
**Add an HTTP Request action**

Select **+** below the trigger → **Advanced → Send HTTP request**.
{% endstep %}

{% step %}
**Configure the HTTP request**

| Field  | Value                                                                           |
| ------ | ------------------------------------------------------------------------------- |
| URL    | `https://<akto-guardrails-url>/api/http-proxy?ingest_data=true&guardrails=true` |
| Method | `POST`                                                                          |

**Body** — select **JSON Content**, then **Edit formula**, and paste:

```
{
    path: "/v1/messages",
    requestHeaders: JSON(
        {
            host: System.Bot.Name & ".copilotstudio.microsoft.com"
        },
        JSONFormat.Compact
    ),
    responseHeaders: JSON(
        {
            'content-type': "application/json"
        },
        JSONFormat.Compact
    ),
    requestPayload: JSON(
        {
            body: System.Activity.Text
        },
        JSONFormat.Compact
    ),
    responsePayload: JSON(
        {
            body: System.Response.FormattedText
        },
        JSONFormat.Compact
    ),
    method: "POST",
    ip: "127.0.0.1",
    destIp: "127.0.0.1",
    time: Text(DateDiff(DateTime(1970,1,1,0,0,0), Now(), TimeUnit.Seconds)),
    statusCode: "200",
    type: "HTTP/1.1",
    status: "200",
    akto_account_id: "1000000",
    akto_vxlan_id: "1000000",
    is_pending: "false",
    source: "MIRRORING",
    contextSource: "AGENTIC",
    tag: JSON(
        {
            'gen-ai': "Gen AI"
        },
        JSONFormat.Compact
    )
}
```

{% endstep %}

{% step %}
**Save the topic**

Select **Save**, then **Publish** the agent so both new topics go live.
{% endstep %}
{% endstepper %}

{% hint style="warning" %}
The response guardrail runs **asynchronously**. The user always receives the AI response immediately; Akto scans it in the background and surfaces violations on the dashboard.
{% endhint %}

## Verify the Integration

1. Open your agent in the **Test agent** pane on the right side of Copilot Studio.
2. Send a benign message (e.g. "Hello") — it should flow through normally.
3. Send a prompt that violates one of your configured Akto policies (e.g. a known prompt-injection payload). The response should be the **Reason** returned by Akto, and the conversation turn should end.
4. Open the Akto dashboard → **Argus → Traffic** and confirm the conversation appears with the corresponding guardrail verdict.

## Troubleshooting

### Request guardrail does not fire

* Confirm the topic trigger is **"A message is received"** and that **Priority** is `0`. A non-zero priority lets other topics match first.

### `Allowed` is always `true` even for malicious prompts

* Check your **guardrail policies** configuration in the Akto dashboard — make sure the policies you expect to trigger are enabled and have rules covering the prompt you tested.
* Check whether **guardrails are enabled for this specific agent** in the Akto dashboard. An agent without guardrails enabled will fall through with `Allowed: true`.

### Block message shows raw JSON instead of the reason

* In the **Send a message** node, insert the variable `GuardrailsResponse.data.guardrailsResult.Reason` directly — do not wrap it in a formula or `JSON(...)` call.

### `4xx` or `5xx` from the HTTP request

* Verify the Akto host is reachable from Microsoft's outbound IP ranges. If the host is internal-only, the HTTP request action cannot reach it.
* Inspect the **Activity** log of the topic run in the Copilot Studio test pane for the exact status code and response body.

## Get Support

If you need help with the sync integration:

* **In-app Chat** — use the chat widget in your Akto dashboard for instant support.
* **Discord Community** — join us at [discord.gg/Wpc6xVME4s](https://discord.gg/Wpc6xVME4s).
* **Email Support** — contact <help@akto.io>.
* **Contact Form** — submit a request at <https://www.akto.io/contact-us>.


# Route MCP Server via Akto Gateway

Route MCP server traffic from Copilot Studio agents through the Akto agent-proxy

## Overview

Microsoft Copilot Studio agents can call external [Model Context Protocol (MCP)](https://modelcontextprotocol.io) servers as **tools**. By pointing the agent at Akto's `agent-proxy` instead of the MCP server directly, every tool call — both the request the agent makes and the response the MCP server returns — flows through Akto for inspection, policy enforcement, and audit.

The gateway is fully transparent: the MCP server sees a normal request and returns a normal response. The agent sees the same MCP server contract. Akto sits in the middle.

## How It Works

```
Copilot Studio agent
        │ (MCP tool call)
        ▼
https://<proxy-host>/agent-proxy/<target-mcp-host>/<path>
        │ (inspected, policies applied)
        ▼
Target MCP server  (e.g. docs.akto.io/~gitbook/mcp)
```

The gateway URL is built by **dropping `https://`** from the target MCP server URL and **appending it to the Akto agent-proxy base**:

| Target MCP server                    | Final gateway URL                                             |
| ------------------------------------ | ------------------------------------------------------------- |
| `https://docs.akto.io/~gitbook/mcp`  | `https://<proxy-host>/agent-proxy/docs.akto.io/~gitbook/mcp`  |
| `https://mcp.example.com/api/v1/mcp` | `https://<proxy-host>/agent-proxy/mcp.example.com/api/v1/mcp` |

{% hint style="info" %}
The gateway preserves the full path, query string, and request body of the original MCP server call. No changes are needed on the MCP server side.
{% endhint %}

## Prerequisites

* A **Microsoft Copilot Studio** agent you can edit (Author or Maker role on the agent).
* The **full HTTPS URL** of the MCP server you want to expose to the agent.
* The **Akto gateway host** (`<proxy-host>`) — provisioned and shared by Akto.
* Permission to publish the agent after the tool is added.

## Steps to Connect

{% stepper %}
{% step %}
**Open the Copilot Studio agent**

Go to [copilotstudio.microsoft.com](https://copilotstudio.microsoft.com) and open the agent you want to attach the MCP server to.
{% endstep %}

{% step %}
**Open the Tools tab**

In the agent's top navigation, select the **Tools** tab. This is where every external action available to the agent — connectors, custom skills, and MCP servers — is registered.
{% endstep %}

{% step %}
**Add a new tool**

Select **+ Add a tool** (top-right of the Tools tab). A side panel opens with the list of tool types Copilot Studio supports.
{% endstep %}

{% step %}
**Select MCP Server**

From the **New tool** panel, choose **Model Context Protocol** (sometimes labelled **MCP Server**). The form switches to the MCP-specific fields.
{% endstep %}

{% step %}
**Enter the name and description**

* **Name** — a short, human-readable label (e.g. `Akto Docs MCP`). The agent uses this name when deciding which tool to call.
* **Description** — one or two sentences explaining what the MCP server does. The model relies on this description to pick the tool, so be specific (e.g. *"Search and retrieve Akto documentation pages"*).
  {% endstep %}

{% step %}
**Enter the gateway URL**

In the **URL** field, paste the Akto agent-proxy URL — **not** the raw MCP server URL.

Build it by taking your target MCP server URL and dropping `https://`, then appending the remainder to `https://<proxy-host>/agent-proxy/`:

```
https://<proxy-host>/agent-proxy/<mcp_server_url_without_https>
```

**Example**

|                   |                                                              |
| ----------------- | ------------------------------------------------------------ |
| Target MCP Server | `https://docs.akto.io/~gitbook/mcp`                          |
| Final Gateway URL | `https://<proxy-host>/agent-proxy/docs.akto.io/~gitbook/mcp` |

{% hint style="warning" %}
Do **not** include `https://` after `/agent-proxy/`. The gateway expects only the host and path of the upstream MCP server.
{% endhint %}
{% endstep %}

{% step %}
**Add the tool**

Select **Add** at the bottom of the panel. Copilot Studio registers the gateway URL as the MCP endpoint for this tool.
{% endstep %}

{% step %}
**Connect**

Select **Connect**. Copilot Studio performs an MCP handshake against the gateway URL — the gateway forwards the handshake to the upstream MCP server and returns the advertised tools list to the agent.

{% hint style="info" %}
If the upstream MCP server requires authentication (API key, OAuth, etc.), Copilot Studio will prompt for it here. Credentials are sent through the gateway verbatim — Akto does not store them.
{% endhint %}
{% endstep %}

{% step %}
**Add and Configure**

Select **Add and Configure**. The tool is attached to the agent and the configuration pane opens — review the auto-discovered MCP tool list and toggle individual tools on or off as needed.

Once finished, **Publish** the agent so the tool becomes available in conversations.
{% endstep %}
{% endstepper %}

## Verify the Integration

1. Open your agent in the **Test agent** pane on the right side of Copilot Studio.
2. Ask the agent a question that requires the MCP server (e.g. *"Look up the Akto MCP connector docs"*).
3. The agent should invoke the new tool. In the **Activity** panel, expand the tool call — the request URL should be the `agent-proxy` URL, not the original MCP server.
4. Open the Akto dashboard → **Argus → Traffic** and confirm the MCP request and response appear with the corresponding policy verdict.

## Troubleshooting

### Tool fails to connect

* Verify the gateway URL is correctly formatted: `https://<proxy-host>/agent-proxy/<host>/<path>` — no `https://` after `/agent-proxy/`, and no trailing slash.
* Confirm the upstream MCP server is reachable from the Akto agent-proxy environment. If the MCP server is internal-only, contact Akto to allow-list it.

### MCP tools do not appear after Connect

* The handshake against the upstream server may have failed silently. Try the original MCP URL directly in an MCP client to confirm it responds, then re-create the tool in Copilot Studio.
* Check the Akto dashboard for gateway errors — the response from the upstream server is logged with the same trace ID.

### Tool calls are not visible in Akto

* Confirm the agent has been **published** after the tool was added — unpublished tools may not route through the configured URL in some tenants.
* Verify the agent is actually using the tool. Inspect the **Activity** panel during a test conversation — the agent may be answering from its model knowledge without calling the tool at all.

## Get Support

If you need help proxying an MCP server through Akto:

* **In-app Chat** — use the chat widget in your Akto dashboard for instant support.
* **Discord Community** — join us at [discord.gg/Wpc6xVME4s](https://discord.gg/Wpc6xVME4s).
* **Email Support** — contact <help@akto.io>.
* **Contact Form** — submit a request at <https://www.akto.io/contact-us>.


# N8N

Connect Akto with N8N

## Overview

N8N is a workflow automation platform that connects various services and automates tasks. This setup is recommended if you want to monitor agentic traffic from your N8N workflows and ensure your automated processes maintain security standards.

The Akto N8N connector automatically:

* Fetches all workflow metadata from your N8N instance
* Monitors workflow executions
* Sends agentic traffic data to Akto for security analysis

## Steps to Connect

{% stepper %}
{% step %}
**Configure Akto Traffic Processor**

Set up and configure your Traffic Processor. The steps are mentioned [here](/akto-argus-agentic-ai-security-for-homegrown-ai/connectors/others/hybrid-saas).
{% endstep %}

{% step %}
**Clone the Akto Infrastructure Repository**

Clone the Akto infrastructure repository and checkout the feature branch:

```bash
wget https://raw.githubusercontent.com/akto-api-security/infra/refs/heads/feature/quick-setup/docker-compose-n8n-cron.yaml

wget https://raw.githubusercontent.com/akto-api-security/infra/refs/heads/feature/quick-setup/n8n-cron.env

wget https://raw.githubusercontent.com/akto-api-security/infra/refs/heads/feature/quick-setup/watchtower.env
```

{% endstep %}

{% step %}
**Configure N8N Environment Variables**

Update the following variables in the `n8n-cron.env` file:

```bash
N8N_BASE_URL=https://<YOUR_INSTANCE_URL>
N8N_API_KEY=<API_KEY>
AKTO_KAFKA_BROKER_URL=kafka1:19092
```

{% endstep %}

{% step %}
**Start the N8N Traffic Connector**

Run the following command to start the N8N traffic connector:

```bash
docker compose -f docker-compose-n8n-cron.yaml up
```

This will start monitoring your N8N workflows and send the traffic data to Akto for analysis.
{% endstep %}
{% endstepper %}

## What Data is Collected?

The N8N connector collects two types of data:

### Workflow Metadata

* All workflows from your N8N instance
* Webhook URLs (if configured in workflow)

### Workflow Executions

* Executions from the last hour
* First node input data
* Last node output data

## Get Support for your Akto setup

There are multiple ways to request support from Akto. We are 24X7 available on the following:

1. In-app `intercom` support. Message us with your query on intercom in Akto dashboard and someone will reply.
2. Join our [discord channel](https://www.akto.io/community) for community support.
3. Contact `help@akto.io` for email support.
4. Contact us [here](https://www.akto.io/contact-us).


# Portkey

## Overview

Akto integrates with **Portkey AI Gateway** to provide comprehensive security guardrails for AI applications. This integration enables automatic guardrail detection and prevention at both the request and response stages of LLM interactions.

### What is Portkey?

Portkey is an AI gateway that routes requests to various LLM providers (OpenAI, Anthropic, etc.) and provides a unified interface for managing AI infrastructure. Learn more at [portkey.ai](https://portkey.ai).

### Key Benefits

* **Guardrails**: Identify prompt injection, data leakage, and other LLM-specific attacks
* **Flexible Response Actions**: Block, sanitize, alert, or log suspicious activity
* **Transparent Integration**: Works seamlessly with existing Portkey configurations
* **Centralized Management**: Configure guardrails from Portkey's admin dashboard

## Architecture

The integration operates as a Portkey plugin that hooks into two critical lifecycle points:

```mermaid
sequenceDiagram
    autonumber
    participant Client
    participant Gateway as Portkey Gateway<br>(Akto Plugin Enabled)
    participant Akto as Akto Guardrail Service
    participant LLM as LLM Provider

    %% --- Request Entry ---
    Client->>Gateway: LLM Request

    Note right of Gateway: Akto plugin intercepts request

    %% --- Input Guardrails ONLY ---
    Gateway->>Akto: Scan Input (request + policies)
    Note right of Akto: Akto Guardrails Analysis
    Akto-->>Gateway: Verdict + Sanitized Request (optional)

    %% --- Enforcement ---
    alt Block (High Risk)
        Gateway->>Akto: Log event (blocked)
        Gateway-->>Client: 403 Forbidden
    else Sanitized (Moderate Risk)
        Gateway->>Akto: Log event (sanitized)
        Gateway->>LLM: Forward sanitized request
    else Allow (Safe)
        Gateway->>LLM: Forward original request
    end

    %% --- LLM Execution ---
    LLM-->>Gateway: Response

    %% --- No Output Guardrails ---

    Gateway-->>Client: Return LLM Response
```

## Setup Guide

{% stepper %}
{% step %}
**Prerequisites**

Ensure the following requirements are available:

* Access to Portkey AI Gateway (v2.0.0 or later)
* Administrative access to Portkey settings
* Akto API key
* Akto API domain
  {% endstep %}

{% step %}
**Configure Akto Credentials in Portkey**

1. Log in to your Portkey dashboard
2. Navigate to **Admin Settings** → **Plugins**
3. Find the **Akto** plugin section
4. Enter the following credentials:
   * **Akto API Key**: Your Akto API key from the dashboard
   * **Akto API Domain**: Your Akto Agentic component domain (e.g., `api.akto.io`)
5. Click **Save** to activate the plugin.
   {% endstep %}

{% step %}
**Obtain Guardrail IDs from Our Support**

Guardrails are pre-configured and managed by the Akto team. To get the guardrail IDs for your specific guardrail detection needs:

1. Contact **Akto Support** at <support@akto.io> or through your account manager,
2. Our team will provide you with:
   * **Input Guardrail IDs**: For request-level scanning
   * **Output Guardrail IDs**: For response-level scanning
   * Configuration details and any specific requirements
     {% endstep %}

{% step %}
**Create a Portkey Configuration with Akto Guardrails**

Define a reusable configuration that includes guardrails and model settings.

1. Navigate to **Portkey Configurations**
2. Create a new configuration
3. Add:
   * **Input guardrails**: List of Akto guardrail IDs
   * **Output guardrails**: List of Akto guardrail IDs
4. Configure:
   * Provider (for example: OpenAI)
   * Model (for example: gpt-4)
5. Save the configuration

Portkey generates a **config ID**.
{% endstep %}

{% step %}
**Use Config ID in API Requests**

You now attach the Portkey configuration at the client level using the generated config ID.\
The config ID encapsulates Akto guardrails and model settings.

{% tabs %}
{% tab title="NodeJs" %}

```js
const portkey = new Portkey({
    apiKey: "PORTKEY_API_KEY",
    config: "pc-***" // Supports a string config id or a config object
});
```

{% endtab %}

{% tab title="Python" %}

```python
portkey = Portkey(
    api_key="PORTKEY_API_KEY",
    config="pc-***" # Supports a string config id or a config object
)
```

{% endtab %}

{% tab title="OpenAI NodeJs" %}

```js
const openai = new OpenAI({
  apiKey: 'OPENAI_API_KEY',
  baseURL: PORTKEY_GATEWAY_URL,
  defaultHeaders: createHeaders({
    apiKey: "PORTKEY_API_KEY",
    config: "CONFIG_ID"
  })
});
```

{% endtab %}

{% tab title="OpenAI Python" %}

```py
client = OpenAI(
    api_key="OPENAI_API_KEY", # defaults to os.environ.get("OPENAI_API_KEY")
    base_url=PORTKEY_GATEWAY_URL,
    default_headers=createHeaders(
        provider="openai",
        api_key="PORTKEY_API_KEY", # defaults to os.environ.get("PORTKEY_API_KEY")
        config="CONFIG_ID"
    )
)
```

{% endtab %}

{% tab title="cURL" %}

```hurl
curl https://api.portkey.ai/v1/chat/completions \
  -H "Content-Type: application/json" \
  -H "Authorization: Bearer $OPENAI_API_KEY" \
  -H "x-portkey-api-key: $PORTKEY_API_KEY" \
  -H "x-portkey-config: $CONFIG_ID" \
  -d '{
    "model": "gpt-3.5-turbo",
    "messages": [{
        "role": "user",
        "content": "Hello!"
      }]
  }'
```

{% endtab %}
{% endtabs %}

For more guidance, refer to the [Portkey Config](https://portkey.ai/docs/product/ai-gateway/configs).
{% endstep %}
{% endstepper %}

You can now route all LLM traffic through Portkey with Akto guardrails enforced.

## Troubleshooting

#### Issue: Guardrails Not Applied

**Symptoms**: Requests passing without guardrail validation

**Solutions**:

1. Verify guardrail IDs in configuration match Portkey records
2. Check Akto credentials are correctly configured in Portkey
3. Confirm Akto plugin is enabled in Admin Settings
4. Check network connectivity to Akto service

#### Issue: Legitimate Requests Being Blocked

**Symptoms**: Valid requests returning 403 errors

**Solutions**:

1. Review blocked request details in logs
2. Adjust guardrail sensitivity settings
3. Temporarily switch BLOCK action to ALERT for analysis
4. Contact Akto support with examples

#### Issue: Performance Degradation

**Symptoms**: Increased latency in API requests

**Solutions**:

1. Reduce number of guardrails applied
2. Use caching for repeated queries
3. Monitor Akto service health
4. Consider separating critical vs. non-critical paths

#### Issue: Akto Service Unavailable

**Symptoms**: Errors about inability to reach Akto

**Solutions**:

1. Check network firewall rules allow Akto domain
2. Verify API key is valid and not expired
3. Check Akto service status page
4. Configure fallback policy (fail open/closed)

## Get Support for your Akto setup

There are multiple ways to request support from Akto. We are 24X7 available on the following:

1. In-app `intercom` support. Message us with your query on intercom in Akto dashboard and someone will reply.
2. Join our [discord channel](https://www.akto.io/community) for community support.
3. Contact <support@akto.io> for email support.
4. Contact us [here](https://www.akto.io/contact-us).


# Salesforce

Connect Akto with Salesforce AgentForce

## Overview

Salesforce AgentForce is a platform for building and managing AI agents within Salesforce. This setup is recommended if you want to monitor conversation data from your Salesforce agents and ensure your AI-powered processes maintain security standards.

The Akto Salesforce connector automatically:

* Imports all Salesforce agents and AI capabilities
* Monitors agent executions and interactions
* Sends traffic data to Akto for security analysis

## Steps to Connect

{% stepper %}
{% step %}
**Enable AgentForce in Salesforce**

1. Log in to your Salesforce account with administrator privileges
2. Navigate to **Setup** > **Feature Activation**
3. Enable **AgentForce** for your organization
4. Ensure your Salesforce org has the necessary AgentForce licenses activated
   {% endstep %}

{% step %}
**Create a Connected App**

1. In Salesforce, go to **Setup** > **Apps** > **App Manager**
2. Click **New Connected App**
3. Fill in the following details:
   * **Connected App Name**: Akto Salesforce Connector
   * **API Name**: AktoSalesforceConnector
   * **Contact Email**: Your email address
4. Under **API (Enable OAuth Settings)**:
   * Check **Enable OAuth Settings**
5. Under **Selected OAuth Scopes**, add:
   * `api`
6. Click **Save**
   {% endstep %}

{% step %}
**Retrieve Credentials**

1. In the Connected App details, locate:
   * **Consumer Key**: Copy this value
   * **Consumer Secret**: Click to reveal and copy this value
2. Keep these credentials safe; you'll need them for Akto configuration
   {% endstep %}

{% step %}
**Configure Akto Connector**

In Akto, provide the following information:

* **Salesforce URL**: Your Salesforce instance URL (e.g., `https://your-domain.my.salesforce.com`)
* **Consumer Key**: OAuth 2.0 Consumer Key from your Connected App
* **Consumer Secret**: OAuth 2.0 Consumer Secret from your Connected App
* **URL for Data Ingestion Service**: Your Akto data ingestion service endpoint
* **Ingestion API Key**: Your Akto ingestion API key
  {% endstep %}

{% step %}
**Authorize the Connection**

1. Click **Connect** in Akto
2. You will be redirected to Salesforce for authorization
3. Log in with your Salesforce credentials
4. Grant permissions to the Akto Connected App
5. You'll be redirected back to Akto upon successful authorization
   {% endstep %}
   {% endstepper %}

## What Data is Collected?

The Salesforce connector collects execution data from your Salesforce agents:

### Agent Metadata

* All Salesforce agents and their configurations
* Agent execution metadata

### Execution Data

* Agent interactions and conversations
* Input and output data from agent executions

## Get Support for your Akto setup

There are multiple ways to request support from Akto. We are 24X7 available on the following:

1. In-app `intercom` support. Message us with your query on intercom in Akto dashboard and someone will reply.
2. Join our [discord channel](https://www.akto.io/community) for community support.
3. Contact <support@akto.io> for email support.
4. Contact us [here](https://www.akto.io/contact-us).


# Snowflake

## Overview

Snowflake is a cloud-based data platform that enables organizations to build data pipelines, analytics, and AI applications. Connect Akto Argus to your Snowflake account to discover Cortex-based agents and Cortex Search Services, and fetch related metadata.

This visibility helps you identify agentic workloads running in Snowflake and assess associated security risks across both execution and retrieval layers. Once connected, Akto Argus automatically:

* **Discovers Cortex AI Agents and Search Services**: Fetches all AI agents and Cortex Search Services from your Snowflake account
* **Monitors Agent Activity**: Captures agent execution data, including prompts, responses, retrievals, and API interactions
* **Sends Traffic to Akto**: Transmits API and retrieval traffic data to Akto for comprehensive security analysis

## Prerequisites

Before setting up the Snowflake connector, ensure you have completed the following:

1. **Traffic Processor** – Configure your Traffic Processor first. Follow the [Hybrid SaaS Setup Guide](/akto-argus-agentic-ai-security-for-homegrown-ai/connectors/others/hybrid-saas) for detailed instructions.
2. **Snowflake Account** – Active Snowflake account with Cortex AI capabilities enabled
3. **Authentication Credentials** – One of the following authentication methods:
   * Username and password
   * OAuth token
   * RSA key pair (recommended for production)
4. **Network Access** – Ensure connectivity between the connector service and:
   * Your Snowflake account URL
   * Akto Data Ingestion Service
   * Kafka broker endpoint

## Steps to Connect

{% stepper %}
{% step %}
**Open the Snowflake Connector in Akto Argus**

1. Navigate to **Akto Argus**.
2. Open **Connectors**.
3. Under **AI Agent Security**, locate the **Snowflake** connector card.
4. Select **Connect** to open setup dialog.
   {% endstep %}

{% step %}
**Enter the Snowflake Account URL**

Enter the base URL of your Snowflake account in the **Snowflake Account URL** field.

* Format:\
  `https://<account_identifier>.<region>.snowflakecomputing.com`
* The value can be obtained from:
  * The browser address bar when accessing the Snowflake UI, or
  * Snowflake account settings.
    {% endstep %}

{% step %}
**Select the Authentication Method**

Select the authentication method used to access your Snowflake account from the **Authentication Method** dropdown.

Available options:

{% tabs %}
{% tab title="Username & Password" %}

* Enter the Snowflake username in the **Username** field.
  * The username must exist in the target Snowflake account.
  * The user must have permissions to query Cortex-related metadata.
* Enter the password for the specified Snowflake user in the **Password** field.

{% hint style="info" %}
The password is used only for authentication. Akto Argus does not modify Snowflake configuration.
{% endhint %}
{% endtab %}

{% tab title="OAuth Token" %}
Enter a valid Snowflake OAuth access token in the **OAuth Token** field.

* The token must be generated using a Snowflake-configured OAuth integration.
* The token must grant read access to required metadata.
  {% endtab %}

{% tab title="Key Pair (RSA)" %}

* Enter the Snowflake username associated with the RSA key pair.
  * The user must have the public key registered in Snowflake.
* Paste the RSA private key in PEM format into the **Private Key (RSA)** field.
  * Format:

    ```
    -----BEGIN PRIVATE KEY-----
    ...
    -----END PRIVATE KEY-----
    ```
  * The corresponding public key must already be associated with the Snowflake user.
* If the private key is encrypted, enter the passphrase in the **Private Key Passphrase** field.
  {% endtab %}
  {% endtabs %}
  {% endstep %}

{% step %}
**Specify Warehouse, Database, and Schema(Optional)**

You may optionally specify:

* **Warehouse**
* **Database**
* **Schema**

These fields control query execution context.
{% endstep %}

{% step %}
**Enter the Data Ingestion Service URL**

Enter the URL of your **self-hosted data ingestion service** in the **URL for Data Ingestion Service** field in order to forward agent execution and telemetry data into your environment for processing.

{% hint style="warning" %}
**Note**

* The ingestion service must be deployed and exposed in your infrastructure.
* The URL must be reachable from Akto.
* The endpoint receives metadata collected by Akto for this connector.
  {% endhint %}
  {% endstep %}

{% step %}
**Complete the Integration**

1. Review all entered values.
2. Select **Import** to finalise the connection.
   {% endstep %}
   {% endstepper %}

## Data Collection

The Snowflake connector captures two categories of information:

### Agent Metadata

* **Cortex AI Agents**: All AI agents built using Snowflake Cortex in your account
* **Agent Configurations**: Model selection, parameters, and settings
* **Cortex Functions**: Usage of built-in Cortex AI functions (COMPLETE, SENTIMENT, TRANSLATE, etc.)

### Agent Execution Data

* **Recent Activity**: Agent executions from the past 60 minutes
* **Input Data**: Prompts, queries, and parameters sent to agents
* **Output Data**: Agent responses and generated content
* **API Interactions**: External API calls made by agents
* **Performance Metrics**: Execution time and resource consumption

## Troubleshooting

### Connection Issues

**Problem**: Cannot connect to Snowflake account

**Solutions**:

* Verify `SNOWFLAKE_ACCOUNT_URL` is correct and includes the region (e.g., `xyz12345.us-east-1.snowflakecomputing.com`)
* Ensure network connectivity from the connector to Snowflake
* Check firewall rules allow outbound HTTPS connections to Snowflake

### Authentication Errors

**Problem**: Authentication failed

**Solutions**:

* **For Password Auth**: Verify username and password are correct
* **For Token Auth**: Ensure OAuth token is valid and not expired
* **For Key Pair Auth**:
  * Verify public key is registered in Snowflake (`DESC USER username`)
  * Ensure private key format is correct (PKCS#8 PEM format)
  * Check passphrase if the private key is encrypted

### Permission Issues

**Problem**: Access denied to warehouse/database/schema

**Solutions**:

* Grant necessary permissions to your Snowflake user:

  ```sql
  -- Create role and user
  CREATE ROLE IF NOT EXISTS <AKTO_CONSUMER>;
  CREATE USER IF NOT EXISTS <AKTO_USER> DEFAULT_ROLE = <AKTO_CONSUMER>;
  GRANT ROLE <AKTO_CONSUMER> TO USER <AKTO_USER>;

  -- Read-only access to AI observability events (via application role)
  -- Read access to AI observability events (traces, spans, metrics)
  GRANT APPLICATION ROLE SNOWFLAKE.AI_OBSERVABILITY_READER TO ROLE <AKTO_CONSUMER>;

  -- Account-level monitoring to discover all agents, cortex search services and view usage stats
  GRANT MONITOR USAGE ON ACCOUNT TO ROLE <AKTO_CONSUMER>;

  -- Required to query Cortex agent metadata and observability functions
  GRANT DATABASE ROLE SNOWFLAKE.CORTEX_USER TO ROLE <AKTO_CONSUMER>;

  -- Monitor ALL existing agents and search
  -- Replace <DB> and <SCHEMA> with each agent's location or cortex search location
  GRANT USAGE ON DATABASE <DB> TO ROLE <AKTO_CONSUMER>;
  GRANT USAGE ON SCHEMA <DB>.<SCHEMA> TO ROLE <AKTO_CONSUMER>;
  GRANT MONITOR ON AGENT <DB>.<SCHEMA>.<AGENT_NAME> TO ROLE <AKTO_CONSUMER>;

  -- Future agents or search services added
  -- GRANT USAGE ON FUTURE SCHEMAS IN DATABASE <DB>
  TO ROLE <AKTO_CONSUMER>;
  ```

### No Agents Appearing

**Problem**: Connector is running but no agents appear in Akto

**Solutions**:

* Verify Snowflake Cortex is enabled in your account
* Ensure you have AI agents deployed in Snowflake
* Check `SNOWFLAKE_DATABASE` and `SNOWFLAKE_SCHEMA` point to the correct location
* Verify Traffic Processor is running and accessible

## Get Support

If you need assistance with the Snowflake connector:

* **In-app Chat**: Use the chat widget in your Akto dashboard for instant support
* **Discord Community**: Join our community at [discord.gg/Wpc6xVME4s](https://discord.gg/Wpc6xVME4s)
* **Email Support**: Contact us at <support@akto.io>
* **Contact Form**: Submit a support request at <https://www.akto.io/contact-us>

Our team is available 24/7 to help with setup, troubleshooting, and best practices.


# Snowflake Red Teaming

Red team your Snowflake AI agents and Cortex endpoints with Akto.

## Overview

Akto lets you run security probes against Snowflake-based AI agents and Cortex endpoints. This guide walks you through generating a Snowflake Programmatic Access Token (PAT), configuring a Scan Role, and running a red teaming scan.

## Step 1: Generate a Snowflake PAT Token

Akto uses a Snowflake Programmatic Access Token (PAT) to authenticate scan requests against your Snowflake endpoints. You can generate one via the Snowflake UI or via a SQL query.

{% tabs %}
{% tab title="Via Snowflake UI" %}
{% stepper %}
{% step %}
**Log in to Snowflake**

Log in to [Snowsight](https://app.snowflake.com).
{% endstep %}

{% step %}
**Go to Governance & Security**

From the left navigation, go to **Governance & Security**.

<div data-with-frame="true"><figure><img src="/files/KTH9m3liyBWpzzptPKSb" alt="" width="563"><figcaption></figcaption></figure></div>
{% endstep %}

{% step %}
**Select the User**

Select the user you want to generate the token for.

<div data-with-frame="true"><figure><img src="/files/Jz1EO07HotdwE2ZmpeGK" alt="" width="563"><figcaption></figcaption></figure></div>
{% endstep %}

{% step %}
**Generate the Token**

Under the **Programmatic Access Tokens** section, click **Generate Token**.

<div data-with-frame="true"><figure><img src="/files/ieR7nW3UjhD7ZW460ITB" alt="" width="563"><figcaption></figcaption></figure></div>
{% endstep %}

{% step %}
**Fill in Token Details**

Enter the following:

* **Name** — a descriptive label for the token (e.g. `akto-red-teaming`)
* **Comment** — an optional note for context
* **Expiry** — set an appropriate expiry duration
* **Role** — grant access to the relevant Snowflake role

<div data-with-frame="true"><figure><img src="/files/tdPcl0ykKHbN3cMdoZiW" alt="" width="563"><figcaption></figcaption></figure></div>
{% endstep %}

{% step %}
**Copy and Save the Token**

Click **Generate**. Copy and save the token — it will not be shown again.
{% endstep %}
{% endstepper %}
{% endtab %}

{% tab title="Via SQL Query" %}
Run the following command in a Snowflake worksheet:

```sql
ALTER USER <your_username> ADD PROGRAMMATIC ACCESS TOKEN <token_name>
  DAYS_TO_EXPIRY = 90
  COMMENT = 'Akto red teaming token';
```

{% hint style="warning" %}
Copy and store the token immediately. Snowflake does not allow you to retrieve it again after generation.
{% endhint %}
{% endtab %}
{% endtabs %}

***

## Step 2: Configure a Scan Role

Create a Scan Role in Akto that uses the PAT token and scopes it to your Snowflake endpoints.

Follow the [Create a Scan Role](/akto-argus-agentic-ai-security-for-homegrown-ai/agentic-red-teaming/how-to/create-a-test-role) guide and apply the Snowflake-specific settings below.

### Snowflake Scan Role Configuration

| Field                  | Value                                              |
| ---------------------- | -------------------------------------------------- |
| **Role Name**          | e.g. `snowflake-test-role`                         |
| **Endpoint condition** | `Endpoint` → `contains` → `snowflakecomputing.com` |
| **Auth type**          | Hard-coded                                         |
| **Header Key**         | `Authorization`                                    |
| **Header Value**       | `Bearer <your-pat-token>`                          |

{% hint style="info" %}
The endpoint condition `snowflakecomputing.com` ensures this auth token is applied only to Snowflake requests and not to any other agentic traffic.
{% endhint %}

***

## Step 3: Run Red Teaming Scan

Once the Scan Role is configured, select your Snowflake agent components, choose the relevant probe categories, and select the Scan Role configured in Step 2 under **Scan Execution Parameters**.

For detailed steps, see [Run Scan](/akto-argus-agentic-ai-security-for-homegrown-ai/agentic-red-teaming/how-to/run-test).

***

## Get Support

There are multiple ways to request support from Akto. We are 24X7 available on the following:

* **In-app chat**: Use the Intercom widget in your Akto dashboard and someone will reply.
* **Discord community**: Join our community at [akto.io/community](https://www.akto.io/community).
* **Email support**: Contact us at <support@akto.io>.


---

[Next Page](/llms-full.txt/1)