> For the complete documentation index, see [llms.txt](https://ai-security-docs.akto.io/llms.txt). Markdown versions of documentation pages are available by appending `.md` to page URLs; this page is available as [Markdown](https://ai-security-docs.akto.io/integrations/servicenow.md).
# ServiceNow
Integrate Akto with ServiceNow to streamline your agentic AI security workflow by creating tickets for vulnerabilities directly from Akto into your ServiceNow instance.
## Quick Setup Steps
The ServiceNow integration uses OAuth 2.0 Client Credentials flow for secure authentication. Follow these steps to set up the integration:
### **1. Configure OAuth in ServiceNow**
{% stepper %}
{% step %}
**Enable Client Credentials Grant Type**
Before creating the OAuth integration, ensure the client credentials grant type is enabled:
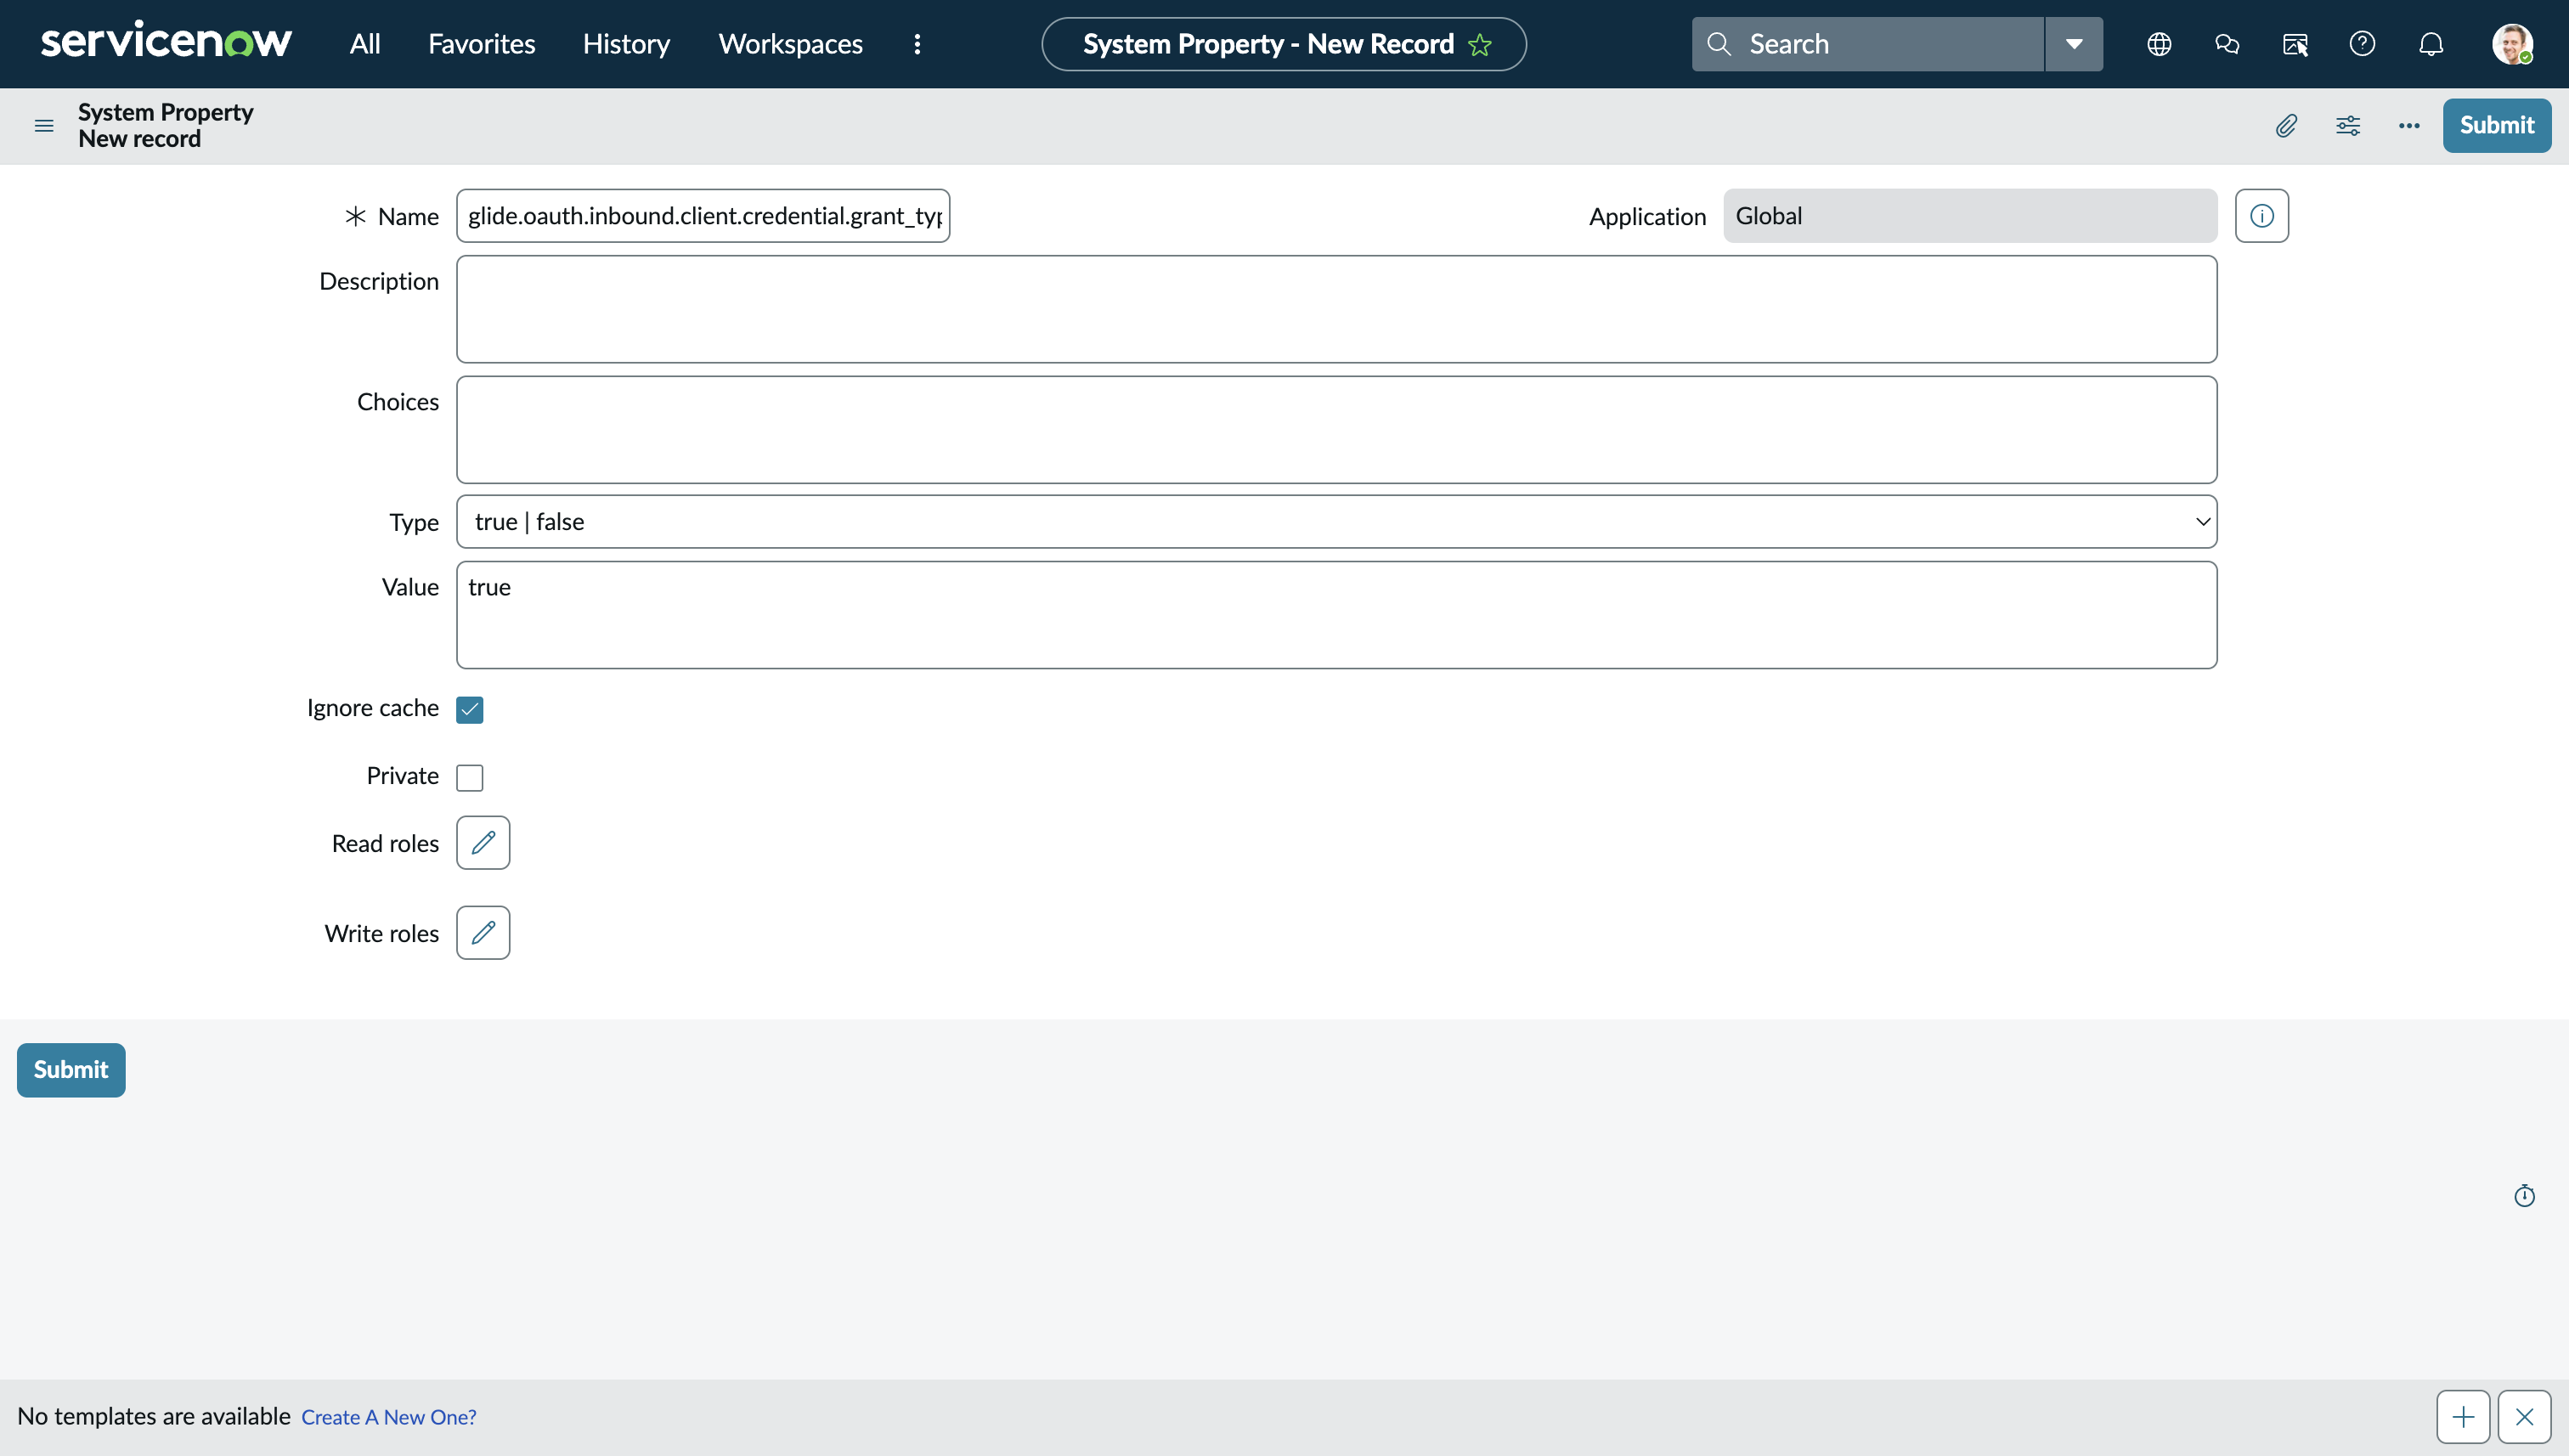
1. In your ServiceNow instance, in the filter navigator, search for `sys_properties.do`
2. Click **New** to create a new system property (or search for existing property)
3. Fill in the following fields:
* **Name:** `glide.oauth.inbound.client.credential.grant_type.enabled`
* **Value:** `true`
* **Type:** `true | false`
4. Click **Save**
5. This property must be enabled for the OAuth integration to work
{% endstep %}
{% step %}
**Create OAuth Integration**
1. In your ServiceNow instance, navigate to **System OAuth** > **Inbound Integrations**
2. Click **New integration** to create a new integration
3. Choose **OAuth - Client credentials grant type**
4. Fill in the following details:
* **Name:** Enter a descriptive name (e.g., "Akto Agentic AI Security Integration")
* **User:** Select a user account that has all required roles to create and manage tickets
* Ensure this user has permissions to access and create records in the tables you want to integrate
* **Active:** Make sure the **Active** checkbox is **enabled**
5. Click **Submit** to create the integration
{% endstep %}
{% step %}
**Save Credentials**
After creating the integration:
1. ServiceNow will display your **Client ID** and **Client Secret**
2. **Important:** Copy and save these credentials securely
* Client ID
* Client Secret
3. You will need these credentials to configure the integration in Akto
{% endstep %}
{% endstepper %}
### **2. Configure ServiceNow Integration in Akto**
{% stepper %}
{% step %}
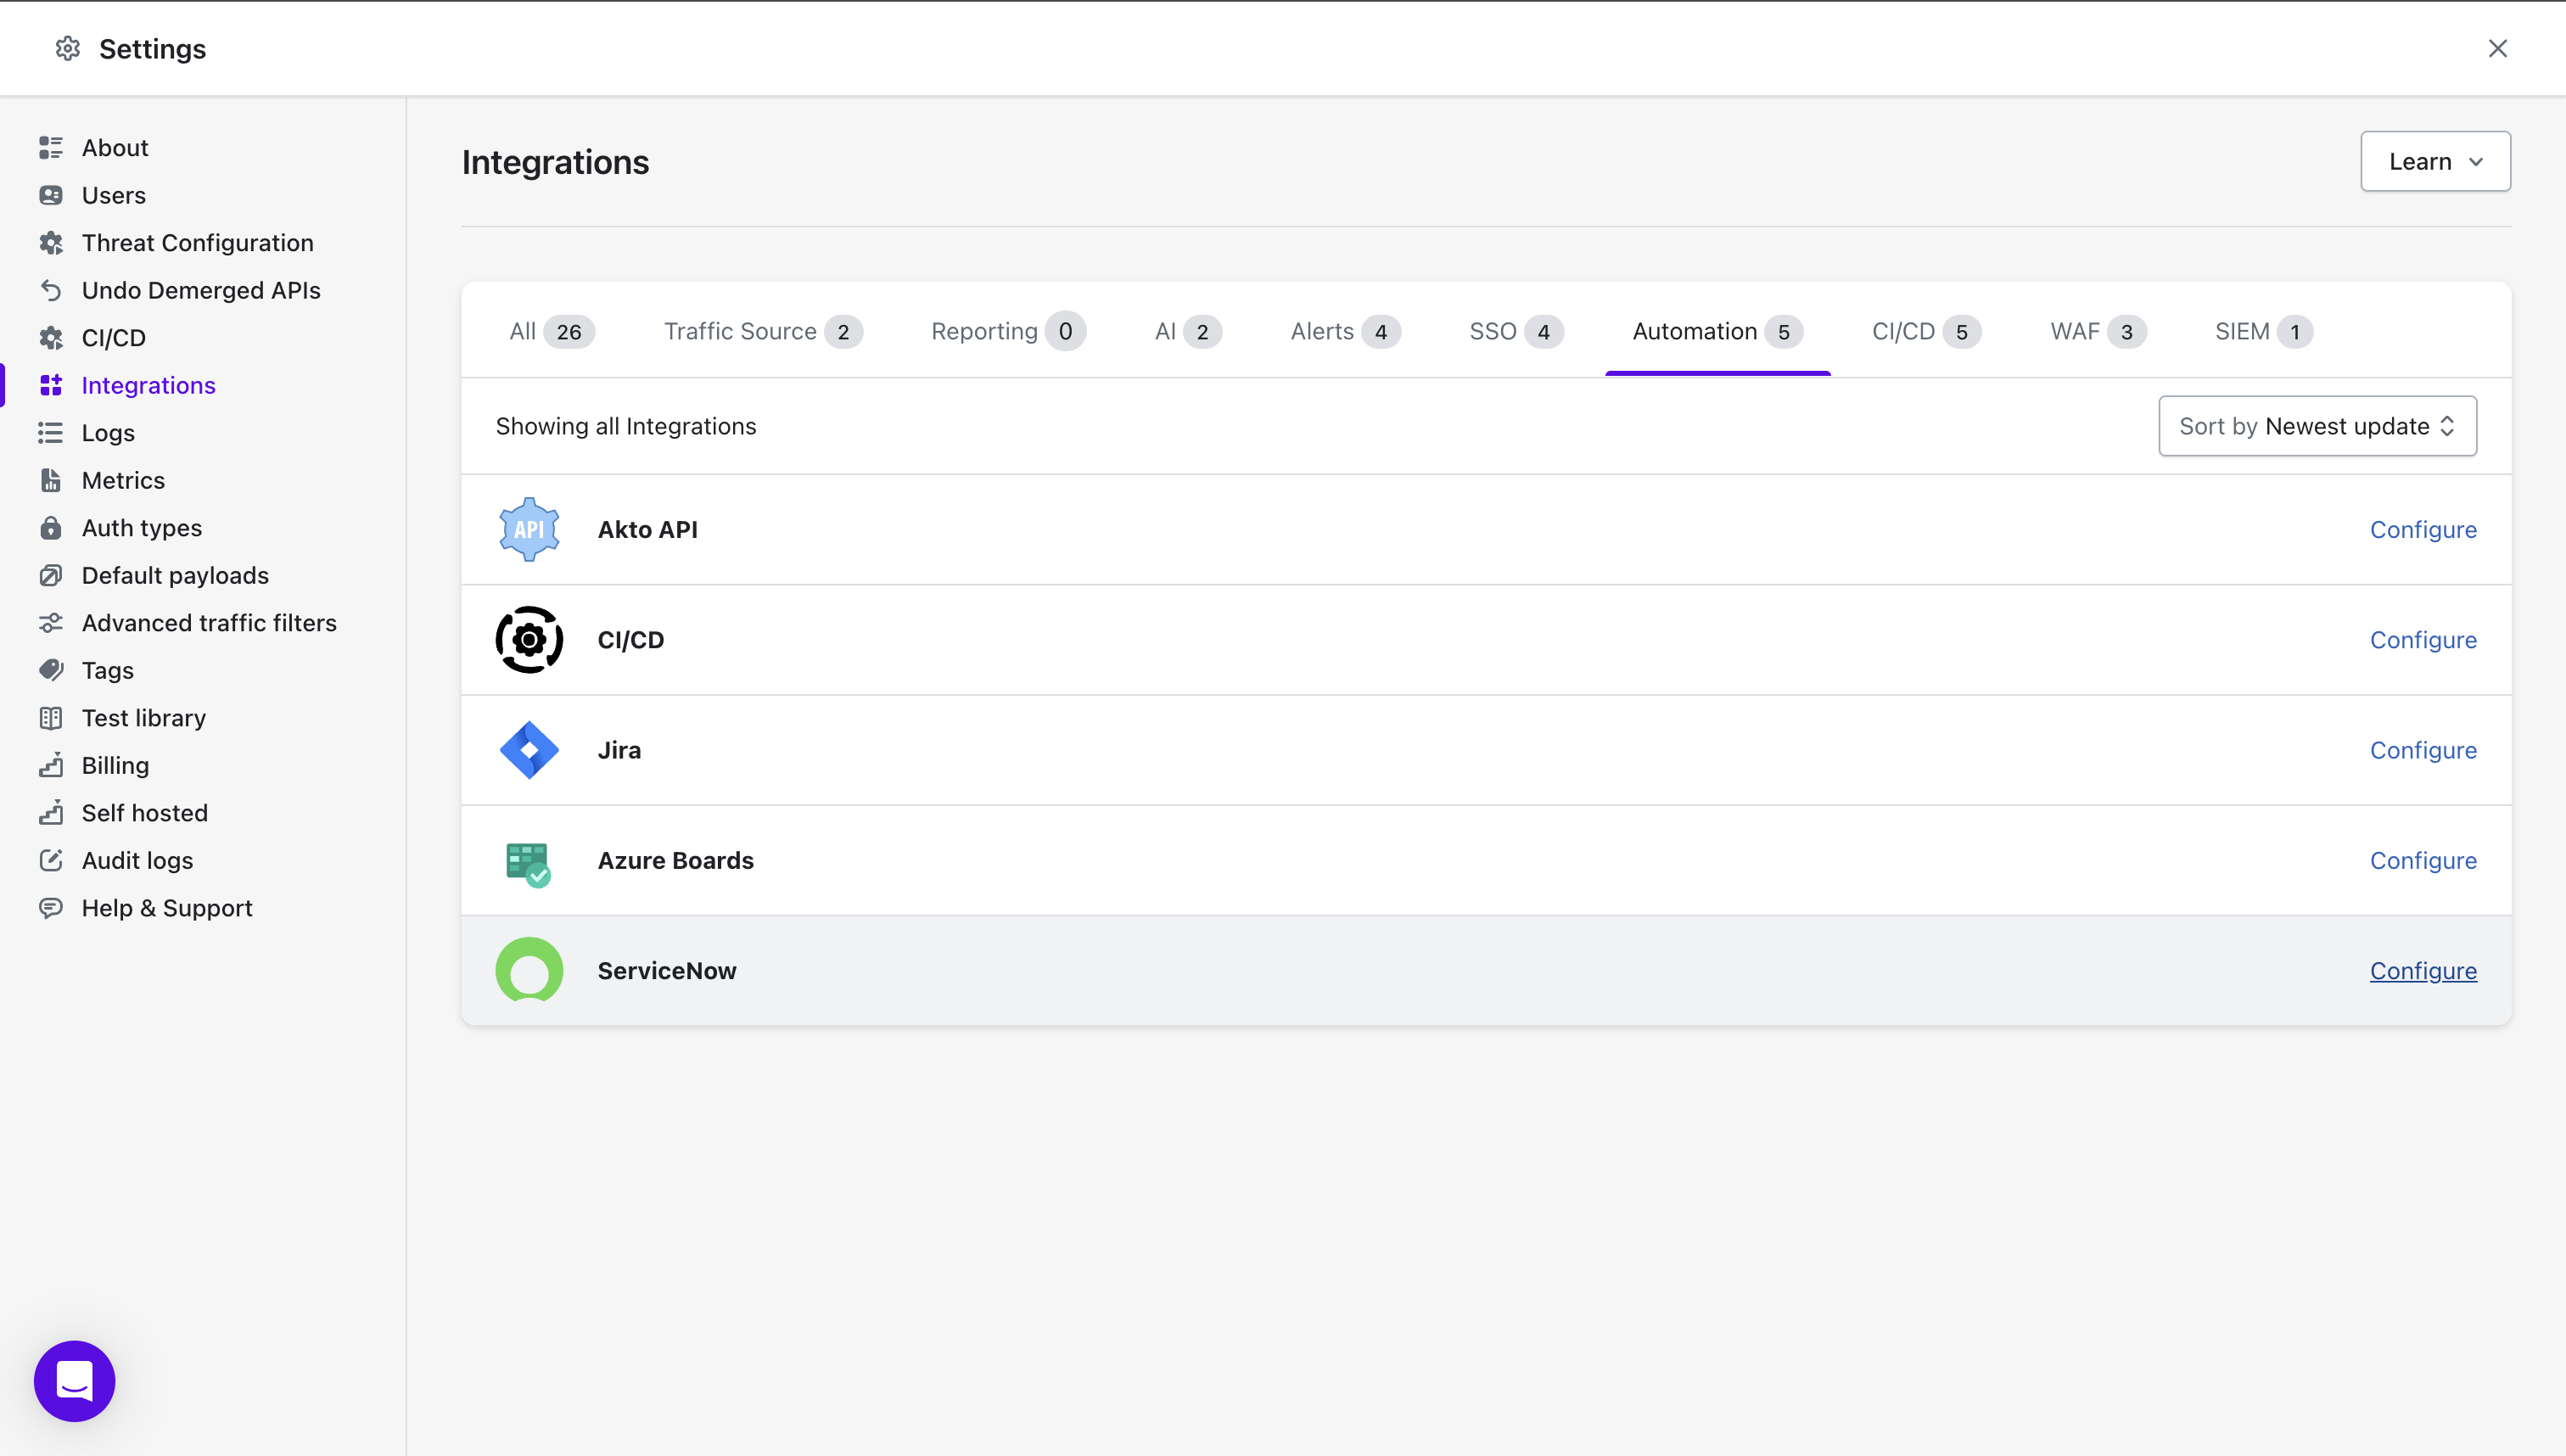
**Access Integrations**
* Go to **Settings > Integrations** in Akto
* Find and click **"Configure"** next to ServiceNow
{% endstep %}
{% step %}
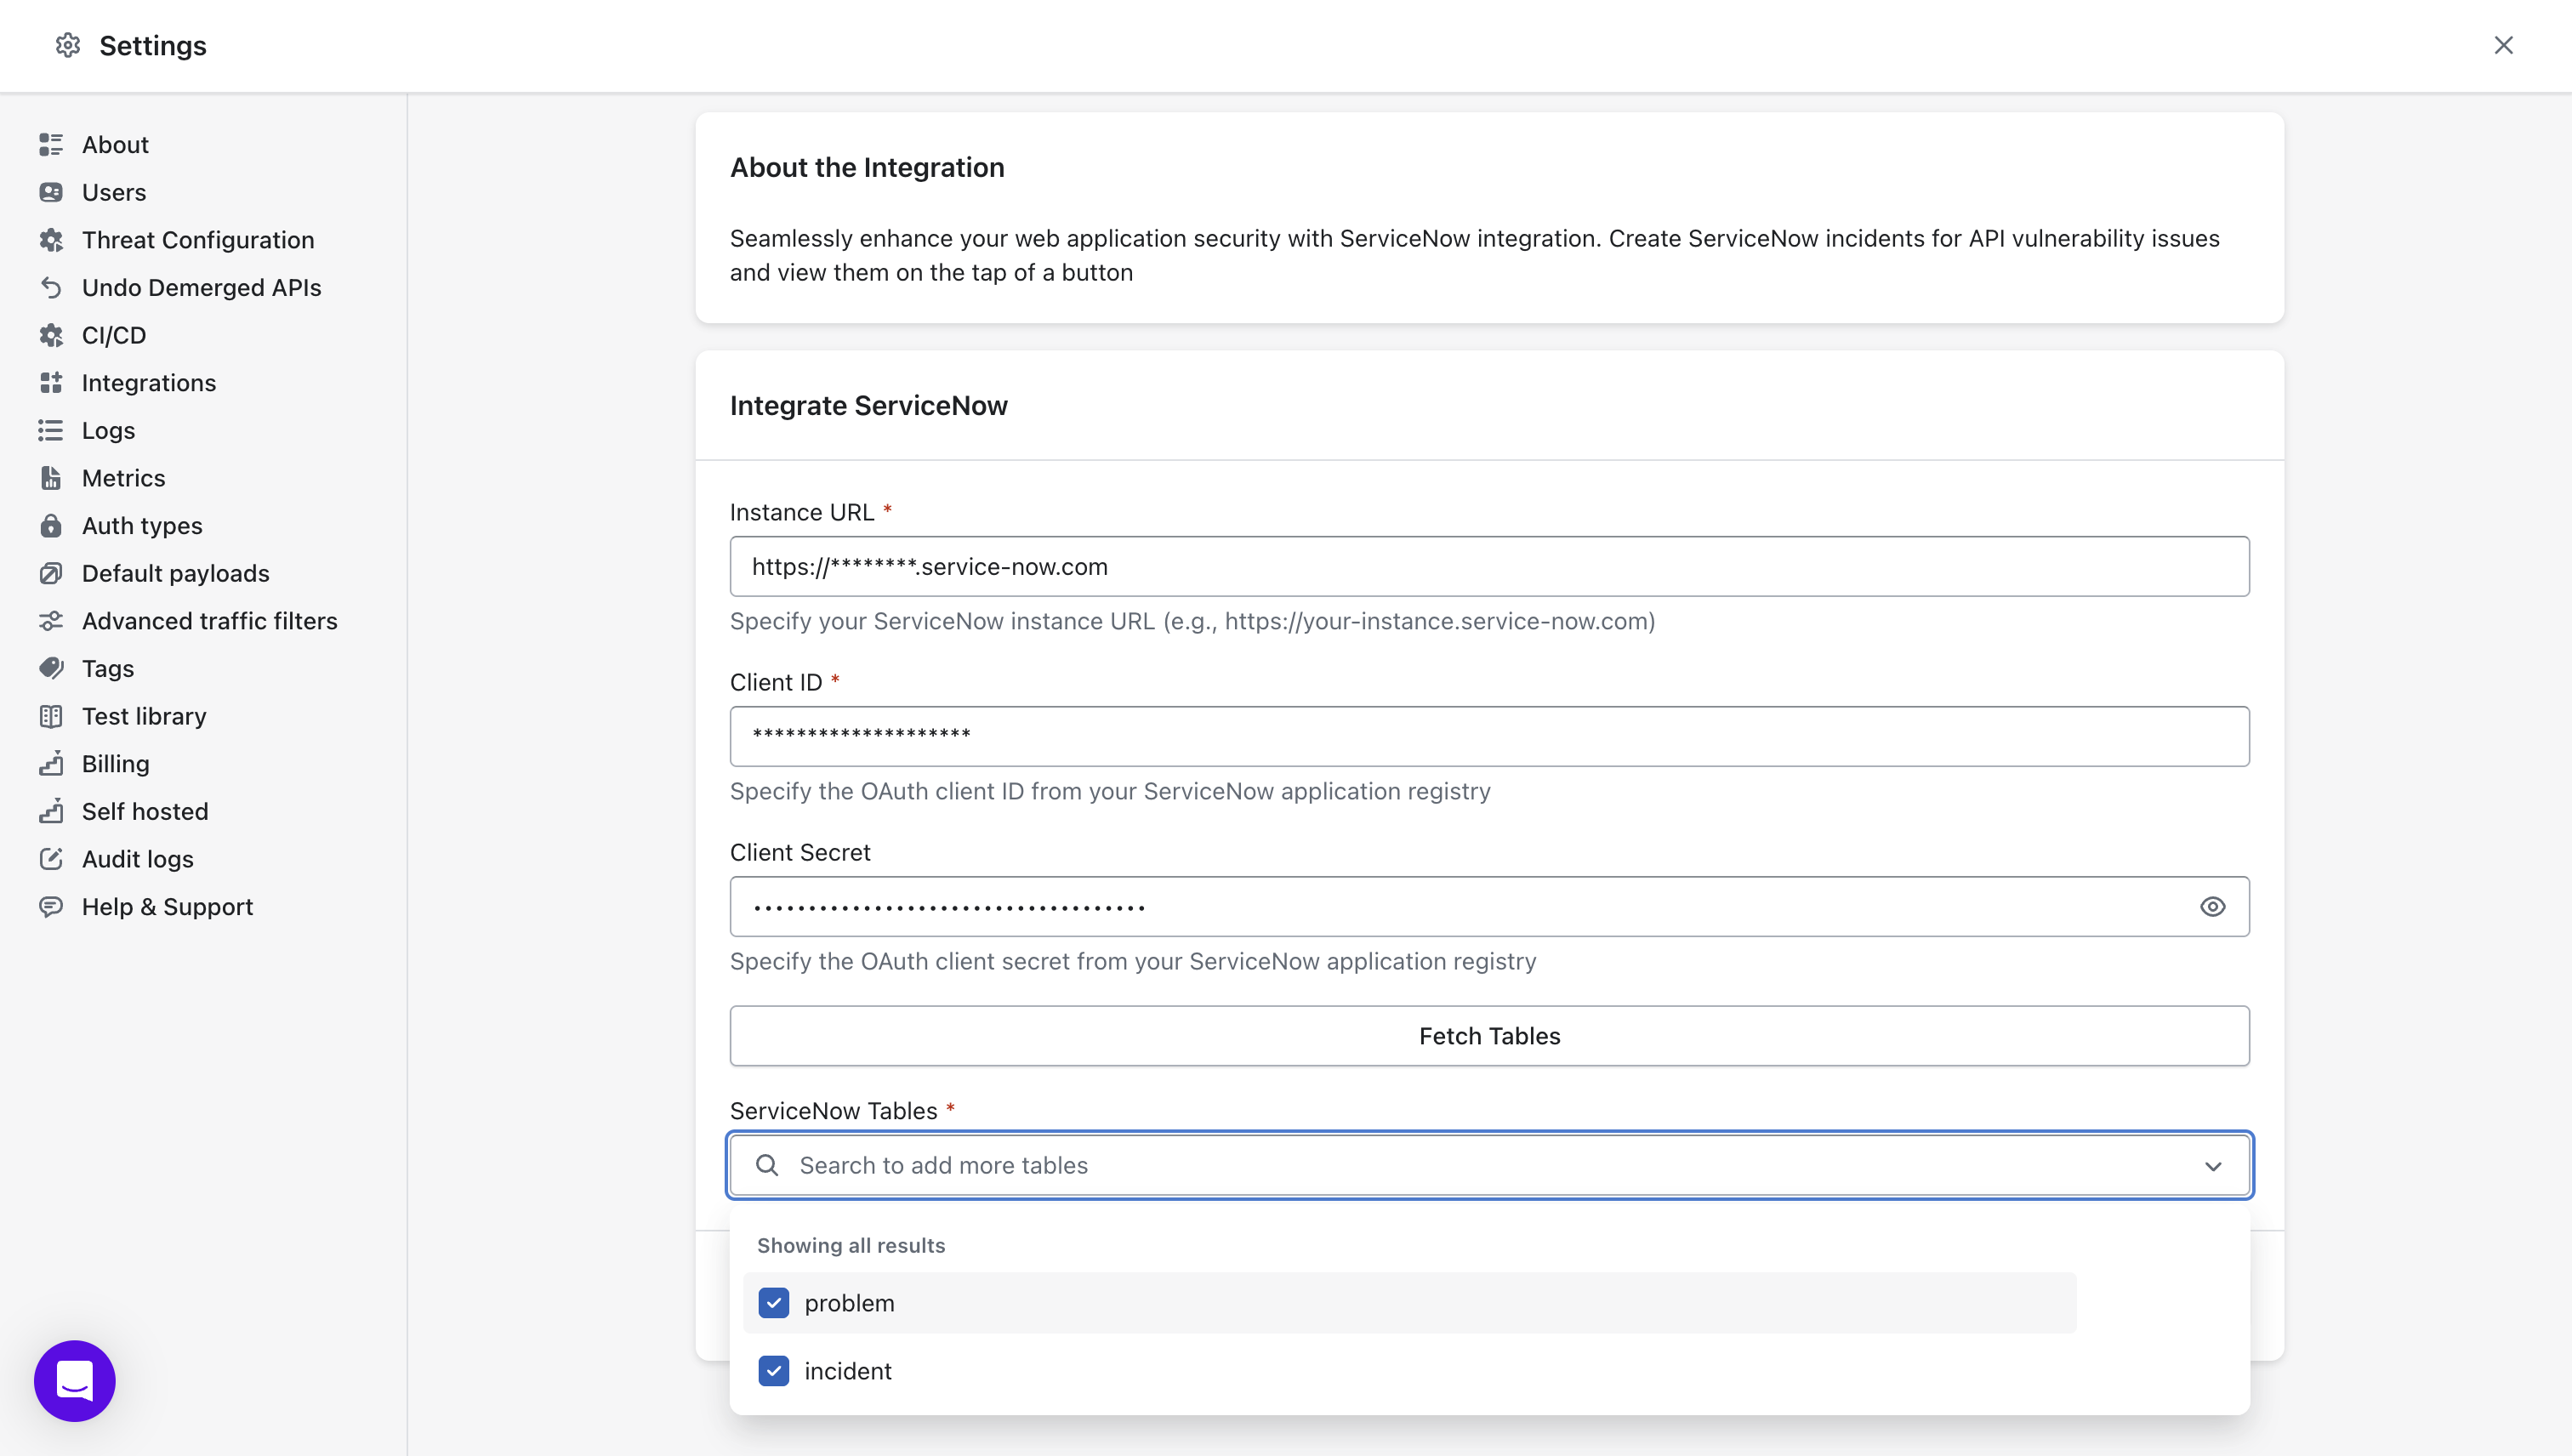
**Enter ServiceNow Details**
* **ServiceNow Instance URL:** Your ServiceNow instance URL (e.g., `https://yourcompany.service-now.com`)
* **Client ID:** Paste the Client ID from the OAuth integration you created in ServiceNow
* **Client Secret:** Paste the Client Secret from the OAuth integration
{% endstep %}
{% step %}
**Fetch and Select Tables**
* After entering the credentials, click **Fetch Tables**
* Akto will retrieve all available tables from your ServiceNow instance
* Select the tables where you want to create tickets for Agentic component vulnerabilities
* Common choices include: `incident`, `problem`, `change_request`, or custom tables
* You can select multiple tables based on your workflow requirements
{% endstep %}
{% endstepper %}
### **3. Save**
* Click **"Save"** to finalize the integration
{% hint style="info" %}
**Important Notes**
* **OAuth Setup:** This integration uses the **New Inbound Integration Experience** in ServiceNow, which is the recommended approach (not the deprecated OAuth API endpoint)
* **User Permissions:** Ensure the ServiceNow user assigned to the OAuth integration has appropriate permissions to:
* Create records in the selected tables
* Read table schemas and metadata
* Access necessary ServiceNow APIs
{% endhint %}
## Get Support for your Akto setup
There are multiple ways to request support from Akto. We are 24X7 available on the following:
1. In-app `intercom` support. Message us with your query on intercom in Akto dashboard and someone will reply.
2. Join our [discord channel](https://www.akto.io/community) for community support.
3. Contact `help@akto.io` for email support.
4. Contact us [here](https://www.akto.io/contact-us).
---
# Agent Instructions
This documentation is published with GitBook. GitBook is the documentation platform designed so that both humans and AI agents can read, navigate, and reason over technical content effectively. Learn more at gitbook.com.
## Querying This Documentation
If you need additional information that is not directly available in this page, you can query the documentation dynamically by asking a question.
Perform an HTTP GET request on the current page URL with the `ask` query parameter:
```
GET https://ai-security-docs.akto.io/integrations/servicenow.md?ask=
```
The question should be specific, self-contained, and written in natural language.
The response will contain a direct answer to the question and relevant excerpts and sources from the documentation.
Use this mechanism when the answer is not explicitly present in the current page, you need clarification or additional context, or you want to retrieve related documentation sections.