> For the complete documentation index, see [llms.txt](https://ai-security-docs.akto.io/llms.txt). Markdown versions of documentation pages are available by appending `.md` to page URLs; this page is available as [Markdown](https://ai-security-docs.akto.io/akto-atlas-agentic-ai-security-for-employee-endpoints/endpoints-discovery-agents/ai-endpoint-shield/macos-standalone-installation.md).
# macOS Standalone Installation
End-user walkthrough of the standalone AI Endpoint Shield installer on macOS, including the security prompts users are asked to approve.
## Overview
This page covers the **standalone installer** on macOS — the `.pkg` a user runs by hand, rather than a fleet-wide MDM rollout. It walks through the installation flow of **AI Endpoint Shield** and the permissions users may be prompted to approve, so you can share it with end users ahead of time.
{% hint style="info" %}
For fleet deployment, use [Jamf MDM Deployment](/akto-atlas-agentic-ai-security-for-employee-endpoints/endpoints-discovery-agents/ai-endpoint-shield/jamf-mdm-deployment.md), [Mosyle MDM Deployment](/akto-atlas-agentic-ai-security-for-employee-endpoints/endpoints-discovery-agents/ai-endpoint-shield/mosyle-deployment.md), or [NinjaOne Deployment (macOS)](/akto-atlas-agentic-ai-security-for-employee-endpoints/endpoints-discovery-agents/ai-endpoint-shield/ninjaone-macos-deployment.md) instead — those install silently, with no user prompts.
If the install completes but the agent does not appear in Akto, see [macOS Troubleshooting](/akto-atlas-agentic-ai-security-for-employee-endpoints/endpoints-discovery-agents/ai-endpoint-shield/macos-troubleshooting.md).
{% endhint %}
## Steps Guide
{% stepper %}
{% step %}
**Run the Installer**
Double-click the **AI Endpoint Shield** **.app** file to launch it. This opens the installer wizard.
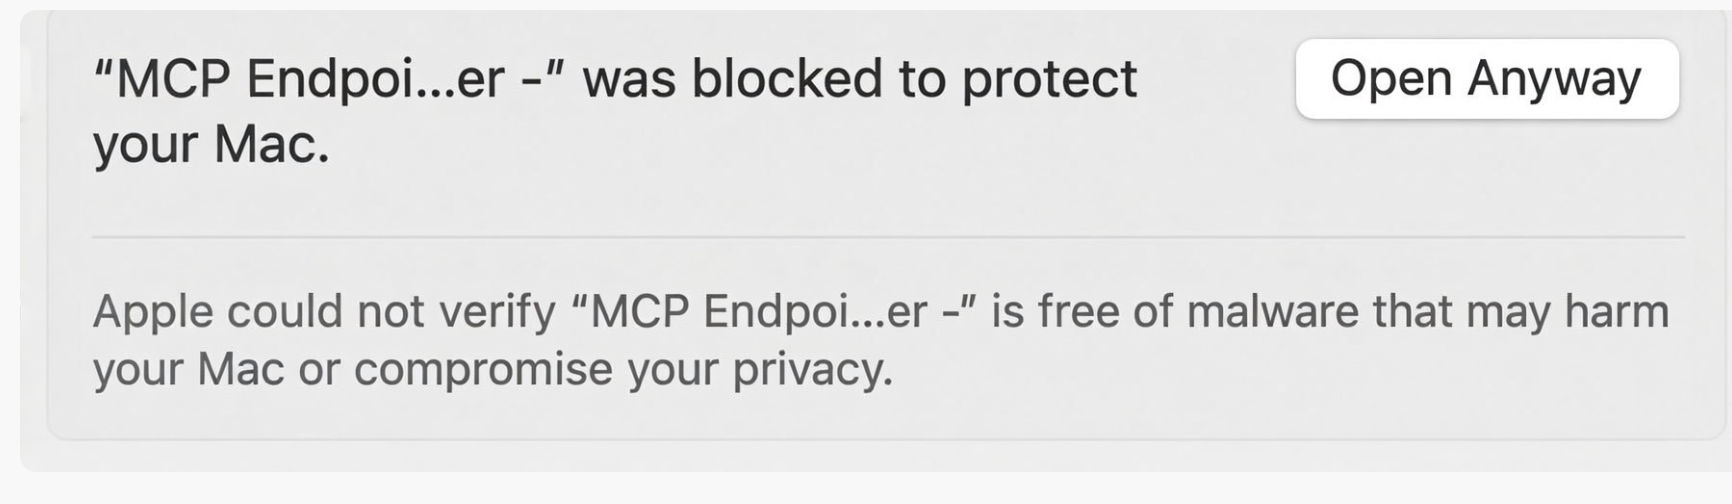
If macOS shows a Gatekeeper warning
macOS may display a warning stating that the application could not be verified and was blocked to protect the system. This is expected behaviour for applications distributed outside the Mac App Store.
**User Action (Required):**
1. Open **System Settings**
2. Navigate to **Privacy & Security**
3. Scroll to the **Security** section
4. Click **Open Anyway** for **mcp-endpoint-shield**
This confirms that the user has explicitly approved the installer. Once approved, macOS allows the installer to run normally — no administrator privileges are required.
{% endstep %}
{% step %}
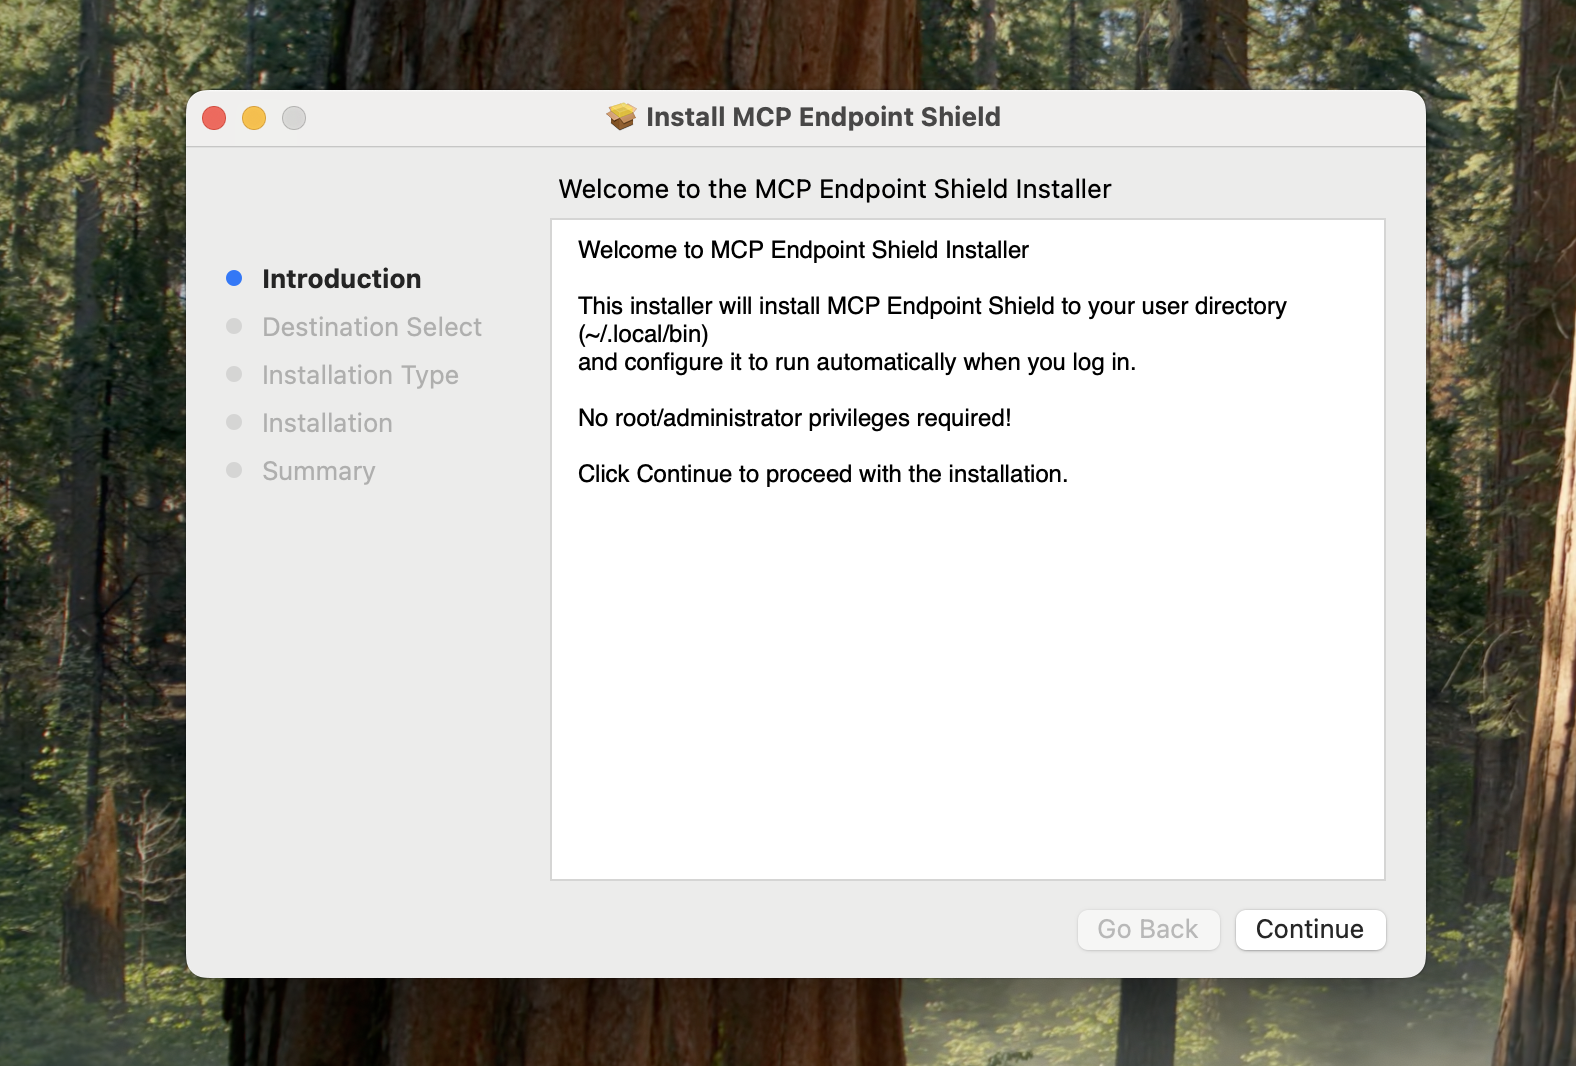
**Installer Wizard – Introduction Screen**
The installer wizard launches.
The introduction screen explains:
* What AI Endpoint Shield does
* The installation location (user directory)
* That no root or administrator permissions are required
Click **Continue** to proceed.
{% endstep %}
{% step %}
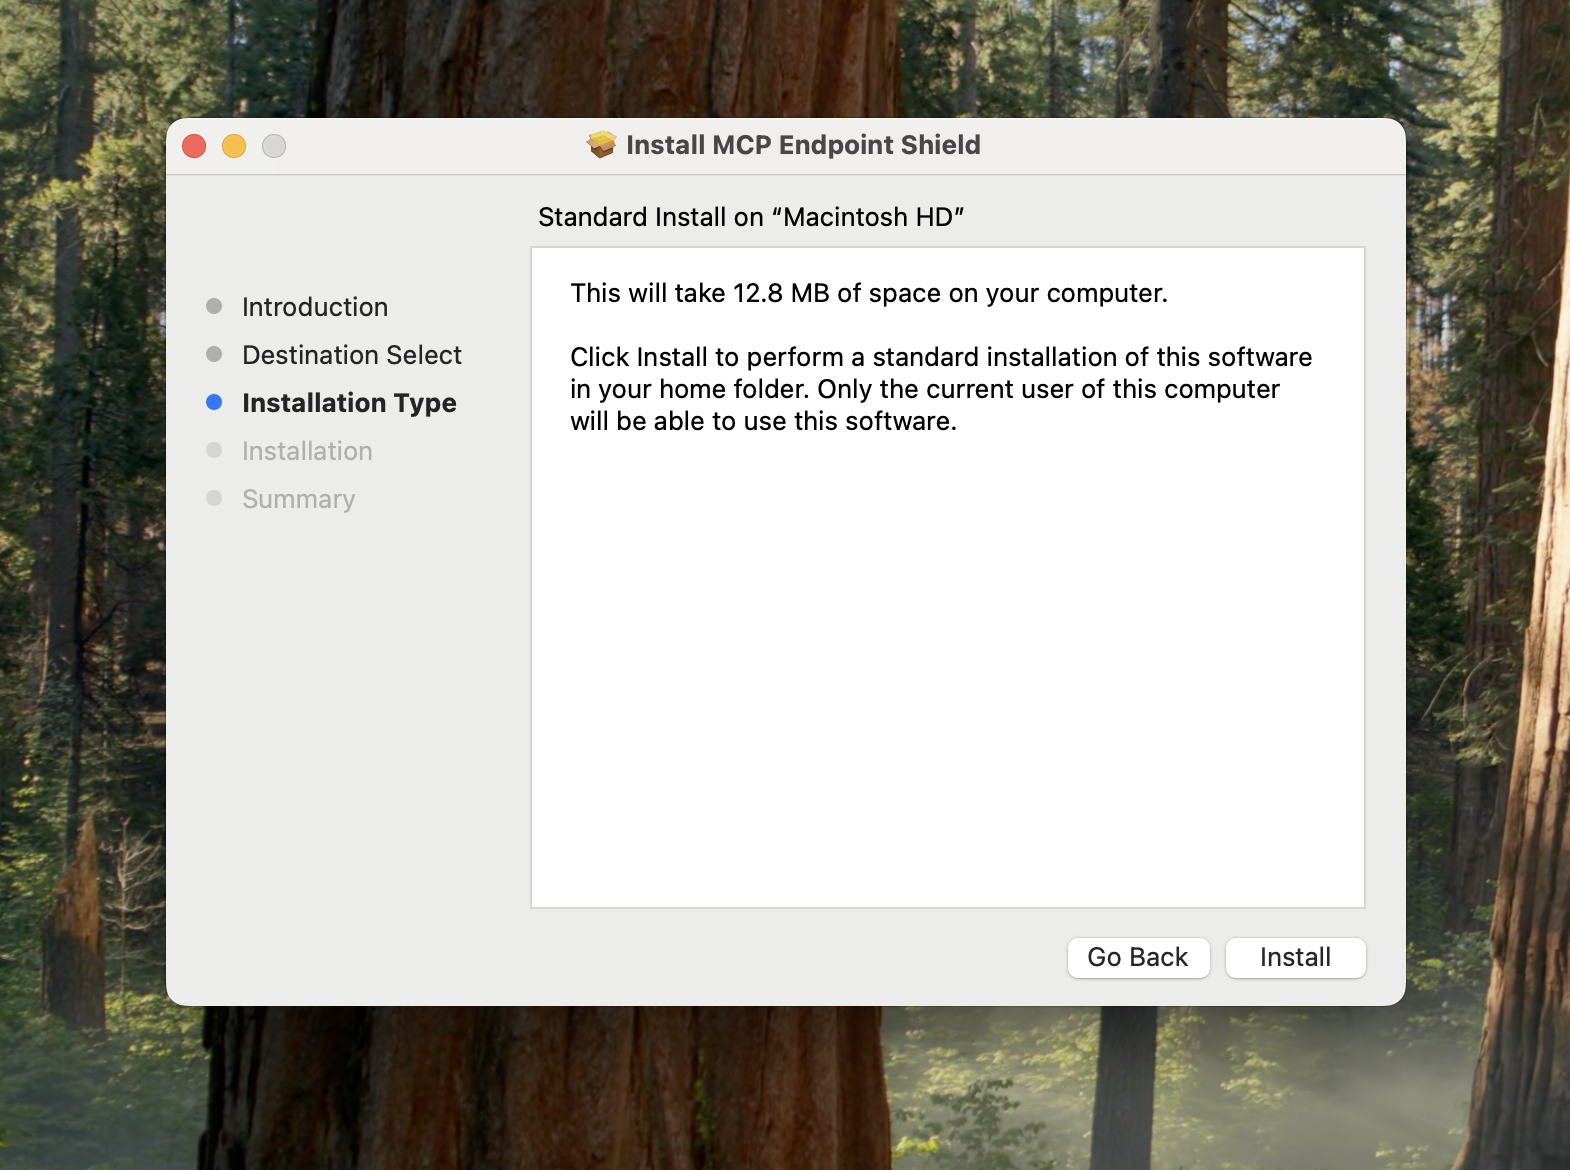
**Installation Type Confirmation**
Click **Install** to begin installation.
This screen confirms:
* Disk space required
* Installation scope (current user only)
* Target disk (e.g., Macintosh HD)
{% endstep %}
{% step %}
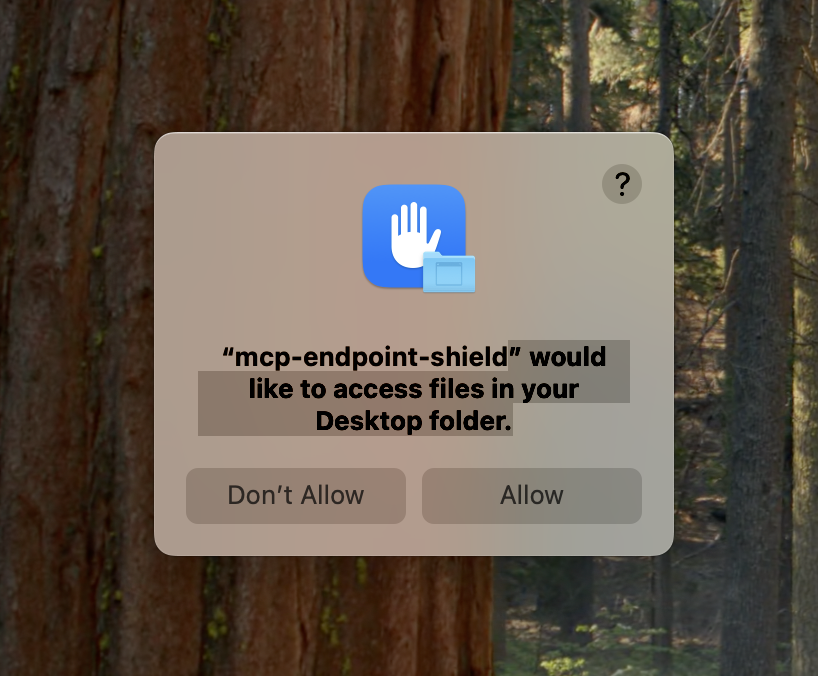
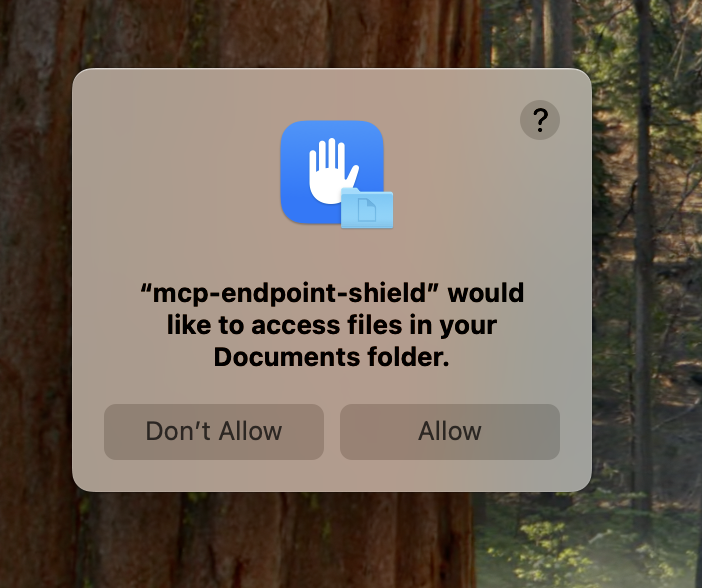
**Folder Access Permissions (Optional)**
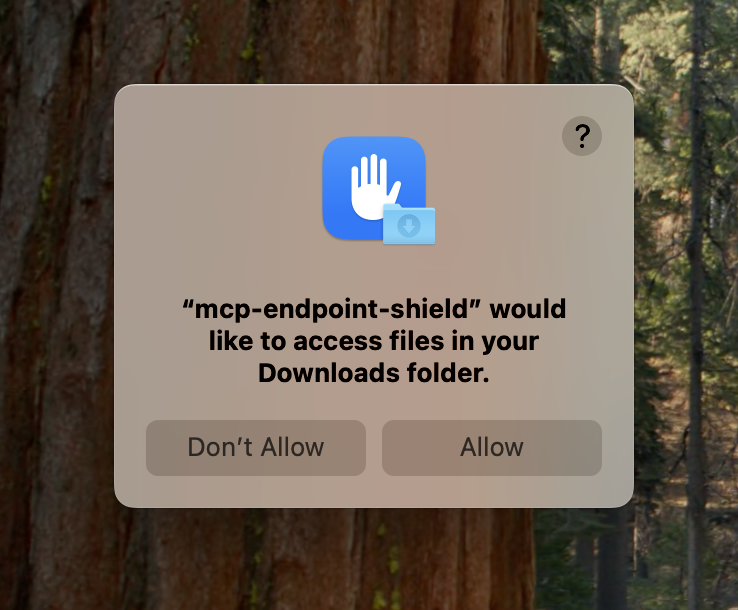
After installation, AI Endpoint Shield may request permission to access specific folders in the user’s home directory:
* Desktop
* Documents
* Downloads
These permissions are used to:
* Scan MCP-related files
* Validate configurations
* Monitor relevant artifacts within the user environment
**User Choice:**
* **Allow** – Enables folder-level scanning
* **Don’t Allow** – Skips access to that folder
{% hint style="info" %}
These permissions are optional. The application will continue to function even if access is denied, but scanning coverage may be limited.
{% endhint %}
{% endstep %}
{% endstepper %}
## After installation
Confirm the agent is running:
```bash
/usr/local/bin/akto-endpoint-shield --version
/usr/local/bin/akto-endpoint-shield check-config --path ~/.akto-endpoint-shield/config
launchctl list | grep akto-endpoint-shield
```
`check-config` should print `provisioned`, and both LaunchAgents should show a PID rather than `-`. If either check fails, see [macOS Troubleshooting](/akto-atlas-agentic-ai-security-for-employee-endpoints/endpoints-discovery-agents/ai-endpoint-shield/macos-troubleshooting.md).
## Related documentation
* [macOS Troubleshooting](/akto-atlas-agentic-ai-security-for-employee-endpoints/endpoints-discovery-agents/ai-endpoint-shield/macos-troubleshooting.md)
* [Allowlist in Security Software](/akto-atlas-agentic-ai-security-for-employee-endpoints/endpoints-discovery-agents/ai-endpoint-shield/allowlist-in-security-software.md)
* [Jamf MDM Deployment](/akto-atlas-agentic-ai-security-for-employee-endpoints/endpoints-discovery-agents/ai-endpoint-shield/jamf-mdm-deployment.md)