For the complete documentation index, see llms.txt. This page is also available as Markdown.

AI Agent Security

Overview

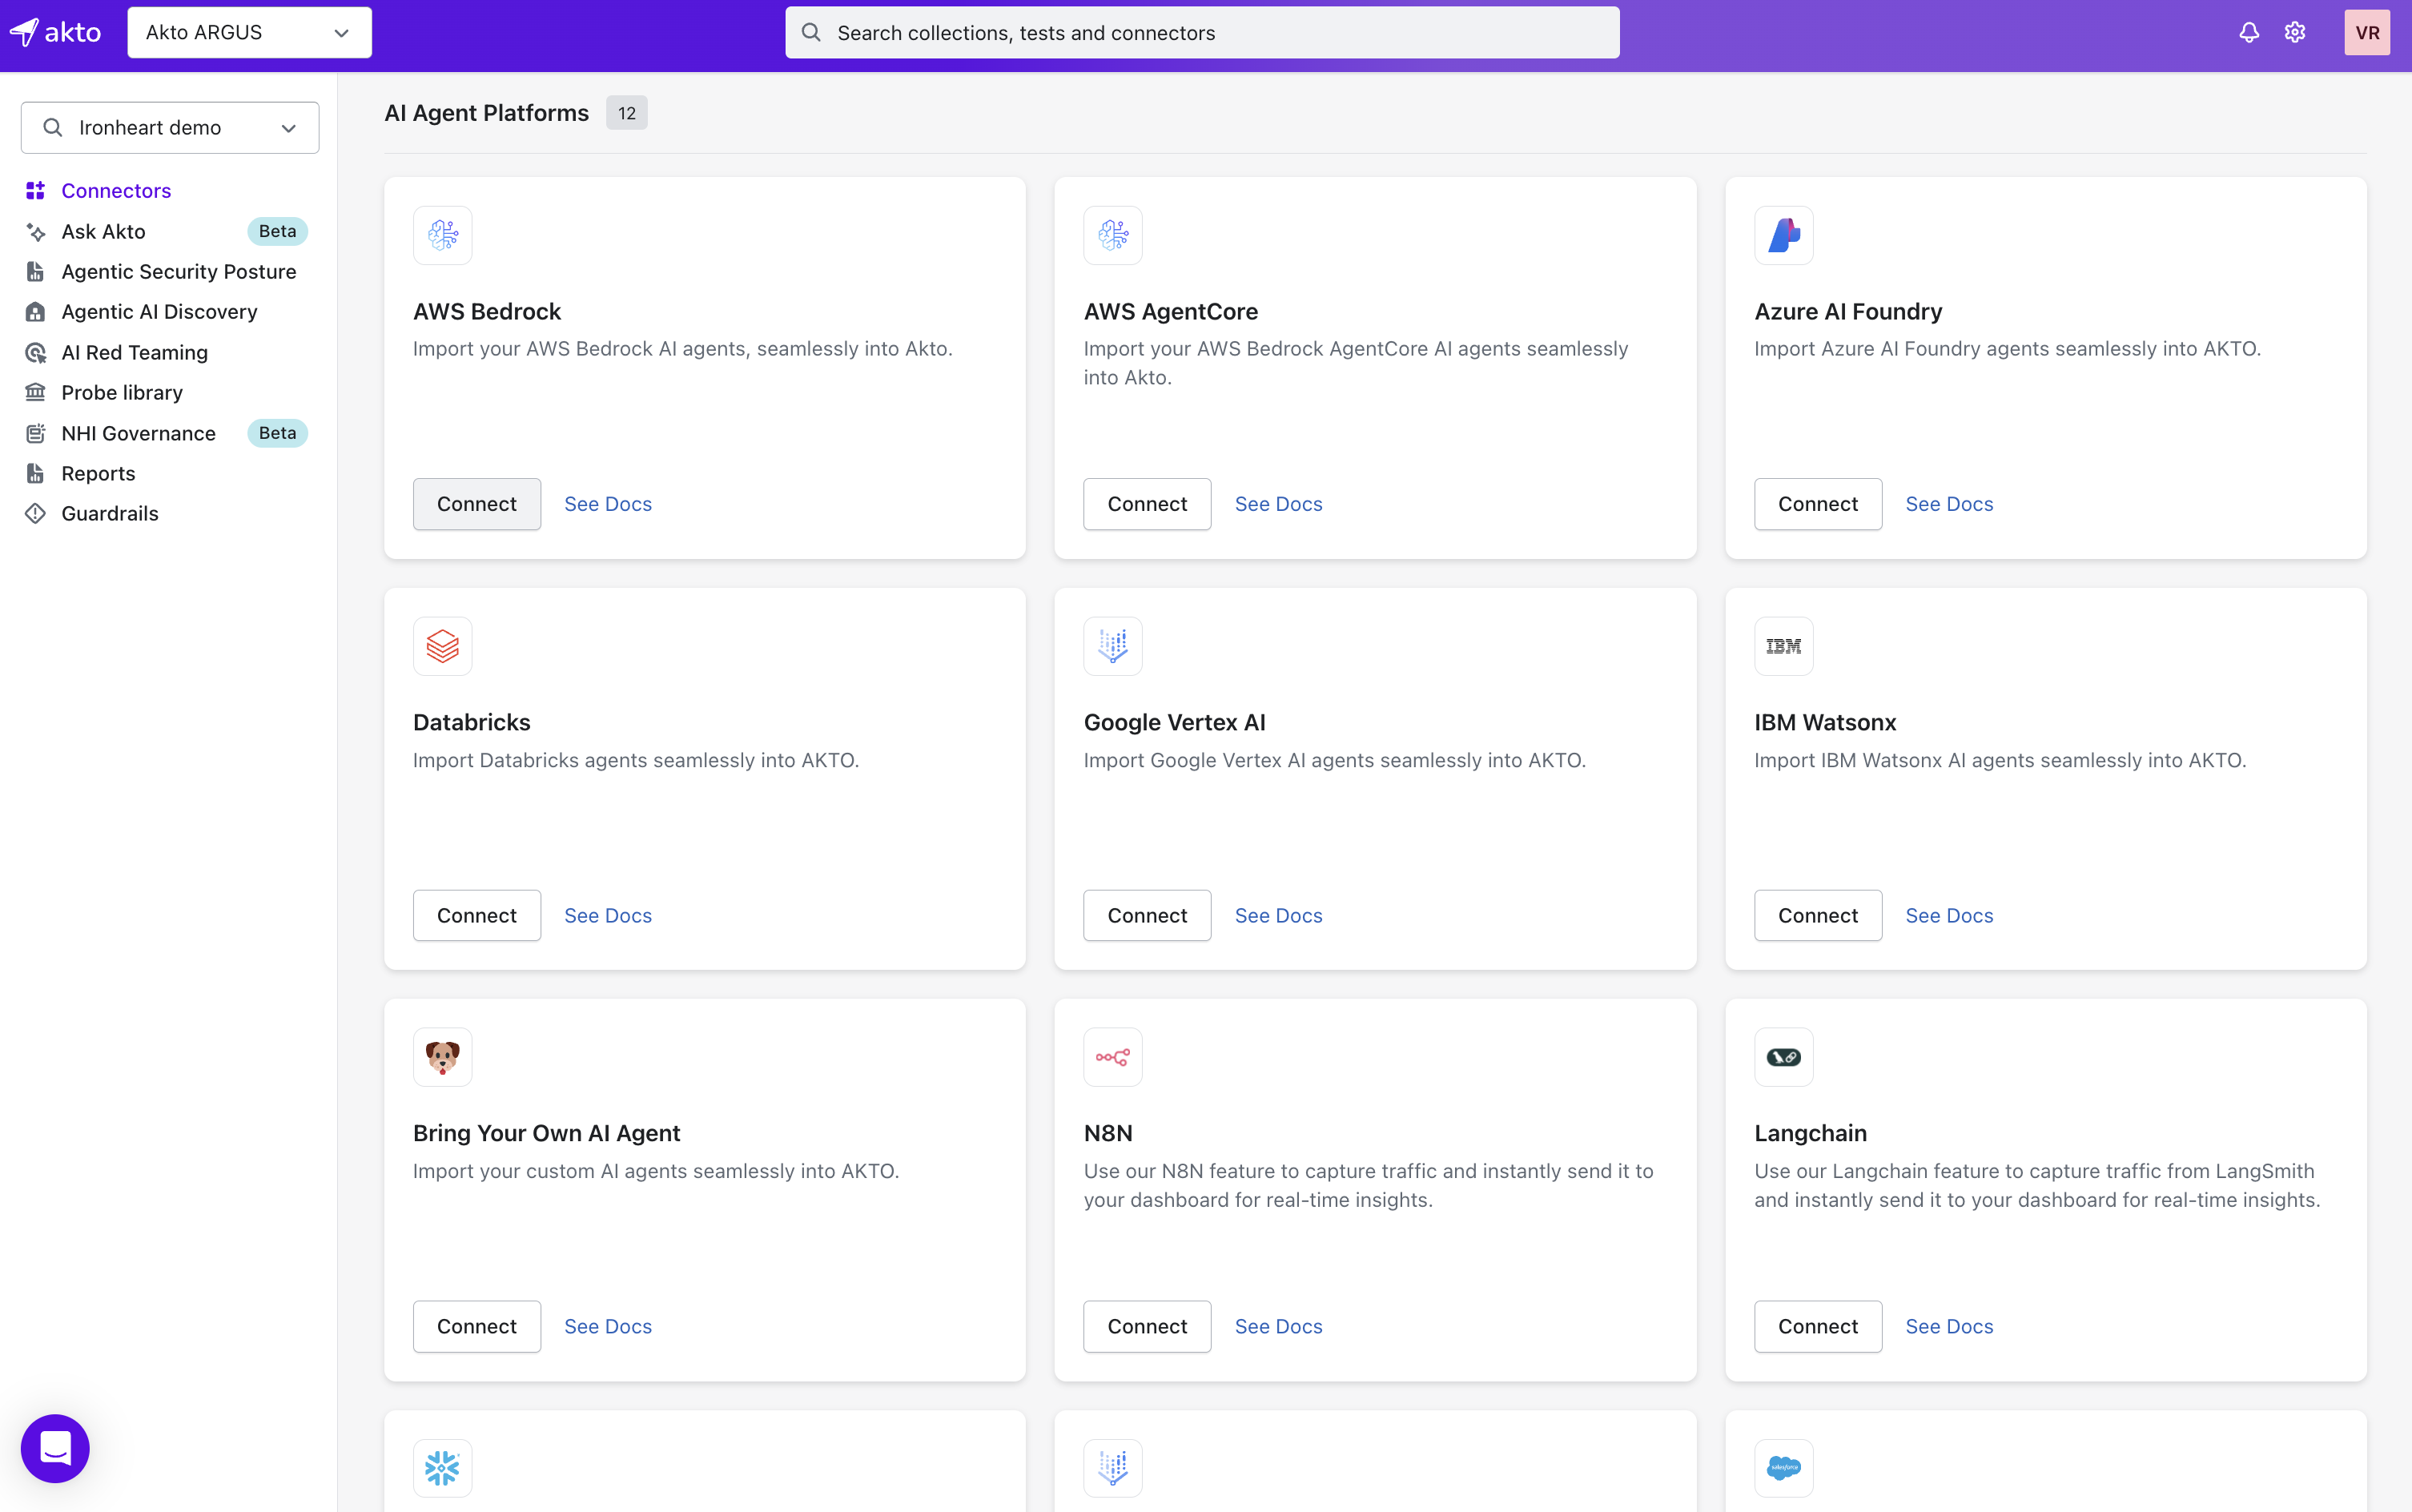
Akto lets you seamlessly import AI agents such as AWS Bedrock, Azure AI Foundry, Databricks, Google Vertex AI, IBM Watsonx, or even your custom agent into AI Agent Security. With just the agent endpoint URL and optional configuration, you can start monitoring and scanning agent activity instantly.

Supported AI Agents

The following AI agents, platforms, and tools are supported by Akto Argus for agentic AI security, enabling visibility, governance, and protection across diverse AI ecosystems.

AI Agent/Connector
Description

Import your AWS Bedrock AI agents seamlessly into Akto.

Import your AWS Bedrock AgentCore AI agents seamlessly into Akto.

Import Azure AI Foundry agents seamlessly into AKTO.

Import Databricks agents seamlessly into AKTO.

Import Google Vertex AI agents seamlessly into AKTO.

IBM Watsonx

Import IBM Watsonx AI agents seamlessly into AKTO.

Bring Your Own AI Agent

Import your custom AI agents seamlessly into AKTO.

Use our N8N feature to capture traffic and instantly send it to your dashboard for real-time insights.

Use our Langchain feature to capture traffic from LangSmith and instantly send it to your dashboard for real-time insights.

Connect to your Snowflake account to discover agents using Cortex and automatically fetch data for all Snowflake agents.

Vertex AI Custom Deployed Model

Import your Vertex AI Custom Deployed Model traffic seamlessly into AKTO.

Import Salesforce agents seamlessly into AKTO.

Bring Your Own AI Agent: What You Need

The steps below are for importing a custom, in-house, or self-hosted agent that doesn't have a dedicated connector in the table above. If your platform is listed above, follow its linked guide instead; it will have setup steps specific to that platform rather than this generic flow.

1

AI Endpoint URL (e.g., https://api.example.com/ai-agent)

2

(Optional) AI Agent Name – if left blank, the hostname from the URL is used

3

(Optional) Custom Request Body – for agents requiring specific input JSON

4

(Optional) Test Role for Authentication – for agents with role-based access

5

(Optional) Custom Headers – for agents requiring additional headers such as API keys or auth tokens

6

(Optional) Custom Response – skip the live call and provide the response yourself, useful when the endpoint isn't reachable from the dashboard

Bring Your Own Agent: Steps to Import

1

Open Akto Argus Dashboard → Go to Connectors

2

Select Bring Your Own AI Agent (or Custom Agent) and click Connect

3

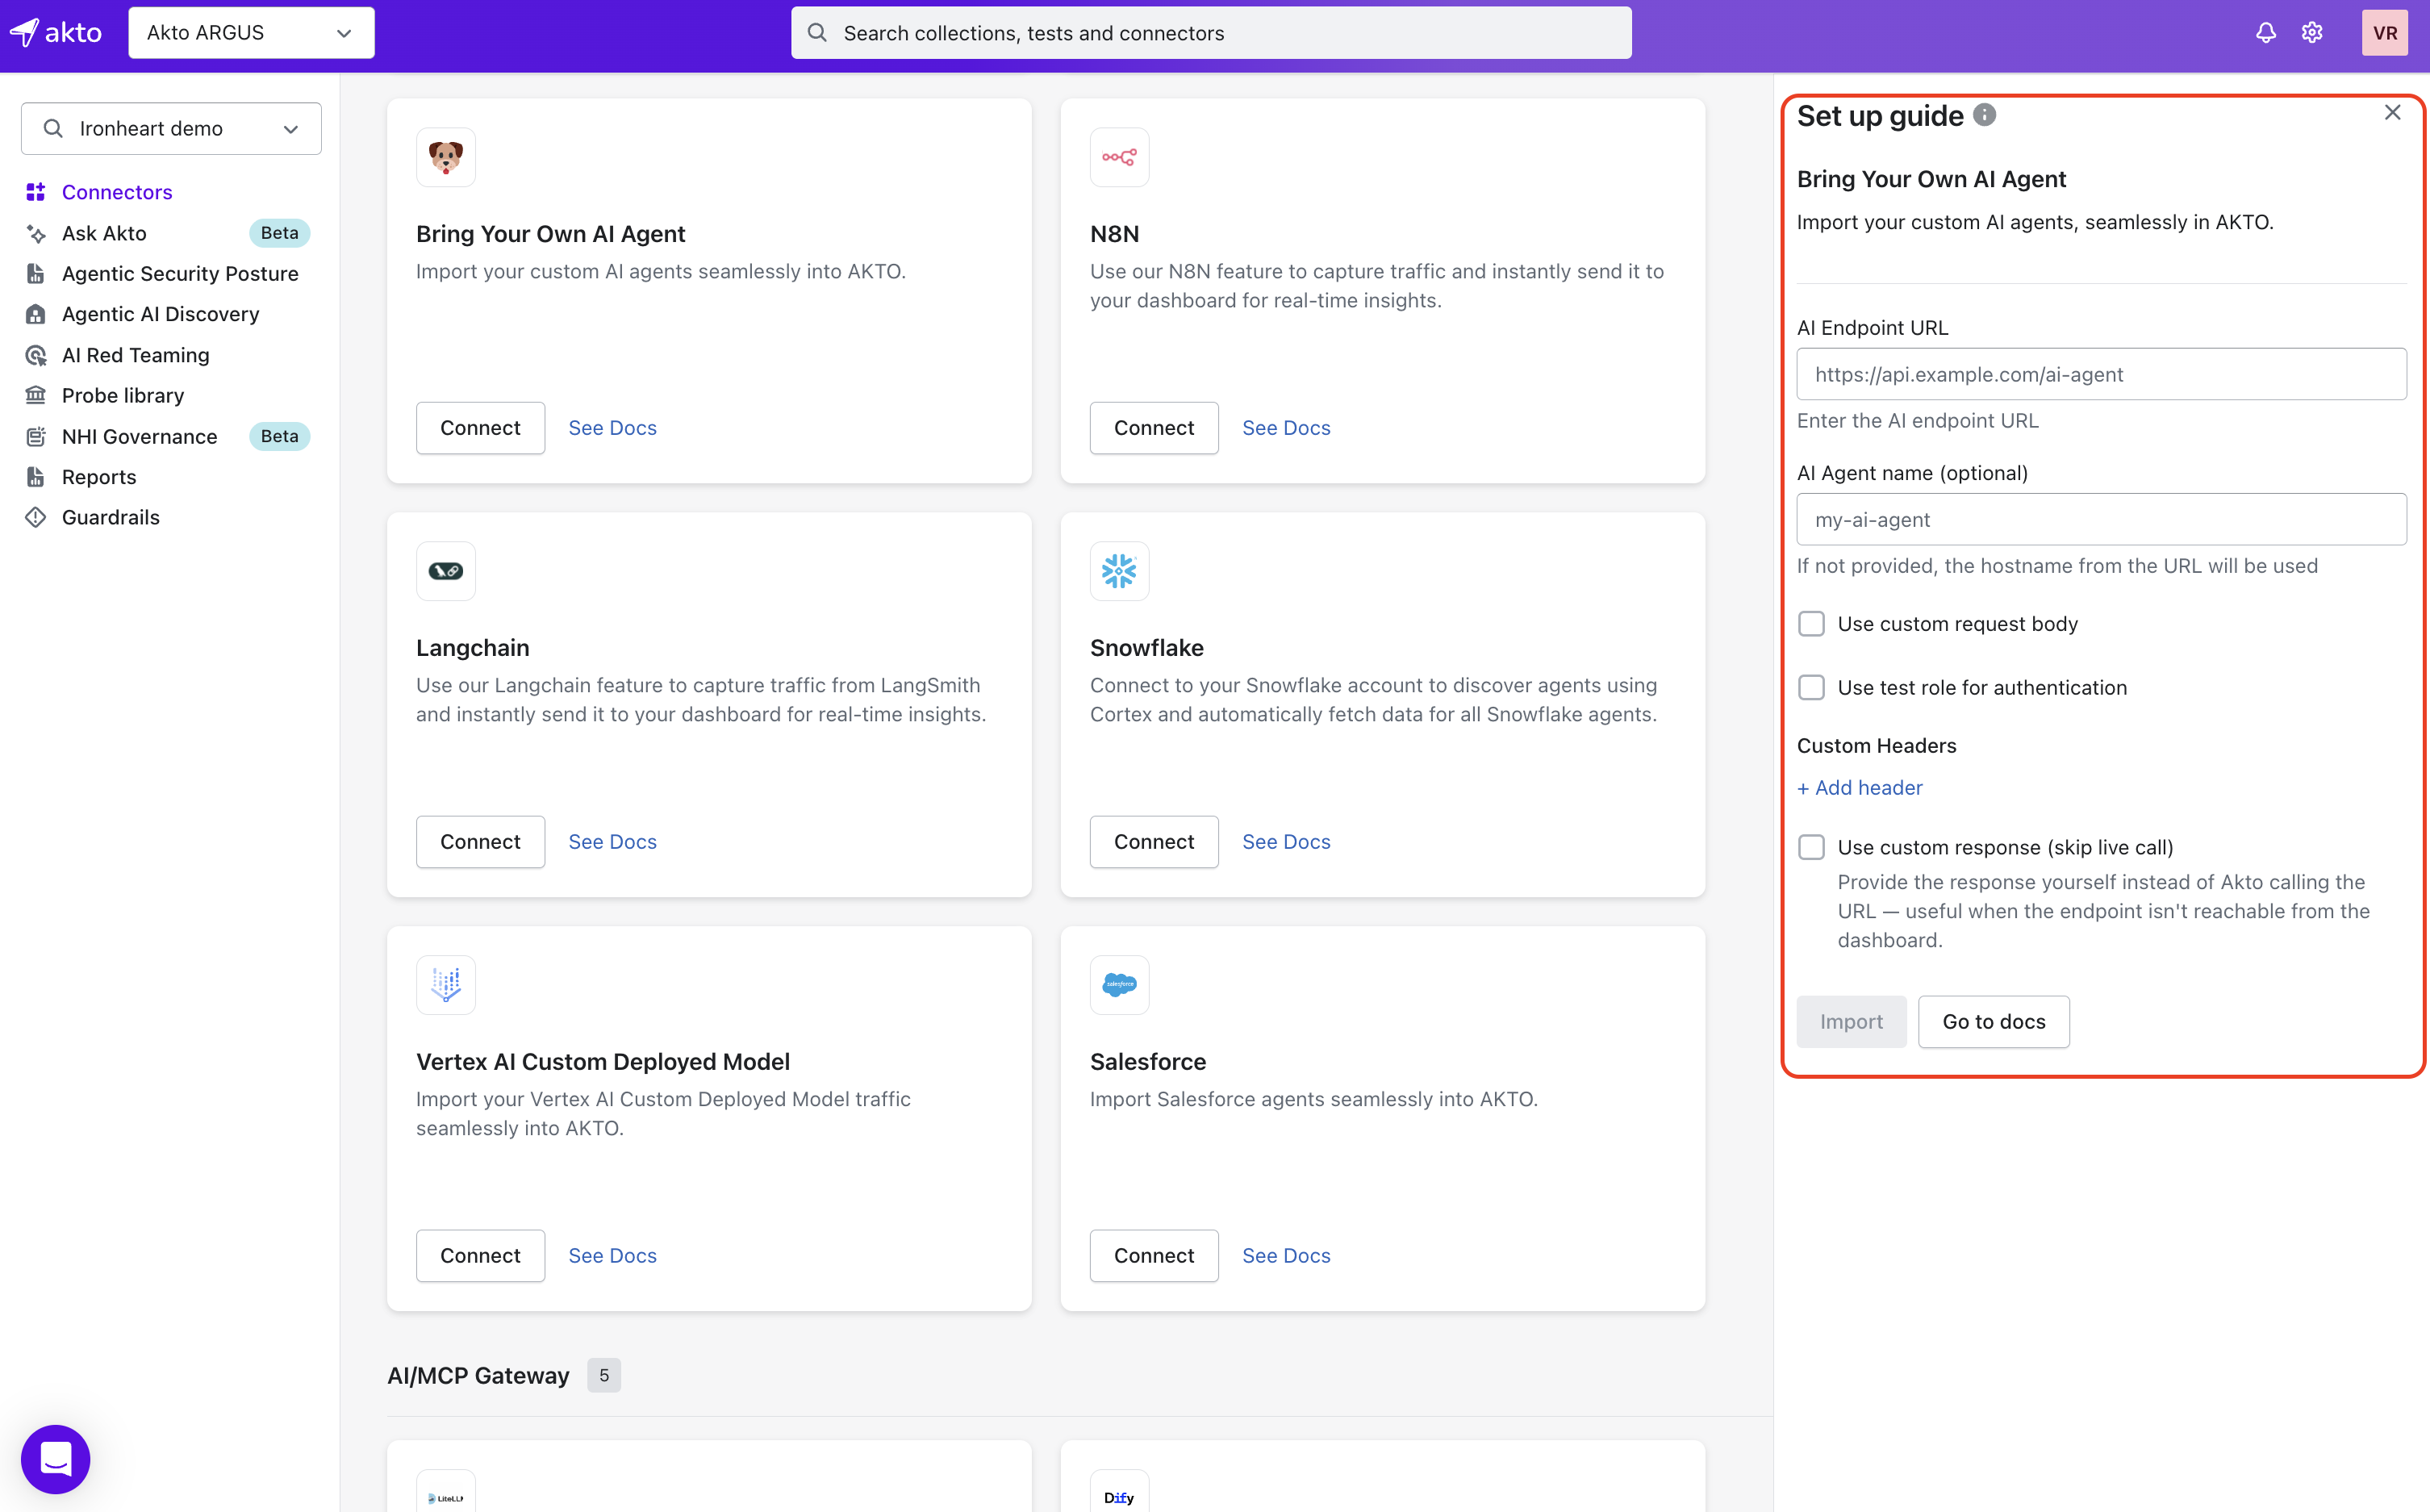
Fill in agent details in the Set up guide panel:

  • AI Endpoint URL: e.g., https://api.example.com/ai-agent

  • (Optional) AI Agent name: if not provided, the hostname from the URL will be used

  • (Optional) Check Use custom request body and enter JSON payload:

  • (Optional) Enable Use test role for authentication and select a role (e.g., ATTACKER_TOKEN_ALL)

  • (Optional) Click + Add header under Custom Headers to pass additional headers with each request

  • (Optional) Enable Use custom response (skip live call) and provide the response yourself instead of Akto calling the URL, useful when the endpoint isn't reachable from the dashboard

4

Click Import

Akto will now automatically:

  • Connect to the AI agent endpoint

  • Send sample test requests to validate the configuration

  • Register the agent into AI Agent Security Inventory for monitoring and scanning

Get Support for your Akto setup

There are multiple ways to request support from Akto. We are 24X7 available on the following:

  1. In-app intercom support. Message us with your query on intercom in Akto dashboard and someone will reply.

  2. Join our discord channel for community support.

  3. Contact support@akto.io for email support.

  4. Contact us here.

Last updated